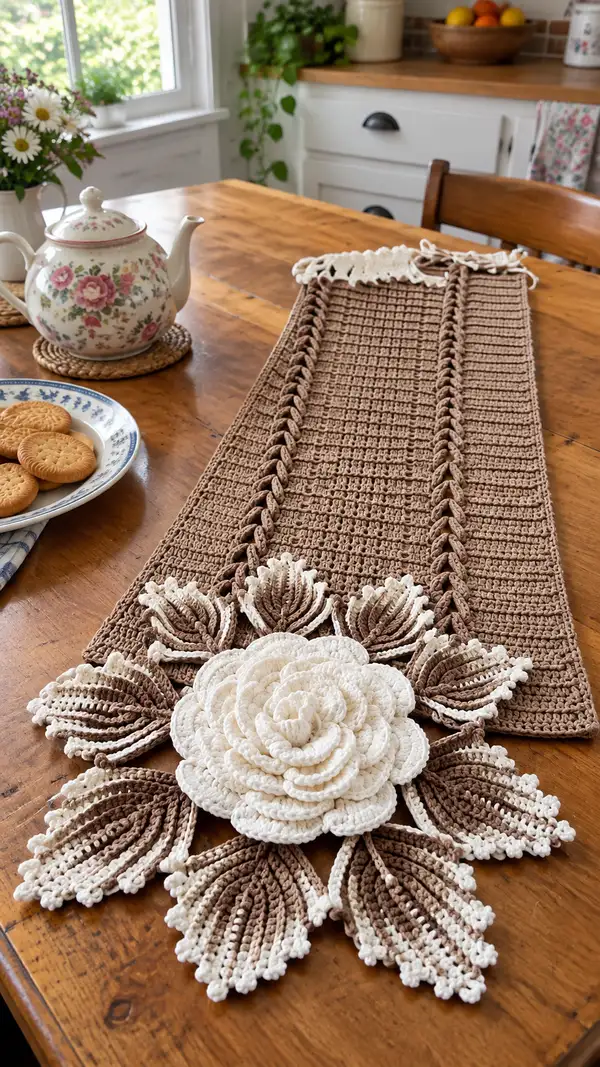
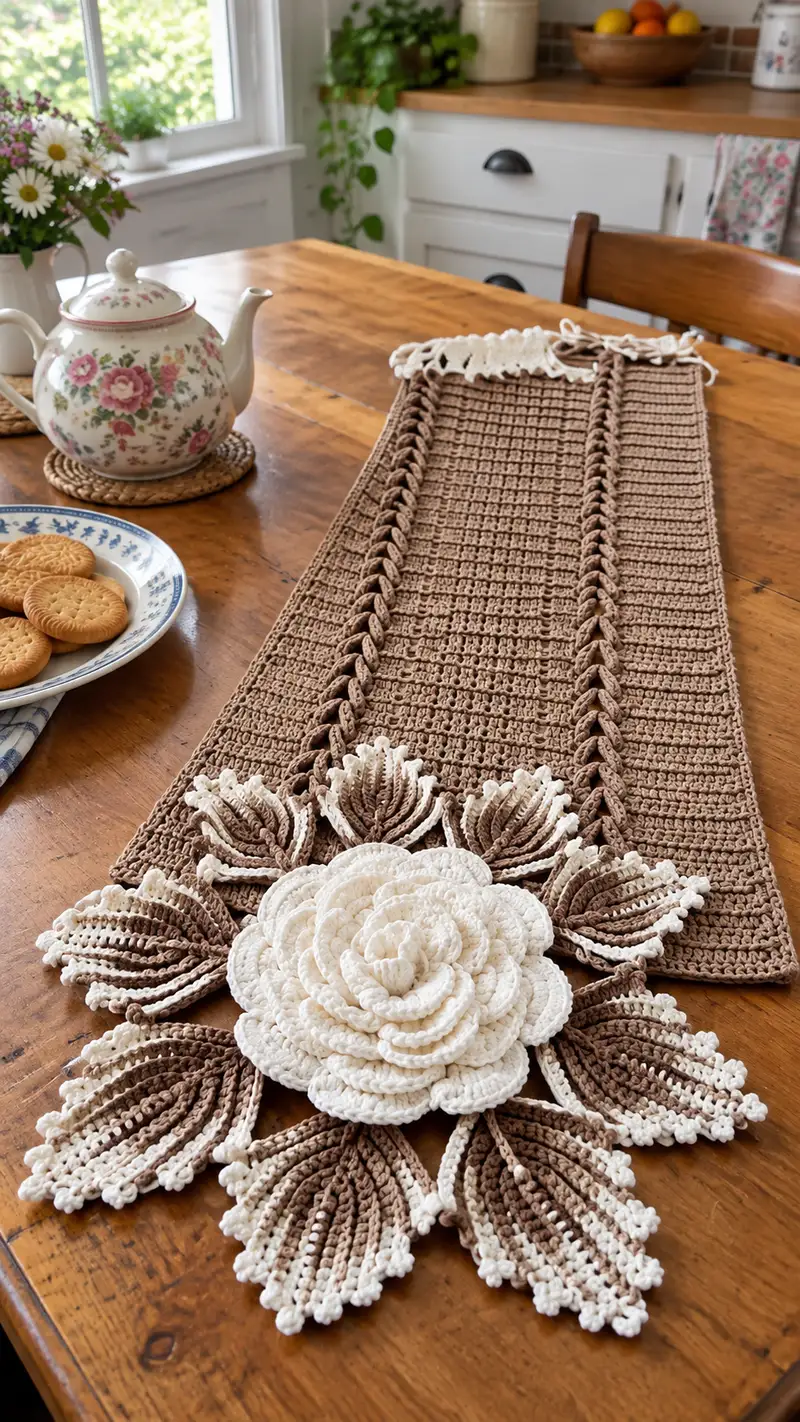
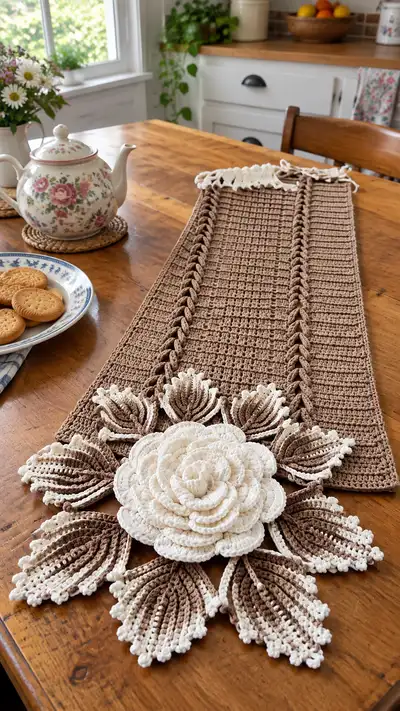
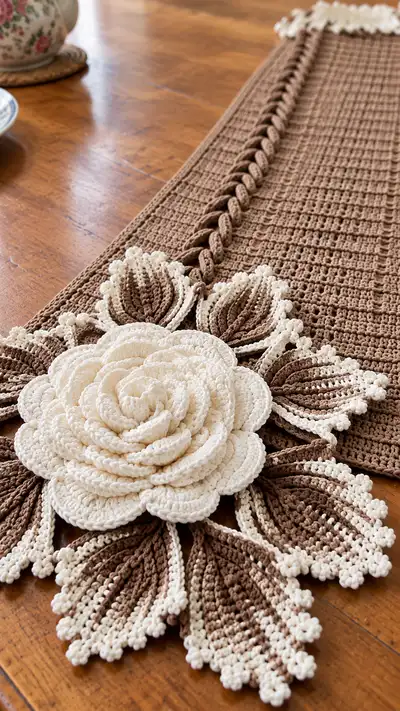
Create a warm, farmhouse-inspired table runner featuring a braided center column and a dramatic layered rose applique with textured leaves. Worked in two contrasting cotton shades—rich coffee brown and soft ivory—this runner combines simple rows with decorative stitchwork for a refined, handmade centerpiece. Perfect for adding a cozy, vintage touch to your table or dresser, the runner is sturdy, washable, and full of tactile detail.
Progress Tracker
0% Complete
— Materials & Gauge :
Info :
Gauge: 18 sc x 20 rows = 10 cm with 3.5mm hook in worsted cotton. Adjust hook to match gauge to get a similar finished size and drape. Finished runner in sample measures approx 14" (35cm) wide by 48" (122cm) long including flower motif.
— Runner Panel :
Round 1 :
Foundation: Ch 61. Sc in 2nd ch from hook and in each ch across (60)
Round 2 :
Ch 1, turn. Sc in each st across (60)
Round 3 :
Ch 1, turn. Sc in each st across (60)
Round 4 :
Ch 1, turn. Sc in each st across (60)
Info :
Keep tension consistent and use a stitch marker at the first stitch of each row for straight edges. Carry contrast color carefully if crocheting braid later in same pass.
Round 5 :
Ch 1, turn. Sc in BLO across (60)
Round 6 :
Ch 1, turn. Sc in each st across (60)
Round 7 :
Ch 1, turn. Sc in each st across (60)
Round 8 :
Ch 1, turn. Sc in each st across (60)
Info :
Work Rows 5-12 in alternating BLO and regular sc rows to create a subtle ribbing texture in the central field. This gives the runner a handcrafted texture while keeping it flat.
Round 9 :
Ch 1, turn. Sc in BLO across (60)
Round 10 :
Ch 1, turn. Sc in each st across (60)
Round 11 :
Ch 1, turn. Sc in BLO across (60)
Round 12 :
Ch 1, turn. Sc in each st across (60)
Info :
Measure your runner panel periodically. Work until panel measures 42" (107cm) from cast-on (this allows space for braid and flower at one end). Sample worked 28 rows after foundation for this length; adjust row count to taste.
Round 13-20 :
Ch 1, turn. Sc in each st across (60) - repeat for 8 rows (60)
Round 21 :
Ch 1, turn. Sc in each st across RS (60)
Round 22-28 :
Ch 1, turn. Sc in each st across (60) - repeat for 7 rows (60)
Info :
If your runner is shorter or longer than desired, add or remove even numbers of rows to maintain symmetry. The braid column is attached later; leave tail end clear for flower placement.
Round 29-34 :
Ch 1, turn. Sc in each st across (60) - repeat for 6 rows (60)
Round 35 :
Ch 1, turn. Work reverse single crochet (crab stitch) along each long edge for a firm border: sc in next st, then reverse sc across edge (60)
Info :
The crab stitch (reverse sc) on the long edges helps the runner lie flat and gives a neat finish. Do it on both long edges and at the working end where the braid will be attached.
Round 36 :
Fasten off main panel but leave a long tail for sewing the braid and flower (or continue without fastening off if you plan to crochet braid off the runner). Weave in small internal ends now or leave them to attach motifs later.
— Center Braid (Make 1 braid strip to length of runner) :
Info :
The visible center braid is constructed from three identical long tube pieces that are then twisted together and sewn to the runner. For a classic rope look, make 3 tubes and braid them. Tubes are crocheted as narrow cylindrical strips worked in rounds (or as long i-cord style chains joined into tubes).
Round 1 :
With coffee brown, ch 6, join with sl st to form loop, or make a magic circle and work in continuous rounds. Work 6 sc into loop (6)
Round 3 :
1 sc in each st around (12)
Round 4 :
1 sc in each st around BLO to create a neat tube seam (12)
Info :
Continue working even rounds until the tube reaches the full length of the runner less 4 inches (to allow seamless joining at ends). Make three identical tubes for braiding.
Round 5-40 :
1 sc in each st around (12) - repeat until length reaches approx 46" (117cm) or desired runner length less braid ends (12)
Round 41 :
Fasten off leaving long tail for sewing. Make 2 more identical tubes (total 3)
Info :
Stuff tubes very lightly with fiberfill to give rounded shape but keep them flexible enough to braid. Do not overstuff or the braid will be stiff.
Round 42 :
Braid the three tubes together tightly along entire length. Pin braid to center of runner aligning braid center with runner center. Braid should sit slightly raised above panel for depth.
Round 43 :
Sew braid to runner using mattress stitch/lace whip stitch along both edges of braid every 1/2" to secure. Use the long tail ends to hide and stitch braid ends to runner corners for a clean finish.
Info :
For a decorative touch, leave a short twisted tail at the far end and knot; cover with a small ivory pompom or bow if desired. Ensure braid is centered; for long runners, check braid alignment frequently during sewing.
— Rose Center Spiral (Make 1 large base spiral) :
Info :
The outer layered rose is constructed from multiple long scalloped strips that are then rolled and sewn in a spiral to create a naturally layered flower. You will make several petal layers: center tight spiral, inner petals, mid petals, outer large petals. Use smaller 3.0mm hook for tighter petal edges on petals if desired.
Round 1 :
With ivory, ch 6. Working into chain backbone: Sc in 2nd ch from hook and next 4 ch (5)
Round 2 :
Ch 3, turn. (Dc, ch1, dc) in first st, sk next st, sc in next, sk next, (dc, ch1, dc) in last st. This creates 3 small petals (9 sts total roughly but remain working in open spiral)
Round 3 :
Continue in a spiral: *Ch 4, sc into next space, ch 4, (3 dc, ch1, 3 dc) into next space* - repeat to create an extended scalloped strip approximately 80-120 ch long. The spiral base should be a long scalloped strip that will be rolled for the rose center.
Info :
Work a continuous scalloped strip approx 90-120 stitches (or until the length will form a 2.5-3" tightly coiled center). The number of sc/dc repeats dictates how tight the center coil is; keep it tighter for center, longer for outer petals.
Round 4 :
Fasten off leaving long tail for rolling. Roll the strip tightly from one end to form center spiral. Whip stitch through layers to secure center coil. This forms the very middle of the rose.
— Rose Petal Layers (Make petal layers and join to spiral) :
Info :
We will make 4 layers of petals, each layer consisting of repeated petal motifs joined as a long strip then rolled around the center spiral. Layer 1 (closest to center) - small petals. Layer 2 - medium petals. Layer 3 - large petals. Layer 4 - outer ruff petals. Each petal strip is worked flat and edged with a picot-like cluster using sc and bobble clusters.
Layer 1 - Small Petals :
Make a strip of 12 small petals: Ch 28.
Round 1 :
Ch 28. Row 1: Sc in 2nd ch from hook and across (27)
Round 2 :
Turn, ch1, (sc, hdc, 3 dc, hdc, sc) in first 5 sts to form a petal, skip 2 sts, sc across next 7 sts to next petal start, rep petal motif across to make 12 petals. End with sc to finish strip.
Info :
The petal cluster (sc, hdc, 3 dc, hdc, sc) gives a small rounded petal. Adjust the number of petals by changing strip length; spacing between petal clusters ensures petals won't overlap too tightly in small layer.
Round 3 :
Fasten off leaving long tail. Block each petal strip lightly on blocking mat if you want petals to lie flat; steam or spray lightly for shape.
Layer 2 - Medium Petals :
Make a strip of 10 medium petals: Ch 36.
Round 1 :
Ch 36. Row 1: Sc in 2nd ch from hook across (35)
Round 2 :
Turn, ch1, (sc, hdc, 5 dc, hdc, sc) in first 7 sts to form a medium petal, skip 3 sts, sc across next 9 sts to next petal start, rep across to make 10 petals (approx 10 motifs)
Round 3 :
Work a picot-style edge on each petal: *At top of each petal work (sl st, ch3, sl st) into last dc cluster to form a mini point* - repeat across petal peaks. Fasten off leaving long tail.
Info :
These medium petals will sit around the small center coil; stagger petals so seams fall behind larger petals for a natural look.
Layer 3 - Large Petals :
Make a strip of 8 large petals: Ch 48.
Round 1 :
Ch 48. Row 1: Sc in 2nd ch from hook across (47)
Round 2 :
Turn, ch1, (sc, hdc, 7 dc, hdc, sc) in first 9 sts to form a large petal center, sk 4 sts, sc across next 12 sts, rep across to make 8 large petals
Round 3 :
Row 3 Edge: At the top of each large petal work a decorative cluster: (3 dc, ch2, 3 dc) into petal top to shape, then finish by sl st to base. Fasten off leaving long tail.
Info :
Large petals will form a ruff around the medium petals and should have slightly more curve. If petals appear flat, add a row of 2 dc in the center of the petal to push the curve outward.
Layer 4 - Outer Ruff Petals :
Make a strip of 6 very large ruff petals: Ch 60.
Round 1 :
Ch 60. Row 1: Sc in 2nd ch from hook across (59)
Round 2 :
Turn, ch1, (sc, hdc, 9 dc, hdc, sc) across to create 6 large ruff petals (use approx 9-11 sts per petal depending on spacing)
Round 3 :
Decorative edge: Work picot-cluster finish: *sc across petal top edge placing small clusters of (sc, ch3, sc) at each curve. Repeat for all petals. Fasten off leaving long tail.
Info :
Block and steam each petal layer separately. Roll and seam each layer concentrically: center coil, layer 1, layer 2, layer 3, layer 4. Use tapestry needle and long tails to stitch through back loops of layers and secure them in place. Arrange petals to overlap naturally as you sew.
Round 1 :
Assembly of rose: With center coil pinned to runner corner, place layer 1 around coil and stitch through base of petal buds. Continue adding layer 2, layer 3, then layer 4, staggering petals so seams fall behind petals above them.
Info :
Work slowly and pin heavily. Use small stitches through the back of petal bases to avoid visible sewing lines on the petal faces. Add stuffing in the very center if you want a slightly domed center but keep petals flat to sit on the runner surface.
— Leaves (Make 10 two-tone leaves) :
Info :
Each leaf is crocheted in two colors: brown foundation with ivory tip/bobble edge. Leaves use FLO texture rows and little picot cluster bobbles around the edge to mimic the decorative scalloped edge in the photo.
Leaf - Round 1 :
With brown, ch 26. Row 1: Sc in 2nd ch from hook and across (25)
Round 2 :
Turn, ch1, sc in next 6 sts, hdc in next 3 sts, 3 dc in next 5 sts (center ridge), hdc in next 3 sts, sc in last 6 sts. (25)
Round 3 :
Turn, ch1, sc in first 6, FLO: hdc in next 3 (FLO), 3 dc in next 5 (FLO), hdc in next 3 (FLO), sc in last 6
Info :
Working FLO on upper rows creates a raised central ridge which will be highlighted by the contrast ivory edging. Keep edges neat by maintaining consistent stitch placement.
Round 4 :
Change to ivory at the tip: Sl st into top center st, ch1, 1 sc in top center, then along one side work small bobble clusters: *(ch2, 3 sc in same st forming a bobble), skip 1 st, sc in next* - repeat toward base. Mirror on other side for symmetry. Fasten off and weave ends.
Info :
Make 10 leaves of varying sizes (4 large, 4 medium, 2 small) to cluster under the rose. The bobble edge is worked in ivory to mimic small bead-like scallops visible in the photograph.
Leaf - Small Variation :
For smaller leaves, ch 18 and follow same shaping with fewer center dcs (use 3 dc center) and fewer flank hdc/scs.
— Leaf Detailed Shaping (Alternate method for raised ribs) :
Round 1 :
Ch 28. Row 1: Sc in 2nd ch from hook across (27)
Round 2 :
Turn, ch1, sc in next 8 sts, (hdc, 3 dc, hdc) in next 5 sts forming center bulge, sc in last 12 sts
Round 3 :
Turn, ch1, Sc in each st but work FLO across center cluster to make ribs: sc in first 8, FLO hdc/dc cluster across next 5, sc in last 12
Round 4 :
Edge: Change to ivory, work small popcorn clusters: *ch2, 5 sc cluster in one st to create mini bobble, sl st next, repeat all around petal edges. Fasten off and weave ends.*
Info :
If you want a more pronounced rib, add one more FLO row before edging. Use a slightly smaller hook for the ivory edge if you want tight tiny bobbles.
— Final Assembly of Rose & Leaves :
Round 1 :
Position the fully assembled rose at one end of the runner panel approx 1.5" from edge and centered between runner sides. Pin heavily through multiple petals to hold in place.
Round 2 :
Place large leaves around the base of the rose forming a sunburst: space leaves evenly (for 10 leaves place 5 on each side overlapping slightly). Pin and adjust for a pleasing arrangement before sewing.
Round 3 :
Sew petals and leaves to runner by stitching through the back of petal bases and runner fabric using the long tail. Use small, close stitches and avoid pulling petal faces. Weave tails through several stitches to secure.
Info :
Work from the underside of the runner when possible to make stitches invisible from the top. Use whip stitch or ladder stitch. Reinforce the flower base with multiple passes so it remains secure when handled.
— Edge & Corner Finishing :
Round 1 :
With ivory, join yarn at one corner and sc evenly around entire runner edge (work 3 sc in each corner space to keep corners flat). Maintain 1 sc per row end along long edges. Work about 120 sc around depending on size.
Round 2 :
Ch 3, *sk 1 st, sc in next, ch2, sc in next* repeat to form small open scallop along edge. Adjust spacing to taste so scallops land evenly around corners.
Round 3 :
Decorative picot row: *(sc, ch3, sl st in 3rd ch) at the peak of each scallop to create tiny bobble points.* Fasten off and weave in ends.
Info :
The ivory edging ties the roses and leaves into the runner visually. Use a contrasting hook or smaller hook for the picot row to create crisp little points.
— Optional Small Flower Buds & Extras :
Round 1 :
Small bud: With ivory, ch6, sl st to join, 6 sc in ring, 2 rounds sc in each st to create a small puff. Fasten and sew near rose for added depth.
Round 2 :
Mini leaf: Ch 12, sc across, shape with FLO and picot edge as earlier. Make a few to tuck around rose for a natural cluster.
Info :
These small extras help blend the flower into the runner and hide the base sewing. Use them to correct balance or fill small gaps.
— Final Blocking & Care :
Round 1 :
Gently steam block the runner (on wrong side) and pin petals and leaves to shape. Allow to dry fully. This helps open the petals and flatten the runner panel for a polished finish.
Round 2 :
Care instructions: Hand wash in lukewarm water with mild soap, reshape and lay flat to dry. Cotton tolerates gentle machine washing; place runner in a laundry bag and use delicate cycle then lay flat to dry to protect motifs.
Info :
Store flat to prevent deformation of petals; avoid heavy stacking or ironing directly on petals. Light steaming or a medium-heat iron through a pressing cloth is fine for the runner panel but not directly on applique petals.
This rustic rose table runner pattern brings a little slow-crafted luxury to any surface. The braided center and layered rose create a dramatic focal point that looks like it took ages to make—yet the techniques are approachable and rewarding. I hope you enjoy the steady rhythm of row work and the satisfying finish of pinning and shaping each petal into place. 🧶✨ Display it proudly or gift it to someone who treasures handmade decor—either way, it will warm a home for years to come. 🌿