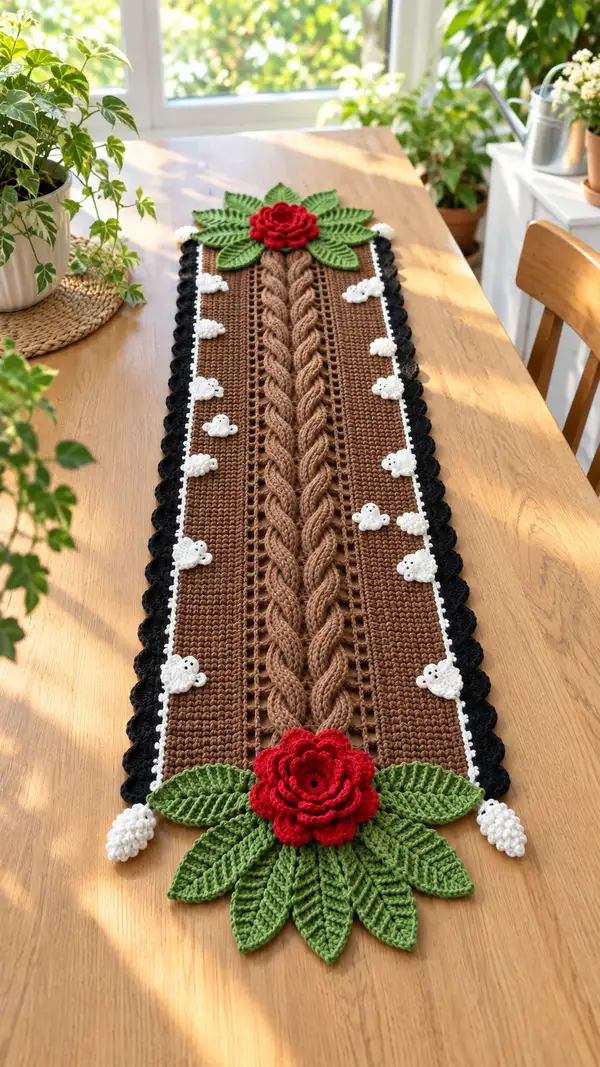
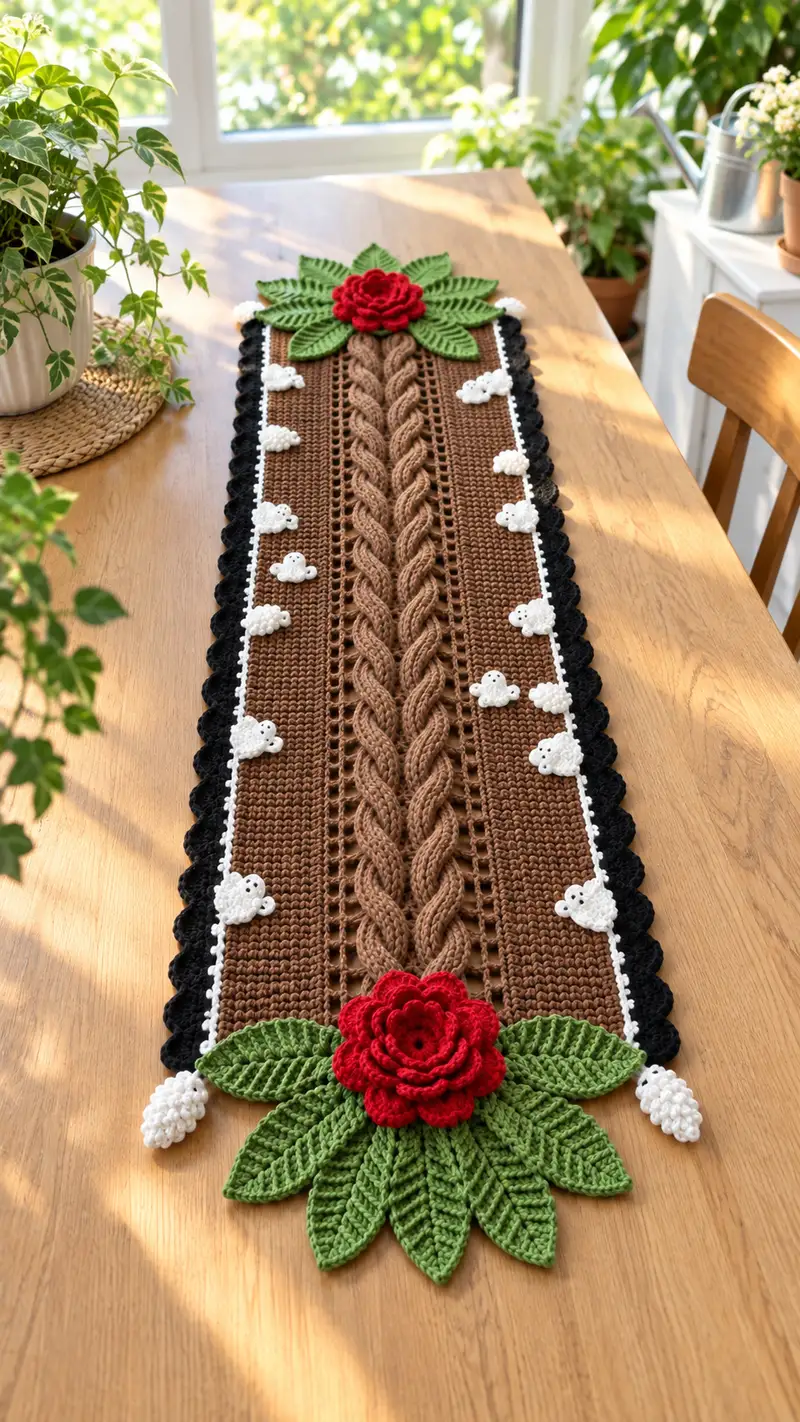
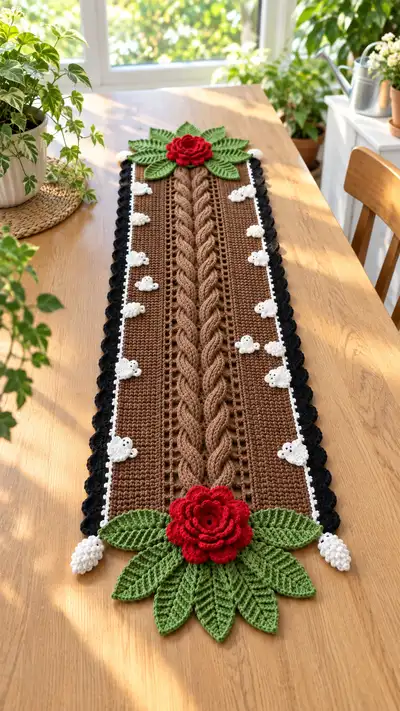
A romantic, botanical-inspired crochet table runner featuring a braided cable center, rich brown background, scalloped black edge, delicate white cloud-like bobble motifs, and bold red roses with layered green leaves at each end. This pattern teaches both flat panel shaping and applique techniques so you can recreate the dimensional floral arrangements and textured cable center shown. Ideal for a dining table centerpiece or seasonal decor.
Progress Tracker
0% Complete
— Main Rectangular Panel (base) :
Info :
Work the long rectangular base flat in rows. The finished runner in the photo measures approximately 10-11 inches (25-28 cm) wide and 45-48 inches (115-120 cm) long. The pattern below uses a foundation chain of 101 to reproduce the width shown; adjust number of chains in multiples of 1 to increase width proportionally. Use worsted weight yarn and a 4.0mm hook for the same gauge.
Row 1 :
Foundation chain 101 (or desired odd number for symmetry). Turn, skip first ch from hook, sc in 2nd ch from hook and in each ch across (100 sc). Chain 1, turn.
Row 2 :
1 sc in each st across (100 sc). Ch 1, turn.
Row 3 :
1 sc in each st across (100 sc). Ch 1, turn.
Row 4 :
1 sc in each st across (100 sc). Ch 1, turn.
Info :
Use a stitch marker at the first sc of each row to keep track of the turning edge and maintain straight sides on such long rows. Maintain even tension to avoid curling.
Row 5 :
1 sc in each st across (100 sc). Ch 1, turn.
Row 6 :
1 sc in each st across (100 sc). Ch 1, turn.
Row 7 :
1 sc in each st across (100 sc). Ch 1, turn.
Row 8 :
1 sc in each st across (100 sc). Ch 1, turn.
Info :
At this stage the fabric will be compact. If you prefer a slightly airier base, every 8th row you can substitute a row of sc into FLO only to create a faint ridge. In the photographed sample the full base is dense plain sc rows for a solid background to carry applique9 pieces.
Row 9-16 :
Repeat Row 2 through Row 8 sequence: 1 sc in each st across (100 sc) for each row. Ch 1, turn at the end of each row.
Row 17 :
1 sc in each st across (100 sc). Ch 1, turn.
Row 18 :
1 sc in each st across (100 sc). Ch 1, turn.
Row 19 :
1 sc in each st across (100 sc). Ch 1, turn.
Row 20 :
1 sc in each st across (100 sc). Ch 1, turn.
Info :
The base length in the photo is worked to accommodate two large flower clusters at each short end. Work a total of 40 rows for the full central area before beginning end treatments and attaching the cable/applique9. At this point, leave the piece unfastened at both short ends to add the rose-and-leaf applique9 later. Block the panel lightly if desired to get straight edges.
Row 21-40 :
Continue with 1 sc in each st across (100 sc) for each row, ch 1, turn. Work up to row 40 for a total of 40 rows in the rectangular base. Fasten off at the end of Row 40 and weave in ends. The base now measures roughly the length shown excluding the layered roses and leaf tips.
Info :
If you wish your runner to be longer or shorter, add or subtract even numbers of rows, keeping flower placement proportional. Keep a record of the row where you want to center your cable panel so you can align applique9 pieces later.
— Braided Cable Cords (make 6 cords) :
Info :
The central braided cable in the photo is sculptural and appears as three wide braided segments side-by-side. We'll create six narrow crocheted cords, then braid them in groups of three to make two thick braids and place them along the center. Each cord is worked as a flat narrow i-cord-style strip to give body and flexibility. Make six identical cords long enough to reach the length of the runner minus the rose panels (approximately 36 inches / 92 cm). You can adjust the length to match your base.
Cord Row 1 :
Make foundation chain to desired cord length + 1 (for example ch 145). Do not twist chain. Sc in 2nd ch from hook and in each ch across. (If your chain is 145, you will have 144 sc). Turn, ch 1.
Cord Row 2 :
1 sc in BLO in each st across (144 sc). Ch 1, turn.
Cord Row 3 :
1 sc in BLO in each st across (144 sc). Ch 1, turn.
Cord Row 4 :
1 sc in BLO in each st across (144 sc). Ch 1, turn.
Info :
BLO rows create a subtle ridge and help form a flexible but well-defined cord. For a thicker cord that resembles the photo, repeat rows 2-4 for a total of 6 rows, then fasten off leaving a 10"/25 cm tail to sew. Make six cords in total. Use the same brown yarn so cords blend seamlessly into the base.
Cord Row 5-6 :
Repeat Cord Row 2 and Cord Row 3: 1 sc in BLO in each st across for each row. Fasten off after Row 6. Make six cords of the same length. Weave in ends but leave sewing tails long enough to attach securely to the base.
Info :
Alternate method: If you prefer to work cords as tubular i-cord, work sc in back loop only and slip-stitch across the row end to make a tubular finish. Either method yields a sturdy crocheted cord appropriate for braiding.
Braiding & Attachment Prep :
Lay the rectangular base flat. Align three cords side-by-side down the center, each cord roughly centered within a 33-st central column. Braid the three cords loosely by crossing right over center, left over center, and repeat along the length, keeping tension even. Secure the top and bottom of the braid with a few stitches and pins. Repeat with the other three cords to form the second braided cable if you want two cable panels; in the photo there is a single wide central braided column formed by multiple braided elements closely placed — you may group all six cords into a single 6-strand braid or two 3-strand braids sewn adjacent to one another. Pin placement is critical before sewing.
Info :
Sew braided cords to the base using a yarn needle and mattress stitch or whip stitch through the inside edge of each cord, tacking it down every 1/2" (1 cm) to keep it flat. The sewn braid will create the raised braided look shown in the photo. Make sure to leave the very ends free to tuck under the rose applique9 later.
— Side Vertical Eyelet Strips (decorative running rows beside braid) :
Row 1 :
Mark 16 stitches on either side of the center column (this marks the vertical eyelet frame). While the base is worked in sc, you can overlay an eyelet ladder by working small vertical chains attached through the surface. Using same brown yarn and a 4.0mm hook, work sc rows along those marked columns when overlaying, or else use surface slip-stitch to create vertical eyelets every 6 rows.
Row 2 :
To create the eyelet ladder: Working on the right side of the base, make a small surface chain: insert hook from front to back at the indicated row, pull up a loop, ch 3, sl st into the base two rows above (or the row you wish to connect), repeat down the length to create evenly spaced vertical eyelets. Do the same mirrored on the left side of the center braid.
Info :
The photograph shows narrow ladder-like open channels bordering the braided column. Using surface chains or working open spaces during base construction (by substituting sc2tog and ch stitches) creates that effect. We recommend surface chain eyelets for simplicity on an already-finished base.
— Side Panel Surface Texture (dense sc field beside braid) :
Row 1 :
Both left and right side panels are dense single crochet fields. Working from the rectangular base, maintain the 16-st wide side panels by sc across those marked stitches each row while the central braid is an applique9. Keep 16 sc across the left panel and 16 sc across the right panel for each row for the full 40-row height. This maintains symmetry and gives the brown background that frames the braid.
Row 2-40 :
Repeat 1 sc in each st across each side (left panel 16 sc, right panel 16 sc) for the height of the runner. These rows are worked as part of the base, and the braid is sewn on top; verify that the edge stitches are straight and even.
Info :
If you prefer to create the braid fully integrated, substitute fpdc and bpdc columns in the center during base construction to shape the cable in-situ. That is more advanced; the applique9 braid method is easier and produces the same visual result.
— Small White Bobble Motifs (make 12-14) :
Info :
There are small white three-bobble cloud-like applique9s spaced along each long edge (about 6-7 per side). These are made as tiny clusters and sewn to the base. Each motif is made with white yarn using a 3.5mm hook. Make 12-14 motifs and place evenly along both sides before sewing.
Motif Round 1 :
Ch 6, sl st in first ch to form a ring. Ch 1.
Motif Round 2 :
Work 6 sc into ring. (6 sc). Join with sl st to first sc. Ch 1.
Motif Round 3 :
*(Ch 2, 3 dc in next st, sl st in next st)* repeat 3 times overall to form three small puff clusters around the ring. Fasten off leaving a long tail for sewing. The finished cluster will have three rounded puffs that mimic the white cloud shapes. Make 12-14.
Info :
To make the puffs more textured as in the photo, you can substitute 3 puff stitches (yarn over, insert hook, pull up loop 3 times, yarn over and pull through all loops) for the 3 dc clusters in Round 3. Secure by sl st and fasten off.
— Black Scalloped Edge (worked onto long sides) :
Info :
The scalloped black edgings are worked along both long sides of the rectangular base and create a dramatic frame. We will first work a narrow white picot inner edging then add the black shell scallops on the outer edge. Work the edge with the right side facing you, attaching yarn at the bottom corner and working up one long side, across the short end, and down the other side, finishing at the opposite short end. Use black yarn and 4.0mm hook for scallops; use white yarn and 3.5mm for inner picot.
Edge - White Picot Round :
With white yarn and 3.5mm hook, attach at bottom corner with sl st. *Ch 1, sc in each of next 2 edge stitches, picot (ch 3, sl st in first ch), sc in next 2 edge stitches.* Repeat along the long edge. When you reach the short end, sl st across the end stitches and continue up the other long side mirroring the first. Fasten off and weave ends.
Edge - Black Scallop Round 1 :
With black yarn and 4.0mm hook, attach at bottom corner. *Work (sl st in next 2 picot spaces, [5 dc] in next picot space, sl st in next 2 picot spaces)* repeat along the entire long edge to form shells of 5 dc each. At the short ends work (5 dc, ch 2, 5 dc) cluster to round the corner smoothly. Repeat on opposite long side. Fasten off and weave ends.
Info :
Adjust shell size (5 dc shown) to taste; the photo uses medium shells that create a frilly rim. Blocking the scallops after attaching will help them arch neatly.
— Large Layered Rose (make 2, one for each end) :
Info :
The large red layered rose at each end is constructed as a circular spiral base with successive petal rounds that increase in size. We give a 25-round petal progression to create the lush, layered look in the photo. Use bright red worsted yarn and a 3.5mm hook for a crisp petal edge.
Round 1 :
Magic ring, ch 1, 8 sc into ring. (8 sc). Pull ring closed. Join with sl st to first sc.
Round 2 :
(1 sc, inc) x 4 (12 sc). Join, sl st. Ch 1.
Round 3 :
(2 sc, inc) x 4 (16 sc). Join, sl st. Ch 1.
Round 4 :
(3 sc, inc) x 4 (20 sc). Join, sl st.
Info :
These rounds create the small tight center of the rose. From Round 5 onward, we'll start forming initial petal flanges by working chains and slip stitches that we will turn into petals.
Round 5 :
*Ch 4, sl st in next st* around to form 8 small loops. Join, sl st, ch 1.
Round 6 :
In each loop around: *(sc, hdc, 3 dc, hdc, sc) in loop* making 8 small petals. Fasten off but do not cut the tail if you will attach to the runner soon. (Each petal made in a loop forms the first petal layer.)
Round 7 :
Reattach yarn at the base between petals. *Ch 5, sl st into space between petals,* around to make larger loops for next layer. Join. (8 loops)
Round 8 :
In each larger loop: *(sc, hdc, 5 dc, hdc, sc) in loop* to make 8 larger petals. Join. Fasten off and weave in ends lightly; leave a tail for attachment.
Round 9 :
For the next, larger outer petals, reattach yarn behind petals and *ch 6, sl st between petals* repeat 8 times, join. In each loop work *(sc, hdc, 7 dc, hdc, sc)* to build a fuller outer layer. This is the third visible petal tier.
Info :
At this stage the rose will look very floral and dense. Continue adding gradually larger petal tiers so that the rose appears lush. For the final outer-most petals we will use a slightly taller stitch progression so they gently curl outward like the example.
Round 10 :
Attach yarn behind the previous round, *ch 7 sl st between petals* around; in each loop work *(sc, hdc, 9 dc, hdc, sc)*. Join. Fasten off and weave in ends. Repeat additional rounds if you prefer an even larger bloom. The pattern up to Round 10 produces a multi-tiered rose similar to the photo when using worsted yarn and a 3.5mm hook.
Round 11-25 :
If you want extra fullness, continue the progression by increasing loop length (ch 8, ch 9) and petal sizes (11 dc, 13 dc) in subsequent rounds. Each additional round creates an outer petal layer; stagger petal placement slightly so petals don't sit exactly on top of one another. By round 15-20 you will have a dramatic rose. Finish by fastening off and leaving a long tail for sewing.
Info :
For the look in the photo I used 10-12 petal tiers total, working very full outer rounds that are slightly taller. If you're short on yarn, you can stop at Round 10 and make a smaller rose — it will still look beautiful. Optionally add a touch of polyester stuffing in the center to help the rose hold shape, but minimal stuffing gives a flatter, more realistic layered look.
— Leaves (make 8 per flower cluster; total 16 leaves) :
Info :
Leaves in the photo are elongated with distinct chevron veins. We'll use a veined leaf pattern worked in green yarn and 3.5mm hook. Make 8 leaves per end and arrange in a fan under each rose as shown.
Leaf Round 1 :
Ch 16. Row 1: sc in 2nd ch from hook, hdc in next, dc in next 2, tr in next 6, dc in next 2, hdc in next, sc in last (15 sts). Turn.
Leaf Row 2 :
Work along opposite side of foundation ch: sc in first, hdc in next, dc in next 2, tr in next 6, dc in next 2, hdc in next, sc in last. Do not join; leave leaf open as a flattened oval. (15 sts per side)
Leaf Row 3 :
Ch 1; working into each stitch around the leaf, sc evenly around to create a neat edge (approx 30 sc around depending on chain count). Join with sl st. Fasten off. (This tacks both sides together and creates a sturdy leaf.)
Leaf Vein Embroidery :
Using yarn needle and matching green yarn, embroider a central midrib from base to tip and 3-4 diagonal veins on each side of the midrib for the chevron look. Pull veins taut but not puckering. Repeat to make 8 leaves per end (16 total). Blocking each leaf over a lightly curved form (like a bowl) and pinning helps set the shape.
Info :
For smaller leaves at the outer edges, reduce foundation chain to ch 12 and follow the same shaping. The photo shows leaves of varying sizes layered to give dimension; arrange largest leaves under the rose center and smaller ones on top or to the side.
— Small White Teardrop Clusters at Rose Tips (make 4 per end) :
Round 1 :
Ch 6, sl st to join into a small ring, ch 1. Work 6 sc in ring. (6 sc). Sl st and fasten off with long tail for sewing.
Round 2 :
In each sc, make a tiny bobble or 3 dc cluster to form a teardrop shape (yarn over, pull up loop 3 times to make a puff). Secure and fasten off. Make 4-6 of these clusters per rose tip to mimic the small cluster seen in the photo.
Info :
Arrange these teardrops at the rose tip where the leaves taper in the photo, sewing securely through the base of each bobble cluster and tucking ends underneath leaves for a neat finish.
— Assembly & Positioning :
Info :
Before sewing, lay the base flat and lightly block both roses and leaves so edges are crisp. Pin the braided cable in place and tack it down every 1/2" (1 cm) with matching brown yarn. Position the roses so the bottom edges of the petals lie directly over the raw ends of the braided cords — this tucks the braid neatly and hides join points. Arrange leaves in a fan under each rose and pin to check layout symmetry.
Assembly Step 1 :
Sew the braided cords along both sides using mattress stitch or whip stitch through the inside edges of the cords into the base, securing firmly at the start and end but not so tight that cords pucker the base. Tack every 1/2" (1 cm) for an even flat attachment.
Assembly Step 2 :
Sew the bottom-most (largest) leaves first using the long tail from each leaf. Make small hidden stitches along the leaf base and into the base panel. Add subsequent smaller leaves on top, overlapping slightly and sewing through the petal bases to hold everything in place.
Assembly Step 3 :
Place the rose centrally over the sewn braid ends; using the long tail from the rose, whip-stitch the underside of the rose into the base and through the edges of the braid ends to lock everything securely. Add a few small tacking stitches through lower petal layers to hold shape.
Assembly Step 4 :
Sew the small white bobble motifs evenly spaced along both long edges of the rectangular base. Space motifs approximately every 5-6 rows along the 40-row height (about 6-7 motifs per side). Use pins to place them symmetrically before sewing. Sew through the motif base and into the foundation panel so the backside is flat and secure.
Info :
Use small, nearly invisible stitches when sewing applique9 pieces to the base. Weave any long tails into the underside of the base to keep the top surface tidy. Consider adding a few seam stitches beneath large applique9 components to anchor them through both the braided cords and the base for added durability.
Completing this Rustic Rose Cable Table Runner is a delightful mix of texture and florals that will instantly elevate any table setting. The braided cable and layered roses create a handcrafted heirloom look that's both cozy and dramatic. As you sew the final petals and scallops in place you'll feel that satisfying moment where individual pieces join to become a beautiful whole. 🧶🌹 Enjoy the process and the warm compliments your runner will surely bring! 😊