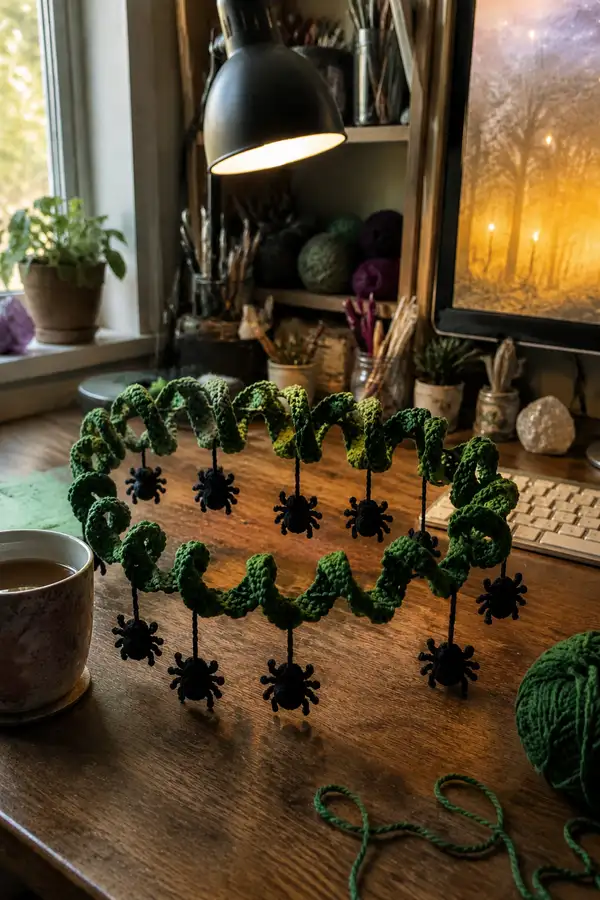
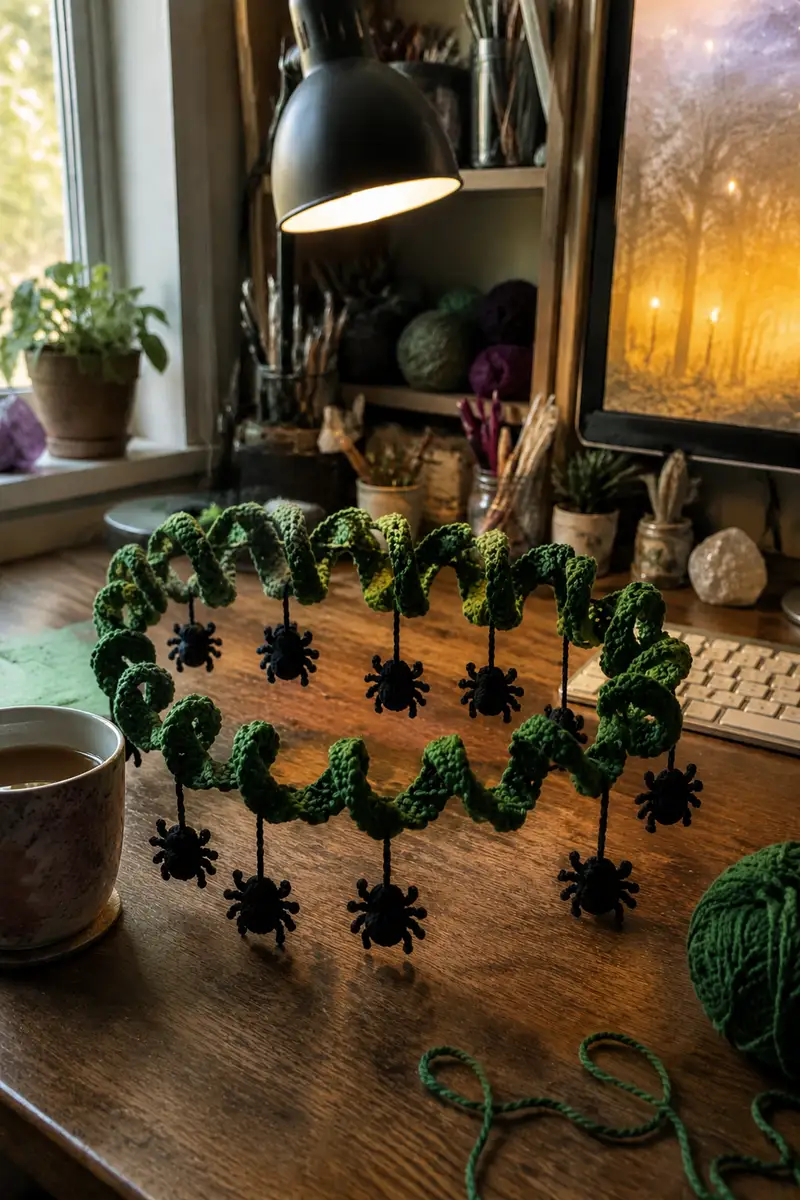
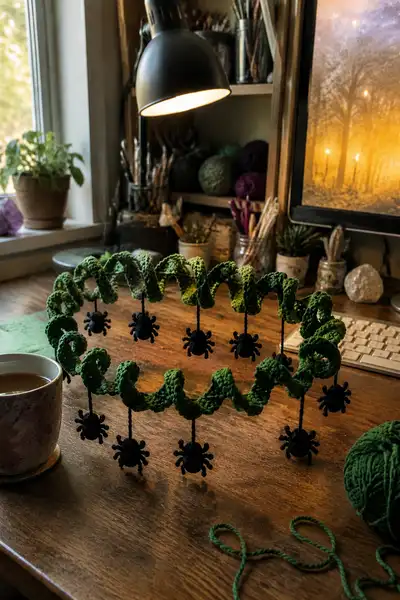
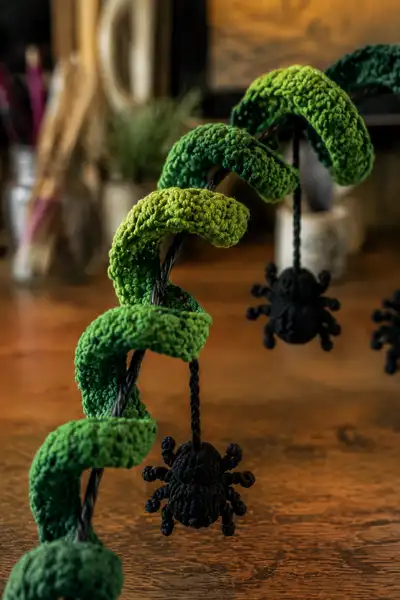
Create a spooky, tactile Halloween garland that winds like a vine and dangles tiny crocheted spiders. This pattern uses gradient greens to form tubular spiral segments that wrap around a pliable core, with eight dangling black spider ornaments suspended on braided cords. It is perfect for a mantel, doorway, or spooky centerpiece and mixes simple amigurumi spiders with textured spiral tubes for a dramatic Halloween accent.
Progress Tracker
0% Complete
— Spiral Tube (Make 8) :
Info :
Each spiral segment is crocheted as a firm tubular piece worked in continuous rounds. Use a stitch marker to mark round starts. The segment is stuffed lightly and a flexible wire core is slipped in before fully closing. Each segment as written gives a tube approximately 7-9cm long and 4-5cm in diameter before wrapping; adjust length by working more even rounds.
Round 1 :
ch 8, join with sl st to form a ring, being careful not to twist chain. 1 sc in each ch around (8)
Round 2 :
Work in continuous rounds: (1 sc, inc) x4 (12)
Round 3 :
(2 sc, inc) x4 (16)
Round 4 :
(3 sc, inc) x4 (20)
Round 5 :
(4 sc, inc) x4 (24)
Info :
At this point the tube circumference is 24 sts. If you desire a wider tube, continue increased rounds one or two more times using (5 sc, inc) x4 = 28, but note it will change curl density.
Round 6-14 :
1 sc in each st (24) — work evenly to build tube height (24)
Info :
Feel the tube as you go; work firmly but not rigidly. After round 8 you can change green shades by joining new color on any round. To mimic the photo, use a darker green for the core rounds, then switch to lighter greens on outer rounds to highlight ridges.
Round 15 :
1 sc BLO in each st (24)
Round 16 :
1 sc FLO in each st (24)
Round 17-22 :
1 sc in each st (24) — continue even rounds to lengthen the segment (24)
Info :
Start stuffing lightly from round 18 onward: add small amounts of fiberfill and push evenly so the tube has a rounded, full shape but remains flexible enough to wrap around the core. Do not overstuff — a lightly cushioned tube wraps more naturally.
Round 23 :
(3 sc, dec) x4 (20)
Round 24 :
(2 sc, dec) x4 (16)
Round 25 :
(1 sc, dec) x4 (12)
Info :
Before closing the tube completely, insert the prepared core (see 'core preparation' section). If you prefer a hollow tube, omit stuffing and insert the wire bundle then continue to close around it.
Round 27 :
Sl st into each remaining st to create a neat closure if needed, leaving a long tail for sewing (6)
Info :
Fasten off leaving a 20cm tail. Use the tail to sew the small opening closed around the wire. If you prefer a tapered tip that looks like a vine tip, stuff more firmly at the end and secure tightly.
Round 28 :
For a decorative lip: join yarn midway along tube (anywhere between rounds 10-16) and work 1 round of sc in BLO to create a subtle ridge (24)
Round 29 :
Optional decorative ridge: (1 sc, inc) x12 worked along one longitudinal seam if you want an embossed spiral texture (36)
Info :
Work a total of 8 identical spiral segments following rounds 1-27. Vary the color change points: some shorter segments might switch to lighter green at round 10, others later, to create that gradient vine look.
Round 30 :
Edge finishing round: join yarn and work sc evenly around open edge of tube if you left it open (24)
Round 31 :
Use mattress stitch to close any remaining seam openings and weave tail inside tube (no stitch count)
Info :
Tip: when carrying color changes, use small tidy joins rather than long floats. Because these segments will be wrapped around a wire bundle, the joins will hide inside the curve if sewn snugly.
— Core Preparation and Wrapping :
Info :
Cut your floral wire or flexible core into pieces that match the final garland length. In the pictured garland, the creator used a central double-strand core that remains slightly visible under the crocheted tube. For a stable spiral, twist two strands of 20-24 gauge wire together to form a strong but bendable core, or use a craft cable. Cover sharp wire ends with tape or heat-shrink tubing before inserting into crochet pieces.
Round 1 :
Measure and form the core: if making an arched garland, cut a length of wire approx 80-100cm and bend into an arch. If making multiple arches, cut per arch. No stitch count.
Round 2 :
Slide the first spiral segment over one end of the wire until the tapered end meets the start point. Position the tube so its seam (the sewn tail) is hidden on the underside of the arch. No stitch count.
Info :
Wrap the crochet tube around the core in a corkscrew fashion: place the tube then gently bend the core to follow the curve of the tube; subsequent segments will nest into one another. If you prefer permanent position, secure each segment to the core with a few hidden yarn stitches through the tube and around the wire, catching only the inner loops so stitches are unobtrusive.
Round 3 :
Secure placement: from the inside opening of the spiral, sew through tube to wire with yarn tail and wrap once or twice, then weave back through tube to hide. Repeat on opposite side. No stitch count.
Round 4 :
Repeat sliding and securing each of the 8 spiral segments along the core, spacing them evenly. For the pictured look, leave approximately 5-8cm between segments to allow for dangling spiders. No stitch count.
Info :
Adjust segment rotation for an organic vine look — alternate which direction each spiral overlaps the core: some spirals can face clockwise while adjacent ones face counterclockwise. This alternation increases visual interest.
— Spider Body (Make 8-10) :
Info :
The spiders are small amigurumi ornaments crocheted in black. Each spider comprises a round abdomen and a slightly smaller cephalothorax, then looped legs are attached around the sides and sewn. Work in continuous rounds and secure safety is optional — embroidered eyes are recommended for children's safety.
Round 1 :
With black yarn, mr, 6 sc into magic ring (6)
Round 3 :
(1 sc, inc) x6 (18)
Round 4 :
(2 sc, inc) x6 (24)
Info :
This is the start of the abdomen. Maintain tight tension so the stuffing won't show. If you prefer a slightly larger spider, increase one more round using (3 sc, inc) x6 to reach 30 sts.
Round 5 :
1 sc in each st (24)
Round 6 :
1 sc in each st (24)
Round 7 :
(3 sc, dec) x6 (18)
Round 8 :
Stuff abdomen lightly. (2 sc, dec) x6 (12)
Round 9 :
Finish abdomen: (1 sc, dec) x6 (6)
Round 10 :
Fasten off leaving long tail for sewing body to cephalothorax; set aside abdomen piece if made separately. (6)
Info :
Some crocheters prefer to work the cephalothorax directly onto the abdomen. If so, do not fasten off — continue with cephalothorax rounds. For clarity we will make a second small ball and sew them together.
Round 11 :
Make cephalothorax: mr, 6 sc (6)
Round 13 :
(1 sc, inc) x6 (18)
Round 14 :
1 sc in each st (18)
Info :
Slightly stuff the cephalothorax. When joining to abdomen, place cephalothorax at one end of abdomen, overlap by about 4-6 stitches of the abdomen's final round.
Round 15 :
Sew abdomen to cephalothorax using tail and whip stitch around meeting seam, creating a two-segment body. Weave tail through several inner stitches and hide. No stitch count.
Round 16 :
Create a small head nub if desired: with leftover tail, embroider two tiny eye bumps or French knots for eyes. Alternatively leave plain for a silhouette look. No stitch count.
Info :
At this point the spider body should be about 2.5-3 cm long. Make 8-10 spiders total using identical round counts. Keep tension consistent for even size.
— Spider Legs (Make 8 legs per spider) :
Info :
Legs are worked as short chains attached around the cephalothorax seam. For the curled look in the photos, work slip-stitch loops or single crochet loops rather than straight chains; each leg ends with a tiny bobble for the foot.
Round 1 :
Attach yarn to side of cephalothorax with a sl st, ch 6 (or ch 8 for longer legs), sc in 2nd ch from hook then (sc, sl st) across the chain to make a slightly textured length, ending in a small bobble: (yo, insert, yo, pull through 2, yo pull through 2) to create a bobble at the end. Fasten off leaving tail for stitching. Repeat to create 8 legs.
Round 2 :
Alternate method for looped leg: ch 10, join into loop with sl st; then work 6 sc into the loop and sl st back to attach — this creates a stout curled leg. Fasten off. (6)
Info :
Position legs evenly: 4 legs on each side of the cephalothorax spaced roughly every 2-3 stitches. For consistent appearance, mark the intended attachment points with pins before sewing legs in place.
Round 3 :
Secure each leg: sew through the base with several small stitches to the cephalothorax, knot tightly and weave tails inside the body to hide. No stitch count.
Round 4 :
Optional: add tiny french-knot toes using tail ends and embroidery needle at the end of legs to form a curled foot appearance. No stitch count.
Info :
Repeat for each spider ensuring legs are mirrored on both sides. Keep spiders lightweight to avoid undue swinging of the garland segments.
— Hanging Cord (Make 8) :
Info :
The spiders hang from twisted cords in the photo. You can make these by tightly braiding or twisting 3 strands of black yarn and securing ends with a few stitches. Each cord should be 6-12cm long depending on desired drop.
Round 1 :
Cut three strands of black yarn each 40cm long. Tie them together at one end and braid tightly for 10-12cm. Tie a secure knot at the end. Repeat to make 8 cords.
Round 2 :
Secure cord to spider: thread the knotted end through the top of the cephalothorax and whip stitch it in place from underside so the braid looks neat on the outside. Use several small stitches and a dab of fabric glue if needed. No stitch count.
Info :
If you want the cords to be twisted rather than braided, hold 3 strands together, twist tightly by winding them around a pencil, then fold in half and allow them to twist around themselves. Knot ends to secure.
— Assembly and Finishing Details :
Round 1 :
Decide placement for spiders: in the pictured sample, spiders hang in the gaps between spiral segments. Using a tape measure or by eye, mark positions along the core: typically place one spider every 8-10cm. No stitch count.
Round 2 :
Thread the top of a braided cord behind a spiral segment and secure by sewing the cord's top stitch to the inner seam of the spiral with hidden stitches; ensure that the cord's knot is covered and does not catch on anything. No stitch count.
Round 3 :
Attach spiders one by one: with the cord sewn into place, dangle the spider and attach the top of the cephalothorax to the cord's end by stitching through the knot and body to secure. Make sure spiders hang freely without twisting. No stitch count.
Info :
Balance your garland by arranging spiders symmetrically on both left and right sides of the arch. If some spiders end up heavier, slide spiral segments slightly to rebalance tension on the core.
Round 4 :
Secure final joins: where spiral segments meet each other or the core, stitch through the inner tube wall and around the core at a few hidden points so the tubes cannot slide. Use matching green yarn for invisibility. No stitch count.
Round 5 :
Trim and weave all tail ends through the inside of spiral segments and into adjacent stitches. Clip excess. Use fabric glue sparingly to secure any stubborn tails. No stitch count.
Info :
Shape the arch: gently bend the wired core to form the final curve and position spirals to taste. If using multiple arches, connect ends by twisting wire and covering the join with a short spiral segment sewn over the connection point.
— Optional Leaf Accent (Make 10-14) :
Round 1 :
ch 8, sc in 2nd ch from hook and across (7)
Round 2 :
Turn work, ch1, (1 sc, hdc, dc, hdc, sc, sl st in last) — this shapes a simple leaf. Fasten off leaving long tail for sewing. No stitch count.
Info :
Sew small leaves sparsely where spiral segments meet to enhance the vine effect. Use darker green for contrast or brown for rustic look.
— Decorative Surface Crochet for Texture :
Round 1 :
If you want more texture, you can add surface single crochet ridges along the outside spiral: working with RS facing, insert hook through front loop only of a round and sc along to create a raised line. No stitch count.
Round 2 :
Work spaced ribbing by sc in FLO for 2 rounds every 5-7 rounds of the segment to simulate leaf veins. This adds a tactile, natural look. No stitch count.
Info :
Surface crochet is optional but provides a realistic vine feel. Do this before final sewing of the spiral onto the core for ease.
This Green Spiral Halloween Garland combines tactile crochet and playful amigurumi details to bring whimsy and spook to any shelf or mantel. The curling spirals and dangling spiders create motion and intrigue, while the gradient greens make the vine-like structure feel alive. Whether you hang it for Halloween or use it year-round as quirky decor, it will be a conversation starter and a handmade treasure. 🧶🕷️✨