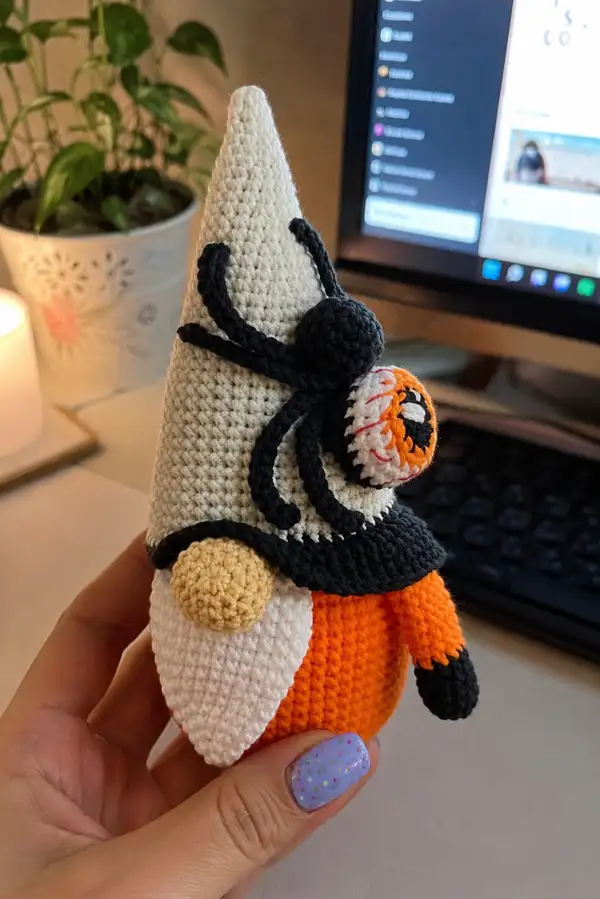
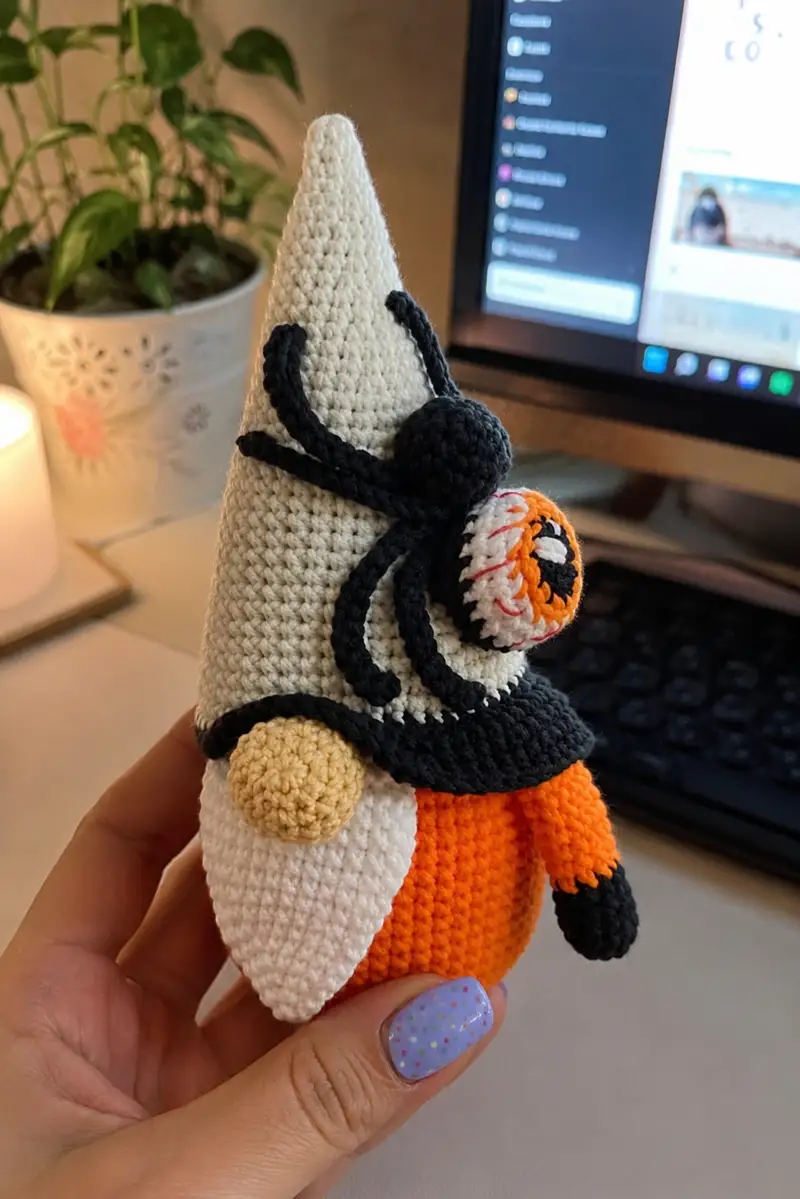
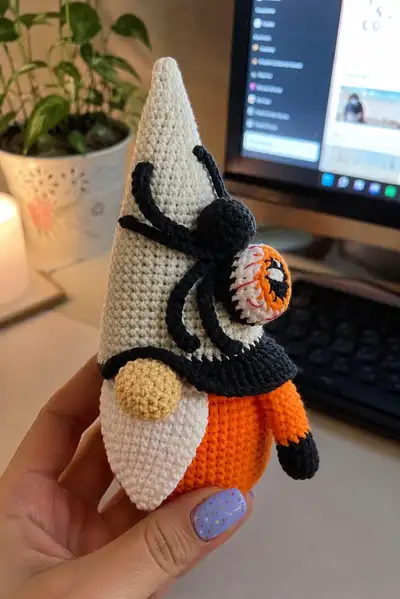
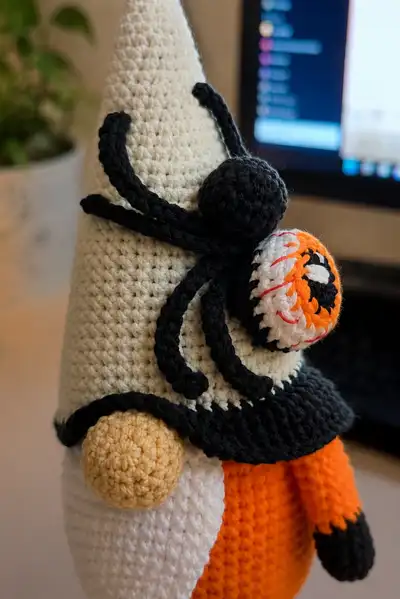
A spooky-cute Halloween gnome dressed in orange with a tall cream cone hat, a dramatic black collar, a white beard panel, and a playful black spider holding a stitched orange eyeball. This detailed amigurumi pattern includes step-by-step round-by-round instructions for every piece — body, hat, collar, beard, arms, legs, nose, the spider and the embroidered eyeball — so you can recreate this charming seasonal friend.
Progress Tracker
0% Complete
— Head :
Round 1 :
6 sc in magic ring (6)
Round 3 :
(1 sc, inc) x 6 (18)
Round 4 :
(2 sc, inc) x 6 (24)
Round 5 :
(3 sc, inc) x 6 (30)
Round 6 :
(4 sc, inc) x 6 (36)
Round 7 :
(5 sc, inc) x 6 (42)
Round 8 :
(6 sc, inc) x 6 (48)
Round 9-14 :
1 sc in each st (48)
Info :
The head for this gnome sits slightly under the hat. If you plan to add safety eyes or embroider a face, place eyes between rounds 11-13 about 8-10 sts apart. For the finished model, the face is mostly covered by the hat and beard so we will add a nose and minimal face details.
Round 15 :
(6 sc, dec) x 6 (42)
Round 16 :
(5 sc, dec) x 6 (36)
Info :
Begin stuffing head firmly now with small amounts of polyfill, focusing on the crown and middle. Keep stuffing slightly firmer than the body so the hat can sit smoothly over it.
Round 17 :
(4 sc, dec) x 6 (30)
Round 18 :
(3 sc, dec) x 6 (24)
Round 19 :
(2 sc, dec) x 6 (18)
Round 20 :
(1 sc, dec) x 6 (12)
Info :
Fasten off leaving a long tail for sewing. This small head will be fully covered by the hat in the finished toy; alternatively you can stop at round 18 and pull closed if you prefer a flatter top inside the hat.
— Hat (worked separately and placed over head) :
Info :
Use Cream/off-white yarn. The hat is tall and conical in the photo; it is worked as a taller cone with a slightly larger opening to sit over the head. Work in continuous rounds so brim is smooth. Place stitch marker and move each round.
Round 1 :
6 sc in magic ring (6)
Round 3 :
(1 sc, inc) x 6 (18)
Round 4 :
(2 sc, inc) x 6 (24)
Round 5 :
(3 sc, inc) x 6 (30)
Round 6 :
(4 sc, inc) x 6 (36)
Round 7 :
(5 sc, inc) x 6 (42)
Round 8 :
(6 sc, inc) x 6 (48)
Info :
At the end of round 8 you have an opening large enough to slip over the head. The hat continues as a tall cone with many even rounds to create height. Mark round starts.
Round 9-24 :
1 sc in each st (48)
Info :
The hat will be tapered to a point after these even rounds. Work 16 rounds of height for a tall conical shape (rounds 9-24). If you want a shorter hat, stop earlier.
Round 25 :
(6 sc, dec) x 6 (42)
Round 26 :
(5 sc, dec) x 6 (36)
Round 27 :
(4 sc, dec) x 6 (30)
Round 28 :
(3 sc, dec) x 6 (24)
Round 29 :
(2 sc, dec) x 6 (18)
Round 30 :
(1 sc, dec) x 6 (12)
Info :
Fasten off, leave a long tail. Stuff the hat lightly at the tip if desired to maintain shape, then use tail to sew closed cleanly and to attach hat to head. You may choose to stitch hat to head at a few key points inside so it does not slide.
— Body (main orange rounded body) :
Round 1 :
6 sc in magic ring (6)
Round 3 :
(1 sc, inc) x 6 (18)
Round 4 :
(2 sc, inc) x 6 (24)
Round 5 :
(3 sc, inc) x 6 (30)
Round 6 :
(4 sc, inc) x 6 (36)
Round 7 :
(5 sc, inc) x 6 (42)
Info :
The orange body is full and rounded. We've increased to 42 sts to create a plump gnome torso. If you prefer a slimmer body, stop at 36 sts. Continue in even rounds for the height of the torso.
Round 8-18 :
1 sc in each st (42)
Info :
Work even rounds 8-18 to build body height. At round 9-10 you will attach the collar and decide where legs will be positioned. Stuff the body gradually starting around round 12 so the torso remains evenly filled and smooth.
Round 19 :
(5 sc, dec) x 6 (36)
Round 20 :
(4 sc, dec) x 6 (30)
Round 21 :
(3 sc, dec) x 6 (24)
Info :
Continue stuffing firmly but not overstuffed—fill to shape the bottom rounded mattress. If you plan to set the gnome to stand, add extra stuffing at the center bottom. For a sit-down gnome, less firm stuffing works well.
Round 22 :
(2 sc, dec) x 6 (18)
Round 23 :
(1 sc, dec) x 6 (12)
Info :
Fasten off leaving long tail for closing and for attaching to base if desired. For this gnome the body opening will be used to sew on the collar and then attach the hat/head assembly on top.
— Collar / Shoulder Cape (Black) :
Info :
The black collar is a flared circular cape worked as a flat round and then a ruffle at the edge. This piece sits around the top of the body and under the hat base to create the dramatic black rim seen in the photo.
Round 1 :
6 sc in magic ring (6)
Round 3 :
(1 sc, inc) x 6 (18)
Round 4 :
(2 sc, inc) x 6 (24)
Round 5 :
(3 sc, inc) x 6 (30)
Round 6-8 :
1 sc in each st (30)
Info :
At the end of round 8 you have a flat disc. The collar in the picture has a defined brim; we will create a shallow ruffle next. Place marker at the start of the round that will sit at the shoulder line.
Round 9 :
*1 sc in next st, 2 sc in next st* around (45) — ruffle begin
Round 10 :
1 sc in each st (45)
Round 11 :
Work BLO for a subtle ridge: 1 sc in each st BLO (45)
Info :
If you prefer the collar to sit flat, do not curl the ruffle; attach the collar to body at this stage by sl st or whip stitch around top edge aligning to round 8 of body. Make sure the collar circumference matches the upper body circumference (round 8 of body).
Round 12 :
Fasten off leaving long tail for attaching. Weave in ends after sewing to the body.
— Beard/Side Panel (White tear-drop shaped panel) :
Info :
The white panel visible on the side of this gnome is a flat teardrop-shaped piece worked as an oval in rounds that is slightly tapered at the top to form a pointed bottom. We work this piece in joined rounds to form a flat shape to sew on the side of the body. Work tightly so it lays flat.
Round 1 :
6 sc in magic ring (6)
Round 3 :
(1 sc, inc) x 6 (18)
Round 4 :
(2 sc, inc) x 6 (24)
Round 5 :
(3 sc, inc) x 6 (30)
Round 6 :
1 sc in each st (30)
Round 7 :
1 sc in next 12 sts, dec, 1 sc in next 12 sts, dec (28)
Round 8 :
1 sc in next 11 sts, dec, 1 sc in next 11 sts, dec (26)
Round 9 :
1 sc in next 10 sts, dec, 1 sc in next 10 sts, dec (24)
Round 10 :
1 sc in next 9 sts, dec, 1 sc in next 9 sts, dec (22)
Round 11 :
1 sc in next 8 sts, dec, 1 sc in next 8 sts, dec (20)
Info :
You are tapering one end of the oval to create the teardrop tip. After you reach round 11 the piece should form a gentle tapered point. Block flat if needed by pinning to shape and lightly dampening.
Round 12 :
Fold the piece in half along its center and work single crochets around the edge to create a slightly 3D panel if preferred: sc evenly around edge to close slightly or leave as flat and fasten off (maintain about 20-22 sts around).
Round 13 :
Fasten off leaving long tail for sewing. Sew the panel to the left side of the body covering rounds 8-14 of the body as pictured. The pointed tip of the teardrop will point downwards toward the base of the body.
— Nose :
Round 1 :
6 sc in magic ring (6)
Round 3 :
1 sc in each st (12)
Round 4 :
(1 sc, dec) x 4 (8)
Round 5 :
1 sc in each st (8)
Info :
Stuff nose lightly and shape with fingers to form a subtle sphere. Fasten off leaving long tail for sewing. Position the nose centered under the hat brim and slightly overlapping the beard panel; sew securely through a few rounds of the head inside the hat so it is stable.
— Left & Right Arms (Make 2) :
Info :
Arms are worked top-down as small cylinders with a black mitten at the tip. The arm attaches at the upper body near round 10-12 for a natural hanging position. Work in orange then change to black for the mitt.
Round 1 :
6 sc in magic ring (6) — palm
Round 3-5 :
1 sc in each st (12)
Round 6 :
Change to orange yarn, 1 sc in each st (12)
Round 7-11 :
1 sc in each st (12)
Round 12 :
Change to black yarn for the mitten. (1 sc, dec) x 4 (8)
Round 13-14 :
1 sc in each st (8)
Info :
Stuff the hand section firmly and the rest of the arm lightly. Fasten off leaving a long tail for sewing. Sew arms to body at rounds 10-12 on the sides matching photo placement. Slight forward tilt looks natural.
— Legs / Lower Body Elements (Make 2 short legs) :
Info :
The gnome in the photo appears to have short legs with black feet. Legs attach to the bottom front of the body and are crocheted as short tubes. We will make two identical legs worked from the foot up.
Round 1 :
6 sc in magic ring (6)
Round 3 :
1 sc in each st (12)
Round 4 :
Change to orange yarn: 1 sc in each st (12)
Round 5-10 :
1 sc in each st (12) — leg length
Round 11 :
Change to black for foot: (1 sc, dec) x 4 (8)
Round 12-13 :
1 sc in each st (8)
Info :
Stuff feet firmly and legs moderately. Sew legs to bottom front of body at equal spacing, approx aligning to the central front between rounds 6-12 of the body depending on proportion you prefer. Sew through a few rounds to secure.
— Spider Body and Legs (Make 1 spider and 8 legs) :
Info :
The black spider sits on the hat with its legs draping down. The spider body is a small sphere, and legs are cords made by crocheting tight chains or small tubes. You can add wire for poseability if desired.
Spider Round 1 :
6 sc in magic ring (6)
Spider Round 2 :
6 inc (12)
Spider Round 3 :
(1 sc, inc) x 6 (18)
Spider Round 4 :
1 sc in each st (18)
Spider Round 5 :
(1 sc, dec) x 6 (12)
Spider Round 6 :
Dec x 6 (6)
Info :
Stuff lightly and fasten off leaving a long tail for sewing. The spider body in the photo is slightly larger than the nose; aiming for a 6-8 round sphere gives a proportionally correct size. You may stop at spider round 5 to leave a slightly larger ball.
Spider Legs (Make 8) Round 1 :
Ch 20, sl st into second ch from hook, sc across back chain for a firm cord (19 sc). Fasten off leaving long tail for sewing. Repeat 8 times.
Info :
For a more rounded tube leg, chain 8 and single crochet back into the chain then work additional rounds around to form a tube: sc in BLO of chain then sc around for 6-8 rounds. If using wire, insert and wrap with yarn before stuffing lightly and closing ends.
Spider Assembly :
Sew the spider body to the hat at the position shown in the photo (slightly off center on the front-right of the hat front). Arrange spider legs to drape naturally; stitch down a few legs to the hat and allow several to hang freely. Use stitch marker or pins to position before sewing.
— Eyeball Ornament (embroidered; attached to spider) :
Info :
The eyeball is a small decorative sphere that is orange/white with a black pupil and red embroidered veins. It is slightly flattened with color changes to create an iris layer. Work it as a small spherical shell and add embroidery after stuffing.
Round 1 :
6 sc in magic ring (6) — black for pupil base if you want a recessed pupil
Round 3 :
Change to orange yarn: (1 sc, inc) x 6 (18)
Round 4 :
1 sc in each st (18)
Round 5 :
Change to white yarn: (1 sc, dec) x 6 (12)
Round 6 :
1 sc in each st (12)
Round 8 :
Stuff lightly and close as needed leaving a long tail for placement. Fasten off.
Info :
After finishing, use red embroidery floss to stitch small vein-like lines across the white outer layer. Use black yarn to stitch the pupil if not included as a black base in round 1. Make a few small stitches of orange to create the inner iris ring if desired. The finished ornament is sewn to the spider body or to a chord held by the spider in the photo.
— Finishing Touches & Assembly Info :
Info :
Position the hat atop the head; decide whether to sew the hat to the head or to the collar. In the sample photos the hat sits firmly with the spider sewn to the hat surface and one side of the beard panel sewn under the collar. Use pins to find the right placement before stitching.
Info :
When sewing pieces together use a whip stitch or mattress stitch for invisible joins. Use the long tails from each piece and a yarn needle, and weave through several rounds to lock in place. Reinforce limbs and accessories with extra passes to prevent sagging if toy will be handled frequently.
Info :
Trim all loose ends and weave in tails. If you want the spider legs to stay in position, consider adding a drop of fabric glue at the sewn points and allow to dry before final placement. If using safety eyes for the face instead of the eyeball accessory, insert and lock eyes before stuffing the head fully.
This Spider Halloween Gnome is a delightful mash-up of cozy and creepy — a perfect seasonal companion to decorate a shelf or gift to a friend! Each section builds on classic amigurumi skills, and the playful spider with an embroidered eyeball brings that extra handcrafted charm. I hope stitching this little gnome brings you as much joy as I had designing it. 🧶🎃🕷️