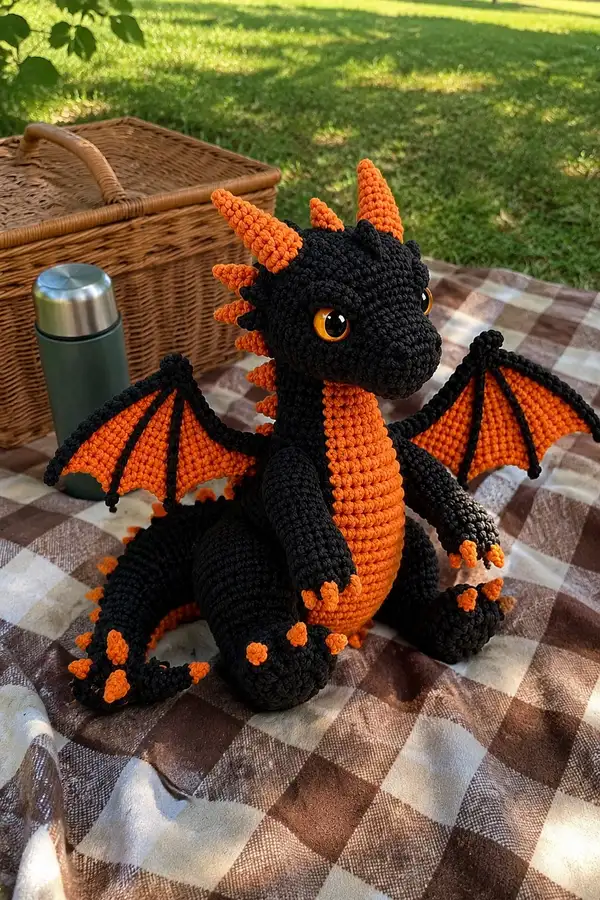
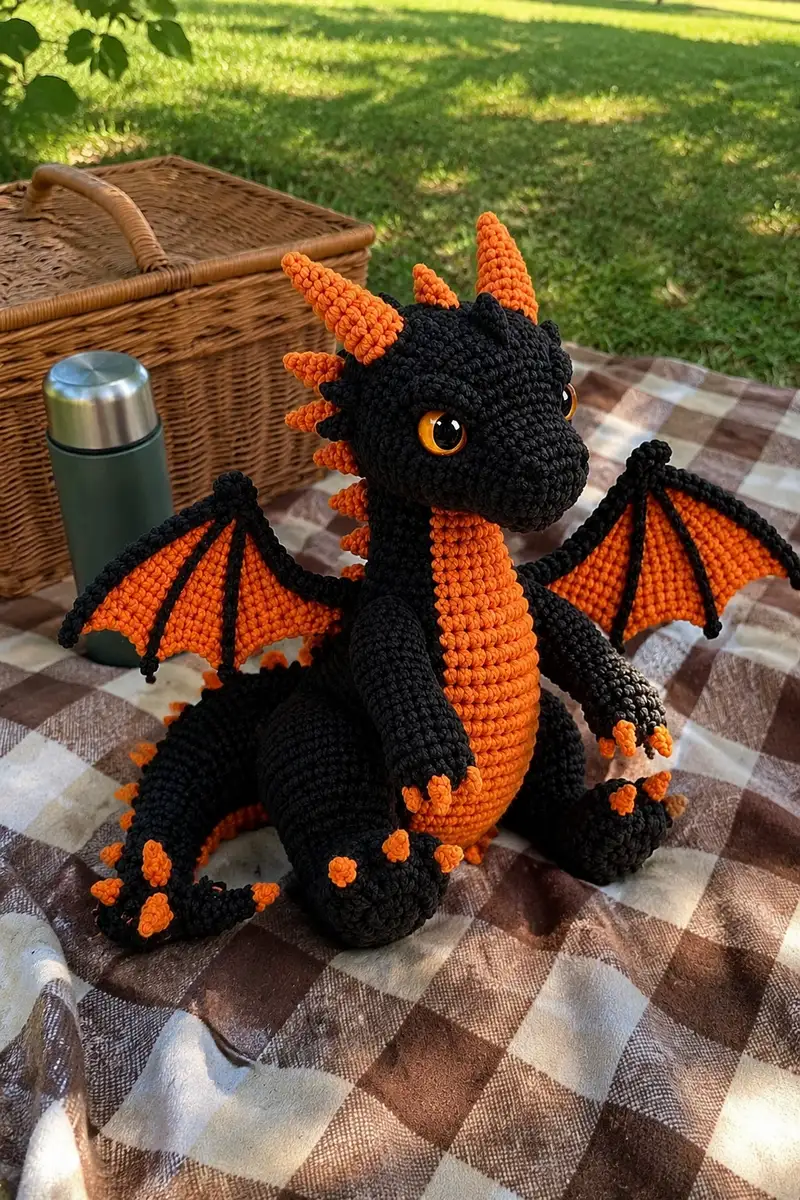
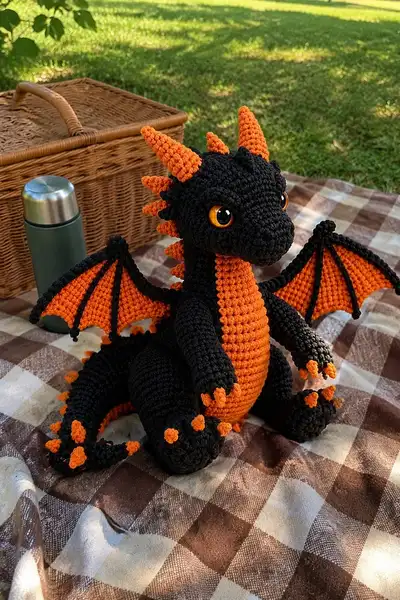
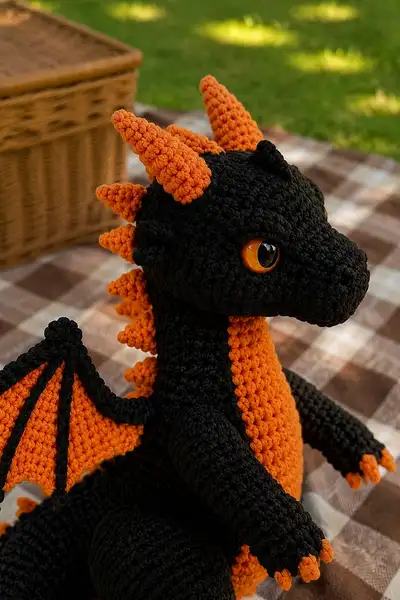
This cute black-and-orange dragon amigurumi is full of personality — oversized amber safety eyes, a curled tail with orange spikes, and expressive wing membranes framed in black. The pattern includes textured cone horns, a ridged belly in contrasting orange, and tiny orange claws for a playful, seasonal look. Perfect as a seasonal gift or a cozy shelf buddy, this dragon sits upright and can be made poseable with optional wire in the limbs.
Progress Tracker
0% Complete
— Head (including sculpted snout) :
Round 1 :
6 sc in magic ring (6)
Round 3 :
(1 sc, inc) x 6 (18)
Round 4 :
(2 sc, inc) x 6 (24)
Round 5 :
(3 sc, inc) x 6 (30)
Round 6 :
(4 sc, inc) x 6 (36)
Round 7 :
(5 sc, inc) x 6 (42)
Round 8 :
(6 sc, inc) x 6 (48)
Info :
Work these initial increases in Black. Keep rounds tight and place a stitch marker at start of each round. The head is worked in continuous rounds (do not join) to maintain a smooth spiral fabric.
Round 9 :
1 sc in each st (48)
Round 10-11 :
1 sc in each st (48)
Info :
Eye placement: mark two points on round 13 spaced 10-12 stitches apart depending on how wide you want the face. Use safety eyes 10mm for the look in the sample; insert between rounds 13 and 14 after securing the front eyelid stitches as described below.
Round 12 :
1 sc in each st (48)
Round 13 :
1 sc in each st (48)
Info :
Insert safety eyes between rounds 13-14 approximately 10 stitches apart for a friendly wide-eyed expression. Place the stitch marker in front center and count stitches to place eyes evenly on both sides.
Round 14 :
1 sc in each st (48)
Round 15 :
(6 sc, dec) x 6 (42)
Round 16 :
(5 sc, dec) x 6 (36)
Info :
Begin slightly stuffing the head now so the face holds shape. Add small handfuls and close gaps as you go. Keep stuffing firm around eye area to avoid sinking when securing eyes.
Round 17 :
(4 sc, dec) x 6 (30)
Round 18 :
(3 sc, dec) x 6 (24)
Round 19 :
(2 sc, dec) x 6 (18)
Info :
For sculpted snout, we will add a short muzzle extension. Do not close head completely; leave opening for snout attachment. Continue stuffing firmly toward the front to support the snout.
Round 20 :
1 sc in each st (18) - work this round holding shaping toward the front to begin muzzle base
Round 21 :
(2 sc, inc) x 6 (24) - start building the muzzle ridge
Round 22 :
(3 sc, inc) x 6 (30)
Round 23 :
1 sc in each st (30)
Info :
Begin shaping the snout by working additional rounds on only the front half of the head: you will count 15 sts (half of 30) and work in rows to form a tapered muzzle. Place extra stuffing into the front to ensure the snout fills out nicely.
Round 24 :
Working in continuous spiral over front 15 sts only: 1 sc in first 15 sts, then rotate and sc across same 15 sts on the next pass to create a short tube — work 1 sc in each of these 15 sts for R24 (15)
Round 25 :
(3 sc, dec) around these 15 sts by working decreases along the outer edges to start taper (12)
Round 26 :
(2 sc, dec) x 4 (9) - small tapered muzzle
Info :
Fasten off the muzzle leaving long tail for sewing. Use yarn needle to whip stitch muzzle opening to remaining head opening. Add finishing stuffing to maintain shape, then close securely.
Round 27 :
Sew muzzle to front opening: align edges and sew around using mattress or whip stitch. After secure, weave in ends.
Round 28 :
Embroider nostrils using two small french knots or tight stitches placed at the tip of the muzzle. Use Black or darker orange as desired.
Round 29 :
Optional: Add small eyelids by crocheting 6 sc into a small strip and sewing partially above the eye to create a hooded look.
Info :
Secure safety eyes from the back with washers and, optionally, a drop of fabric glue. Ensure eyes are seated evenly and the head's stuffing will not push them out. Adjust stuffing if eyes protrude too much or look sunken.
Round 30 :
Finish closing any gaps at the back of the head, decrease if needed in 2-3 rounds to leave neck opening. Fasten off and leave long tail for sewing to body.
— Neck & Body :
Round 1 :
6 sc in magic ring (6) - begin body base if making as separate piece, otherwise work directly onto body as described
Round 3 :
(1 sc, inc) x 6 (18)
Round 4 :
(2 sc, inc) x 6 (24)
Round 5 :
(3 sc, inc) x 6 (30)
Round 6 :
(4 sc, inc) x 6 (36)
Round 7 :
(5 sc, inc) x 6 (42)
Round 8 :
(6 sc, inc) x 6 (48)
Round 9-11 :
1 sc in each st (48)
Info :
Change to Pumpkin Orange for the belly strip now. You will crochet the belly separately and then sew to the front center of the body to create a neat color-blocked look. Carry the orange yarn along the inside of the body if you prefer a seamless switch.
Round 12 (Belly start) :
With orange, ch 1 and work 1 sc in next 24 sts counted on front center only to form belly strip foundation (24) - these are worked in rows back and forth to create a flat belly panel
Round 13-18 (Belly panel) :
Row-like: 1 sc across 24 sts, do not join, turn and sc back across (24) x6 rows total creating a vertical ribbed belly. Fasten off and leave long tail to sew to body.
Round 19 :
With Black, continue body rounds around whole circumference: 1 sc in each st (48)
Round 20-23 :
1 sc in each st (48)
Info :
Begin stuffing the body moderately from this point. The body should be firm enough to support head and allow the dragon to sit; add more stuffing to the bottom than the top to create a stable base.
Round 24 :
(6 sc, dec) x 6 (42)
Round 25 :
(5 sc, dec) x 6 (36)
Round 26 :
(4 sc, dec) x 6 (30)
Round 27 :
1 sc in each st (30)
Round 28 :
Stuff remaining body firmly, shape the hips to create a seated position by pressing the bottom flat and distributing stuffing so the dragon can sit securely
Round 29 :
(2 sc, dec) x 6 (24)
Round 30 :
(1 sc, dec) x 6 (18) - leave opening for head attachment
Info :
Fasten off leaving a long tail for sewing. Use tail to sew head to body using a tight whip or mattress stitch, aligning head opening to body opening evenly. Reinforce with extra passes for stability.
— Arms (Make 2) :
Round 1 :
6 sc in magic ring (6) - start with Black
Round 3 :
(1 sc, inc) x 6 (18)
Round 4 :
1 sc in each st (18)
Info :
Begin the hand/ paw shaping. We make tiny orange claw tips later by making small cones or popcorns and sewing them to the tips of fingers. Stuff the hand firmly but leave the wrist opening unstuffed for easier attachment later.
Round 5 :
1 sc in each st (18)
Round 6 :
(4 sc, inc) x 3 (21) - slight widening toward lower arm
Round 7-12 :
1 sc in each st (21)
Info :
If you want poseable arms, insert a length of floral wire to the center of the arm before stuffing. Wrap wire with a small piece of yarn or tape to avoid sharp ends. Leave 1-2 inches of wire extending into the body for secure anchoring.
Round 13 :
(3 sc, dec) x 3 (18)
Round 14-16 :
1 sc in each st (18) - work smaller rounds forming elbow region
Round 17 :
(2 sc, dec) x 3 (15)
Round 18 :
1 sc in each st (15)
Round 19 :
Stuff hand and arm lightly; leave top opening to sew to body. Fasten off leaving long tail for sewing.
Round 20 :
Sew arms to body: position arms at approx. body rounds 18-22 on each side and sew tightly using long tail. Use pins to check placement and symmetry before stitching.
— Hands: Tiny Claws (Make 6 small claws per hand) :
Round 1 :
4 sc in magic ring with Orange (4)
Round 2 :
(1 sc, inc) x 2 (6)
Round 3 :
1 sc in each st (6)
Round 4 :
Flatten, sl st through both loops to close and leave tail for sewing. Make 12 small orange dots (6 per hand) and sew to finger tips.
Info :
Sew claws onto rounded tips of hands firmly; a small dab of fabric glue helps secure if necessary. Keep claws oriented forward for a playful pose.
— Legs & Feet (Make 2) :
Round 1 :
6 sc in magic ring (6)
Round 3 :
(1 sc, inc) x 6 (18)
Round 4 :
(2 sc, inc) x 6 (24)
Round 5 :
(3 sc, inc) x 6 (30)
Round 6-8 :
1 sc in each st (30) - foot base rounds
Info :
Stuff the foot base fairly firm to create a flat stable sole. Flatten the foot slightly opposite the top so the dragon sits evenly. Add extra stuffing to the heel area for stability.
Round 9 :
(4 sc, dec) x 5 (25)
Round 10 :
1 sc in each st (25)
Round 11 :
(3 sc, dec) x 5 (20)
Round 12-16 :
1 sc in each st (20) - lower leg shaft
Round 17 :
(2 sc, dec) x 5 (15)
Round 18-20 :
1 sc in each st (15)
Round 21 :
(1 sc, dec) x 5 (10)
Round 22 :
Stuff leg lightly, leave opening for sewing. Fasten off leaving long tail for attachment.
Info :
Sew legs to lower body at the bottom edge: place them spaced about 12-14 stitches apart to create a balanced seated posture. Attach firmly, stitching through base rounds to prevent sagging.
— Tail :
Round 1 :
6 sc in magic ring (6) - begin tail tip in Black
Round 3 :
(1 sc, inc) x 6 (18)
Round 4-5 :
1 sc in each st (18)
Round 6 :
(2 sc, dec) x 6 (12) - start tapering
Round 7-20 :
1 sc in each st (12) - length of tail (work until tail is roughly as long as body, approx 14-18 cm depending on tension)
Info :
For a poseable tail, insert a length of floral wire along the center of the tail before stuffing. Bend and shape the tail to give it a natural curl; secure the wire at the base by wrapping with yarn and stitching to the body interior.
Round 21 :
(1 sc, inc) x 6 (18) - slightly widen the tail base for seam to body
Round 22 :
1 sc in each st (18)
Round 23 :
Sew tail to back center of body at approx. body rounds 8-12, curving it slightly to one side for a natural seated look. Add orange spikes along the top of tail as directed below.
— Spikes & Horns (Make 9-11 spikes for spine and 3 larger horns for head) :
Spike Cone Round 1 :
6 sc in magic ring (6) - Orange
Spike Round 2 :
(1 sc, inc) x 3 (9)
Spike Round 3 :
1 sc in each st (9)
Spike Round 4 :
(2 sc, inc) x 3 (12)
Spike Round 5 :
1 sc in each st (12)
Spike Round 6 :
(2 sc, dec) x 3 (9)
Spike Round 7 :
6 sc, fasten off leaving long tail for sewing (9)
Info :
Make 7-9 small spikes for neck and tail and 3-4 medium spikes for mid-tail. For head horns make larger cones by continuing increases to reach about 18-24 sts in circumference then decreasing to a point; see Horn Cone below.
Horn Cone Round 1 :
6 sc in magic ring (6) - Orange
Horn Round 3 :
(1 sc, inc) x 6 (18)
Horn Round 4 :
(2 sc, inc) x 6 (24)
Horn Round 5 :
1 sc in each st (24)
Horn Round 6 :
(3 sc, dec) x 6 (18)
Horn Round 7 :
(2 sc, dec) x 6 (12)
Horn Round 8 :
(1 sc, dec) x 4 (8)
Horn Round 9 :
Slip stitch dec around to close to a cone tip, fasten off leaving long tail for sewing (6)
Info :
Make 3 horns for the head and 7-9 small spikes for neck/tail. Sew each spike/horn securely along the center seam from the base of the skull down the back and along tail. Stagger spikes so they sit neatly on the ridge.
— Wings (Make 2) :
Wing Membrane Base Round 1 :
With Orange, ch 15, sc in 2nd ch from hook and across (14)
Wing Round 2 :
Ch1, turn, 2 sc in first st, 1 sc in next 10 sts, 2 sc in last st (16)
Wing Round 3 :
Ch1, turn, inc at both ends: (2 sc in first st, 1 sc next 14 sts, 2 sc last st) (18)
Wing Round 4-6 :
1 sc in each st (18) - build membrane height
Info :
Work the wing membranes flat in rows. After R6 stop increasing and shape the outer curve by decreasing a stitch at the outer edge every other row for 4 rows to create a tapered wing tip. Block wings flat if needed.
Wing Round 7 :
(dec at outer edge) 1 sc across until last 2 sts, dec at end - repeat shaping to create curved outer edge
Wing Round 8 :
Finish shaping so the membrane counts around 16 sts at the top edge; fasten off membrane and leave tail for sewing
Wing Frame :
With Black, crochet a narrow ridge around the wing by working sc stitches around the curved edge of the orange membrane: join Black at wing base and sc evenly along the outer curve to form a frame. Make 3-4 narrow black ribs by surface slip stitching or working chains from base to outer edge then sl st down to secure, creating the wing veins.
Info :
For the ribs: ch a length from base to outer edge (matching your wing height), sl st into membrane to tack down; repeat for 3 ribs spaced evenly. These ribs give structure and the bold black contrast seen in the photos.
Wing Attachment :
Sew wings to back at approx. body rounds 8-12. Angle them slightly outward and up toward the head. Pin in place and stitch securely through the wing base and a few body rounds for stability.
— Finishing Touches :
Info :
Sew head onto body using long tail and mattress stitch. Add horns to top of skull: position two larger horns at top center and one smaller central horn slightly toward the nose if desired. Place the row of small spikes starting at the occiput and continue down the spine to tail tip.
Info :
Sew arms and legs to body. Add claws to toes and hands using the small cones previously made. Use short, strong stitches and double back for security. For a neat seam, weave the tail end through the inside rows before pulling tight to hide knots.
Info :
Weave in all ends. Optionally add a bit of blush to the cheeks using pastel or a tiny brush of fabric paint; test on scrap first. Add extra reinforcement stitches where parts will be handled frequently.
Info :
If you want your dragon to be poseable, ensure wires in limbs have ends folded and covered with yarn, and stitch them to body anchor points to prevent slippage. Avoid using wire in toys intended for small children.
Info :
Final check: balance the dragon by redistributing stuffing in feet and bottom to make it sit evenly. Trim any visible tails and tidy final seams.
This joyful dragon pattern blends playful sculpting with bold seasonal colors for a delightful handmade friend. The step-by-step rounds guide you through shaping the head, belly, wings, horns and tail with clear tips for stuffing and assembly. The finished piece sits proudly and brings a whimsical Halloween vibe to any shelf or gift basket. I hope you enjoy crocheting every spike and stitch — happy crafting! 🧶🐉