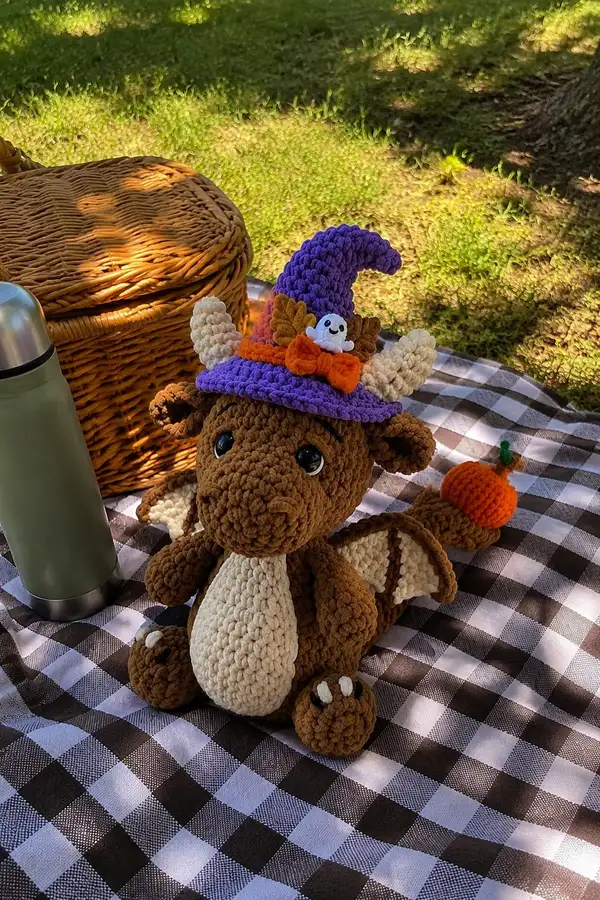
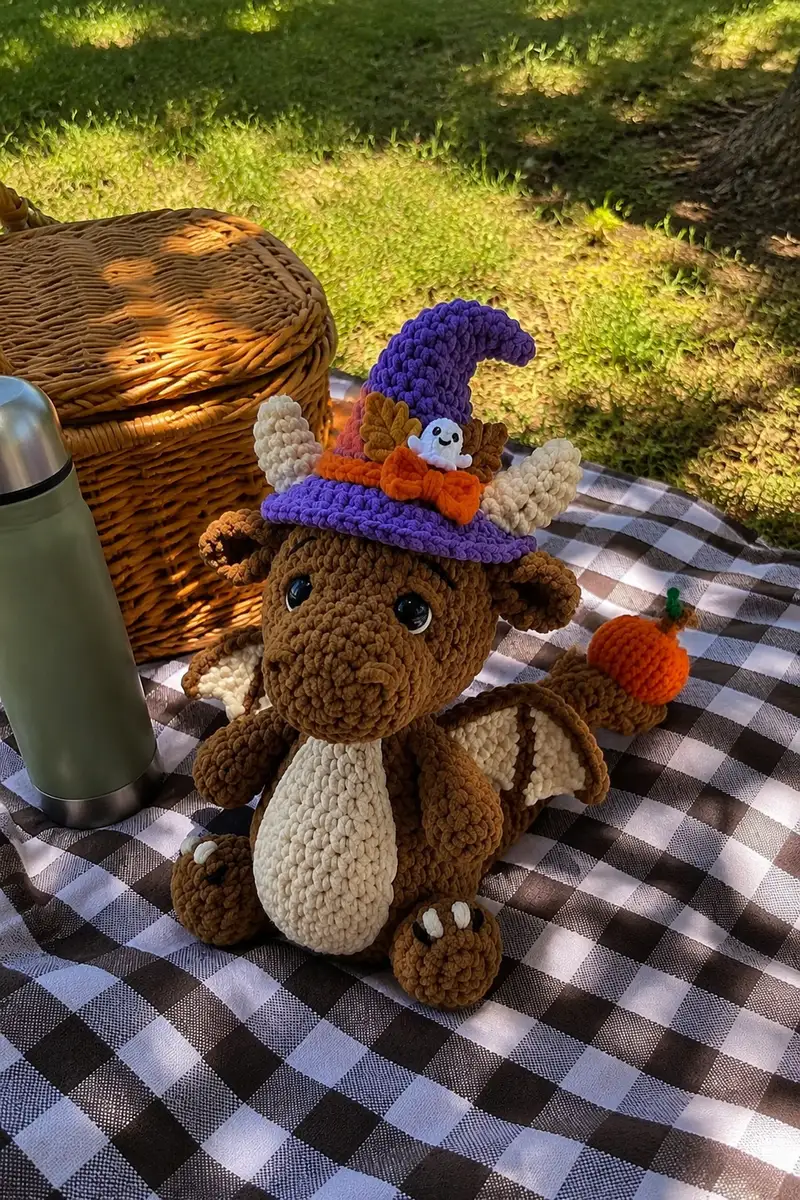
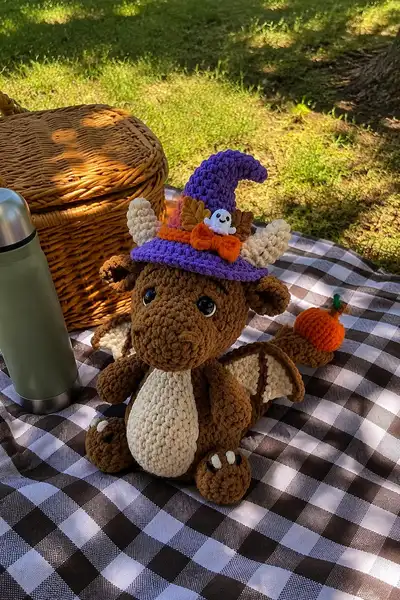
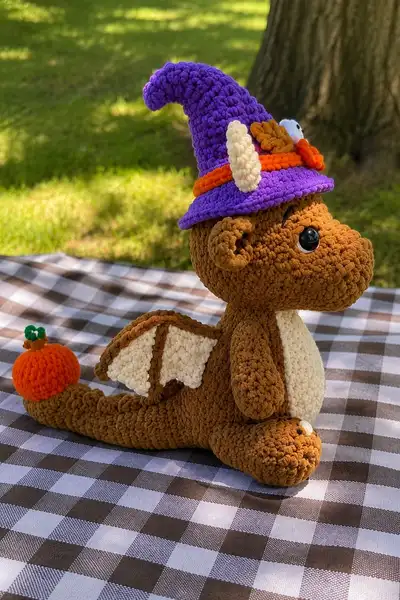
Make a cuddly, seasonal dragon dressed in a purple witch hat with a tiny pumpkin tail. This plush dragon features a warm brown body, cream belly and wing membranes, stitched claws and a curved, whimsical hat decorated with a bow, leaves and a tiny ghost. The squishy chenille-style yarn and large safety eyes give it an irresistibly soft, expressive look—perfect for Halloween displays, gifts, or cozy cuddles.
Progress Tracker
0% Complete
— Head :
Round 1 :
6 sc in magic ring (6)
Round 3 :
(1 sc, inc) x 6 (18)
Round 4 :
(2 sc, inc) x 6 (24)
Round 5 :
(3 sc, inc) x 6 (30)
Info :
Use the main chocolate brown yarn. Work tightly; chenille yarn is plush so keep stitches snug to avoid gaps.
Round 6 :
(4 sc, inc) x 6 (36)
Round 7 :
(5 sc, inc) x 6 (42)
Round 8 :
(6 sc, inc) x 6 (48)
Round 9 :
(7 sc, inc) x 6 (54)
Round 10 :
(8 sc, inc) x 6 (60)
Info :
At this point the head is wide enough for large safety eyes. Place stitch marker at beginning of each round to keep track in continuous spiral.
Round 11-16 :
1 sc in each st (60)
Info :
Place safety eyes between rounds 13 and 14, spacing them approximately 10-12 stitches apart. For the expressive look shown, aim for 11 stitches between centers (adjust as needed).
Round 17 :
1 sc in each st (60)
Round 18 :
1 sc in each st (60)
Info :
If adding a slight brow ridge, embroider with surface slip stitch across rounds 14-16 before continuing decreases.
Round 19 :
(8 sc, dec) x 6 (54)
Round 20 :
(7 sc, dec) x 6 (48)
Round 21 :
(6 sc, dec) x 6 (42)
Info :
Begin stuffing now: add small amounts of fiberfill, pressing into forehead and eye area to keep shape even. Do not overstuff — head should be firm but slightly squishy.
Round 22 :
(5 sc, dec) x 6 (36)
Round 23 :
(4 sc, dec) x 6 (30)
Round 24 :
(3 sc, dec) x 6 (24)
Round 25 :
(2 sc, dec) x 6 (18)
Info :
Smooth stuffing as you go using a blunt stuffing tool or the blunt end of a crochet hook to reach small areas. Ensure cheeks and jaw are evenly filled.
Round 26 :
(1 sc, dec) x 6 (12)
Round 28 :
Fasten off leaving a long tail for sewing neck to body. Weave tail through remaining stitches and pull tight to close slightly; do not fully close — leave a short neck opening for sewing (approx. 2-3 rows depth)
Info :
Leave long tail (30-40 cm) for sewing. Stuff head fully before final tightening; the neck opening will be used to anchor the head to the body with whip stitch.
— Ears / Horns (Make 2 horns and 2 small ears) :
Round 1 :
6 sc in magic ring (6)
Round 3 :
(1 sc, inc) x 6 (18)
Round 4 :
1 sc in each st (18)
Round 5 :
(3 sc, dec) x 4 + 2 sc (14)
Info :
For the ivory horns, switch to cream yarn at start. Slightly oval shape; stuff lightly to keep ears curved. For small floppy ears, skip rounds 5 and use fewer decreases.
Round 6 :
(2 sc, dec) x 4 + 2 sc (10)
Round 7 :
1 sc in each st (10)
Round 8 :
Fasten off leaving tail for sewing. Shape horn by folding slightly and sewing base to head between rounds 6-8, spacing horns approx. 6-8 stitches apart over top crown.
Info :
Pin horns in place and try hat on head to ensure hat sits around horns properly before sewing permanently.
— Body :
Round 1 :
6 sc in magic ring (6)
Round 3 :
(1 sc, inc) x 6 (18)
Round 4 :
(2 sc, inc) x 6 (24)
Round 5 :
(3 sc, inc) x 6 (30)
Info :
Use the same chocolate brown yarn. Body will be worked from bottom up; this base forms the bottom of the body. Keep increasing evenly for a rounded belly.
Round 6 :
(4 sc, inc) x 6 (36)
Round 7 :
(5 sc, inc) x 6 (42)
Round 8 :
(6 sc, inc) x 6 (48)
Round 9-12 :
1 sc in each st (48)
Info :
Join cream yarn at front center for belly piece placement later. Mark front center stitch to align belly and head later.
Round 13-14 :
1 sc in each st (48)
Round 15 :
(6 sc, dec) x 6 (42)
Round 16 :
(5 sc, dec) x 6 (36)
Info :
Begin stuffing body firmly from the bottom up. Add moderate stuffing; body should hold shape but not be rock-hard. Insert a bit more stuffing near the front where head will attach.
Round 17 :
(4 sc, dec) x 6 (30)
Round 18 :
(3 sc, dec) x 6 (24)
Round 19 :
(2 sc, dec) x 6 (18)
Round 20 :
(1 sc, dec) x 6 (12)
Round 22 :
Fasten off leaving long tail for sewing. Do not fully close; leave a neck opening about 4-6 stitches wide where head will be sewn. Reinforce the area with extra stuffing to prevent collapse.
Info :
Sewing tip: leave head and body openings slightly open while sewing to allow you to adjust placement and stuff more if required. Use pins to align the center front stitch of body to chin center of head.
— Belly Plate (Cream, Make 1) :
Round 1 :
6 sc in magic ring (6)
Round 3 :
(1 sc, inc) x 6 (18)
Round 4 :
(2 sc, inc) x 6 (24)
Round 5 :
(3 sc, inc) x 6 (30)
Round 6 :
1 sc in each st (30)
Info :
Make this oval slightly flattened before fastening off. Leave long tail to whip stitch belly panel onto front of body overlapping rounds 9-14 to center under head.
Round 7 :
Fasten off leaving long tail for sewing. Pin to front of body and sew with whip stitch, pulling fabric snug to avoid gaps.
— Arms (Make 2) :
Round 1 :
6 sc in magic ring (6)
Round 3 :
(1 sc, inc) x 6 (18)
Round 4 :
1 sc in each st (18)
Round 5 :
(3 sc, dec) x 4 + 2 sc (14)
Info :
Work arms in chocolate brown. Stuff hand portion firmly so it keeps shape when sewn to body. Leave opening at top for sewing to body round 14-16 area.
Round 6 :
1 sc in each st (14)
Round 7-12 :
1 sc in each st (14)
Round 13 :
(2 sc, dec) x 3 + 2 sc (11)
Round 14 :
1 sc in each st (11)
Round 15 :
Fasten off leaving long tail for sewing. Stuff hand portion firmly and leave shoulder open to attach to body. For more rounded arm, add a few extra sc rounds before finishing.
— Legs (Make 2) :
Round 1 :
6 sc in magic ring (6)
Round 3 :
(1 sc, inc) x 6 (18)
Round 4 :
(2 sc, inc) x 6 (24)
Round 5 :
(3 sc, inc) x 6 (30)
Info :
Create a flat base for the foot by adding a short oval sole later. These rounds build the foot circumference; be mindful of direction so foot sits flat when attached.
Round 6-9 :
1 sc in each st (30)
Round 10 :
(4 sc, dec) x 6 (24)
Round 11 :
(3 sc, dec) x 6 (18)
Round 12-15 :
1 sc in each st (18)
Round 16 :
(2 sc, dec) x 4 + 2 sc (14)
Round 17 :
1 sc in each st (14)
Round 18 :
Fasten off leaving long tail. Stuff foot firmly, especially sole. Sew legs to bottom of body, spacing them evenly to allow model to sit upright. Add small white or cream claws: embroider three small stitches on top of each foot or make tiny ovals.
— Tail :
Round 1 :
6 sc in magic ring (6)
Round 3 :
(1 sc, inc) x 6 (18)
Round 4 :
(2 sc, inc) x 6 (24)
Round 5-8 :
1 sc in each st (24)
Info :
Create a long tapered tail by working even rounds then decreasing gradually. For a bendable tail, insert a length of florist wire before most stuffing and wrap ends securely.
Round 9 :
(4 sc, dec) x 4 + 2 sc (20)
Round 10 :
(3 sc, dec) x 4 + 2 sc (16)
Round 11-14 :
1 sc in each st (16)
Round 15 :
(2 sc, dec) x 4 (12)
Round 16-18 :
1 sc in each st (12)
Round 19 :
(1 sc, dec) x 4 (8)
Round 20-22 :
1 sc in each st (8)
Round 23 :
Fasten off leaving long tail for sewing. Add small pumpkin to tail tip (see pumpkin section). Sew pumpkin to tail end securely.
— Wing Panels (Make 2 large outer panels and 2 inner cream panels) :
Round 1 :
6 sc in magic ring (6)
Round 3 :
(1 sc, inc) x 6 (18)
Round 4 :
(2 sc, inc) x 6 (24)
Round 5 :
1 sc in each st (24)
Round 6 :
BLO 1 sc in each st to create a wing ridge (24)
Round 7 :
Switch to cream yarn for inner membrane; work a scallop shape across edge: (3 sc, ch 2, sl st into next st) across edge to create three membrane points
Info :
Sew inner membrane panels onto inner edge of outer wing panel using whip stitch. Leave a small opening to stuff lightly then close. Pin wings to body center-back between rounds 8-12 to achieve same height as in photos.
Round 8 :
Fasten off leaving long tail for sewing. Repeat for second wing. For wing bones, use a row of slip stitches in brown along inner seam to suggest ribbed wing bones.
— Tiny Pumpkin (for tail tip) :
Round 1 :
Magic ring 6 sc (6) with bright orange yarn
Round 3 :
(1 sc, inc) x 6 (18)
Round 4 :
1 sc in each st (18)
Round 5 :
(2 sc, dec) x 6 (12)
Round 6 :
1 sc in each st (12)
Round 7 :
(1 sc, dec) x 4 (8)
Round 8 :
Fasten off leaving long tail for sewing. Lightly stuff and use a length of green yarn to stitch vertical ribs around pumpkin, pulling firmly to form ridges. Add a tiny green stem and attach to tail tip.
Info :
Use small amount of darker orange for shading or embroider a face to personalize pumpkin. Attach with several secure stitches.
— Hat (Purple Witch Hat) :
Info :
Hat is worked separately and placed on head. Build a wide brim then a tall cone for the hat crown. Use purple bulky yarn and an orange accent band. Work in continuous rounds for a smooth slouched cone.
Round 1 (Brim) :
6 sc in magic ring (6) with purple yarn
Round 3 :
(1 sc, inc) x 6 (18)
Round 4 :
(2 sc, inc) x 6 (24)
Round 5 :
(3 sc, inc) x 6 (30)
Round 6 :
1 sc in each st (30)
Info :
To create a flat brim, work several rounds with FLO to create a slight ridge that will flare. This helps brim sit slightly up at edge.
Round 7 :
1 sc in each st FLO (30)
Round 8 :
1 sc in each st (30)
Round 9 :
(4 sc, inc) x 6 (36)
Round 10-11 :
1 sc in each st (36)
Round 12 :
Switch to cone shaping: (5 sc, inc) x 6 (42)
Round 13-18 :
1 sc in each st (42)
Round 19 :
(6 sc, inc) x 6 (48)
Round 20-24 :
1 sc in each st (48)
Round 25 :
(6 sc, dec) x 6 (42)
Round 26 :
(5 sc, dec) x 6 (36)
Round 27 :
(4 sc, dec) x 6 (30)
Info :
To make the hat slouch and curl, place a small amount of stuffing or a light wire in crown before final shaping. Bend top slightly to the side for the whimsical curve.
Round 28 :
(3 sc, dec) x 6 (24)
Round 29 :
(2 sc, dec) x 6 (18)
Round 30 :
Fasten off leaving long tail if you want to sew hat closed a bit at crown; otherwise leave open to place over head. Create orange band: make a chain long enough to wrap brim circumference and seam, then sl st into back loops to create a raised band. Add an orange bow and leaves by crocheting small shapes (see embellishments).
Info :
Embellishments: Make a small ghost (white) with 6-12 sts and embroider eyes; make two small flat leaf shapes by ch 6 and forming scallops; stitch all to band. Position band on brim and sew band to brim at even points.
— Small Ghost Accent :
Round 1 :
6 sc in magic ring (6) white yarn
Round 2 :
1 sc in each st (6)
Round 3 :
Fasten off leaving tail and flatten slightly; embroider two small black French knots for eyes using embroidery thread or use tiny black beads. Sew ghost onto orange band.
— Claws and Small Details :
Info :
Claws: make three tiny ovals in cream by ch 3, 3 sc across, fasten off, sew to top of each foot. Eyebrows: embroider small arcs over eyes to create the sleepy friendly expression. Nose detail: a small ridge on muzzle made by surface chain stitch across two stitches.
— Assembly & Finishing :
Info :
Weave in ends as you go. Block hat slightly if needed so brim sits flat. Use pins to position head on body before final sewing.
Step 1 :
Attach head to body by sewing neck opening to the body neck with a strong yarn tail using whip stitch. Align center front of head with center front of body (chin to belly center). Use approx. 10-14 secure stitches evenly spaced and stuff more if needed before closing.
Step 2 :
Sew arms to sides of body at rounds 14-16 on each side. Use ladder stitch or whip stitch to hide seams and shape arm attachment so they appear slightly forward-facing.
Step 3 :
Sew legs to bottom of body at the base rounds so the dragon can sit. Make sure feet are angled slightly outward for stability. Reinforce with extra stitches where legs meet body.
Step 4 :
Sew wings to back at rounds 9-12 near center of back. Use strong yarn and many small stitches along wing base; wings are lightly stuffed so they keep shape.
Step 5 :
Sew pumpkin to tail tip and secure with multiple stitches. If adding wire inside tail, conceal wire end before sewing pumpkin and wrap end in yarn to avoid poking through stitches.
Step 6 :
Place hat on head and position horns through hat holes or sew hat to head at two small stitches at back/side to secure. Sew on bow, leaves and ghost to orange band. Embroider final facial details and add highlights with white yarn or embroidery thread.
Info :
After final assembly, check all safety eyes and small parts are secure. Weave all tails into seams at least 5 cm and trim close. Add slight blush to cheeks with fabric-safe chalk if desired.
Completing this adorable Halloween dragon is such a joyful project—each piece snaps together into a charming, huggable character! The plush chenille gives it a soft, warm feel while the tall witch hat and pumpkin tail add seasonal personality. Enjoy the slow, creative process and the big smile when you place the finished dragon on display. 🧶🎃✨