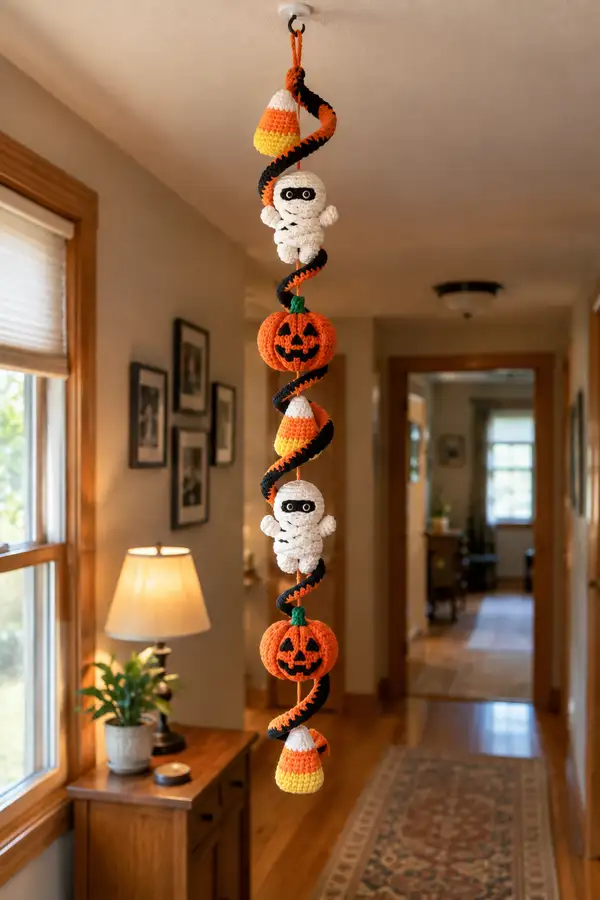
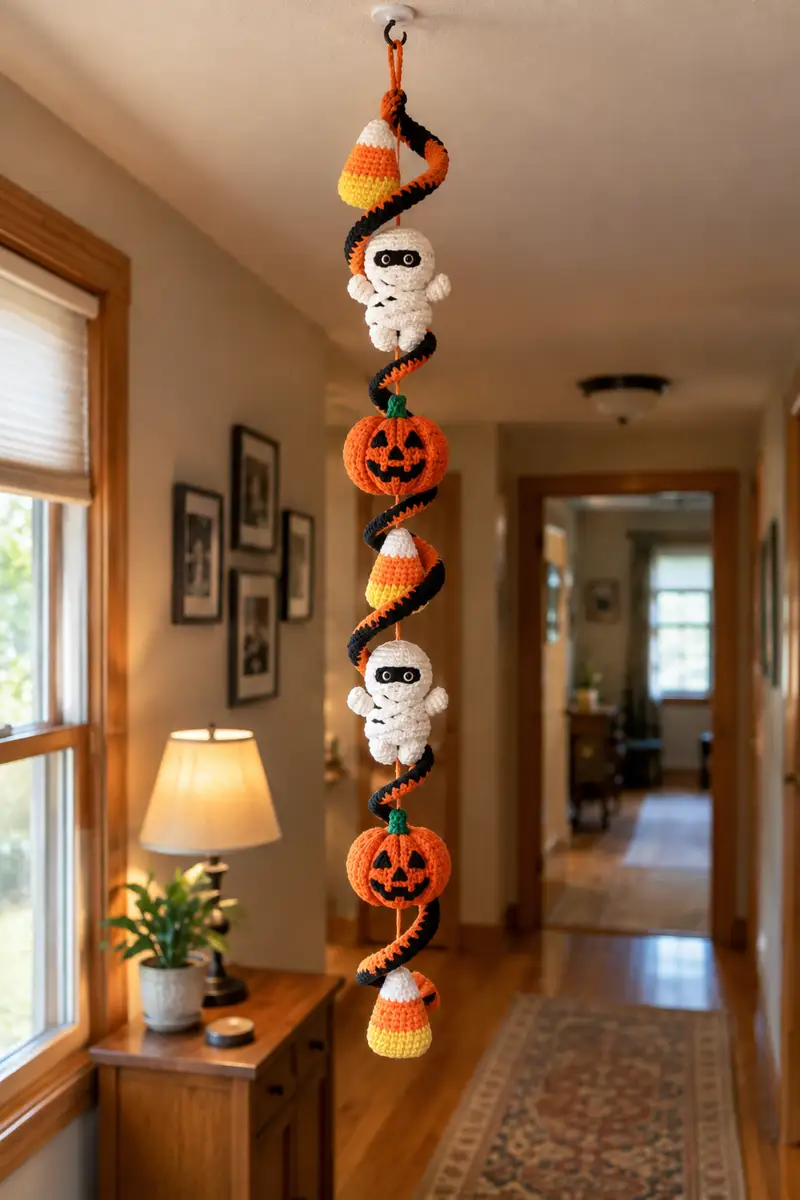
Create a whimsical hanging Halloween garland featuring two cuddly mummies, two friendly jack-o-lanterns, and three candy corn charms strung along a playful black-and-orange spiral. This pattern shows how to crochet each motif, a long spiral tube, and assemble a decorative mobile that hangs beautifully in a doorway or hallway.
Progress Tracker
0% Complete
— Notes & Overview :
Info :
This pattern makes a vertical hanging garland approx 28-36 inches long depending on spacing and how tightly you coil the spiral. You will crochet all motifs separately then thread them onto a central hanging cord. Make 3 candy corns, 2 small mummies, and 2 jack-o-lanterns as shown. Work tightly for amigurumi to avoid stuffing showing. Use stitch markers at the start of each round.
Info :
All pieces are worked in continuous rounds unless instructed to join. When joining color changes, carry yarn inside when possible or fasten off leaving tails for weaving. Counts in parentheses are stitch totals for each round.
— Spiral Tube (make 1 long tube for covering the central cord) :
Info :
Foundation: Decide desired finished length for spiral (I recommend 120-160 chains depending on spacing). This sample uses a foundation chain of 150 ch. The tube is worked in rounds around this chain to create a long narrow tube that will coil. Alternate colors every few rounds to create the black-and-orange spiral effect.
Round 1 :
Ch 150, join with sl st to first ch to form a loop, taking care not to twist (150)
Round 2 :
1 sc in each ch around (150)
Round 3 :
1 sc in each st (150)
Round 4 :
1 sc in each st (150)
Round 5 :
1 sc in each st (150)
Info :
Change to black yarn now for 4 rounds to create a black stripe. Carry unused yarn inside or fasten off and weave ends later. Use marker to note start of rounds every 10 rounds to help count long runs.
Round 6-9 :
1 sc in each st (150)
Info :
Switch back to pumpkin orange, work 6 rounds. Pattern alternates black (4 rounds) and orange (6 rounds) to give a striped spiral appearance. You can vary stripe widths for visual interest.
Round 10-15 :
1 sc in each st (150)
Round 16-19 :
Switch to black yarn. 1 sc in each st (150)
Round 20-27 :
Switch to pumpkin orange. 1 sc in each st (150)
Info :
Continue alternating orange and black stripes following the same sequence until the tube reaches your required length. This sample continues for 80 rounds total (about 40 stripes), then fastens off leaving a long tail for sewing. If you prefer, make the tube longer or shorter to fit your hanging plan.
Round 28-80 :
1 sc in each st (150) alternating stripes as described (150)
Info :
Optional: To make the tube slightly more dimensional, work the tube in BLO for the last 4-6 rounds to create a ribbed edge that helps the spiral hold shape when wrapped. Fasten off leaving long tail for joining. If using a central cord, thread cord through the center of tube before coiling; otherwise coil and sew the tube to itself in a spiral formation.
— Central Hanging Cord :
Info :
Cut a length of sturdy embroidery floss or strong cord approx 3-4 inches longer than the finished spiral tube. This will be used to string motifs; knots will be used to hold motifs in place. If you used a tube with open center, thread the cord through the tube now.
— Candy Corn (Make 3) :
Info :
Each candy corn is worked from yellow base to orange middle to white tip with color changes. Work in continuous rounds. These are small, cone-shaped charms approx 2.25-3 inches tall depending on yarn/hook.
Round 1 :
With yellow, 6 sc in mr (6)
Round 3 :
(1 sc, 1 inc) x6 (18)
Round 4 :
(2 sc, 1 inc) x6 (24)
Round 5 :
(3 sc, 1 inc) x6 (30)
Info :
Stuff the base lightly to give the candy corn a rounded bottom but not too firm; the candy should remain a little squishy for hanging balance. Change to bright orange at the top of this round if you like a smoother color join, or change after Round 6 for a wider yellow section.
Round 6 :
1 sc in each st (30)
Round 7 :
Change to bright orange. 1 sc in each st (30)
Round 8 :
1 sc in each st (30)
Round 9 :
(3 sc, 1 dec) x6 (24)
Round 10 :
1 sc in each st (24)
Round 11 :
Change to white/cream for tip. 1 sc in each st (24)
Round 12 :
(2 sc, 1 dec) x6 (18)
Round 13 :
(1 sc, 1 dec) x6 (12)
Info :
Finish stuffing lightly while rounds are still open. Fasten off leaving a long tail for sewing to the central cord or for weaving in. Make three candies identical or vary stripe sizes for visual interest.
— Mummy (Make 2) :
Info :
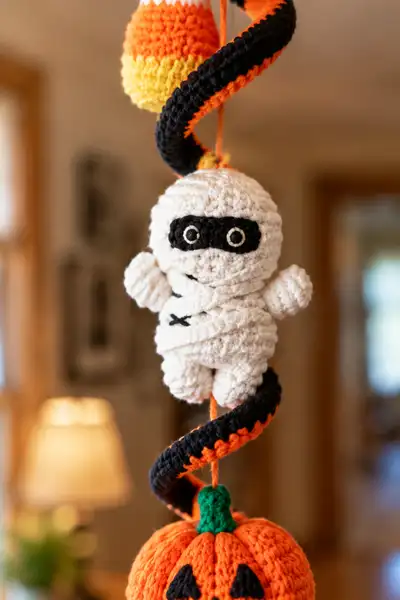
Each mummy is worked as one piece with head and body forming a slightly pear-shaped amigurumi, about 3.5-4 inches tall. After assembly, surface-wrap with narrow cream/white chains to mimic bandages and embroider small black crosses for stitching details.
Round 1 :
With cream, 6 sc in mr (6)
Round 3 :
(1 sc, 1 inc) x6 (18)
Round 4 :
(2 sc, 1 inc) x6 (24)
Round 5 :
(3 sc, 1 inc) x6 (30)
Round 6 :
(4 sc, 1 inc) x6 (36)
Round 7 :
(5 sc, 1 inc) x6 (42)
Round 8-12 :
1 sc in each st (42)
Info :
Place safety eyes between rounds 9-10 approximately 8-10 stitches apart depending on desired expression. If embroidering eyes, mark placement and leave those rounds unstuffed until eyes are secured. Begin stuffing lightly from round 10 onward to keep head round.
Round 13 :
(5 sc, 1 dec) x6 (36)
Round 14 :
(4 sc, 1 dec) x6 (30)
Info :
Begin stuffing head firmly and continue stuffing as you work down into the body. Stuff little and often to avoid lumps. The body will be slightly narrower where the neck forms.
Round 15 :
(3 sc, 1 dec) x6 (24)
Round 16 :
(2 sc, 1 dec) x6 (18)
Round 17 :
1 sc in each st (18)
Round 18 :
(2 sc, 1 inc) x6 (24)
Round 19 :
(3 sc, 1 inc) x6 (30)
Round 20-22 :
1 sc in each st (30)
Info :
To form the lower body/wrap shape, we add rounds with slight shaping. Keep stuffing moderately firm; the mummy should be compact so it hangs straight without tipping the garland too much.
Round 23 :
(3 sc, 1 dec) x6 (24)
Round 24 :
(2 sc, 1 dec) x6 (18)
Round 25 :
(1 sc, 1 dec) x6 (12)
Info :
Fasten off leaving a long tail for sewing. Finish stuffing and close the hole by weaving the tail through remaining 6 stitches and pulling closed. Weave in the end inside the body.
Info :
Arms and legs: Work small appendages separately and sew in place. Use surface crochet or narrow chains to wrap the mummy for bandage detail, then embroider a few black 'X' shaped stitches for patched effect.
— Mummy Arms (Make 2) :
Round 1 :
With cream, 6 sc in mr (6)
Round 3-6 :
1 sc in each st (12)
Info :
Stuff arms very lightly; they should remain soft and slightly flexible. Flatten the opening and sew to sides of body roughly at rounds 12-14 of the body (count from top of body) for proportional placement.
Round 7 :
(1 sc, 1 dec) x4 (8)
Info :
Fasten off with long tail for sewing. Sew arms to body using ladder stitch for invisible seam. Add small surface stitches to mimic bandage wrap across arms if desired.
— Mummy Legs (Make 2) :
Round 1 :
With cream, 6 sc in mr (6)
Round 3-5 :
1 sc in each st (12)
Round 6 :
(1 sc, 1 dec) x4 (8)
Round 7 :
1 sc in each st (8)
Info :
Stuff feet moderately firm so the mummy sits well on the garland when hanging. Sew legs to the underside of the lower body at even spacing so the legs dangle symmetrically.
Info :
Fasten off leaving long tail for sewing. For a wrapped look, crochet a long narrow chain in cream and stitch across body diagonally to simulate bandages, tacking the ends underneath.
— Mummy Face Details :
Info :
Black eye band: With black yarn, ch 7, join to work in rounds making a small flat oval approx 7 ch long; sc across both sides to create a small oval patch. Alternatively, embroider a rectangular band directly onto the head. Stitch on two small white circles (embroidered or crocheted tiny rounds) for eye highlights or use safety eyes before closing the head.
Round 1 :
With black, ch 7, sc in 2nd ch from hook, sc across remaining ch (6), turn, sc 6 along opposite side of ch to make oval (12)
Round 2-3 :
1 sc in each st (12)
Info :
Sew black eye band to face between rounds 9-10 (head count). Embroider small white circles for pupils using yarn or thread, or attach 6mm safety eyes through the band (secure on inside and use a dab of glue if needed).
— Jack-o-Lantern Pumpkin (Make 2) :
Info :
Pumpkins are worked in the round to a full sphere, then shaped with surface crochet ridges or by sewing vertical segments to create the pumpkin ribs. Use BLO rounds to create pronounced ridges if desired. Each pumpkin measures approx 3-3.5 inches across when stuffed lightly.
Round 1 :
With pumpkin orange, 6 sc in mr (6)
Round 3 :
(1 sc, 1 inc) x6 (18)
Round 4 :
(2 sc, 1 inc) x6 (24)
Round 5 :
(3 sc, 1 inc) x6 (30)
Round 6 :
(4 sc, 1 inc) x6 (36)
Round 7-10 :
1 sc in each st (36)
Info :
To create ribbing, from Round 11 onward work 2-3 rounds in BLO to produce a groove effect. You will work surface stitch lines after stuffing to deepen the pumpkin segments. Start stuffing firmly at round 10-11 to maintain round shape.
Round 11 :
1 sc in each st BLO (36)
Round 12 :
1 sc in each st BLO (36)
Round 13 :
(4 sc, 1 dec) x6 (30)
Round 14 :
(3 sc, 1 dec) x6 (24)
Round 15 :
(2 sc, 1 dec) x6 (18)
Round 16 :
(1 sc, 1 dec) x6 (12)
Info :
Fasten off leaving long tail; weave tail through last 6 sts and pull to close. Weave remaining yarn inside. After closing, use a needle and yarn to sew vertical lines pulling slightly to create ribs — sew from top center to bottom around = 6-8 segments depending on how many ridges you prefer.
Info :
Pumpkin face: With black yarn, cut small felt triangles or crochet tiny triangles (ch 3-4, sc back across) for eyes and nose; stitch into place. For mouth, embroider a smiling jack-o-lantern mouth with triangular teeth design.
Stem :
With green, 6 sc in mr (6)
Round 2 :
1 sc in each st (6)
Round 3 :
1 sc in each st (6) - fasten off leaving tail for sewing to top of pumpkin
Info :
Sew stem to top center of pumpkin; tuck and weave ends to secure. If desired, slightly tilt stem for a whimsical look. For stronger stem, insert a tiny piece of wire inside the stem before sewing (fold wire ends to avoid poking).
— Pumpkin Face Details (Surface Crochet/Embroider) :
Info :
Use black yarn to surface crochet the eyes and mouth directly onto pumpkin or sew on crocheted shapes. For surface crochet: bring yarn up at start point and sc along surface to outline shapes, then fill in with single crochet or embroidery stitches.
— Assembly Prep & Small Details :
Info :
Make small black oval pads for mummy eye bands and tiny white pupils for eyes if you prefer crocheted details rather than safety eyes. Use narrow chains to wrap mummy bodies for bandage details. Make sure all tails are woven in inside pieces before assembly to avoid visible knots on the outside of the garland.
— Threading & Final Assembly :
Info :
Thread your sturdy central cord through the centers of each motif (if you closed centers, use a yarn needle to pierce through top and bottom for threading). Alternatively, stitch motifs to the spiral tube using a needle and long tails: place motifs at planned positions and tack them through the tube and into the central cord for stability.
Step 1 :
Plan spacing: From top to bottom I recommend spacing as follows for the pictured arrangement: small candy corn (top), mummy, pumpkin, candy corn (middle), mummy, pumpkin (bottom), candy corn (end). Use temporary pins to hold positions then adjust until satisfied.
Step 2 :
Attach top loop: Create a 6-8 ch loop at top of central cord and secure with a knot to make a hanger. Reinforce with a few stitches over the knot to keep stable.
Info :
When sewing motifs onto the cord or tube, sew through both the motif and the tube to ensure they cannot slide. Use matching yarn to hide running stitches. Sew each motif with at least 6-8 evenly spaced stitches around the top seam for security.
Step 3 :
Position motifs and secure: For each motif, tie a small knot under the base on the cord so the motif sits at the desired height. Bring motif’s top tail around the cord, stitch to tube and cord to lock in place. Hide knot inside motif if possible.
Step 4 :
Wrap spiral: If your spiral tube is not already coiled, coil it around the central cord and tack the coil at several points using hidden stitches. Make sure the spiral orientation is consistent so it reads as a single twisting stripe down the length.
Info :
Balance distribution: Heavier motifs (pumpkins) should be closer to the center so weight is distributed evenly. If garland tilts, adjust spacing or add a small bead or stitch under a motif to rebalance.
Step 5 :
Final finishing: Weave in all remaining tails, trim excess yarn, and check seams. Add small embroidery stitches to the mummies to simulate hand-sewn patching. If using safety eyes, check that the washers are secure and add a dab of fabric glue to the inside for extra security when gifting to children.
Info :
Optional: Lightly steam-block the pumpkin surface (do not press directly with hot iron) to set shape, or gently shape with fingers after stuffing to even out lobes. Avoid wet blocking if you used acrylic yarn as it can stretch; instead use dry shaping with stuffing adjustments.
— Troubleshooting & Customization Tips :
Info :
If your spiral looks floppy, add a thin wire or pipe cleaner inside the central cord before covering — make sure to fold wire ends and keep them out of reach. To change scale, use a thicker yarn with a larger hook and adjust stitch counts proportionally (e.g., increase magic ring counts by 50% for larger motifs).
Info :
Leftover yarn use: These small motifs are ideal for using scrap yarn — pumpkins take the most orange, mummies take mostly cream, and candy corns use small amounts of three colors.
Congratulations — you made a cheerful Halloween spiral garland! Each little pumpkin, mummy, and candy corn brings personality and festive charm to your home. The spiral rope gives fun movement while the motifs add a handcrafted, cozy touch. 🧶🎃 I hope this project brightens your doorway and sparks smiles from everyone who passes by. Happy stitching and don't be afraid to share variations — I can't wait to see your creations! ✨