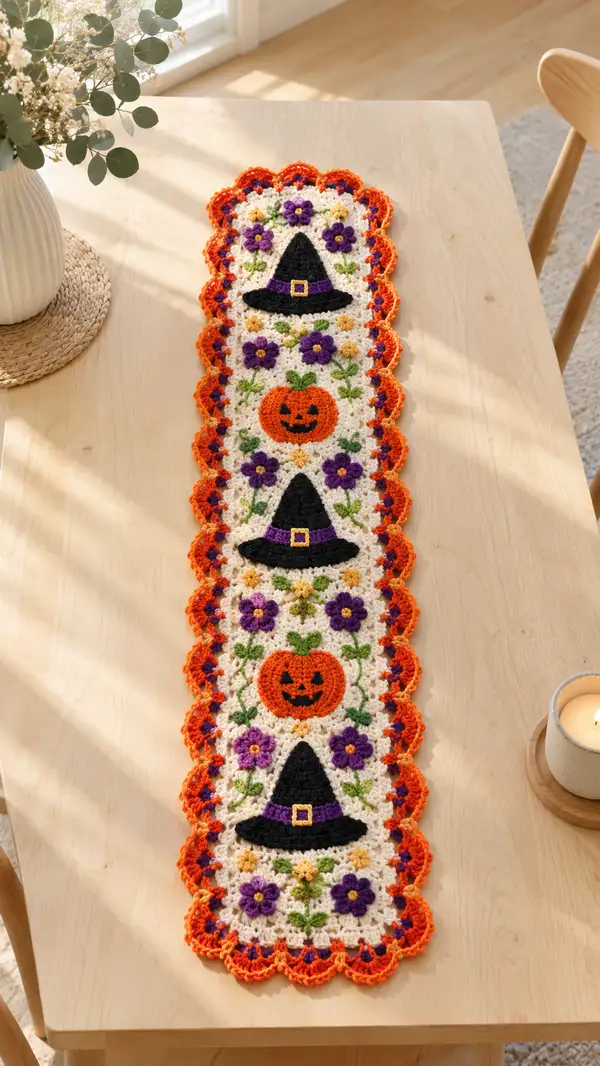
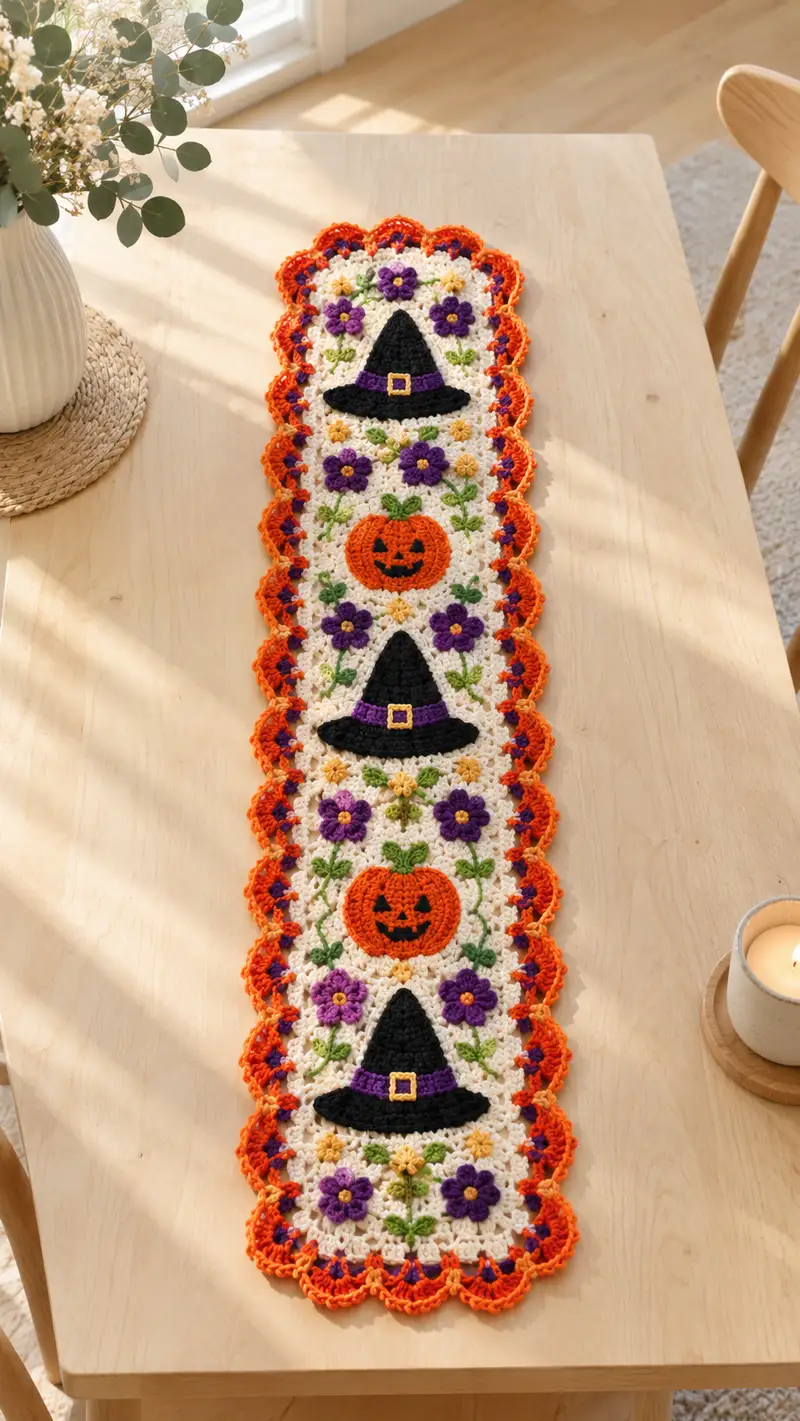
A festive Halloween table runner featuring three repeating panels of witch hats, smiling pumpkins and clusters of purple flowers framed by leafy vines. Each panel is worked as a lacy granny-style square with detailed appliques and a scalloped orange-and-purple border for a bright seasonal finish. Perfect for decorating a narrow dining table or sideboard with a handcrafted autumn touch.
Progress Tracker
0% Complete
— Main Lacy Panel (Make 3 identical panels) :
Round 1 :
With cream yarn, ch4, join with sl st to form a ring. Ch3 (counts as dc), 11 dc into ring, join with sl st to top of ch3 (12 dc)
Round 2 :
Ch3, dc in same st, ch1, (2 dc in next dc, ch1) around to create 12 clusters separated by ch1, join with sl st to top of ch3 (12 clusters)
Round 3 :
Sl st into next ch1 space, ch3, 2 dc in same ch1 sp, ch1, (3 dc in next ch1 sp, ch1) x11, join with sl st to top of ch3 (12 shell clusters)
Round 4 :
Sl st to center of first shell cluster, ch3 (counts dc), 2 dc in same sp, ch2, 3 dc in same sp (corner made), *3 dc in next ch1 sp, ch1; repeat until corner; at each corner work (3 dc, ch2, 3 dc) to form a rounded square. Join with sl st (use 4 corner ch2 spaces)
Info :
This lacy square builds a stable but airy background for the appliques. Keep tension even to ensure panels block flat. Place stitch markers in corner ch2 spaces after this round to mark future corner increases.
Round 5 :
Ch3, in same corner sp work (2 dc, ch2, 3 dc), *in next side ch1 spaces work 3 dc in each ch1 sp across side, at next corner (3 dc, ch2, 3 dc); repeat around, join (panel now larger; count: sides now have 6 shells between corners)
Round 6 :
Repeat Round 5 but work 3 dc in each shell across; ensure corners remain (3 dc, ch2, 3 dc) (panel continues to expand evenly)
Round 7 :
Repeat Round 6 (the square should be growing; count shells per side should be 8 shells between corners depending on your tension)
Round 8 :
Work 1 round of 1 dc in each stitch and 1 dc in each ch space instead of shells to even the edges: Dc evenly around sides and 3 dc in each corner ch2 then join (this evens out shell edges) (stitch count will vary with your initial gauge)
Info :
At this point decide panel size: aim for approx 9-10" square before trimming to runner width. Blocking will open the lace and set measurements. Make 3 identical panels.
Round 9 :
Ch1, sc evenly around working 1 sc in top of each dc and 2 sc in corner points (3 sc across corner area) to create a neat edge (sc round will make applique attachment easier)
Round 10 :
Ch3, dc in next 2 sts, ch1, *skip 1 sc, (dc, ch1, dc) in next sc to create mini shell spaces down each side; repeat around; join with sl st
Info :
Mark the central vertical axis of each panel with two removable safety pins or stitch markers to align appliques later. That center line will hold the hat, pumpkin and hat motif vertically.
Round 11 :
Ch2 (counts hdc), hdc in each st around into dc and ch1 spaces evenly for one even textured round; join (this creates a slightly denser anchor for appliques)
Round 12 :
Ch1, sc in each st around, placing 2 sc in corner points to keep the edges square; join and fasten off leaving long tail for assembly if desired
Info :
Make three of these lacy panels identical. Lightly block each to match shape and size. Ensure center alignment marks are in the same place on each panel before continuing.
Round 13 :
Optional extra lace: rejoin cream to any side and work a decorative fan row (ch3, skip 1, (5 dc in next st, skip1) across each side, 5 dc in corner ch2 spaces) to add texture if you prefer a wider panel (add only when making all three identical)
Info :
These panels serve as the canvas. If you want a narrower runner, you may reduce the number of expansion rounds (Rounds 5-7). For wider, add one more expansion repeat before Round 8.
— Witch Hat Applique (Make 3) :
Round 1 :
With black yarn, ch2, 6 sc in 2nd ch from hook or mr 6 sc (6)
Round 2 :
Inc in each st around (12)
Round 3 :
(1 sc, inc) x6 (18)
Round 4 :
(2 sc, inc) x6 (24)
Round 5 :
(3 sc, inc) x6 (30)
Info :
This small cone will be flattened later to form the conical part of the hat. Stuffing is not used; we shape the cone by folding and sewing. Make certain your increases are even to avoid wavy cones.
Round 6 :
1 sc in each st around (30)
Round 7 :
1 sc in each st around (30)
Round 8 :
Work 2 rounds of hdc into each stitch around to add height: ch2, hdc in each st (30)
Round 9 :
Fold cone flat so rounds align into a cone shape forming a triangular profile. Starting at base edge, sc through both layers to seam up the back creating a pointed cone shape. Work 12 sc along the seam to close slightly (creates stable cone)
Round 10 :
Switch to black brim: join black yarn around base edge of cone, ch1, sc evenly around base edge (count will vary; aim for 36 sc) to create brim base. Join with sl st
Round 11 :
For brim shaping work (2 sc, ch1, skip 1) x around to create spaced texture, join with sl st (adds scallop to hat brim)
Info :
Make a purple hatband: With purple yarn, ch30 or long enough to wrap around base snugly. Join ends with invisible seam and sew to brim over seam. Alternatively, make a few rows of sc to create a band strip and sew it on.
Round 12 :
Hat buckle: With gold yarn or embroidery floss, make a small square: ch5, sl st in 2nd ch from hook and next 2 ch to make small loop, fasten off leaving tail. Sew square to the purple band in the center front.
Info :
Sew hat to panel by positioning it so the base of brim sits on the center vertical line about 1.25" from the top edge of the panel. Use mattress or whip stitch with black yarn for an invisible attachment. Reinforce with additional stitches if runner may be handled often.
— Pumpkin Applique (Make 3) :
Round 1 :
With orange yarn, mr, ch1, 6 sc into mr (6)
Round 2 :
Inc in each st around (12)
Round 3 :
(1 sc, inc) x6 (18)
Round 4 :
(2 sc, inc) x6 (24)
Round 5 :
(3 sc, inc) x6 (30)
Info :
Create the curved pumpkin shape by working additional surface ribbing. We will add vertical ridges to suggest pumpkin segments using slip stitch ribs later.
Round 6 :
1 sc in each st around (30)
Round 7 :
Switch to BLO for one round to create a slightly recessed edge: 1 sc in each st BLO (30)
Round 8 :
Ch1, sc in each st around, fasten off leaving long tail for sewing to panel
Round 9 :
Surface ribs: With orange or slightly darker orange, work surface sl sts or embroidery from top center to bottom center in 6 evenly spaced vertical ribs (use a yarn needle or surface crochet technique). Space ribs evenly across pumpkin (6 ribs provide a classic pumpkin look).
Round 10 :
Stem and leaf: With green yarn, ch4, sl st into base to make a small stem loop; sew to top center of pumpkin. Crochet a small leaf: ch5, sc in 2nd ch from hook, hdc next, dc next, slip off leaving tail and sew to stem.
Info :
Jack-o-lantern face: embroider the eyes and mouth using black yarn or embroidery floss. Use satin stitch triangles for eyes and backstitch to create the smile and triangle nose. Place face slightly lower than the pumpkin center to keep proportions like photo.
— Five-Petal Flower Applique (Make 12 per runner) :
Round 1 :
With purple yarn, ch2, 6 sc in 2nd ch from hook or mr 6 sc (6)
Round 2 :
*Ch4, sl st back into same st to make a loop petal; repeat 4 more times to make 5 loops total across; finish with sl st to join (5 loops)
Round 3 :
Working into each petal loop: (sc, hdc, 3 dc, hdc, sc) into each loop to form a full rounded petal; repeat for all 5 petals. Join and fasten off leaving long tail for sewing.
Round 4 :
Yellow center: With gold/yellow yarn, mr, 6 sc, join and sew into center of purple flower. Optionally add an extra round of 6 sc around this center for a puffed look (12 sc) then sew to the purple petals.
Info :
Make twelve flowers total for the runner: four per panel spaced around the main appliques as shown. When sewing, place two flowers above and two below each major applique, alternating slightly left and right down the center line for visual balance.
— Leaf and Vine Detailing (Make many) :
Round 1 :
With green yarn, ch10 for vine length sections that run between flowers and appliques. Attach vine with sl st or surface slip stitch along the cream panel following pictures (use surface slip stitch method: insert hook under top of stitch, pull loop through and sl st to make a surface line).
Round 2 :
Leaves: make small leaves along vine by ch4, sc in 2nd ch from hook, hdc in next ch, dc in next ch, sl st back into vine base. Space leaves evenly about every 6-8 ch stitches.
Info :
Vines are worked after panels are complete and blocked. Use green yarn and embroider or surface-crochet the vines for the flat look seen in the photo. Vines should appear trailing and natural; do not over-stuff.
— Joining Panels (Join 3 panels end-to-end) :
Round 1 :
Lay Panel A and Panel B right sides together aligning edges and center lines. Use cream yarn and mattress stitch or whip stitch through both loops to join along one full side edge (use 1 sc spacing equivalent, approx 2.5mm seam allowance). Repeat to join Panel B to Panel C.
Round 2 :
Info : After joining, press seams flat with blocking pins and a damp cloth if using acrylic that tolerates low heat. The join should lie flat; if seam is wavy, remove and re-seam with smaller tension or more frequent stitches.
Round 3 :
Once all panels are joined, work a 1-round sc border in cream around the entire rectangular runner to even out edges: sc evenly placing 3 sc in corners for smooth turns.
Info :
Ensure seams are on the underside by turning runner over before final edge work. This makes the top surface completely smooth and consistent with the photographed piece.
— Scalloped Edge & Color Accent (Multiple Rounds) :
Round 1 (Edge Prep) :
With cream, ch1, sc evenly around the outer edge of joined panels (including across seams). Place 3 sc in corners. Join and fasten off. This evens edge counts for scallop foundation (st count varies).
Info :
We will add two colorful rounds to create the bright scalloped look seen in the photo (orange outer scallop and inner purple accents). Work these rounds evenly to maintain scallop regularity.
Round 2 (Purple Accent) :
Join purple in every 3rd sc around, ch3, (2 dc, ch2, 3 dc) in those spaced spots to create small purple shell clusters spaced evenly; join and fasten off. This purple layer will peek between the orange scallops.
Round 3 (Orange Outer Scallop - Round A) :
Join orange yarn in a sc; ch4, skip one sc, *5 dc in next sc, sl st in next sc; repeat across to create a series of large scallops. At corners work 7 dc to give a rounded corner. Join and fasten off.
Round 4 (Orange Outer Scallop - Finish) :
Rejoin orange at first scallop apex with sl st, work a small picot or ch3 and sl st back into same apex to create a neat edge; work one picot at each scallop peak for decorative points. Fasten off and weave ends.
Info :
Maintain consistent stitch spacing for scallops so they align symmetrically along the runner sides. If scallop width seems uneven, frog the round and re-space purple accent clusters to even them out before working the orange scallops.
— Detailed Finishing Rounds & Texture Enhancements :
Round 1 :
Optional decorative ridge: With cream rejoin behind scallops and work 1 round of reverse single crochet (crab stitch) to create a rope-like texture along inner edge, giving a framed appearance.
Round 2 :
Info : If you prefer a flatter runner for table use, skip the crab stitch and instead work a low-profile sc round in cream only, then weave in ends nicely on back.
Round 3 :
Sew appliques: Position each witch hat, pumpkin, and flowers using the center line markers. Sew using matching yarn with small stitches around appliques so that stitches remain invisible from front.
Round 4 :
Info : For stronger attachment, sew through both the applique and the panel backing by catching 2-3 strands of the panel fabric at each stitch. For the hat brim, sew every 4-5 stitches; for pumpkins and flowers sew closer, every 2-3 stitches.
— Optional Embroidery & Face Details :
Round 1 :
Using black embroidery floss or black worsted yarn, choose a small embroidery needle and satin stitch the pumpkin face: two triangles for eyes and a mouth made of three or four backstitched segments to create jagged smile. Secure ends on back and knot then weave in.
Round 2 :
Hat buckle detail: embroider a small square outline on the gold buckle with backstitch for crisp edges. Alternatively use a square sequin sewn at center for a sparkle accent; sew securely.
Info :
Keep embroidered details small and neat; use coordinating yarn for strongest look. Test a practice stitch on scrap fabric to determine stitch length before embroidering the finished applique.
— Decorative Extras and Customization Rounds :
Round 1 :
You may optionally add a row of small orange bobble stitches between purple accents and scallops to create a third-color pop. Work bobbles: (yo, insert, yo pull up, yo pull through 2 loops) x3 then finish bobble into same space; continue every 4 scallops.
Round 2 :
Info : To make a more subtle runner, swap purple for deep plum or navy; to create a child's Halloween runner, add tiny felt stars sewn between appliques for extra whimsy.
Round 3 :
Final touch: weave in all ends on the back using yarn needle. Trim excess yarn and press lightly if allowed for your yarn type. Inspect edges and reinforce any loose applique stitches.
Round 4 :
Info : Blocking after final assembly will open scallops and flatten seams. Use a steam iron at a safe distance or wet block according to yarn manufacturer recommendations. Pin scallops into rounded shape while damp and let dry fully before use.
— Stitch Count and Rounds Summary (for tracking) :
Info :
Main Panel rounds per panel approx 12-13 rounds each; Witch hat roughly 12 rounds each; Pumpkin 10 rounds each; Flower 4 rounds each; Border rounds 4-6 rounds; Decorative and finishing rounds 6-10 rounds. Total cumulative rounds across all motifs, decorations and edges for the full runner: approximately 140-165 rounds of focused work depending on customization choices.
Info :
Check stitch counts frequently and keep a notebook or counter to log rounds performed per motif (helps when making identical repeated panels). If you diverge with customization, note changes so both ends of runner match.
This Halloween Table Runner brings seasonal charm to your home with playful appliques and a bold scalloped border. Each panel is a mini work of art—stitched flowers, leafy vines, witch hats and smiling pumpkins combine for a whimsical fall display. The contrasting orange and purple accents pop against the lacy cream background for a balanced, festive look. 🎃🧡 Place it on your table, sideboard, or entry console to welcome autumn guests with handmade flair. Happy stitching and enjoy the cozy holiday glow! ✨