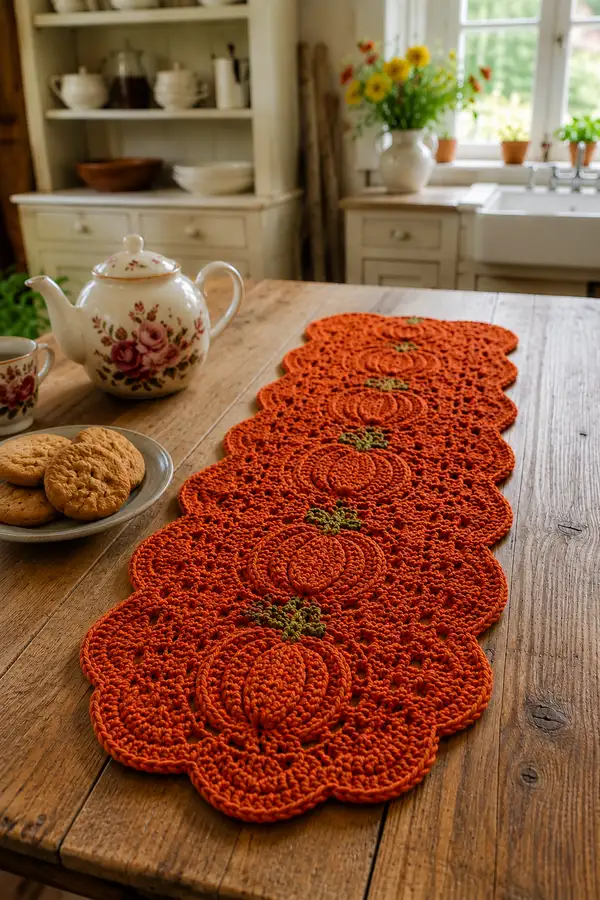
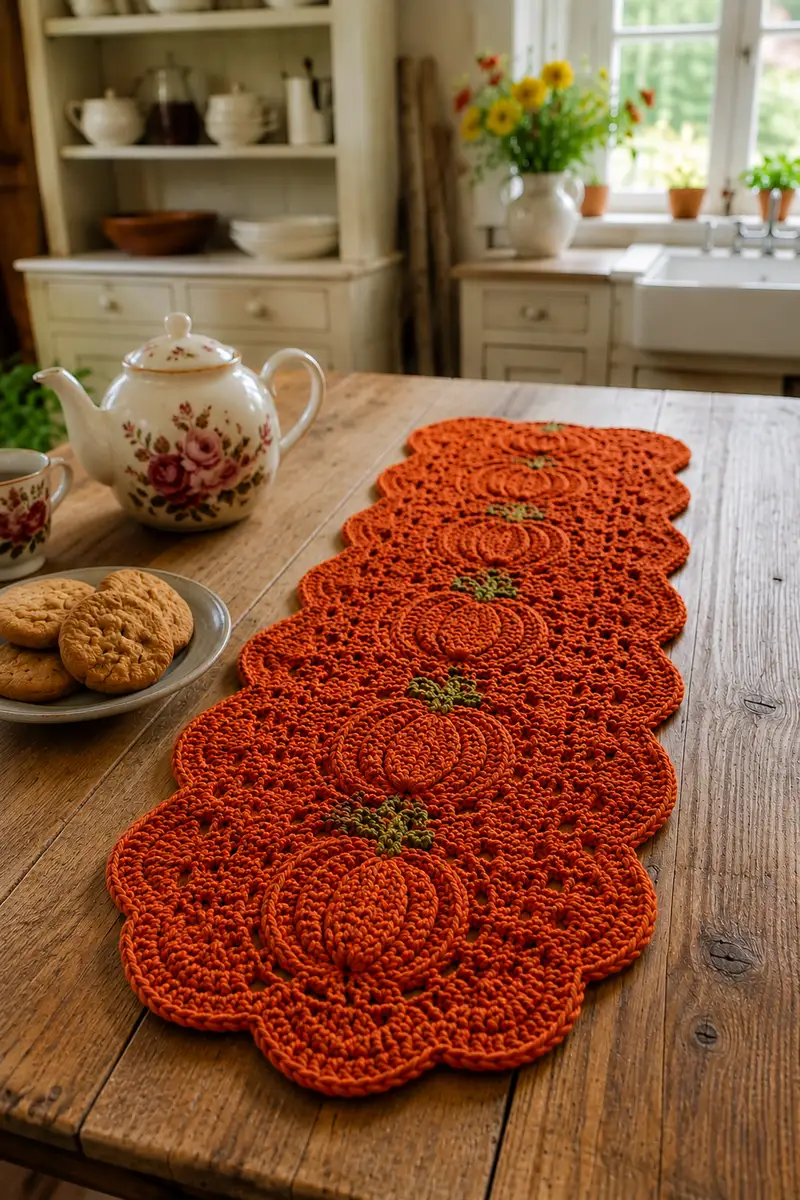
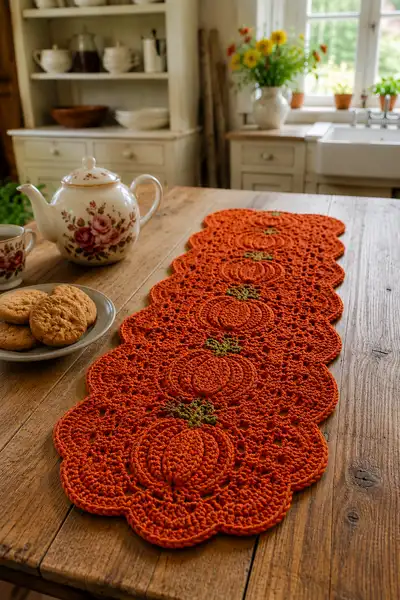
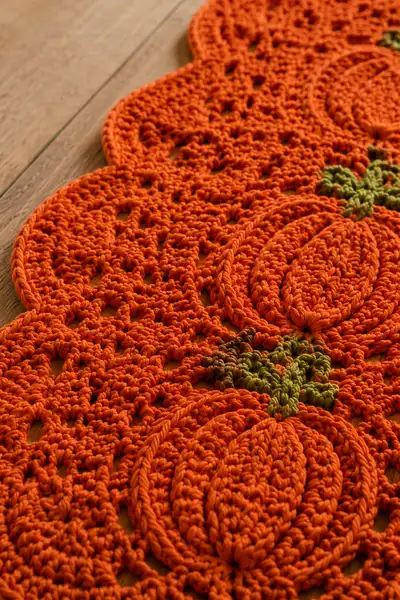
Bring warm autumn charm to your table with this Pumpkin Harvest Scalloped Table Runner. Rich burnt orange pumpkin motifs are joined by delicate lace-like scallops and tiny green stems to create a long, elegant runner perfect for fall. The pattern uses textured front-post ribs to give each pumpkin a plump, dimensional look and a crisp scalloped edge for a finished, professional appearance. Ideal for seasonal decorating or a handmade gift for the harvest season.
Progress Tracker
0% Complete
— Notes & Construction Overview :
Info :
This runner is made by working individual pumpkin motifs and then joining them with a lace connector. After joining the repeated module sequence, an outer scalloped edge and final rope-like round provide neat structure. The pattern is modular: make 5 pumpkin motif modules to match the example photos. Adjust motif count for length.
Info :
Work tightly for the pumpkin ribs (use recommended hook). Use stitch markers at round starts. When changing to mossy green for stems, carry yarn inside smaller loops or fasten off and weave in immediately.
— Pumpkin Motif (Make 5) :
Round 1 :
6 sc in magic ring (6)
Round 3 :
(1 sc, inc) x 6 (18)
Round 4 :
(2 sc, inc) x 6 (24)
Round 5 :
(3 sc, inc) x 6 (30)
Round 6 :
(4 sc, inc) x 6 (36)
Round 7 :
(5 sc, inc) x 6 (42)
Round 8 :
(6 sc, inc) x 6 (48)
Info :
At the end of Round 8 you have a flat disk base. From Round 9 we build the pumpkin wall and ribs. Keep stitches even; if the center cups, tug gently while blocking later.
Round 9 :
1 sc in each st (48)
Round 10 :
1 sc in each st (48)
Round 11 :
1 sc in each st (48)
Info :
Rounds 9-11 create height for the pumpkin 'face'. Mark 8 evenly spaced stitches around the circumference—these will serve as anchor points for the ribs. To mark, divide 48 by 8 = every 6th stitch place a marker.
Round 12 :
(*5 sc, place marker in next st*) x 8 (48)
Round 13 :
Work a front-post double crochet (fpdc) ridge around the marked stitch, then 5 sc; repeat across all 8 marked positions to create the first rib round. Example: (*fpdc around corresponding st of Round 8, 5 sc*) x 8 (48)
Info :
FPdc ribs are worked around the post of the previous round so they sit up from the surface. Work fpdc from behind to pull the ridge forward. Maintain 48 stitches each round.
Round 14 :
1 sc in each st (48)
Round 15 :
*(2 sc, fpdc around same post as Round 13 rib), 3 sc* x 8 (48)
Round 16 :
1 sc in each st (48)
Info :
Rounds 13-16 reinforce the ribs with additional front-post stitches positioned to create 8 defined channels. Keep count at 48 by working fpdc as replacements for sc (so the stitch count remains consistent).
Round 17 :
*(1 sc, 1 hdc, fpdc around rib post, 1 hdc, 1 sc) in next group of 6* x 8 (48)
Round 18 :
1 sc in each st (48)
Round 19 :
*(fpdc around rib post twice for a raised ridge, 4 sc) x 8 (48)
Info :
These rounds use a combination of fpdc and hdc to bulk the ribs and make them more three-dimensional. If your fpdc pulls too tight, use hdc in adjacent stitches to soften the transition.
Round 20 :
1 sc in each st (48)
Round 21 :
*(2 sc, inc) x 8 (64)
Info :
Round 21 slightly enlarges the pumpkin so it reads as a plump round shape; the added increases create a shallow curve. If you prefer a flatter pumpkin, omit this increase round and continue even.
Round 22 :
1 sc in each st (64)
Round 23 :
*(6 sc, fpdc around central rib post) x 8 (64)
Round 24 :
1 sc in each st (64)
Round 25 :
*(5 sc, dec) x 8 (56)
Info :
Begin shaping back toward a controlled edge. We will create a defined pumpkin outline then move to a decorative round that forms the petal-like scalloped join point.
Round 26 :
*(4 sc, dec) x 8 (48)
Round 27 :
1 sc in each st (48)
Round 28 :
*sc around, but work a trio of sc3tog (decrease 3) at the eight points that align with the ribs to create slight indentations* (48)
Round 29 :
1 sc in each st (48)
Round 30 :
Work an outer rope round: *sl st, ch 1, sc in same st on BLO around entire motif (48)*; join and fasten off leaving long tail for seaming (48)
Info :
Fasten off and weave ends. Make 5 pumpkin motifs repeating Rounds 1-30. Block each motif flat. Ensure ribs are centered and press gently by steam blocking or wet blocking on a towel until dry.
— Lace Connector Panel (Make 4 to join pumpkins) :
Info :
The lace connector sits between pumpkins to create the long runner. Each connector is worked to match scallop points on pumpkins. Make 4 connectors to link 5 pumpkins (one connector between each pair).
Round 1 :
ch 6, sl st to form small ring, ch 1 (foundation ring)
Round 2 :
Work 12 sc into ring, join (12)
Round 3 :
(ch 4, skip 1, sc in next) around to create airy spaces, join (12 chains)
Round 4 :
Into each ch-4 space work (sc, hdc, 3 dc, hdc, sc) to form petal clusters (12 petals)
Round 5 :
1 sc in each st and in the top of each petal cluster for 36 sc (36)
Info :
These petals will nestle between adjacent pumpkins and the sc round will provide stable points to join motifs later. Keep uniform tension so connectors sit flat.
Round 6 :
*(4 sc, ch 2, skip 2) around (36 with 18 ch-2 spaces)
Round 7 :
In each ch-2 space work (sc, 3 dc, sc) to form small arches — 18 arches
Round 8 :
1 sc around entire connector, sl st join (36)
Round 9 :
Work 1 round of fpdc in alternating stitches at connector top to create a ridge that meshes with pumpkin rope edge (36)
Round 10 :
fasten off leaving tails for joining
Info :
Make 4 lace connectors. They will be joined to the rope rounds around each pumpkin using slip-stitch points described in Assembly sections. Block connectors to match pumpkin curvature.
— Stem & Leaf Embellishments (Make 5 stems + 10 leaves) :
Round 1 :
With mossy green, ch 4 (foundation for stem)
Round 2 :
Starting in 2nd ch from hook work 3 sc across (3)
Round 3 :
Turn, ch 1, 1 sc in first, hdc in next, 1 sc in last (3)
Round 4 :
Fold lengthwise and sl st through both layers to create a firm stem; fasten off leaving long tail for sewing
Info :
Sew stem to center top of each pumpkin motif, covering the central join. For extra thickness, make a second stem and sew together or wrap with yarn before securing.
Leaf 1 :
Ch 6, sc in 2nd ch from hook, hdc, dc, hdc, sc across, sl st to base to form a small leaf. Fasten off leaving tail for sewing.
Leaf 2 :
For a slightly larger leaf ch 8 and work sc, hdc, 2 dc, hdc, sc across. Fasten off with tail.
Info :
Sew 1-2 leaves around each stem using small stitches in mossy green and a couple of espresso brown accent stitches at leaf base if desired.
— Joining Motifs Sequence :
Info :
Arrange your five pumpkin motifs in a line, ribs vertical and stems pointing up. Place a lace connector between each set of pumpkins so the scallops nestle. Pin in place. The join follows the rope round of each pumpkin and the outer arches of each connector.
Round 1 :
To join, position first pumpkin and connector edge; with main color and right sides facing, sl st through connector arch and through pumpkin rope round every 6th sl st to make an evenly spaced seam. Continue around connection points, making 12 slip stitches per connection point for stability.
Round 2 :
After joining both sides of connector to adjacent pumpkins, repeat with the next connector until all pumpkins are joined in a single linear strip.
Info :
Use a contrasting removable marker or safety pins to ensure connectors are symmetrical and ribs line up. The slip-stitch join is low-profile; if you prefer a visible seam, use single crochet through both layers instead.
— Middle Lace Fill Panel (Optional wide runner version) :
Round 1 :
Attach yarn to underside of connector join seam, ch 3 (counts as dc), 2 dc in same base, ch 2, *3 dc in next base space, ch 2* around to create an open lacy strip; join
Round 2 :
Turn, ch 1, sc in each dc and (sc, ch 3, sc) in each ch-2 arch to make little openwork arches—this fills the gaps between pumpkins without hiding ribs
Round 3 :
Work two more rounds of dc with alternating ch-2 spaces to build a consistent lace panel that matches the outer edge height of pumpkins
Info :
Only use this panel if you want a wider runner. If you prefer the narrow version pictured, skip this section and proceed to the outer scalloped border.
— Outer Scalloped Border :
Round 1 :
Attach main color to bottom edge of assembled strip, ch 1, work 1 sc evenly along entire outer edge to create a firm base (count will vary depending on motif count; maintain even spacing)
Round 2 :
*ch 3, skip 2, sc in next; rep across to form chain spaces for scallops*
Round 3 :
In each ch-3 space work (sc, hdc, 3 dc, hdc, sc) to create scallop petals along both long edges (number of scallops equals number of ch-3 spaces)
Info :
Stagger scallops so they sit between the pumpkin ribs and mirror the connector arches. Work petals firmly to keep scallops crisp; use BLO slip-stitch round next to anchor them.
Round 4 :
1 sc around scallop bases to stabilize and tighten edge
Round 5 :
Work a rope round: *fpdc in each sc of previous round pulling post toward center so the rope sits raised* — this creates the braided/ridge effect shown in photos
Round 6 :
Edging finish: *sl st evenly around scallops; for points slip stitch 3 times in apex to form a neat tip*; fasten off and weave ends
Info :
If desired, repeat rope round once more for a thicker border. For a delicate look use a smaller hook for the outermost round to cinch the scallops slightly inward.
— Finishing & Optional Shading :
Info :
Weave in tails neatly along the back of the runner so they are not visible from the top. Add a couple of espresso brown stitches to each stem base where it meets the pumpkin to simulate depth.
Round 1 :
Optional shading: with a thinner yarn or embroidery thread, use surface slip-stitch or couching to stitch a few accent lines along pumpkin ribs to create the illusion of shadow; secure ends well.
Info :
Block the entire assembled runner: pin to shape on blocking mat and mist or wet-block until dry. Blocking evens out stitch tension and makes scallops sit flat. If runner will get heavy use, consider a light starch application when pressing to stiffen slightly.
— Notes on Sizing & Scaling :
Info :
The sample runner has 5 pumpkin motifs and measures approximately 40-45 inches long by 11-13 inches wide when blocked. To lengthen, add additional pumpkin modules and connectors. To shorten, remove modules. Match connector count to motif count minus one.
Info :
Using a thicker yarn or larger hook will increase size proportionally. For a denser runner, pick a smaller hook than the yarn label to tighten fabric and reduce holes in the lace areas. For more drape use a hook one size up.
Completing this Pumpkin Harvest Scalloped Table Runner is a truly rewarding autumn project. Each pumpkin motif and lace connector comes together to form a warm, handcrafted centerpiece that anchors any fall table. The raised ribs and scalloped edges give a handmade sophistication that guests will notice instantly. 🧶🍁 I hope you enjoy every stitch, and may this runner bring cozy harvest vibes to your home all season long. Happy crocheting! 🎃