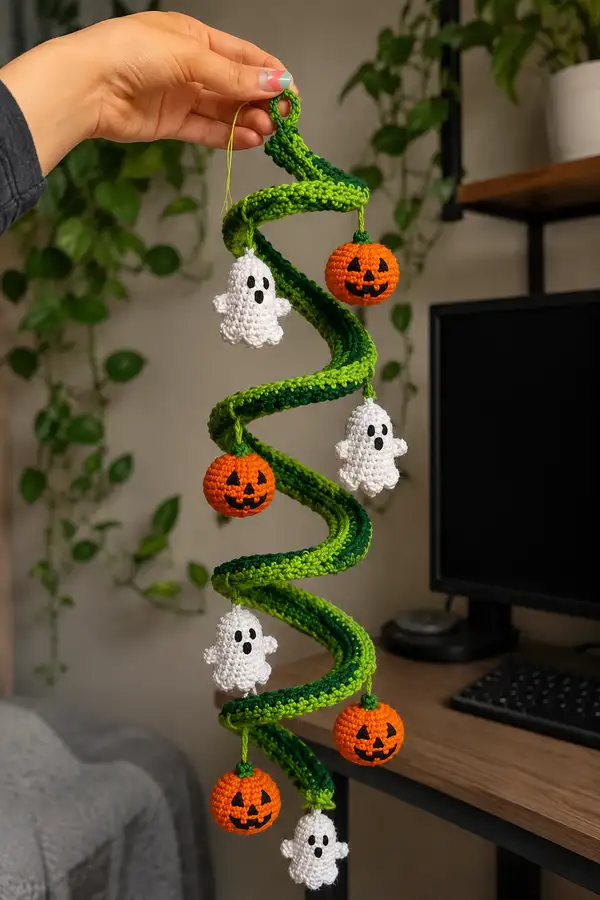
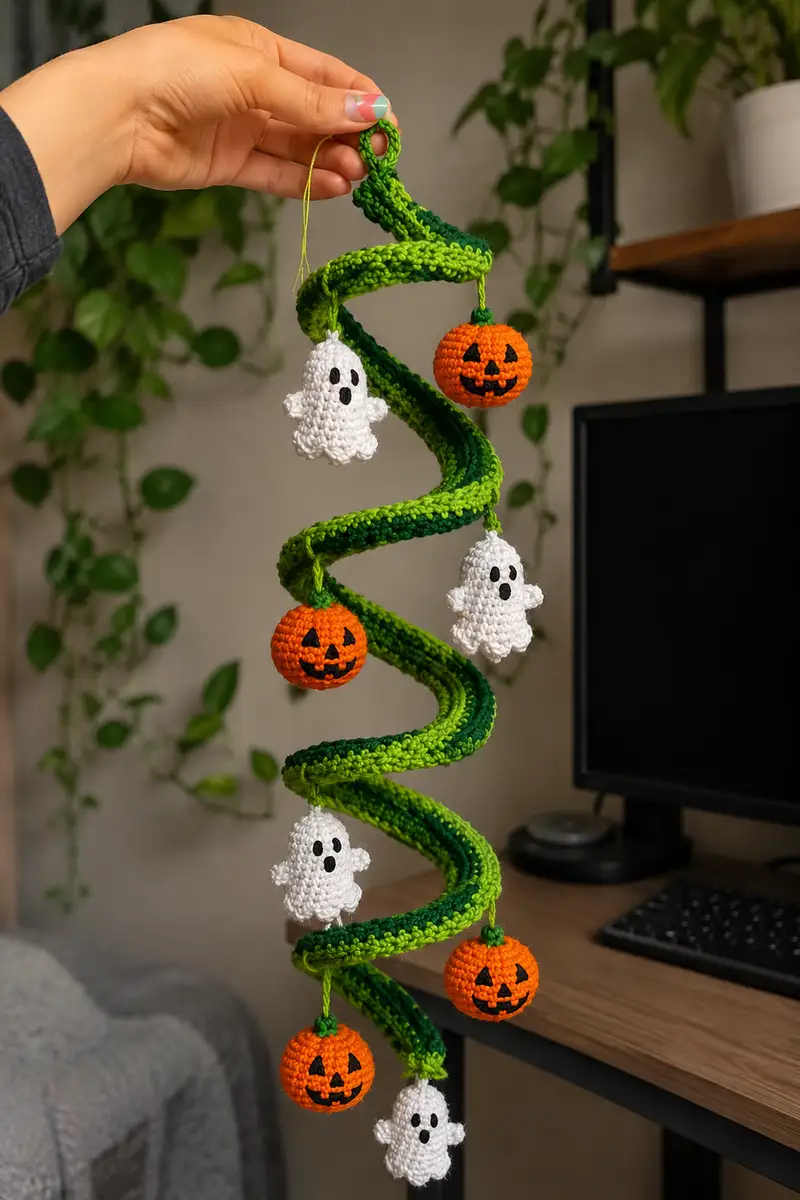
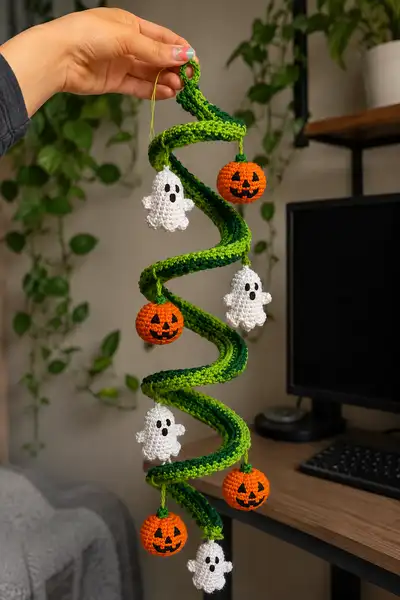
Create a whimsical hanging spiral garland with tiny jack-o-lanterns and sweet scalloped ghosts. This pattern uses two shades of green for a spiraling vine effect and features embroidered pumpkin faces and little ghost arms. The finished piece hangs as seasonal décor and can be shaped with optional flexible wire for a dramatic spiral silhouette. Perfect for gifting or adding Halloween charm to a doorway, shelf, or mantel.
Progress Tracker
0% Complete
— Spiral Base (work one)
Round 1 :
6 sc in magic ring (6)
Round 3 :
(1 sc, 1 inc) x 6 (18)
Round 4 :
(2 sc, 1 inc) x 6 (24)
Round 5 :
(3 sc, 1 inc) x 6 (30)
Round 6 :
(4 sc, 1 inc) x 6 (36)
Round 7 :
(5 sc, 1 inc) x 6 (42)
Round 8 :
(6 sc, 1 inc) x 6 (48)
Info :
This spiral base is a tubular amigurumi cord. Work tightly to avoid stuffing showing through. Place a stitch marker at the beginning of the round and move it each round. If you plan to insert wire for shaping, thread the wire through the tube as you make the first 8-12 rounds to keep it centred.
Round 9-18 :
1 sc in each st (48)
Info :
Decide your final spiral length now. Each 10-12 rounds adds roughly 3-4 cm depending on tension. The sample spiral was worked for 108 total rounds to reach a long hanging shape; you can shorten or lengthen accordingly.
Round 19-28 :
1 sc in each st (48)
Info :
Change color here if using two greens for a stripe. To create a twisted two-color effect, carry the unused color up the inside and switch at the start of the round. For a bold stripe, fasten off and rejoin in new color at the start stitch.
Round 29-38 :
1 sc in each st (48)
Info :
If adding shaping ribs or texture, work one or two rounds in BLO to create a visible ridge on the outside. For example, Round 35: 1 sc in each st BLO (48) will create a subtle ridge that reads as a spiral highlight.
Round 39-48 :
1 sc in each st (48)
Info :
Insert craft wire now if you did not add it earlier. Use a wire at least 2-3 times the length of final spiral height. Tuck wire centrally into the tube; if the tube is not yet long enough, feed wire through as you continue to work.
Round 49-58 :
1 sc in each st (48)
Info :
To make the spiral hold shape better, work every 8th round in HDC to add a bit of body. Example: Round 56: hdc in each st (48). This adds stiffness but keep it sparse to maintain flexibility.
Round 59-68 :
1 sc in each st (48)
Info :
Check periodically that the tube remains even and stuffing (if using) is consistent. If you included wire, do not overstuff; the wire provides structure. If no wire, fill the tube lightly with stuffing every 20 rounds for gentle fullness.
Round 69-78 :
1 sc in each st (48)
Round 79-88 :
1 sc in each st (48)
Info :
For the two-tone look seen in the photo, alternate blocks of 10 rounds in lime green and 10 rounds in dark green. Repeat this block pattern until you reach the desired length. Fasten off neatly when you reach the total length needed.
Round 89-98 :
1 sc in each st (48)
Round 99-108 :
1 sc in each st (48)
Round 109-114 :
Reduce length by preparing top loop: (6 sc, 1 dec) x 6 (42)
Round 115 :
(5 sc, 1 dec) x 6 (36)
Info :
Create a hanging loop: leave a 40-60 cm tail and fold it into a small chain loop. Alternatively, continue crocheting to form an integrated hanging ring. This section narrows the tube to form a tidy loop base for the top ring.
Round 116 :
(4 sc, 1 dec) x 6 (30)
Round 117 :
(3 sc, 1 dec) x 6 (24)
Round 118 :
(2 sc, 1 dec) x 6 (18)
Round 119 :
(1 sc, 1 dec) x 6 (12)
Info :
Fasten off leaving a long tail for sewing the last round closed neatly. Weave tail through remaining 6 sts and pull tight to close. Tidy the top loop by attaching a small metal ring or forming a chain loop with the leftover yarn; secure and weave in ends.
— Ghost (Make 4)
Round 1 :
6 sc in magic ring (6)
Round 3 :
(1 sc, 1 inc) x 6 (18)
Round 4 :
(2 sc, 1 inc) x 6 (24)
Round 5 :
(3 sc, 1 inc) x 6 (30)
Info :
Ghost body begins as a little sphere then flares into a ruffled skirt. Place safety eyes between rounds 6-7 spaced 6-8 stitches apart OR embroider eyes later with black yarn/felt. For toddler-safe versions, embroider eyes only.
Round 6 :
1 sc in each st (30)
Round 7 :
1 sc in each st (30)
Round 8 :
1 sc in each st (30)
Round 9 :
(4 sc, 1 inc) x 6 (36)
Info :
Stuff the ghost lightly through the opening as you gain height. The body should be soft and slightly floppy so the scalloped skirt hangs nicely. Do not overstuff.
Round 10 :
1 sc in each st (36)
Round 11 :
1 sc in each st (36)
Round 12 :
(5 sc, 1 inc) x 6 (42)
Round 13 :
1 sc in each st (42)
Info :
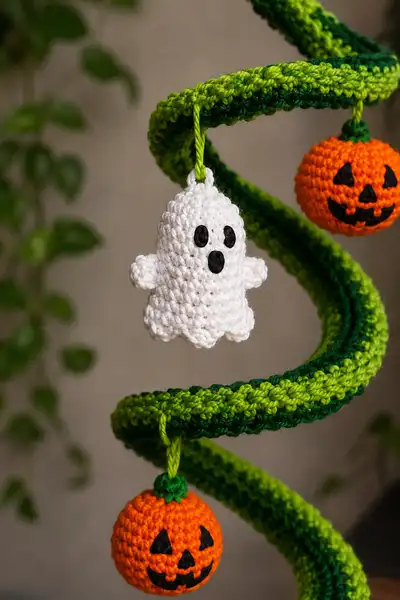
We will now create the scalloped hem that gives the ghost its cute ruffled skirt. The scallops are formed by small clusters of stitches along the last rounds.
Round 14 :
(1 sc, ch 3, sl st in same st, skip 1 st) rep around to create a picot-like scallop effect. Work evenly to create 14 scallops (42)
Round 15 :
Fasten off and leave a tail for hanging loop. Fold a 8-10 ch from top center and attach to a top stitch to create the hanging loop, or leave a long tail to tie to spiral.
Info :
Embroider or attach felt eyes and mouth now. For sewn faces: use black yarn and whip stitch to create two round eyes and an O-shaped mouth. Alternatively glue small felt shapes. Ensure faces are secure before final assembly.
Round 16 :
Using leftover yarn, create two tiny arms: make 1 ch, 6 sc in 2nd ch from hook (or 6 sc in mr), fasten off leaving tail for sewing. Flatten slightly and sew each arm to body at round 9-11, spacing arms evenly on either side (Make 2 arms per ghost)
Info :
Sew arms with hidden stitches through the body rounds 9 and 11 to secure. Position arms slightly forward for a playful waving look. Weave in all ends neatly into the body.
— Pumpkin (Make 4)
Round 1 :
6 sc in magic ring (6)
Round 3 :
(1 sc, 1 inc) x 6 (18)
Round 4 :
(2 sc, 1 inc) x 6 (24)
Round 5 :
(3 sc, 1 inc) x 6 (30)
Round 6 :
(4 sc, 1 inc) x 6 (36)
Round 7 :
1 sc in each st (36)
Info :
Begin stuffing pumpkin firmly but evenly from this round outwards. Use small amounts of stuffing to form a round, slightly flattened ball for a classic pumpkin shape.
Round 8 :
1 sc in each st (36)
Round 9 :
(4 sc, 1 dec) x 6 (30)
Round 10 :
(3 sc, 1 dec) x 6 (24)
Round 11 :
(2 sc, 1 dec) x 6 (18)
Round 12 :
(1 sc, 1 dec) x 6 (12)
Info :
Before closing completely, make sure the pumpkin is stuffed to the desired firmness. To create vertical pumpkin ribs, run yarn in contrasting color through the pumpkin from top to bottom in 6 evenly spaced lines, pulling slightly to indent and create ribbing.
Round 14 :
Fasten off and weave the tail through the remaining 6 sts and pull tight to close. Leave a long tail for stem. With dark green, embroider or crochet a small stem and attach to top center.
Round 15 :
Small stem: 6 sc in mr, sl st in first st, ch 1, 6 sc around to make tiny stalk. Sew onto pumpkin top and secure. Add a 4-6 ch tie for attaching to the spiral.
Info :
Embroider a jack-o-lantern face with black yarn (triangular eyes and nose, jagged smile) across rounds 5-7. Use small satin stitches for smooth filled shapes or glue felt cutouts for a different look. Ensure embroidery is secure so small pieces are not a choking hazard.
— Ghost Arm Detail (Make 8)
Round 1 :
6 sc in magic ring (6)
Round 2 :
1 sc in each st (6)
Round 3 :
1 sc in each st (6)
Round 4 :
Fasten off leaving long tail for sewing (Make 2 small arms per ghost)
Info :
Flatten and sew arms into side of ghost body at rounds 9-11. Slightly shape with fingers to give a rounded arm look before sewing. Weave tails neatly through the body to hide them.
— Pumpkin Stem & Ribbing
Round 1 :
Using dark green, ch 2 (counts as first st), 6 sc in ch (6), sl st to join forming a tiny ring. Ch 1, 6 sc around (6)
Round 2 :
(sc, inc) x 3 (9)
Round 3 :
1 sc in each st (9)
Info :
Make the stem sturdy by looping the tail through the top center of the pumpkin several times before sewing the stem on. Add a small knot under the stem inside the pumpkin for stability.
Round 4 :
Fasten off leaving tail to sew onto pumpkin top. Optionally add a short green ch-loop to attach to spiral.
— Hanging Loop & Ties
Round 1 :
For each ornament, ch 10 (or desired length), sl st to form a loop, fasten off and weave tail into ornament top. Alternatively create adjustable ties of 12-20 ch to position ornaments along the spiral.
Info :
Use a slipknot to temporarily attach ornaments to the spiral when planning placement. This makes it easy to reposition before final sewing. Tighten knots and sew through loops to secure once placement is satisfactory.
— Assembly: Attaching Ornaments to Spiral
Info :
Plan spacing first: sample spiral used 8 evenly spaced attachment points for 4 pumpkins and 4 ghosts, alternating as you descend. Mark these positions with pins. The spiral should look balanced visually; alternate ghost and pumpkin for variety.
Round 1 :
Thread ornament loop through a marked stitch on the spiral and tie or sew with a few secure stitches. For extra security, run a short length of yarn through the inside of the spiral tube and tie to the ornament loop before weaving ends in.
Info :
When sewing small ornaments to the spiral, go through multiple tubes of spiral stitches to distribute stress. Sew at least 6 secure stitches in an invisible ladder or whip stitch pattern, knot internally and weave ends at least 4-6 cm into the spiral to avoid unravelling.
— Finishing & Shaping
Info :
Shape the spiral: if you added wire, gently bend the coil into a spiral that hangs evenly. If no wire, you can stitch the spiral around a wire coat hanger curled into a spiral or wrap it around a cardboard spiral form and stitch through to hold shape. Press lightly with your hands to set
Round 1 :
Weave in all loose ends on each ornament and spiral. Use small backstitches for embroidered faces to reduce fraying. Trim threads close.
Info :
To secure embroidered pumpkin faces further, dab a tiny bit of fabric glue on the reverse side of each stitch after embroidery and allow to dry. This is optional but helps when ornaments will be handled often.
Round 2 :
If the spiral droops in the middle, add a narrow ribbon or fishing line along the interior hidden with a few stitches to connect top and bottom for extra support without changing appearance.
Info :
Final inspection: check each hanging loop, tug gently on ornaments to ensure secure attachment. Adjust positioning if necessary by untying temporary loops and sewing in place.
This seasonal spiral garland brings playful Halloween vibes to any room — bright green spiral, smiling pumpkins and tiny ruffled ghosts combine for a joyful decoration. Each piece is small, portable, and bursting with personality. Grab your favorite yarn scraps and make a set to decorate a mantel, doorway, or classroom. 🧶🎃👻 Enjoy the slow, meditative rhythm of the spiral and the quick wins of tiny ornaments — then hang up your handiwork and admire every stitched smile!