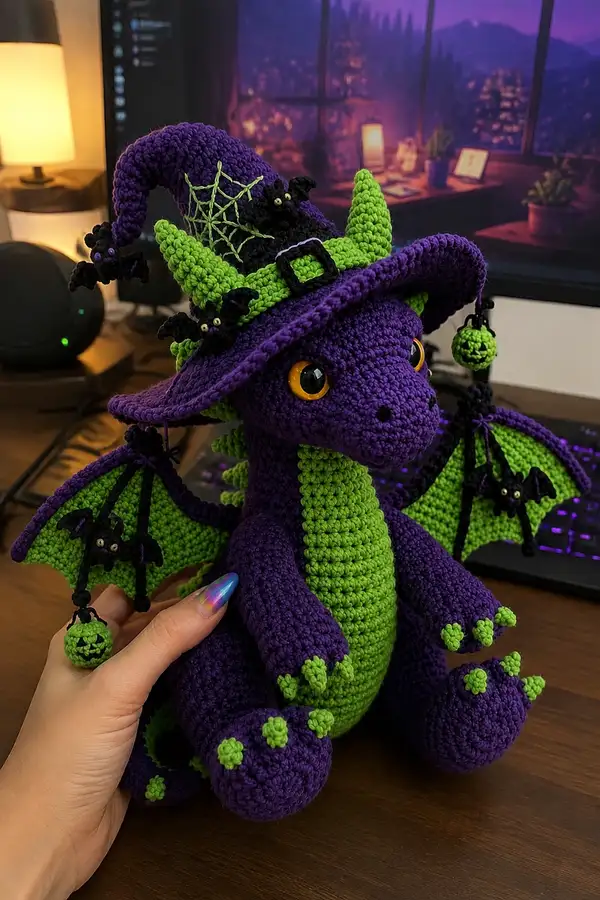
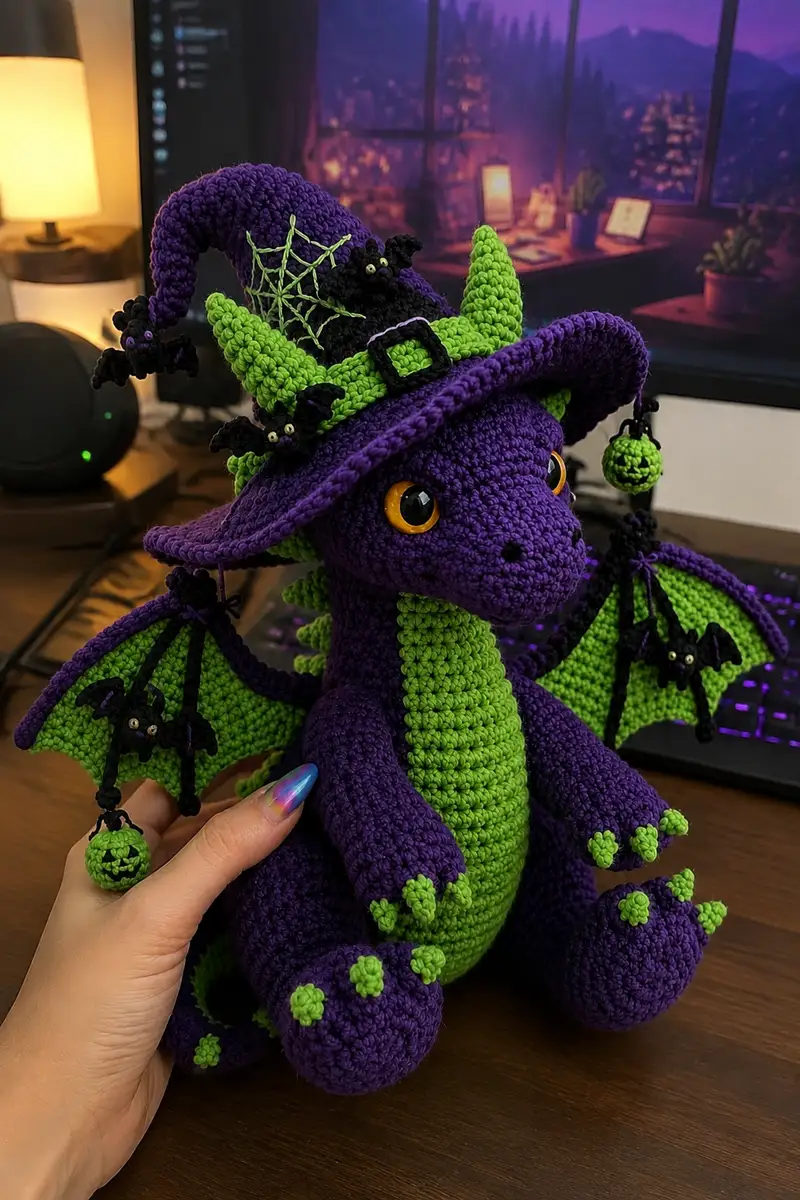
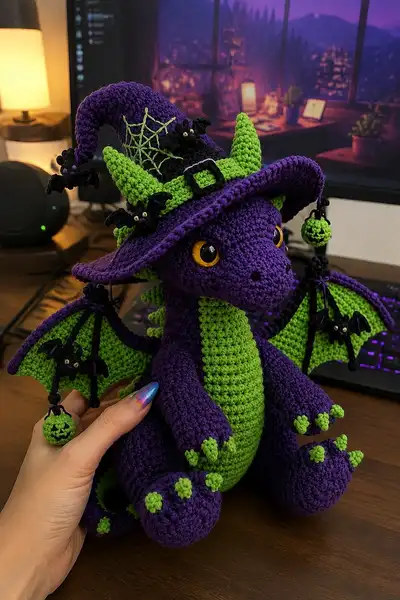
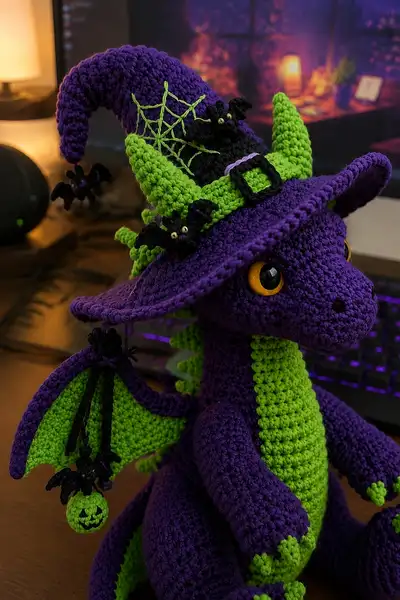
Create a spooky-cute Halloween witch dragon with bright lime-green accents and deep purple body. This detailed amigurumi pattern includes a whimsical witch hat, bat and pumpkin charms, expressive safety eyes, winged membrane details, and textured spikes. Perfect as a seasonal gift or tabletop decoration, this plush dragon balances charm and character with carefully explained construction and assembly.
Progress Tracker
0% Complete
— Head :
Round 1 :
6 sc in magic ring (6)
Round 3 :
(1 sc, inc) x 6 (18)
Round 4 :
(2 sc, inc) x 6 (24)
Round 5 :
(3 sc, inc) x 6 (30)
Round 6 :
(4 sc, inc) x 6 (36)
Round 7 :
(5 sc, inc) x 6 (42)
Round 8 :
(6 sc, inc) x 6 (48)
Round 9 :
(7 sc, inc) x 6 (54)
Round 10 :
(8 sc, inc) x 6 (60)
Round 11-14 :
1 sc in each st (60)
Info :
Place safety eyes between rounds 14-15, approximately 10 stitches apart for a wide friendly expression. Mark the first stitch of each round with a stitch marker to avoid losing your place when counting.
Round 15-17 :
1 sc in each st (60)
Info :
If using 14mm eyes, place them so the bottom edge sits roughly at round 14. Slightly stuffing under the eyes helps lift them for expression.
Round 18 :
(8 sc, dec) x 6 (54)
Round 19 :
(7 sc, dec) x 6 (48)
Round 20 :
(6 sc, dec) x 6 (42)
Info :
Begin stuffing head firmly but not overstuffed. Use small amounts of fiberfill and push into the muzzle and forehead to keep a smooth shape. Continue stuffing incrementally as you decrease.
Round 21 :
(5 sc, dec) x 6 (36)
Round 22 :
(4 sc, dec) x 6 (30)
Round 23 :
(3 sc, dec) x 6 (24)
Round 24 :
(2 sc, dec) x 6 (18)
Round 25 :
(1 sc, dec) x 6 (12)
Info :
Fasten off leaving a long tail for sewing. Finish stuffing the head to a firm-but-squishy feel. We will attach the head to the body later; keep the opening large enough to pin in place easily.
— Muzzle shaping (worked into head during rounds 11-20 placement) :
Info :
To create a slightly protruding muzzle, before round 18 make a short snout by embroidering two small nostrils with black yarn between rounds 13 and 15, centered 6-8 stitches below eyes. Use tiny French knots or embroidered sc to make nostrils.
— Neck Connector :
Round 1 :
Attach lime green yarn to base of head opening. 1 sc in each stitch around the head opening for 6 rounds to create a firm neck collar (6-12 stitches depending on head opening). Adjust to match body joining circumference.
Info :
Work the neck connector to make it easier to sew the head onto the body later. Keep the collar slightly tighter (use smaller hook if needed) to avoid gaping seam when joining.
— Body :
Round 1 :
6 sc in magic ring (6)
Round 3 :
(1 sc, inc) x 6 (18)
Round 4 :
(2 sc, inc) x 6 (24)
Round 5 :
(3 sc, inc) x 6 (30)
Round 6 :
(4 sc, inc) x 6 (36)
Round 7 :
(5 sc, inc) x 6 (42)
Round 8 :
(6 sc, inc) x 6 (48)
Round 9-12 :
1 sc in each st (48)
Info :
Change to lime green yarn on round 13 to begin belly panel. Carry the purple yarn inside the body if you prefer to avoid weaving many ends, or fasten off and weave in later for a cleaner edge.
Round 13 :
Change to lime green. 1 sc in each st (48)
Round 14-18 :
1 sc in each st (48)
Round 19 :
(6 sc, inc) x 6 (54) - increase slightly for tummy fullness
Round 20-24 :
1 sc in each st (54)
Info :
Begin stuffing body moderately from round 20 onward. Keep the base firmer than the torso so the dragon can sit. Use small clumps of fiberfill to shape the belly curve but do not overstuff; a flexible body reads better when sewing limbs.
Round 25 :
(6 sc, dec) x 6 (48)
Round 26 :
(5 sc, dec) x 6 (42)
Round 27 :
(4 sc, dec) x 6 (36)
Round 28 :
1 sc in each st (36). Fasten off and leave a long tail for sewing head later if you plan to sew instead of crocheting together.
Info :
If you want a slightly elongated body, continue 2-4 extra rounds of even sc (36) before decreasing. Adjust stuffing after increased height to maintain sit-ability.
— Belly Panel (worked separately, then sewn on) :
Round 1 :
Make a lime green oval by chaining 7, sc in 2nd ch from hook across to last ch, 3 sc in last ch, turn and sc along opposite side of chain back to start, 3 sc in first ch. Join with sl st to form ring (approx 18-20 sts depending on tension)
Round 2 :
Work 1 sc in each st around, placing increases evenly at the 3-st corners to keep the oval flat (increase 2-4 sts total to make an oval approx 24 sts)
Round 3-6 :
1 sc in each st (24) - make 4 rounds to create a slightly raised belly panel (adjust rounds to match body height)
Info :
Sew belly panel to front of body matching center and aligning bottom edge with round 16-18 of the body. Use mattress stitch to make the seam invisible and stuff the belly lightly through edges before fully closing.
— Arms (Make 2) :
Round 1 :
6 sc in magic ring (6)
Round 3 :
(1 sc, inc) x 6 (18)
Round 4-6 :
1 sc in each st (18)
Info :
These first rounds create the paw. Stuff the paw firmly to keep a rounded end. For a thumb/three-toe look, we'll add small claws after shaping the arm.
Round 7 :
(2 sc, dec) x 6 (12)
Round 8-14 :
1 sc in each st (12) - work 7 rounds to form the forearm length (adjust to desired arm length)
Round 15 :
(1 sc, dec) x 4 then 4 sc (8) - light shaping to taper near shoulder (8)
Round 16 :
1 sc in each st (8)
Info :
Leave a long tail for sewing the arm to the body. Stuff paw firmly and arm lightly, concentrating stuffing in the paw and less in the upper arm. Make 2 identical arms.
Claws (Make 6 small claws total for both hands) :
Ch 2, 3 sc in 2nd ch, sl st to join (3). Fasten off, leave tail to sew to paw tip. Make 3 per arm and sew spaced along paw edge to form little green claws.
— Legs (Make 2) :
Round 1 :
6 sc in magic ring (6)
Round 3 :
(1 sc, inc) x 6 (18)
Round 4 :
(2 sc, inc) x 6 (24)
Round 5-8 :
1 sc in each st (24) - form foot base
Info :
Emphasize a round, squat foot by working a few rounds with tighter tension. Add small flat base by slightly flattening the foot before continuing the leg tube.
Round 9 :
(3 sc, inc) x 6 (30)
Round 10-16 :
1 sc in each st (30) - lower leg and calf shaping
Round 17 :
(3 sc, dec) x 6 (24)
Round 18-22 :
1 sc in each st (24) - upper leg
Round 23 :
(2 sc, dec) x 6 (18)
Round 24 :
1 sc in each st (18). Fasten off leaving a long tail for sewing. Stuff foot firmly and leg moderately to ensure the dragon sits evenly.
Info :
Sew legs to the bottom front of the body so the dragon can sit. Position them evenly spaced and slightly turned out for a natural seated posture.
Toe details :
Make 3 small claws per foot as for arms or make 5 as desired. Ch 2, 3 sc in 2nd ch, sl st to join. Sew on toes across the front edge of each foot.
— Tail :
Round 1 :
6 sc in magic ring (6)
Round 3 :
(1 sc, inc) x 6 (18)
Round 4-6 :
1 sc in each st (18)
Round 7 :
(2 sc, dec) x 6 (12) - slight taper
Round 8-14 :
1 sc in each st (12) - lengthen tail to desired curve
Round 15 :
(1 sc, dec) x 4 then 4 sc (8) - taper end
Round 16-18 :
1 sc in each st (8)
Info :
Optionally insert a thin floral wire or pipe cleaner along the inside to make the tail poseable. Fold the wire ends and wrap with masking tape before inserting to avoid sharp edges. Stuff tail lightly; keep the tip soft so the tail can curve naturally.
Round 19 :
6 dec (3) or fasten off with hole closed depending on taper. Fasten off leaving long tail for sewing to back base of body.
— Spikes (Make 10-12) :
Round 1 :
Make lime green: 6 sc in magic ring (6)
Round 3 :
1 sc in each st (12)
Round 4 :
(1 sc, dec) x 4 (8)
Round 5 :
6 dec (3) - if needed fasten off leaving tail to sew spike to back center line from tail base up to head. Make 10-12 spikes decreasing size slightly for those near the head to create a natural ridge.
Info :
Sew spikes in a row down the center back from head to tail. Use small tight stitches and pin each spike to ensure consistent spacing. Slightly stuff the largest spikes so they sit upright; smaller spike bases can remain unstuffed for a flat seam.
— Wings (Make 2) :
Wing Inner Membrane (Lime) Round 1 :
Ch 20, sc in 2nd ch from hook and across to last ch, 3 sc in last ch, sc along opposite side of chain back to start, sl st to join (approx 36-40 sts)
Round 2 :
1 sc in each st (36-40)
Round 3 :
(4 sc, inc) repeat across to shape curve (increase total 6-8 sts) (42-48)
Round 4-6 :
1 sc in each st (42-48)
Info :
Block or pin the membrane flat as you work to maintain a wing shape. Keep the membrane slightly stretched before adding the purple edging to create a crisp wing outline.
Purple Edging (Attach purple to outer edge) Round 1 :
Work 1 sc evenly around the edge of the lime membrane to create a sturdy wing border (approx 48 st)
Round 2 :
1 sc in each st BLO to create a raised rib edge (48)
Wing Ribbing (Black)
With black yarn, attach to top inside edge and ch 20, sl st back into wing to create a rib. Make 3-4 ribs spaced evenly across the wing to mimic webbing. Tie off and weave ends. For each rib tie a small decorative bat at the rib ends if desired.
Info :
Sew wings to upper back at rounds 10-12 of the body using strong stitches. Pin wings so they angle slightly outward and upward. Reinforce with multiple passes of yarn so wings stay in position if toy is handled.
— Hat (Witch Hat) :
Hat Cone Round 1 :
6 sc in magic ring (6) - purple
Round 3 :
(1 sc, inc) x 6 (18)
Round 4 :
(2 sc, inc) x 6 (24)
Round 5 :
(3 sc, inc) x 6 (30)
Round 6-12 :
1 sc in each st (30) - work even to build cone height
Info :
To get that tall floppy witch hat look, add more rounds for height (up to round 18) and then begin shaping the tip to curl. For a dramatic curl, start decreasing on one side and stuff the tip lightly before closing.
Round 13 :
(3 sc, dec) x 6 (24) - begin taper for tip
Round 14 :
(2 sc, dec) x 6 (18)
Round 15 :
(1 sc, dec) x 6 (12)
Round 16 :
6 dec (6) - leave a small opening and stuff the tip lightly to shape curl
Hat Brim (Make flat wide brim) Round 1 :
Attach purple yarn to base of cone. Ch 3, 2 hdc in same st, *(skip next st, 3 hdc in next st)* around to form ruffled brim. Adjust increases so brim lays flat (approx adding 30-36 additional sts around)
Round 2 :
1 hdc in each st around, sl st to join (work extra increases if brim curls upward)
Info :
Work the brim with slightly looser tension so it flops attractively. Use an extra round of BLO single crochet to create a defined edge. To stiffen, lightly spray with fabric starch if desired, or insert a thin circle of craft felt under the brim and sew through all layers.
Hat Band (Black) :
Ch length to wrap around hat base, join, and sc in rounds for 3-4 rounds to create a band. Add a black buckle by making a small rectangle of sc squares and sewing onto band. Add lime green horns or horns sewn through hat band as shown in photo.
Spider Web Embroidery :
Using lime green embroidery floss, stitch a spiderweb on one side of the cone. Bring the needle from inside to out at the center point, make 6 radiating spokes, then weave arcs between spokes. Secure ends and hide tails into hat interior.
Info :
Sew hat onto head by placing the hat brim over the head and attaching through brim and head seam using a whip or ladder stitch. Place the hat slightly tilted for character. Optionally stuff hat lightly to keep its shape.
— Horns (Make 2) :
Round 1 :
With lime green: 6 sc in magic ring (6)
Round 3-6 :
1 sc in each st (12)
Round 7 :
(1 sc, dec) x 4 (8)
Round 8-10 :
1 sc in each st (8) - taper tip with a tight finish
Round 11 :
2 dec, sc across to close (4) - fasten off leaving tail to sew horns to top of head or through hat band
Info :
Sew horns either to the side of hat band to look like hat-is-on-horn, or directly to the head above ears. Stuff lightly and pin position before sewing. Make 2 identical horns.
— Bats (Make 4-6 small bats) :
Bat Body Round 1 :
6 sc in magic ring (6) with black
Round 3 :
1 sc in each st (12)
Bat Wings :
Attach to sides: ch 6, sc in 2nd ch from hook across, sl st back into body. Fold wings and sew slight curve to give fluttering appearance. Add tiny embroidered gold eyes (seed beads or French knots) and small legs if desired.
Info :
Make small bats in black and hang from wings or hat by knots of black yarn. Sew bead eyes or embroider with metallic floss for tiny highlights. Make several bats and vary size by reducing ch foundation length.
— Mini Pumpkins (Make 2) :
Round 1 :
6 sc in magic ring (6) with lime green or orange depending on desired look
Round 3 :
(1 sc, inc) x 6 (18)
Round 4-5 :
1 sc in each st (18)
Round 6 :
(1 sc, dec) x 6 (12). Stop stuffing, close slightly or use a gather stitch and sew a short stem of black yarn or brown on top to look like a jack-o-lantern. Embroider face with black yarn: stitch simple triangle eyes and jagged mouth. Leave a tail long enough to attach as hanging charm.
Info :
Make pumpkins in lime green for the look in the reference photo. Hang them from wing tips and the hat tip by crocheting a small chain and knotting it into place. Make 2-3 for balance and visual interest.
— Assembly & Embellishments :
Info :
Arrange all pieces before sewing: head centered over body, belly panel aligned, legs evenly spaced at the base, arms sewn to sides, wings pinned high on the back, tail centered at back base, spikes sewn down the back line, horns or hat accessories attached as shown. Pin and photograph your layout to make sure you like placement before committing stitches.
Sewing Head to Body :
Align head opening with body top opening. Use mattress stitch or overcast whip stitch around the seam, making sure the head sits level. Sew through head neck collar if you created one, and through the top rounds of the body (rounds 9-13 are a good anchor point). Use a matching tail to hide seam transitions.
Wing Attachment :
Sew wings where the shoulder blades would be, roughly at body rounds 10-12. Reinforce seam with an additional pass of yarn across the base to ensure wings stay attached during play or display. If adding dangles to wing tips, attach them before final sewing to make placement easier.
Hat Placement :
Position hat slightly tilted over one eye for charm. Sew the brim to the top of the head in several spots around the inside so the hat won't slide, but allow the brim edge to remain floppy and visible.
Final Touches :
Embroider small eyebrows or eyelids if desired to add expression. Add a small row of surface slip stitches to define the jaw or mouth line. Weave in all ends and trim close to fabric. Add tiny beads or painted highlights to the eyes for extra sparkle if desired.
Info :
Take time to shape and position embellishments such as bats and pumpkins. Use small, tight stitches to secure charms. Test balance as you add weighty items; adjust stuffing or sewing positions so the dragon sits upright without tipping.
This whimsical Halloween dragon is a magical mix of cozy amigurumi technique and seasonal charm. Each stitch builds a character full of personality—from the floppy witch hat down to the tiny bats and pumpkin charms. Following these detailed instructions will help you create a polished and poseable friend perfect for gifting or seasonal decor. 🧶🎃✨