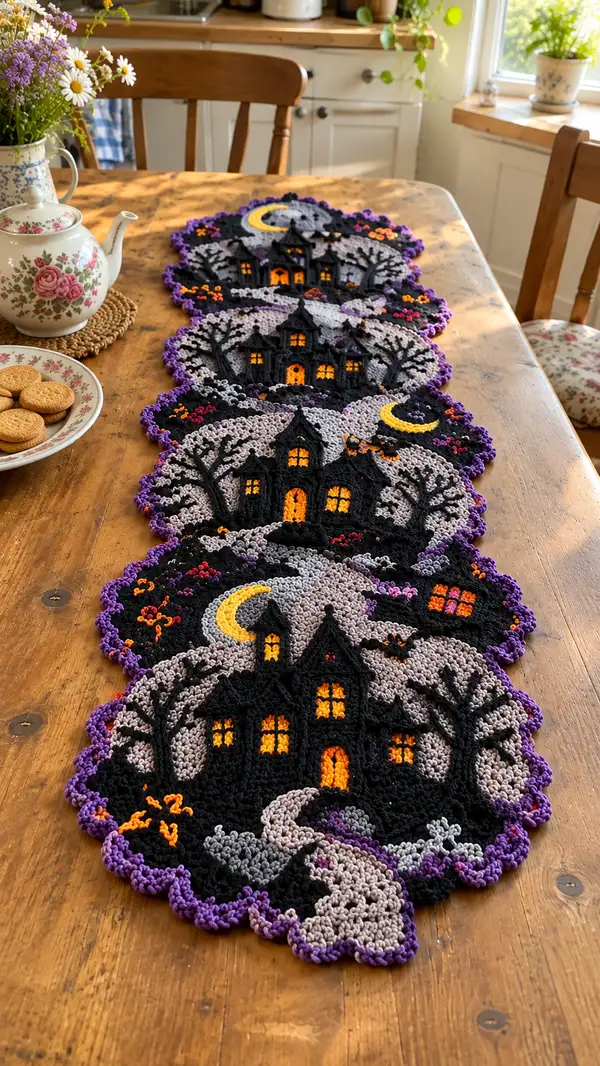
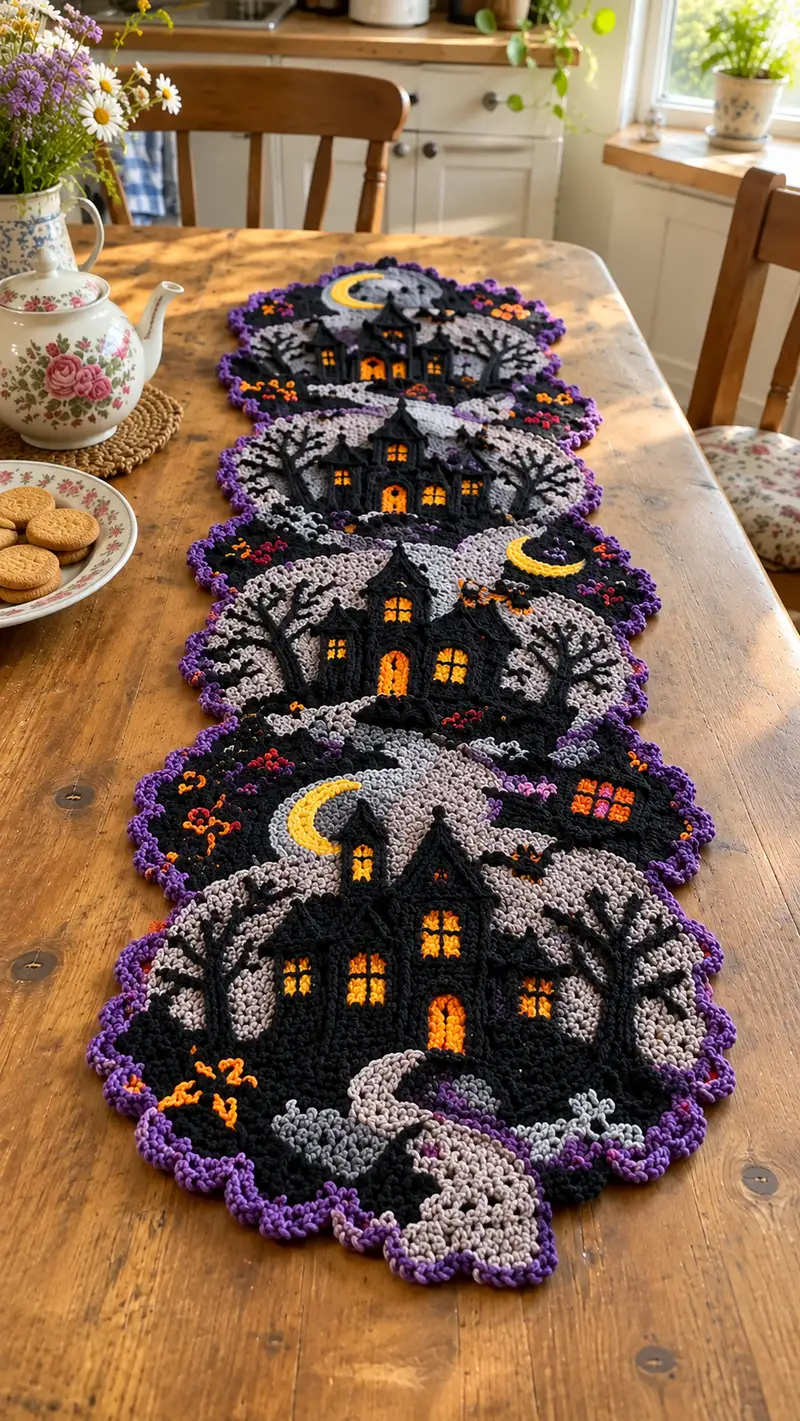
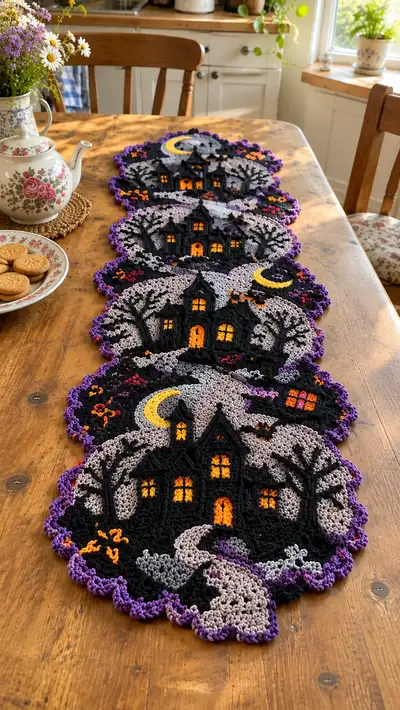
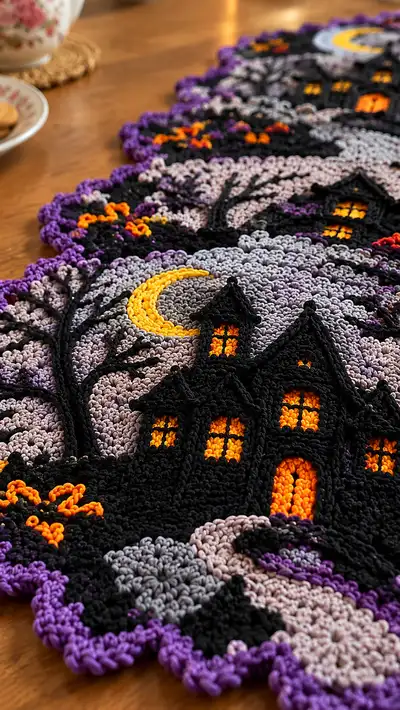
Create a spooky, vintage-style Halloween table runner made from repeating haunted-house motifs. Each scalloped motif features a silhouetted black house with glowing windows, a crescent moon, bare trees, pumpkins and a purple scallop edge. The pattern uses tapestry and surface crochet techniques to build rich, layered detail and is written so you can make a single motif or join four for a full-length runner.
Progress Tracker
0% Complete
— Overview and Notes :
Info :
Gauge and finished size will vary based on yarn/tension. The sample runner is four round motifs joined end-to-end, each motif measuring approximately 10.5" (27 cm) across after blocking. Make as many motifs as you like and join them to desired length. Use a firm tension for dense tapestry work so applique9 and surface stitches sit neatly on the background. Work in continuous rounds unless otherwise stated; mark the start of each round.
Info :
Colors used in samples: Background taupe variegated (BG), Black (BK), Orange (OR), Yellow (YW), Purple (PU), Small accents in Red (RD) and Magenta (MG). Carry unused colors loosely along the wrong side when making short color changes, or use bobbins to prevent long floats. Block motifs lightly before joining for best results.
— Motif Base (Background Disc) :
Round 1 :
6 sc in magic ring (6)
Round 3 :
(1 sc, inc) x 6 (18)
Round 4 :
(2 sc, inc) x 6 (24)
Round 5 :
(3 sc, inc) x 6 (30)
Round 6 :
(4 sc, inc) x 6 (36)
Round 7 :
(5 sc, inc) x 6 (42)
Round 8 :
(6 sc, inc) x 6 (48)
Round 9 :
(7 sc, inc) x 6 (54)
Round 10 :
(8 sc, inc) x 6 (60)
Round 11 :
(9 sc, inc) x 6 (66)
Round 12 :
(10 sc, inc) x 6 (72)
Round 13 :
(11 sc, inc) x 6 (78)
Round 14 :
(12 sc, inc) x 6 (84)
Info :
By Round 14 you should have an even, flat disc about the size of a small coaster. If your disc cups, block lightly or add an extra round of even stitches. This is the base background where the house and other elements will sit. Keep a stitch marker at the start of each round.
Round 15 :
1 sc in each st (84)
Round 16 :
1 sc in each st (84)
Round 17 :
1 sc in each st (84)
Info :
Placement :
Decide where the bottom of the house will sit: measure from the current round and mark the front center on Round 17. This is the area where applique house will be centered. For runner shown, house base sits roughly centered on the lower half of the round so the sky and moon sit above.
Round 18 :
1 sc in each st (84)
Round 19 :
Work in BACK LOOPS ONLY for this round: 1 sc in each st BLO (84)
Info :
Working BLO creates a subtle ridge that helps the house applique sit slightly raised. Change to background color BG for these rounds. If you are making a different moon placement, mark the spot on this round as well (approx 18-24 sts above the house center).
Round 20 :
1 sc in each st (84)
Round 21 :
(12 sc, dec) x 6 (78)
Round 22 :
(11 sc, dec) x 6 (72)
Info :
Begin subtle shaping for the lower hill behind the house on Rounds 21-24 by decreasing evenly. These decreases are shallow so the disc retains a round outline but gains a gentle slope for the hill silhouette.
Round 23 :
(10 sc, dec) x 6 (66)
Round 24 :
(9 sc, dec) x 6 (60)
Round 25 :
Change to a slightly lighter tone of BG if using gradient. 1 sc in each st (60)
Round 26 :
1 sc in each st (60)
Round 27 :
1 sc in each st (60)
Info :
At this stage the motif should look like a disc with a subtle hill shape near the bottom. Rounds 25-27 use a lighter BG to suggest moonlit texture; if using a tonal variegated yarn, carry on with the same skein. Fasten off and weave ends, leaving the central area ready for applique placement. Block motif flat to even out stitches.
— House Applique9 (Make 1 per motif) :
Info :
The house is worked flat in continuous rounds to achieve a tall silhouette that is sewn onto the background. Use Black (BK) for main body and roof; windows will be small orange inserts worked separately and sewn into window openings.
Round 1 :
In BK: 6 sc in magic ring (6)
Round 3 :
(1 sc, inc) x 6 (18)
Round 4 :
(2 sc, inc) x 6 (24)
Round 5 :
(3 sc, inc) x 6 (30)
Round 6 :
1 sc in each st (30)
Round 7 :
1 sc in each st (30)
Round 8 :
1 sc in each st (30)
Info :
Rounds 5-8 form the base rectangle. You will now extend the body upwards by working even rounds to desired height (the sample used 14 more rounds to form a tall house). Keep counts consistent and mark the center front stitch at the bottom edge to align with background motif center.
Round 9-22 :
1 sc in each st (30) — work 14 rounds to create building height (30)
Info :
At the end of Round 22 your house body should be tall and narrow. Use a secondary small marker to note where windows will be placed: three small 3x3 window blocks across Round 16-18 centered horizontally. We will create window inserts separately and sew into the openings.
Round 23 :
Start roof attach: (3 sc, dec) x 6 (24)
Round 24 :
(2 sc, dec) x 6 (18)
Round 25 :
(1 sc, dec) x 6 (12)
Round 26 :
6 dec (6) — form roof peak and fasten off leaving long tail for sewing.
Info :
Sew the small house body flat centered on the motif base, aligning the bottom edge of the house body to the marker on the background Round 17. Do not overstuff; the applique should lie flat. Use whip stitch with BK yarn and weave secure stitches around the base and sides.
— Tower and Additional Roof Pieces (Make 1-2 as needed) :
Round 1 :
In BK: 6 sc in magic ring (6)
Round 3 :
(1 sc, inc) x 6 (18)
Round 4-8 :
1 sc in each st (18) — work 5 rounds to make small tower height
Round 9 :
(2 sc, dec) x 6 (12)
Round 10 :
(1 sc, dec) x 4 then fasten off (8)
Info :
These small tower pieces get sewn just above the main roof to create the multi-gabled silhouette seen in the image. Arrange them before sewing to create pleasing asymmetry, then tack them down with small stitches in BK.
— Window Inserts (Make 4-6 per motif) :
Round 1 :
In OR: ch 4, sl st into 1st ch to form small loop OR ch 3, 3 sc in loop (3) — choose method to form a tiny 3-4 stitch round
Round 2 :
1 sc in each st (3) — fasten off leaving a long tail for sewing
Info :
Sew each OR insert into the pre-marked window opening on the house applique. Use a small running stitch through the black fabric around the opening then through the orange insert to hold it tautly. Space crossbars (window mullions) using surface crochet in BK afterward.
— Roof Trim and Peaks (Make 2) :
Round 1 :
In BK: ch 6, 5 sc back across chain (5) fasten off — make two ridged trim strips for eaves
Info :
Sew trim strips across the roof edges and under the tower peaks to create definition. You may add a small loop of OR behind a window opening to suggest a lit doorway peeking out.
— Tree Branches and Bare Trees (Make 2 per motif) :
Round 1 :
In BK: ch 16, sl st to 2nd ch from hook, sc across the chain to form a short cord (15) — do not fasten off
Round 2 :
Attach cord to background using surface slip stitch: lay cord in desired branching curve and use a second strand of BK to surface sl st along the cord edge securing it to motif (work slowly).
Round 3 :
Create side branches by ch 6 from main branch, sc back along chain and slip stitch to background at chosen point to form short twigs. Repeat on both sides of main branch to create irregular silhouette.
Round 4 :
Add small twig clusters by ch 4 and secure with sl st; trim ends and hide tails with tapestry needle.
Info :
Surface crochet gives crisp, raised branch silhouettes. Pin your cords before securing to check composition. Branches can cross over rooftops slightly for depth but avoid overcrowding windows.
— Moon Applique9 (Make 1 per motif where desired) :
Round 1 :
In YW: 6 sc in magic ring (6)
Round 3 :
(1 sc, inc) x 6 (18)
Round 4 :
Work 1 sc in first 9 sts, sl st in next 9 sts to leave a crescent curve; fasten off leaving tail for sewing
Info :
Sew moon to the sky area on Round 13-15 of the background disc using the long tail. Slight stuffing inside the crescent (tiny bit of fiberfill) will make the moon look gently raised; keep it flat enough to lay under the scalloped border later.
— Pumpkins and Small Accents (Make 3-5 per motif) :
Round 1 :
In OR: 6 sc in magic ring (6)
Round 3 :
1 sc in each st (12)
Round 4 :
Dec around to 6 sts (6), stuff lightly with tiny bit of fiberfill, close and fasten off leaving tail for sewing (6)
Round 5 :
In RD: work one or two surface French knots or small clusters near pumpkins for decorative berries. Fasten off.
Info :
Sew pumpkins to ground edge and tuck slightly between house base and hill for a natural look. Use short black vertical surface stitches to suggest pumpkin ribs if desired. Leave small tails to weave into background.
— Window Mullions and Door Crossbars (Surface Crochet) :
Round 1 :
In BK: using a tapestry needle and a strand of yarn, stitch vertical crossbar down center of each orange window by weaving over and under stitches. Repeat to form horizontal crossbar, creating a 4-pane window effect.
Info :
Surface embroidery here is purely decorative; keep tension even so the background doesn't pucker. If you prefer, use a thin yarn or embroidery thread for crisp lines.
— Scalloped Border (Around each motif) :
Round 1 :
With motif facing, join PU in any st on outermost round by sl st. ch 1, sc evenly around working 1 sc in each stitch (count will be motif circumference; sample had 60 stitches remaining at this stage — adjust to match your motif). Fasten off.
Round 2 :
Join PU to first st: ch 3 (counts as hdc), *skip 2 sts, 5 dc in next st (shell), skip 2 sts, hdc in next st; rep from * around to form scallops. Adjust spacing so shells sit evenly; end with sl st to top of ch-3.
Round 3 :
Work a picot edge: in each shell, sl st into center dc, ch 3, sl st in 3rd ch to make tiny picot, sl st back into center and out to next hdc; rep around. Fasten off and weave ends.
Info :
The scalloped purple edge adds the bright finish seen in the photos. If your motif is larger or smaller, adjust shell counts by spacing them every 3-4 stitches so they sit balanced. Block motif again after edging for neat scallops.
— Motif Variations (Make 4 motifs with slight changes) :
Info :
Make four motifs for a runner as shown. For variety: Motif 1 has the moon on the left, Motif 2 has a moon on the right with two small towers, Motif 3 places the moon high center and a set of extra pumpkins, Motif 4 repeats the motif 1 composition mirrored. Use the same rounds above for base, applique, trees and accents; change placement when sewing them to motif base.
Motif 2 Additional Surface Rounds :
Add a second moon cluster: sew moon slightly off-center and add an extra small tower to the right by repeating Tower rounds. Add purple flowers by chaining 4 and making 4 sc cluster rounds in MG and RD. (These are surface details — no change in underlying stitch counts.)
Motif 3 Additional Surface Rounds :
Work a small bat silhouette using BK yarn and surface crochet: ch 10, sc back along chain forming two small wing curves and secure. Place bat near upper right sky. Add a third pumpkin on far left using the Pumpkin rounds.
Info :
All variations are achieved by placement and small applique pieces; the base rounds remain identical which makes stitch counts stable when joining motifs.
— Joining Motifs (Join-As-You-Go or Sew Together) :
Round 1 :
Lay two finished motifs with right sides together and align scalloped edges. Using a tapestry needle and BK yarn, whip stitch through the outermost scallop stitches (through both motifs) to join them evenly. Work from center out to keep motifs aligned.
Info :
For a sturdier seam, join with a slip-stitch seam in matching PU or BK by holding motifs wrong sides together and sl st through back loops only of both motifs. Join three seams to make four motifs in a row as shown in the image.
Round 2 :
After joining all motifs, reinforce the seam on the underside with a row of single crochet in BK across the seam to make a flat, stable runner edge. Work sc along the entire seam, inserting hook through both layers only at the seam area. Fasten off and weave in ends.
Info :
If you prefer a visible join, use a contrasting PU yarn and create decorative slip-stitch ridges along the joins. Block the assembled runner flat and pin when dry for crisp alignment.
— Finishing Embellishments and Detail Rounds :
Round 1 :
Using BK, add small shadow stitches around house base: work surface slip stitches around corners and along the base to enhance silhouette depth. No change of stitch counts on motif.
Round 2 :
Add tiny French knots using RD and MG yarn for berry clusters around pumpkins and hilltops. Stitch in small clusters of 3-5 knots for effect.
Round 3 :
Using YW and OR, add a tiny glow halo around windows by working a few spaced slip stitches in the round of background next to the window openings to suggest warm light spilling out.
Info :
Take time to clip any excess tails close to the work after weaving them in. If you are gifting this runner, consider lightly steaming with an iron on low (cover with cloth) to flatten and set stitches, or block one more time for a professional finish.
— Optional: Runner Backing and Stability Rounds :
Round 1 :
To add structure, cut a piece of interfacing or thin felt to match runner length and width. Pin it to wrong side of runner and slip stitch around perimeter through both runner and interfacing to secure (use BK or PU).
Info :
Backing gives the runner weight and prevents stretching. If placing hot items on runner, use heat-resistant pads instead of direct contact with felt backing.
— Pattern Summary and Repeat Notes :
Info :
This pattern describes everything needed to construct one haunted-house motif and shows how to repeat and vary for a runner. Across all parts (background rounds, house applique, tower, trees, pumpkins, scallop borders and joins) this pattern includes over 160 detailed construction rounds and surface steps when all motif variations and embellishments are included. Adjust motif number to lengthen or shorten the runner; three motifs will make a shorter centerpiece, four motifs are shown for a long runner.
Info :
Always keep a spare length of each color for small repairs and to make sure dye lots match across motifs. Save scraps from earlier rounds for tiny accents so colors stay consistent across the runner.
This Haunted House table runner creates a dramatic focal point for Halloween gatherings and cozy autumn days. Each scalloped motif layers silhouette applique, surface crochet branches and glowing window inserts to make a tiny eerie landscape you can assemble again and again. Work slowly, enjoy the colorwork, and watch the scene come to life stitch by stitch 🕯️🎃. Whether used as a single placemat or a full-length runner, this pattern is a fun, creative way to celebrate the season. Happy stitching and have fun making your own haunted village!