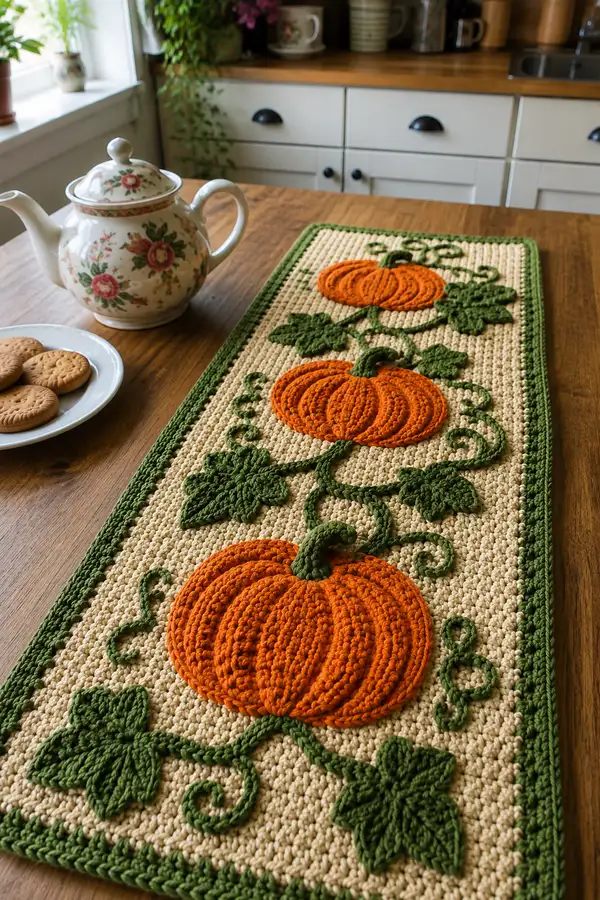
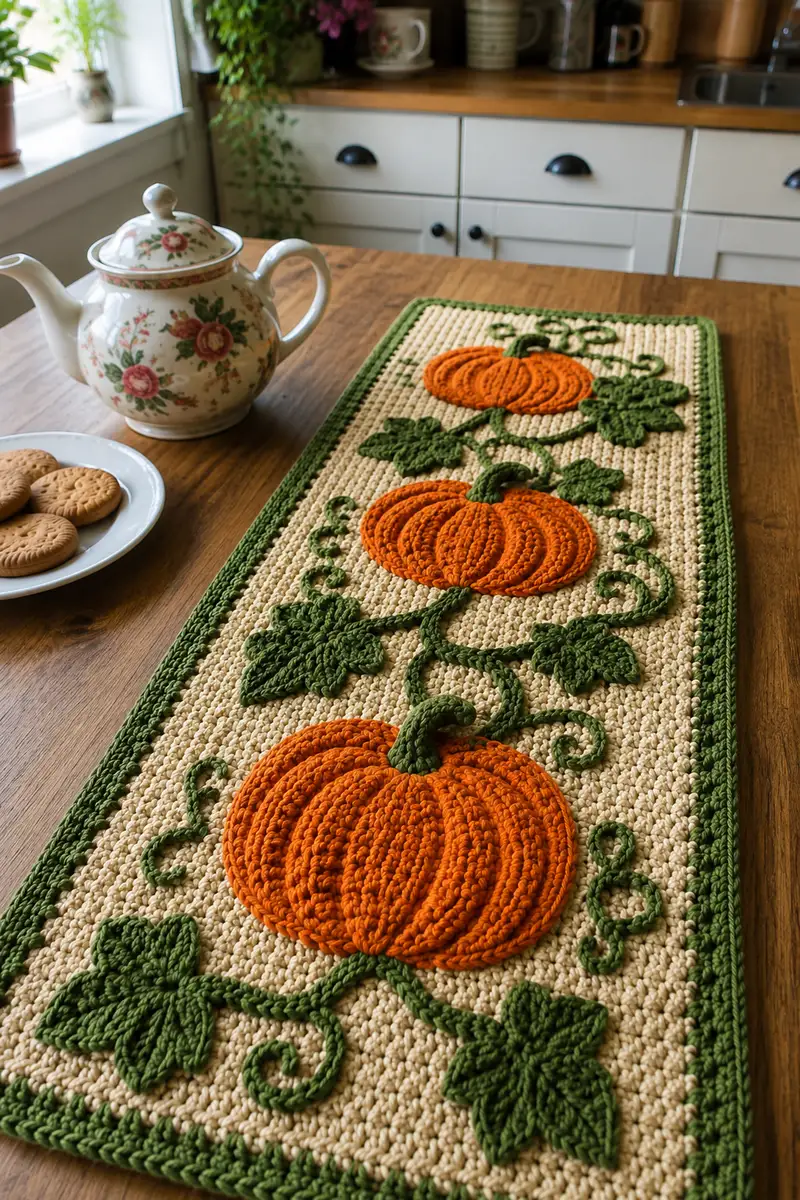
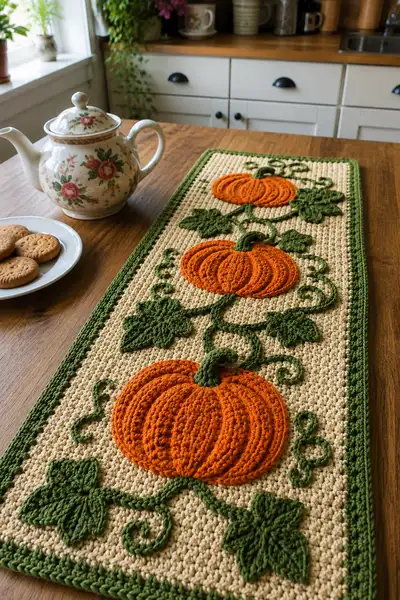
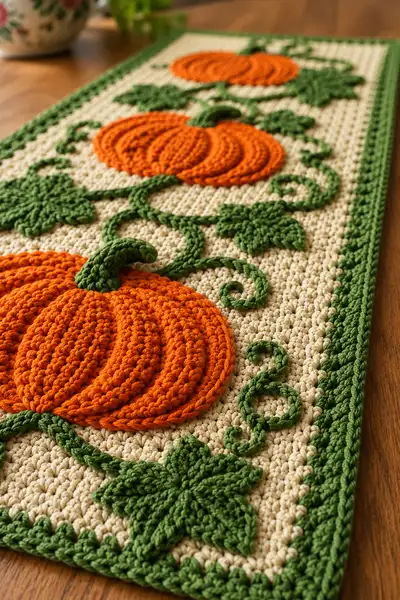
A warm autumn table runner featuring three raised pumpkins, curling green vines and textured leaves on a neutral background. This runner uses applique pumpkins sewn onto a dense stitched panel to create a dimensional, farmhouse-style centerpiece. The pattern includes step-by-step instructions for the base panel, pumpkins, stems, leaves, vines/tendrils and finishing border so you can craft a long-lasting seasonal accent.
Progress Tracker
0% Complete
— Notes & Gauge :
Info :
This runner is designed to be dense and reversible on the base. Gauge is not critical but affects finished size. With worsted-weight cotton and a 3.5mm hook expect roughly 4.5-5 sc per inch and approximately 6-7 rows per 2 inches in single crochet rows. Final finished runner in this pattern is approximately 36" long x 10" wide; adjust foundation stitches or row number to alter finished size.
Info :
Work right-handed instructions. When changing hooks for texture, maintain consistent edge stitches for a neat border. Carry unused yarn neatly along wrong side when possible or weave in ends after assembly.
— Base Panel (make 1) :
Row 1 :
Foundation single crochet 92 sts (fsc 92) – this creates the width for a runner roughly 10" wide with worsted cotton (92)
Info :
If you want a wider runner, increase your foundation single crochet in multiples of 4 to keep pattern symmetry for applique placement. Keep an even stitch count for edge consistency.
Row 2 :
Turn. 1 sc in each st across (92)
Row 3 :
Turn. 1 sc in each st BLO (92)
Row 4 :
Turn. 1 sc in each st (92)
Row 5 :
Turn. 1 sc in each st BLO (92)
Info :
Alternate BLO rows to create a subtle ribbed/seed-like texture that mimics the woven, pebbled background you see. Keep consistent tension so the panel lies flat.
Rows 6-40 :
Repeat Rows 4-5 pattern (1 sc entire row, next row sc BLO) for a total of 40 rows from foundation (92)
Info :
At this point you have a substantial neutral panel. Mark three evenly spaced centers along the long axis for the pumpkins: roughly 3.5" in from both short ends and one centered. Example marking rows: Row 6 area (bottom pumpkin), Row 20 area (middle pumpkin), Row 34 area (top pumpkin) for placement reference. Use pins or stitch markers to reserve placement.
Rows 41-76 :
Continue repeating Rows 4-5 to reach a total of 76 rows (92)
Info :
This yields a panel approximately 36" long. If you prefer a longer runner, add more alternating rows in multiples of two to maintain the texture.
Row 77 :
Turn. 1 sc in each st (92)
Row 78 :
Turn. 1 sc in each st BLO (92)
Info :
Fasten off leaving a long tail (~24") for the border joining if you plan to join border as you go. Otherwise fasten off and weave in ends later. Lightly block the panel if desired to square up edges.
— Pumpkin Applique (Make 3 identical) :
Round 1 :
Using pumpkin orange yarn, make a magic ring, 6 sc into ring (6)
Round 3 :
(1 sc, inc) x 6 (18)
Round 4 :
(2 sc, inc) x 6 (24)
Round 5 :
(3 sc, inc) x 6 (30)
Round 6 :
(4 sc, inc) x 6 (36)
Info :
We are forming a slightly flattened disc for the pumpkin. Keep rounds fairly snug to build a thick applique. Place a stitch marker at your first stitch to track rounds if needed.
Round 7 :
1 sc in each st (36)
Round 8 :
1 sc in each st BLO (36)
Round 9 :
1 sc in each st (36)
Info :
These even rounds increase the height of your pumpkin applique. If you prefer a flatter pumpkin, stop at Round 8. For a taller, pillow-like look, add an extra even round (Round 10) before starting the shaping of the edge.
Round 10 :
(4 sc, dec) x 6 (30)
Round 11 :
(3 sc, dec) x 6 (24)
Round 12 :
(2 sc, dec) x 6 (18)
Info :
We are slightly shaping the underside to create a domed pumpkin surface. Do NOT fasten off yet; we will add the prominent ribs using separately crocheted cords to achieve that raised look.
Round 13 :
(1 sc, dec) x 6 (12)
Info :
Fasten off leaving a 12" tail for sewing the applique to the base panel. Lightly stuff the center (optional) with a small pinch of fiberfill to give a gentle dome — do not overstuff; the pumpkin ribs will provide most dimension.
— Pumpkin Ridges / Raised Ropes (Make 8 ribs per pumpkin) :
Info :
The raised ribs you see are braided-looking cords sewn around each pumpkin surface. Each rib is made by making a fast crocheted cord (chain + sl st back) or by crocheting a narrow tube and flattening it. These instructions make a narrow cord with body and good loft.
Rib 1 :
With pumpkin orange and 4.0mm hook, ch 48, sl st into 2nd ch from hook, sl st along chain back to beginning to create a flat cord (47 sl st). Finish leaving long tail for positioning (~18").
Info :
Make 8 identical cords for each pumpkin. The exact length will depend on the pumpkin size; if your cord is longer than needed, trim/adjust and bury ends under pumpkin. For smaller pumpkins, make ch 36-42 instead.
Rib 2-8 :
Repeat Rib 1 to make a total of 8 ribs per pumpkin. Space them evenly across the pumpkin surface when sewing.
Info :
To attach, lay the orange disc on a flat surface. Arrange ribs from top to bottom, slightly overlapping at the center top and bottom to mimic natural pumpkin segments. Pin ribs in place with sewing pins or stitch markers. Sew the ribs into the pumpkin by ladder or whip stitch through the underside of the rib into the pumpkin body, catching a couple of stitches of the disc to secure. Sew ends under the disc and weave tails through to hide them.
— Pumpkin Stem (Make 3) :
Round 1 :
Using forest green, ch 6, join to first ch with sl st to form a small loop (6)
Round 2 :
Work 1 sc in each ch around (6)
Round 3 :
1 sc in each st around (6)
Round 4 :
(1 sc, inc) x 3 (9)
Round 5 :
1 sc in each st around (9)
Info :
For a curved stem as seen in the images, after Round 5 create a short turned tube: ch 6, 1 hdc in 2nd ch from hook and across, sl st into next available stem base st to fold and create a curved tendril. Finish and leave a long tail for sewing.
Round 6 :
Optional: 1 sc in each st around for additional height (9)
Info :
Stuff stems very lightly with a small amount of fiberfill if you want them to stand slightly off the pumpkin. Sew stems to the top part of each pumpkin, covering any rib overlapping point. Sew securely through pumpkin disc and ribs to anchor the stem.
— Leaf (Make 6 large leaves and 4 small leaves) :
Leaf Center :
Ch 12. Row 1: Starting in 2nd ch from hook: 1 sc, 1 hdc, 3 dc, 1 hdc, 1 sc, 1 sl st (across to create a tapered shape). Fasten off leaving tail for sewing. This creates a long pointed leaf base.
Info :
For fuller leaves as in images, make a small round motif and then shape with post stitches. The sample runner uses flat textured leaves with visible veins created by surface slip stitch or front post hdc lines.
Leaf Detail :
Using green, sew a central vein with yarn needle using whip stitch: start at base and work 3-4 spaced vertical stitches to the tip. Add two diagonal veins on each side by couching a short row of stitches from center outward. Block leaf flat and sew to base panel.
Info :
Make 6 larger leaves (follow center length ch 12 method) and 4 smaller leaves (ch 8 version) for an arrangement similar to the photo. Position around the pumpkins symmetrically—two leaves around each pumpkin cluster—then pin before stitching.
— Vines & Tendrils (Make 6 long vines, 12 short curls) :
Vine 1 :
Using green, ch 80 (or desired length), join with sl st to last ch to form a rope? Alternatively: make crocheted cord by sc into each chain to build thickness. Method: ch 80, turn, sc into 2nd ch from hook and across (79 sc). Fasten off leaving long tail for sewing (~24").
Info :
To make a thicker, rounded vine as pictured, use the chain and sc-around method: ch 40-60, then with the opposite color or same green, work 3 sc into each chain space around the chain to create a tubular rope. For a chunky look use a 4.0mm hook for the vine while the base panel uses 3.5mm.
Vine 2-6 :
Repeat Vine 1 to make 6 long vines. You will then shape them into S-curves and attach from pumpkin to pumpkin to mirror the photograph’s flowing vines.
Tendril :
Make short curly tendrils by chaining 12, then 2 sc in each of next 4 ch, 1 sc in remaining ch, sl st to finish. Stretch and twist into a spiral before sewing. Make 12 tendrils total for the runner decorations.
Info :
When placing vines, pin them on top of the base and arrange to curve naturally. Tendrils are sewn at the end points of vines and near pumpkins to mimic natural curling. Sew vines using matching green yarn and a mattress/whip stitch close to the vine body for extra hold.
— Alternate Pumpkin Method (Raised Tube Pumpkin) :
Info :
If you prefer the ribbed pumpkin look without sewing cords: work a wide oval tube and fold it into a disc, or crochet a spiral tube, flatten and sew into concentric rings to mimic the raised ribs. Example technique: make 3 tubes and stack, sewing segments into a rounded pile. Use slip stitch tubing for prominent ribs.
— Leaf Vein & Texture Details :
Info :
To achieve the raised vein appearance on leaves, use front post hdc or surface slip stitch. After laying a leaf flat, use a contrasting or same green yarn and work a line of surface slip stitches from stem to tip. Make two to three branches off this main vein to mirror the look in the photos.
— Assembly & Applique Placement :
Info :
Lay the base panel flat with the wrong side up. Position the bottom pumpkin approximately 3.5" from the short edge and centered horizontally. The middle pumpkin should be centered along the panel length and the top pumpkin 3.5" from the opposite short edge. Use pins or small safety pins to hold each pumpkin disc in place.
Info :
Arrange leaves and vines around pumpkins to create an organic flow: stem from top of pumpkin toward above pumpkin, curl tendrils near edges, and fill negative spaces with smaller leaves. Take a photograph of your layout before sewing to reproduce symmetry if desired.
Sewing Pumpkin :
Using long tail left from disc, sew around edge of pumpkin disc attaching it to the base panel with whip stitch. Catch a few base panel stitches per stitch of the disc to secure; ensure the disc sits flat and the ribs line up vertically. Sew ribs on top of the disc where needed with small invisible stitches to secure them to both the disc and base.
Info :
Sew stems at the top center of each pumpkin, securing through the pumpkin disc and into the base panel. For additional security, sew the base of the stem through a couple of ribs and the disc bottom.
— Decorative Border :
Round 1 :
With green and 3.5mm hook, join to any corner stitch. Work 1 sc evenly around the entire panel working 3 sc into each short-row end to keep edges flat and 1 sc in each row-end. Approx stitch count will be equal to initial foundation (92) + side rows. Maintain 1 sc per st for a neat join. Fasten off (exact count varies).
Round 2 :
Join green again. Ch 2 (counts as hdc), hdc in each sc around working 3 hdc in corners. This creates a slightly raised border. Sl st to join. (approx same count as Round 1)
Round 3 :
For a decorative scalloped edge: *Skip 1 st, (5 dc in next st), skip 1 st, sl st in next st* rep around. Adjust repeats to fit evenly; work fewer or more dc in scallop to match turnout. Sl st to join. Fasten off and weave in ends.
Info :
Alternatively, you can make a thick rope border: with green, ch 6 and sc in rounds along the edge, or make an i-cord and sew it around for a framed look as in the photo. The pictured runner uses a chunky two-row hdc border with an outer textured raised ridge.
— Finishing Touches :
Info :
Once all appliques are sewn on, weave any remaining tails into the body of the runner and trim. Steam-block lightly if cotton yarn allows; press flat with a cloth over the runner to avoid crushing ribs. If the runner is to be used on a table, consider adding a thin slip-resistant fabric back or interfacing to protect the wood finish underneath and stabilize the runner.
Info :
If any ribs or vines feel loose after washing or handling, secure them with a few small stitches and hide tails under adjacent shapes. For more dimension, you can strategically add a small amount of fiberfill beneath the pumpkins before sewing to the base to create a slightly raised pillow effect.
— Care Instructions :
Info :
Hand wash or gentle machine wash in a mesh bag on cool and lay flat to dry. Cotton can shrink slightly; always wash a swatch first if unsure. Avoid bleach and high dryer heat to preserve color and shape.
— Optional Variations & Tips :
Info :
Use bulb yarn or a tweed cotton to create vintage texture. Change pumpkin count to suit your table—make 1 large and 2 small pumpkins for a different layout. For a more primitive look, use tan yarn for stems and a muted orange for pumpkins.
Info :
To speed up work, make all pumpkin discs assembly-line style: make all discs, then all ribs, then all stems, then sew. This efficient approach helps maintain consistent size across pieces.
Creating this Pumpkin Patch runner is a lovely way to welcome autumn into your home! The combination of raised pumpkins, curling vines, and textured background makes for a striking centerpiece that you'll be proud to display. Each applique and stitch adds character, and the modular pattern means you can take it at your own pace. 🧶 Enjoy the cozy process and have fun customizing colors and placement—this runner will make your table look festive and handmade. 🎃🍁