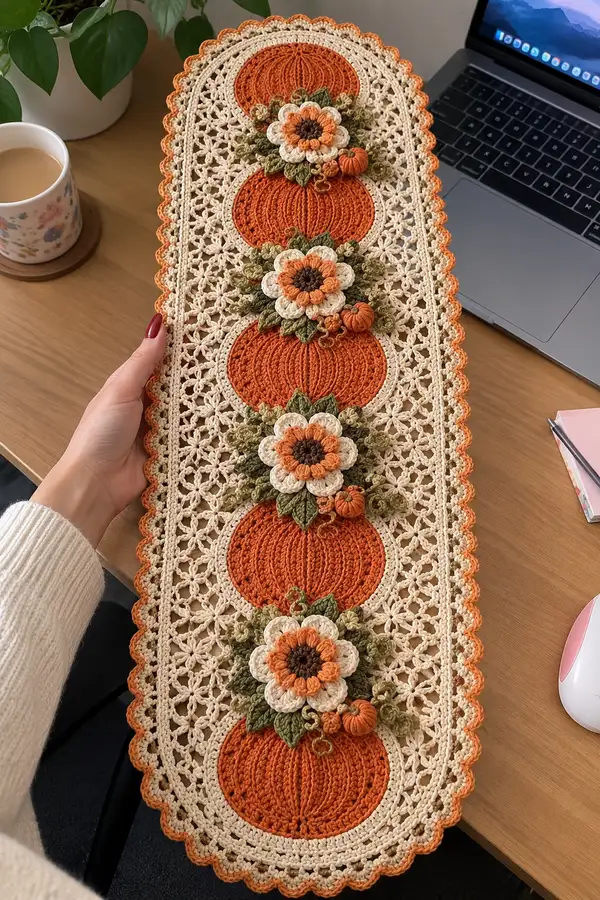
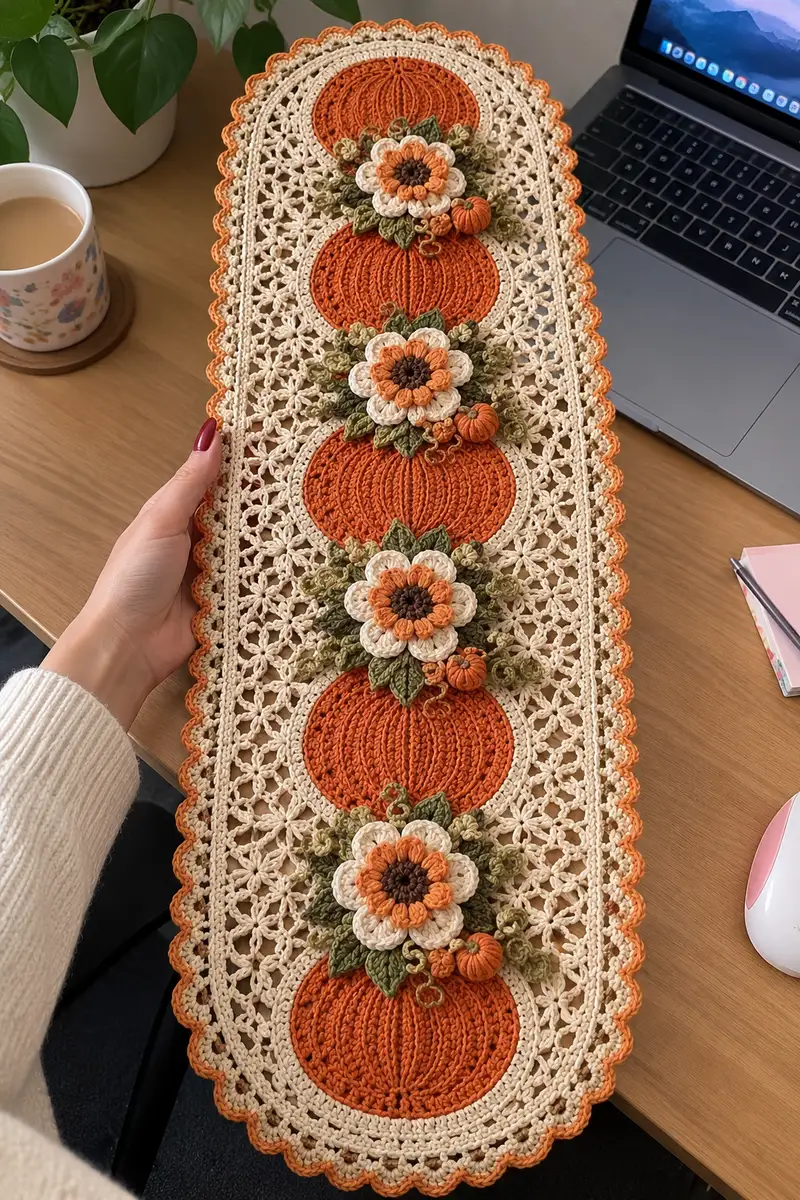
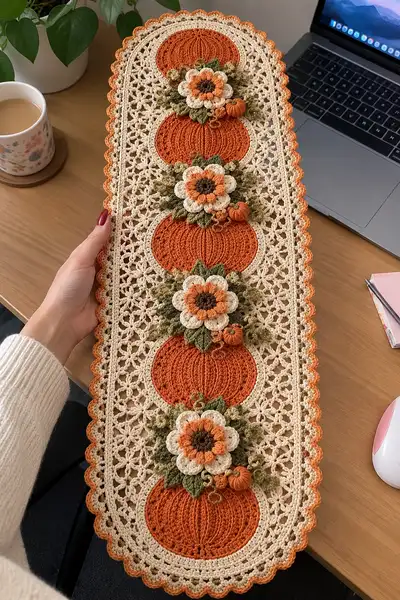
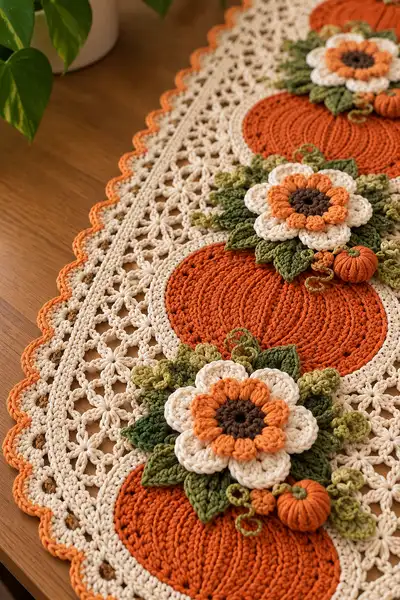
A long, elegant fall table runner featuring four raised pumpkin medallions, layered floral appliques, curling vines and a lacy cream lattice background. Warm orange pumpkins sit in a soft cream frame with olive-green leaves and tiny 3D pumpkins for charming seasonal detail. This pattern recreates the textured ribs, layered flowers and scalloped edging for a beautiful tablescape centerpiece.
Progress Tracker
0% Complete
— Pumpkin Circular Motif (make 4) :
Round 1 :
6 sc in magic ring (6)
Round 3 :
(1 sc, inc) x 6 (18)
Round 4 :
(2 sc, inc) x 6 (24)
Round 5 :
(3 sc, inc) x 6 (30)
Round 6 :
(4 sc, inc) x 6 (36)
Round 7 :
(5 sc, inc) x 6 (42)
Round 8 :
(6 sc, inc) x 6 (48)
Info :
Change to Pumpkin Orange yarn now if you have been working in a neutral provisional color. Work tightly to avoid holes so the pumpkin looks solid in the center.
Round 9 :
1 sc in each st (48)
Round 10 :
1 sc in each st (48)
Round 11 :
1 sc in each st BLO (48)
Info :
Working Round 11 in BLO creates a shallow ridge for the rim of the pumpkin and helps the later front-post ribs sit proud of the surface.
Round 12 :
1 sc in each st (48)
Round 13 :
1 sc in each st (48)
Round 14 :
1 sc in each st (48)
Round 15-18 :
1 sc in each st (48)
Info :
These even rounds build the body of the pumpkin. Keep stitches consistent and lay the work flat to ensure it's round and not ruffled.
Round 19 :
Prepare for ribbing: place stitch markers at every 6th stitch to mark 8 equal sections (48)
Round 20 :
*FPdc around the post of the next stitch, 5 sc; rep from * to end to create first set of raised ribs (48)
Round 21 :
1 sc in each st (48)
Round 22 :
FPdc around the post of each marked rib stitch to deepen ribs (48)
Info :
Ribbing is created by working front-post double crochet (FPdc) stitches over specific stitch posts at even intervals; these do not change stitch counts but create raised columns.
Round 23 :
1 sc in each st (48)
Round 24 :
Work FPdc around post stitches to define ribbing again (48)
Round 25 :
1 sc in each st (48)
Round 26 :
Switch to BLO for next round: 1 sc in each st BLO (48)
Round 27 :
(2 sc, dec) x 12 (36)
Info :
Begin a very gentle decrease to slightly flatten the outer edge so the pumpkin sits slightly indented within the cream frame later on. Continue stuffing lightly if making any three-dimensional accent; these are flat so no stuffing usually necessary.
Round 28 :
(1 sc, dec) x 12 (24)
Round 30 :
Fasten off leaving long tail for joining. Weave tail around remaining stitches and pull to close very slightly for a flattened center if desired
Info :
Block each pumpkin motif flat to same diameter before joining into the runner. Aim for a finished pumpkin diameter of approximately 12-14 cm depending on your gauge.
— Pumpkin Rib Detail (surface texture) :
Round 1 :
With Pumpkin Orange, use 3.5mm hook to work a round of sl st around the edge of the pumpkin to create a crisp border. Work evenly (48)
Round 2 :
*Ch1, FPdc around a post where marked at every 6th stitch, ch1 between each FPdc, rep around to make 8 defined ribs (48 est)
Round 3 :
1 sc in each st (48)
Info :
FPdc ribs are purely decorative and count does not change. Use a tapestry needle to add light embroidery lines from center outwards to emphasize ribs if you prefer.
— Tiny 3D Pumpkin Accent (make multiple) :
Round 1 :
6 sc in magic ring (6)
Round 3 :
(1 sc, inc) x 6 (18)
Round 4 :
1 sc in each st (18)
Round 5 :
(2 sc, dec) x 4, 2 sc (14)
Info :
Stuff lightly with a small pinch of fiberfill to create a plump yet slightly squishy little pumpkin. Do not overstuff.
Round 6 :
(1 sc, dec) x 4, 2 sc (10)
Round 8 :
Fasten off leaving long tail. Using tail, run through each stitch on last round and pull tight to close, then wrap tail around pumpkin to create vertical ridges (6-8 wraps). Secure and hide tail.
Info :
Emulate the plump vertical sections of a real pumpkin by wrapping a length of yarn around the outside and securing at the top, forming small vertical indentations. Add a short brown stem with a knot or tiny tube of single crochet.
— Layered Flower Applique (make 4) :
Round 1 :
6 sc in magic ring with dark brown (6)
Round 2 :
Inc in each st (12)
Round 3 :
Switch to light orange. *(Ch2, sl st into next st) x 6 to form base picot ring (12 loops)
Round 4 :
With light orange, in each loop: (sc, hdc, dc, hdc, sc) to make 6 small petals (6 petals, petal base counts do not change)
Info :
Work petals into the chain-loop bases you made; keep tension consistent so petals lay flat. Fasten off and attach light orange center later.
Round 5 :
With cream yarn, join in back of flower and work round of 12 sc in back loops around petal bases for a second layer (12)
Round 6 :
In each back-loop sc: (sc, hdc, dc, hdc, sc) to form 6 large outer petals (counts remain consistent)
Round 7 :
Fasten off and weave ends. Optionally add a round of slip-stitch picots around edge with cream for extra definition.
Info :
Block each flower flat. Flowers are layered: small center, medium orange petals, larger cream petals to create the sunflower look seen in photos.
— Leaves and Curly Vines (make many) :
Leaf Round 1 :
Ch 8, sc in 2nd ch from hook, hdc, dc, tr, dc, hdc, sc to end; fasten off (leaf length ~6-7 sts)
Leaf Round 2 :
Make 2 sets in Olive: one set slightly larger by ch10 and adding an extra tr in center for layered look
Info :
Leaf shaping: use slip stitch and single crochet along the base to stiffen leaf. Make about 3-5 leaves per flower cluster and vary size for realism.
Vine Round 1 :
With olive, chain 30-40 depending on desired curl and work alternating sc and ch3 loops to produce coils. For curly tendrils, ch20 then work 3 sc in each ch2 across to curl naturally.
Info :
To make a spiral vine: ch 30, in 3rd ch from hook work 3 sc, *skip 1 ch, 3 sc in next ch* rep to end - the strip will naturally curl into a spiraled tendril.
— Lacy Background Panel (make 1 long panel) :
Row 1 :
With cream yarn, ch 96 (or adjust multiple to suit measurement), join with sl st to form long oval foundation taking care not to twist
Row 2 :
Ch3 (counts as dc), dc in each ch around to establish a firm border; join to top of ch3 (96)
Info :
This foundation chain will be the internal length matching four pumpkin motifs spaced evenly. Adjust the chain multiple by the circumference of one pumpkin plus spacing. The example uses 96 for a pattern with four pumpkins approximately 12 cm across with small spacing.
Row 3 :
Switch to star cluster body: *ch3, sk 1 st, (dc, ch2, dc) in next st (cluster made), ch3, sk 1* repeat across to create airy 3D star clusters. Join at end.
Row 4 :
Ch1, sc in each cluster top and in ch3 spaces to stabilize row; join (maintain even stitch count across; approx 96)
Row 5 :
Repeat Row 3 to create alternating lattice rows for height; continue repeating rows 3-4 until lattice reaches desired width so pumpkins can be set within apertures (suggest 16-20 such rows)
Info :
Make sure the lattice is wide enough so each pumpkin can sit inside a circular opening created later. The star cluster creates the open lacy motif visible in the photos.
Row 6-24 :
Continue alternating star cluster rows and stabilizing sc rows (approx 20 total repeats) until panel height allows for the pumpkins to be evenly spaced vertically
Row 25 :
Create circled openings for pumpkins: mark positions and in those rounds work around the circular pumpkin edges with 1 sc in each st to form recessed wells. Use tapestry needle to measure and align pumpkin edges to wells.
Info :
The panel integrates open star clusters and a solid border row to hold the pumpkins. Blocking and pinning the pumpkins into position before sewing is essential for even alignment.
— Joining Pumpkins to Panel :
Step 1 :
Pin each blocked pumpkin into marked circular wells on the lattice panel, spacing consistently to match photos (approx 3-4 cm between pumpkins).
Step 2 :
Sew each pumpkin to the cream panel using long tail from round 30 of pumpkin motif with matched color, using a whip stitch around the rim. Sew through both pumpkin edge and lattice border so the join is secure.
Info :
Make sure the pumpkin surface is centered within the well so the visible cream frame is even around the pumpkin. Use pins to hold in place while stitching.
— Assembling Flower Clusters on Pumpkins :
Step 1 :
Position the layered flower on the top-center of each pumpkin, slightly off-center toward the inner runner edge to mirror the photo layout.
Step 2 :
Sew the flower center, then tack down leaves in a fan around it. Add 1-3 small curled vines and one 3D miniature pumpkin per cluster; stitch stems securely.
Info :
Build the cluster by layering from back (largest leaves) to front (central small petal flower). Sew through the pumpkin motif and the lattice so the cluster is anchored to both elements.
— Border & Scalloped Edge :
Round 1 :
With cream, work 1 rnd sc evenly around whole runner edge to create a neat border; count should equal the total perimeter stitches (work evenly)
Round 2 :
Ch3, skip 1, sc in next st around to form small looped edge (approx counts vary depending on perimeter)
Info :
This establishes the foundation for the scallop. Keep tension loose enough that the edge will be flat and not wavy after scallop rows are added.
Round 3 :
Switch to Pumpkin Orange. In each loop: (5 dc, sl st in base) to create a large scallop; rep around for full scalloped edge.
Round 4 :
With cream, work sl st into each scallop base, then sc into the middle of each scallop for definition. Fasten off and weave ends.
Info :
Scallop color echoing pumpkin orange completes the visual loop with the pumpkin color. Block final runner to open star stitches and flatten scallops evenly.
— Finishing Touches and Blocking :
Step 1 :
Pin runner flat on blocking mat to the exact rectangular shape you want, stretching each scallop to an even size. Mist lightly with water and allow to dry completely.
Step 2 :
Weave in all ends securely and trim. Reinforce any heavy-stress joins with an extra round of short stitches behind the cluster.
Info :
Blocking not only evens the stitches and opens the lace motif but also sets the pumpkins into their rubbed-in recesses so they appear integrated rather than just sewn on.
Completing this runner brings a cozy, handcrafted autumn centerpiece into your home — each pumpkin and flower layered with care for a truly special finish. The combination of lacy background and textured appliques makes it ideal for seasonal display. I hope you enjoy every stitch as it comes together into this warm fall accent. 🍂🧶