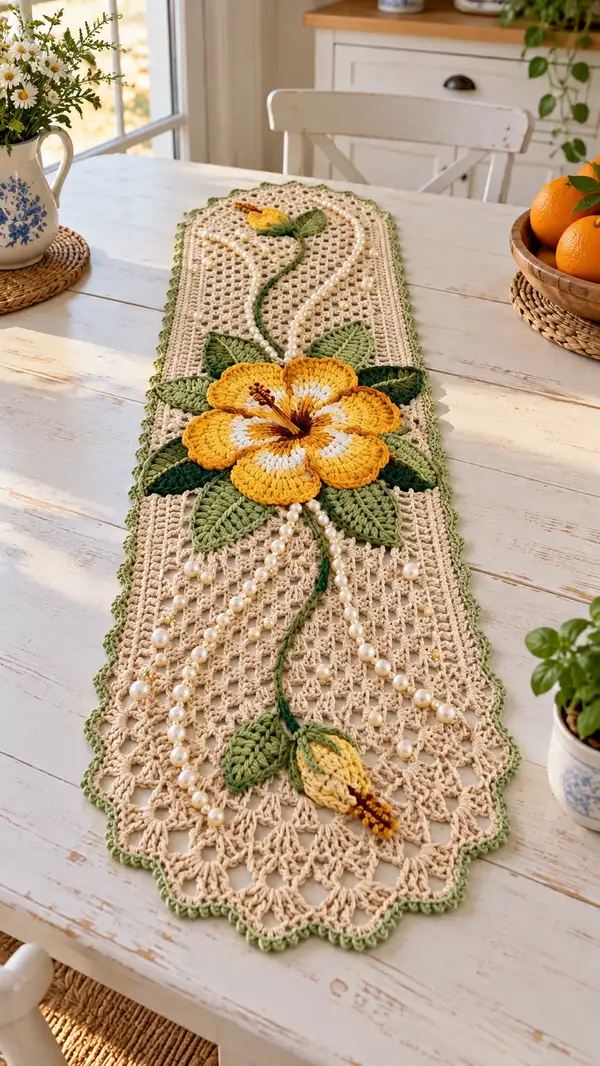
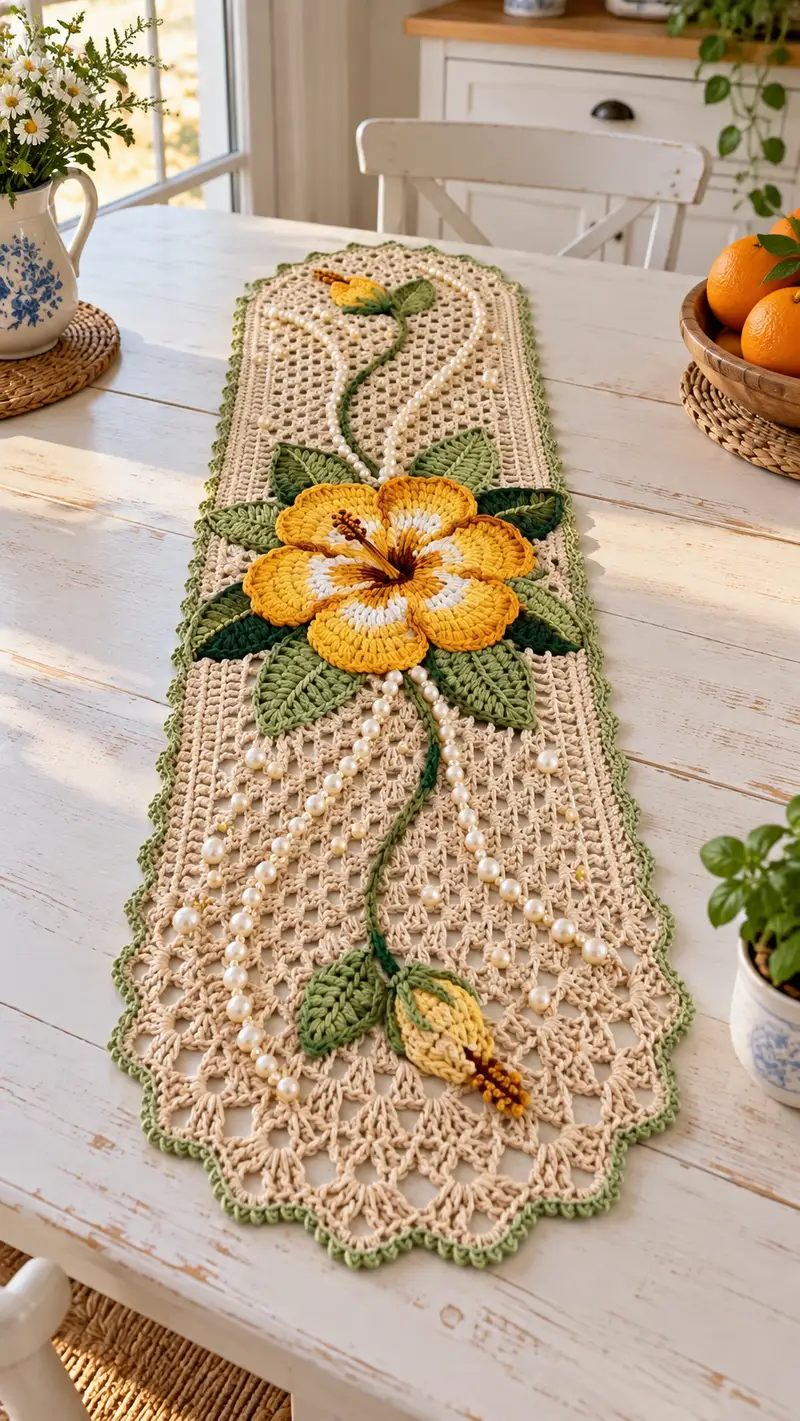
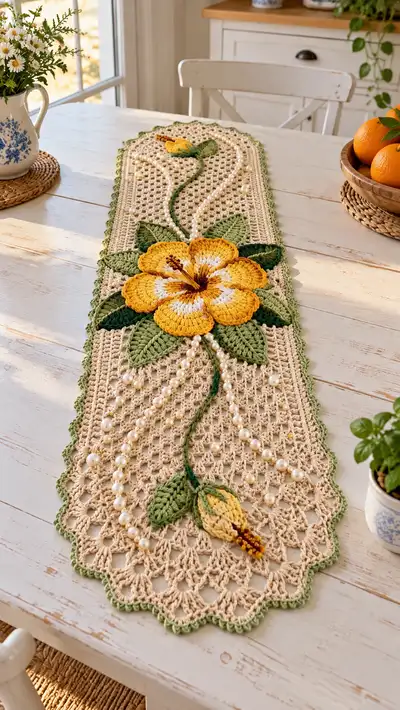
A romantic, vintage-inspired table runner featuring a large yellow hibiscus applique, layered green leaves, delicate pearl strands and an airy lace mesh body. Worked in soft cotton with a scalloped green border, this runner adds an elegant botanical focal point to any table. The pattern includes detailed applique, bead paths and step-by-step assembly so you can recreate the exact look from the photo.
Progress Tracker
0% Complete
— Base Panel (Mesh Body) :
Round 1 :
Ch 101 (foundation chain width). Row 1: Sc in 2nd ch from hook and in each ch across to end. Turn. (100 sc)
Info :
This foundation chain yields approximately 10-11 inches width with worsted cotton and 3.5mm hook; adjust chain in multiples of 4 + 1 to change width while keeping repeat alignment.
Round 2 :
Ch 3 (counts as dc), *sk 2 sc, (dc, ch2, dc) in next st (creates a shell with ch2 picot space), sk 2 sc, dc in next st*; rep from * to * across. Turn. (100 base points maintained)
Round 3 :
Ch 1, sc in first dc, *ch 3, sk ch2 sp and next dc cluster, sc in next dc; rep across to last dc, sc in top of turning ch. Turn. (mesh arches carried across; 100 sc positions counted)
Round 4 :
Ch 3, dc in same st, *ch 2, dc in next ch-3 sp, ch 2, dc in next sc; rep across to end; dc in top of turning ch. Turn. (100 dc locations)
Round 5 :
Ch 1, sc in each st and ch-space across, placing 1 sc in each dc and 1 sc in each ch-2 to tidy mesh. Turn. (100 sc)
Info :
Work loosely but evenly; keep consistent tension so the applique will sit flat. Place stitch markers every 20 sts to help count repeats across wide rows.
Round 6 :
Ch 4 (counts as tr), *sk 2 sc, (tr, ch2, tr) in next sc, sk 2 sc, tr in next sc*; rep across. Turn. (100 base repeat positions)
Round 7 :
Ch 1, sc in first tr, *ch 3, sc in next tr; rep across; sc in last tr. Turn. (100 sc placements)
Round 8 :
Repeat Round 4 exactly (creates alternate open grid). Turn. (100 dc positions)
Round 9 :
Repeat Round 5 to normalize the row edges and keep mesh tidy. Turn. (100 sc)
Round 10 :
Ch 3, dc in next stitch, *ch 2, sk ch-space, dc in next sc; rep across to create a uniform openwork mesh. Turn. (100 dc spaces)
Round 11-20 :
Repeat Rounds 3-10 twice (8 rows), maintaining the mesh pattern and keeping 100 stitches per row. After Row 16 you will have established the central long mesh section for attaching the hibiscus pieces. (100 sts each row)
Info :
Between Rows 12-15 mark the center line of the panel with a removable marker on both edges so you can align the hibiscus center exactly at the visual center later. Also measure total length so you can position the large flower off-center like the photo (about 2/3 from one end).
Round 21 :
Ch 1, sc in each st across to tidy edges and build stability (100 sc). Turn.
Round 22 :
Ch 3, *sk 2 sc, (2 dc, ch 2, 2 dc) in next sc (shell), sk 2 sc, dc in next sc*; rep across to create slightly larger shell grid. Turn. (100 positions)
Round 23 :
Ch 1, sc in each st and ch-space across to flatten the shell row. Turn. (100 sc)
Round 24-30 :
Repeat Rounds 10-23 as established, keeping stitch counts constant. Work a total of 30 mesh rows (including initial rows) or until runner reaches desired length minus allowance for scalloped ends and border - in the pictured runner aim for approximately 30-34 inches of mesh before end shaping. (100 sts per row)
Info :
At this stage block the main mesh panel lightly to exact rectangular dimensions before continuing to scalloped ends and border. Use pins to square the ends and allow to dry for 2-4 hours for best placement when applying applique pieces.
Round 31 (End scallop shaping begins - Left End) :
Work 12 rows as follows to shape the left scalloped terminal: Row A: Ch3, dc in next 40 sts, stop and turn; leave remainder unworked and place marker where scallop begins. This creates the narrowed end that will become scalloped. (40 dc)
Round 32 :
Ch1, sc across 40 sts to reinforce end. Turn. (40 sc)
Round 33 :
Ch3, *(3 dc in next st, sk 2, sl st) rep to end to start shell formation; end row with dc in last. (Approx. 13 shells across 40 sts)
Round 34 :
Ch1, sc across shells placing 1 sc in center of each shell to create a tidy scalloped row. Fasten off end section and repeat mirrored shaping at opposite end later. (13 sc)
Info :
These terminal scallops are worked on both ends to match the photograph. The center section remains open mesh for applique placement; you may work scallops first and re-join to main body later with sl st seams if preferred.
Round 35 :
Re-join yarn at main mesh at the other end and mirror rounds 31-34 so both ends have scalloped termination. When both ends are complete and blocked, go on to the border and edging. (scallops mirrored)
Info :
Keep main mesh slightly larger than final desired length until applique placement and edge are complete; blocking shrinks sizes slightly so allow 1-2% extra length.
— Border & Scalloped Edge :
Round 1 :
With light green yarn, join at an outside corner with sl st. Round 1: Ch1, work 1 sc evenly around the entire runner working 1 sc into every row-end (the chain or dc at ends) and placing 3 sc into each scallop tip to keep scallop definition. When you reach the long sides, work 1 sc in each indicated edge stitch across. Join with sl st. (approx. 420 sc total depending on length)
Info :
Use stitch markers on each corner and at even spacing along sides to keep count and symmetry. Do not pull edge tight—aim for a smooth frame around the mesh.
Round 2 :
Ch 3 (counts as dc), *sk 1 sc, (2 dc, ch 2, 2 dc) in next sc, sk 1 sc, dc in next sc*; rep along straight edges and place (5 dc) in each scallop tip to make shells. Join with sl st. (Border shells spaced evenly).
Round 3 :
Ch 1, sc in each dc and ch-space across, placing additional 2 sc in each scallop valley to keep scallop shape. Join with sl st. (approx. 420 sc)
Round 4 :
Ch 3, dc in next 2 sts, *ch 1, sk 1, dc in next 3 sts; rep across to shape shallow scallops along straight sides.* At each corner work (dc, ch2, dc) to turn. Join. (consistent counts)
Info :
Edge rounds use BLO on Round 5 to create a decorative ridge where the applique will sit; this helps hide join stitches when sewing the hibiscus down.
Round 5 :
Ch1, 1 sc in each st BLO around entire runner, placing 3 sc in each scallop tip to maintain shape. Join. (approx. 420 sc)
Round 6 :
Final picot scallop: *Ch3, sl st in 3rd ch from hook to make small picot, sk 2 sc, sl st in next sc*; rep around to create the delicate green picot scallop edge seen in the photo. Fasten off and weave ends. (final decorative edging complete)
Info :
Keep edge tension consistent; this final picot adds the finished look. If you prefer a larger scallop, work (5 dc, sl st) in each scallop valley instead.
— Large Hibiscus Applique (Make 1) :
Round 1 :
Using golden yellow, 6 sc in magic ring. (6)
Round 2 :
6 inc (12) (work 2 sc in each st). (12)
Round 3 :
(1 sc, inc) x 6 (18)
Round 4 :
(2 sc, inc) x 6 (24)
Round 5 :
(3 sc, inc) x 6 (30)
Info :
This small disc forms the base for petal attachment and creates the central cup of the flower. If you want a subtle white center highlight, switch to cream for rounds 1-3 and then change back to yellow for shaping.
Round 6 :
Ch 1, sc in each st around (30). Fasten off yellow and join a slightly darker golden yellow for petal shaping. (30)
Round 7 :
To create template for 5 petals: Ch3, sc in next 6 sts (forms first petal base), *sl st to next st, ch3, sc in next 6 sts; rep until 5 petals formed. Fasten off. (5 petal bases)
Info :
Petal count is 5 to match the photo. You will crochet each petal individually into those base loops; pin each petal in place and adjust curvature before final sewing.
Petal (Make 5; work into each petal base) - Round 1 :
Join yarn at petal base: ch 1, 1 sc in base st, ch 2, 2 dc in next st, 1 tr in next, 3 tr in next (creates fullness), 1 tr in next, 2 dc, ch2, sc in base opposite to mirror. (petal outline created)
Petal - Round 2 :
Rotate and work 2 sc in each ch-2 corner, *(2 dc, 2 tr, 3 tr cluster, 2 tr, 2 dc) into the wide top of petal* to build layers; finish with sc in root. This yields a petal with a layered ruffled edge. (approx. 28 sts per petal)
Petal - Round 3 :
Switch to darker amber/yellow for outer edge: BLO 1 sc in each st around petal for a raised ridge, then work 6 picot-like loops across top by (ch4, sl st in 3rd ch) spaced evenly. Fasten off and weave end. (edge finished)
Info :
If you prefer a flatter petal, omit the tr clusters and use only dc clusters; for a more dimensional look add a small amount of polyester fiberfill into center of each petal before fastening off to make them slightly domed.
Round 8 :
Assemble petals around the central disc: place petals evenly, overlap slightly, and baste them in place with sewing thread. Use whip stitch through the base of each petal and the center disc for a secure join. After basting, sew more thoroughly through two rows to anchor. (flower assembled)
Round 9 (Stamen Cluster) :
Using dark brown thread, make 10-12 small knots or French knots on a length of sewing thread to form stigma tips, and anchor them into the center with several stitches. Alternatively, crochet small 10-ch cords, knot, and tack into flower center. Secure firmly and tuck ends under the center. (stamen attached)
Info :
Work small eyes of cream or white in the center if desired for highlight. The brown stamen is sewn into the central magic ring and tied off underneath to hide knots.
— Leaves (Make 6: layered arrangement) :
Leaf - Round 1 :
Make 6 leaves in two sizes (4 large, 2 small). Large leaf: Ch 12. Row 1: Sc in 2nd ch from hook and next 4 ch, hdc in next 2, dc in next 3, work 3 dc in last ch to create tip; continue working down opposite side: dc in next 3, hdc in next 2, sc in next 4. Sl st to join into a flat leaf. (approx. 26 sts)
Leaf - Round 2 :
Join medium green, BLO 1 sc around edge of leaf making 2 sc in tip to keep shape; at center spine (on wrong side) add 5 evenly spaced sc to create a ridge that will look like a raised vein. Fasten off. (leaf edge completed)
Small Leaf :
Ch 8; repeat shaping scaled by working fewer dc (use 1 dc top) and fewer edge sc; finish with same ridge in center using hdc. (small leaf approx 16-18 sts)
Info :
Make leaves in two greens by alternating light and mid-tones; slightly block each leaf with pins to shape the curve so leaves look natural when appliqued. For a layered look, place darker leaves beneath lighter ones like in the photo.
Leaf - Round 3 (Vein Embroidery) :
With darker green thread, using stem stitch or a simple running stitch, embroider a central vein from base to tip and 3-4 short diagonal veins on each side. Knot and hide ends on wrong side. (veining added)
Info :
Leaves should be slightly curved; during sewing, bend slightly and secure with short mattress stitches at the base so they lift off the mesh slightly for dimension.
— Stem and Vine (Work as Crocheted Cord) :
Round 1 :
Using dark green yarn, ch 3, sc in 2nd ch from hook and in last ch to form beginning short cord; then 3 sc in each chain across until you have a length of cord approximately 20-24 inches for the long curving vine pictured. Fasten off leaving long tail. (cord length variable)
Info :
Crocheted cord technique: alternatively work an i-cord with 3-4 sts in a round using short rows to create a firm, tubular stem. Keep cord moderately firm but flexible to sew into curves.
Round 2 :
Using a tapestry needle, 'twist' the cord slightly and tack at intervals to the mesh along the marked center line so it forms the two graceful curves shown in the photograph. Secure with small stitches under the cord only, not through the cord, to avoid flattening.
Info :
Plan the path of the cord before sewing: in the photo the cord creates mirrored S-curves with bead strings attached along outer contours. Use pins to hold shape while adding applique leaves and flower.
— Bud (Make 1 Hanging Bud) :
Round 1 :
Ch 6, work 1 sc in 2nd ch from hook and next 3 chs, 3 sc in last ch, then work back along opposite side sc in next 3 chs, sl st to join (oval bud base). (approx. 10 sc)
Round 2 :
Ch 1, sc around bud adding 1 sc in tip to increase and shape into teardrop; work 2 sc together at base to slightly close. (approx. 12 sc)
Round 3 :
Switch to light yellow and work 1 sc around, then dec 2 sts evenly to close tip slightly; leave tail for sewing. Add a small tuft of dark brown at the tip with embroidery to mimic anthers. (bud shaped)
Info :
Attach bud to one end of the green cord with a few tight stitches so it dangles; secure further with a small drop of fabric glue if required (test glue on scrap first).
— Bead Strands (Pearl Chains) :
Round 1 :
Prepare three pearl bead strands in varying lengths: Strand A ~ 12 beads, Strand B ~ 18 beads, Strand C ~ 22 beads using sewing thread or fine beading thread. Knot at both ends and add a small reinforced loop for sewing through.
Round 2 :
Layout bead strands along both curves produced by the green cord and pin carefully. The beads are sewn through the mesh in spaced intervals so each bead rests in a ch-space of the mesh to appear integrated. Secure each bead loop with 3 tiny stitches through yarn and bead loop. (beads secured)
Info :
Use creamy pearl beads in graduated sizes for the cascading effect. Sew the larger beads near the flower base and reduce size toward the ends to mimic natural drooping pearls.
— Small Details and Embellishments :
Round 1 :
Using contrasting dark yellow yarn, work a single round of tiny surface slip stitches around each petal (close to edge) to define edges and create the shadow lines visible in the photo. Work slowly to maintain even spacing. (surface detail)
Round 2 :
Lightly tack leaves into place with whip stitch at their bases on top of the cord, making sure the leaf points rest over the mesh spaces and not on the solid dc rows. Attach alternate leaves with a slight overlap to create the layered cluster under the flower. (leaves attached)
Info :
Use hidden stitches under petal bases to attach petals and keep visible join minimal; weave in ends toward center and bury them under the stamen cluster to hide them.
— Final Finishing Rounds (Touch-ups) :
Round 1 :
Inspect entire runner for loose ends or gaps. Re-tension any border sections that look loose by adding one extra sc in border valleys. This often adds 6-12 extra sts total and helps the runner lie flat. (minor adjustments)
Round 2 :
Block the final assembled runner: spray lightly with water, pin to exact rectangle, and allow to dry 8-12 hours. Re-shape scallops if needed and re-secure beads if any moved during blocking. (blocking completed)
Info :
Once dry, iron very gently on the wrong side using a pressing cloth if desired for an extra flat finish. Do not iron over beads or synthetic threads.
Round 3 :
Weave in all loose ends with yarn needle and trim. Inspect beads for security and reinforce any bead with an extra stitch through the mesh and bead loop. (project complete)
Info :
For a long-lasting finish, soak lightly in a mild soap solution and reshape, then air dry flat. Avoid machine washing due to pearls and delicate applique.
Completing this hibiscus lace table runner is a delightful blend of lacework and applique—every stitch builds the vintage botanical charm seen in the photo. The combination of airy mesh, dimensional petals and pearl details makes it a stunning centerpiece that invites compliments. I love how the green scalloped edge frames the runner, and how the golden flower becomes the focal point of the table. Enjoy the slow, satisfying process and then delight in setting it out for a special meal! 🧶🌼