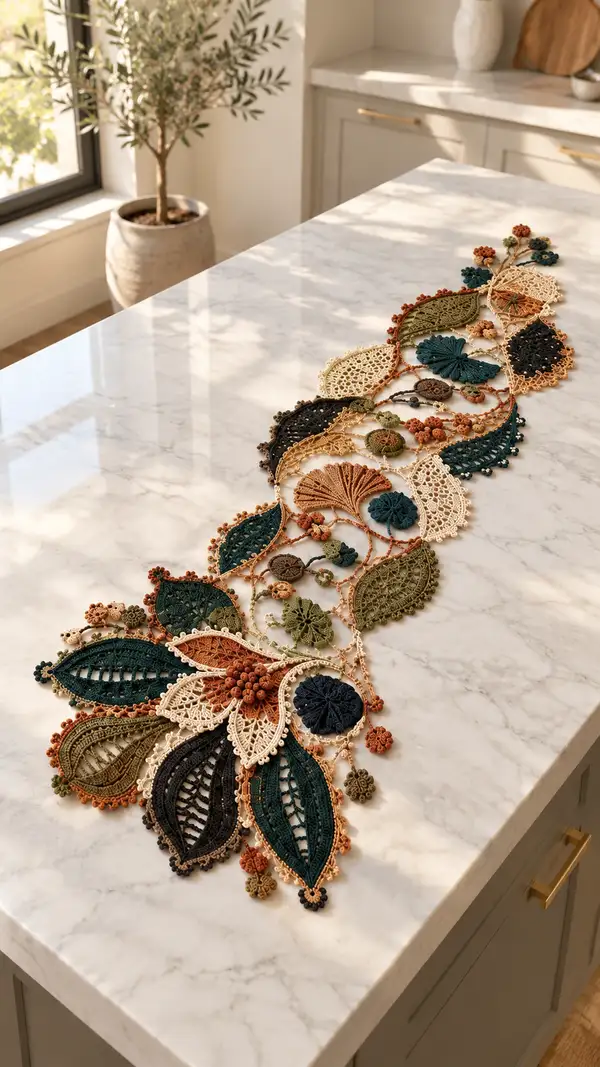
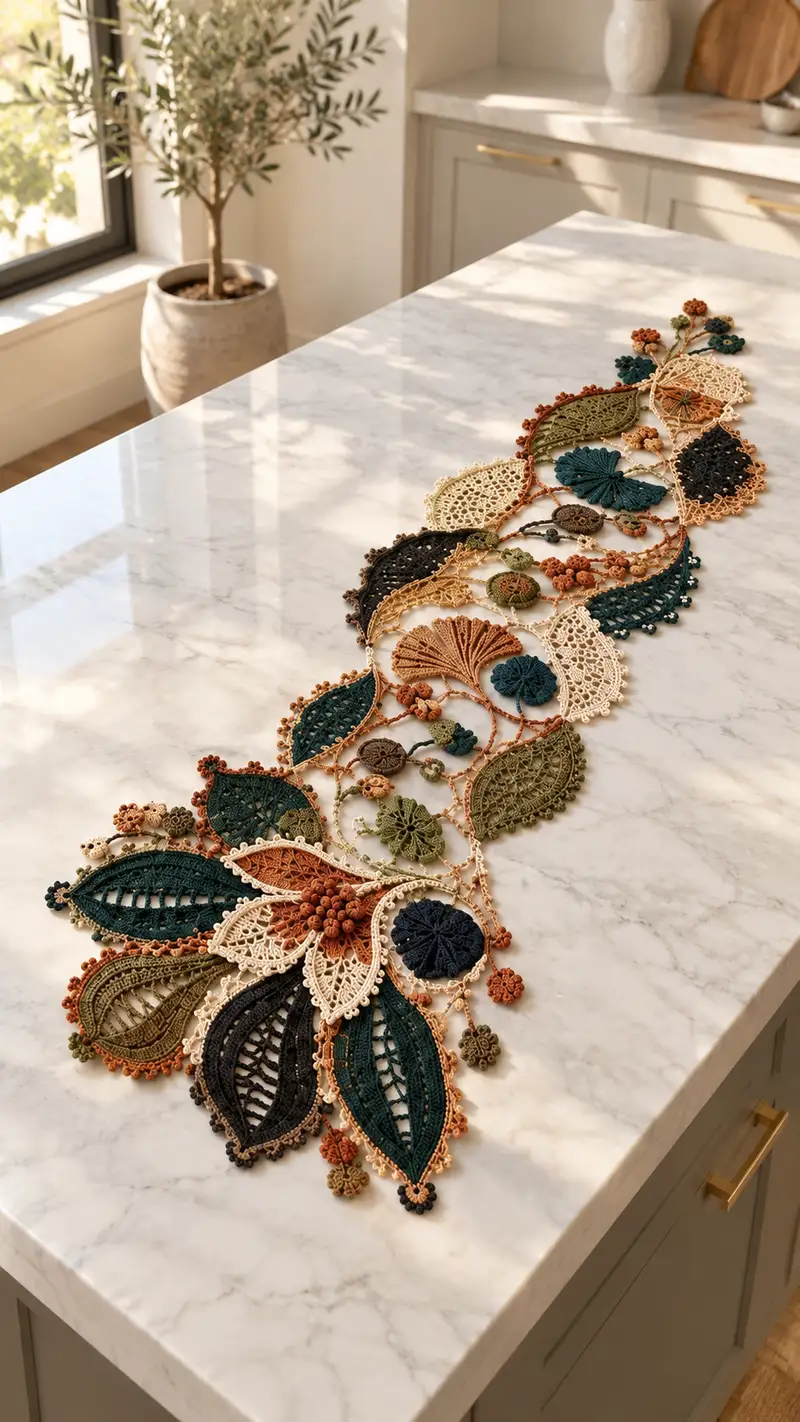
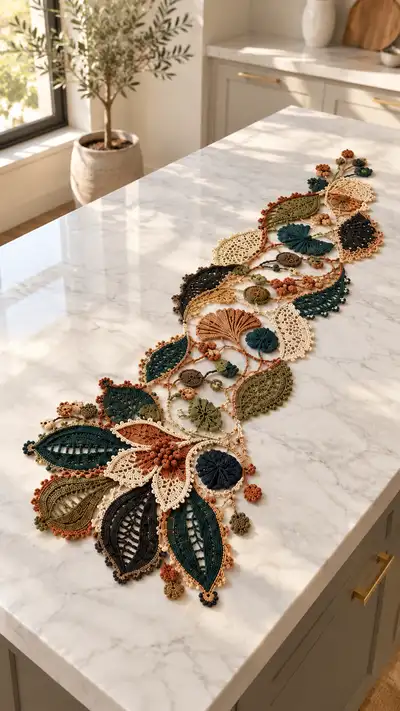
Create a stunning botanical lace table runner inspired by freeform Irish crochet motifs. This pattern recreates the layered leaves, fans, rosettes and tiny berry clusters pictured, using fine cotton thread and delicate picot edging. The runner is built from multiple modular motifs that are crocheted individually and joined with decorative chain-bridges for a light, airy finished look. Perfect for seasonal tables or as a year-round centerpiece.
Progress Tracker
0% Complete
— Notes & Gauge :
Info :
This pattern is modular. Make motifs slightly larger or smaller by changing hook size by one step. Gauge is not strict but motif size will change proportionally. For reference, one large leaf (Rounds 1-28) measures approximately 6.5" long when worked with 1.75mm hook and size 10 cotton thread.
Info :
Maintain consistent tension and block each motif flat as soon as it's finished and ends are woven in. Blocking aligns motifs for neat joining. Use rust-proof pins and a spray bottle to shape and hold motifs while drying.
— Large Leaf Motif (Make 6-8 depending on runner length) :
Round 3 :
(1 sc, inc) x 6 (18)
Round 4 :
(2 sc, inc) x 6 (24)
Round 5 :
(3 sc, inc) x 6 (30)
Info :
We are forming a central solid center for the leaf; keep rounds 1-5 worked tightly to create a stable foundation for later openwork.
Round 6 :
(4 sc, inc) x 6 (36)
Round 7 :
(5 sc, inc) x 6 (42)
Round 8 :
1 sc in each st (42)
Info :
Change to BLO for the next two rounds to create a raised midrib effect if desired: switch to BLO on Round 9.
Round 9 :
1 sc in each st BLO (42)
Round 10 :
1 sc in each st BLO (42)
Round 11 :
(6 sc, inc) x 6 (48)
Round 12 :
(7 sc, inc) x 6 (54)
Info :
Begin forming the tapered leaf tip: we'll add chains and tall stitches for lacy veins. Keep stitch count increases even to maintain symmetry across the midline.
Round 13 :
*Ch 3 (counts as tr), skip next st, dc in next, ch 2, sk 2 sts, sc in next; rep from * around to maintain 54 base loops; adjust last repeats to end with a sc in the base (54 loops)
Round 14 :
Work 1 sc around each ch-space and st (54)
Round 15 :
(8 sc, inc) x 6 (60)
Round 16 :
1 sc in each st (60)
Info :
To create the openwork 'rib' effect, we will work alternating 1 ch-3 loops anchored by scs on either side. This gives the elongated leaf appearance when blocked.
Round 17 :
*Ch 3, skip next 2 sts, sc in next 1; rep from * around (approx. 20 ch-3 loops and corresponding scs; total foundation remains 60 including loops)
Round 18 :
Into each ch-3: work (dc, tr, dc) to form a tall 'vein'; sc in each sc between ch-3 loops (60)
Round 19 :
1 sc in each st (60)
Round 20 :
(7 sc, dec) x 6 (54)
Info :
Begin outer scallop shaping: we'll shape the pointed tip and work decorative picot edging shortly. Start blocking the motif lightly to check symmetry.
Round 21 :
(6 sc, dec) x 6 (48)
Round 22 :
(5 sc, dec) x 6 (42)
Round 23 :
1 sc in each st (42)
Round 24 :
To form pointed leaf tip: (3 sc, dec) x 6 (36)
Round 25 :
(2 sc, dec) x 6 (30)
Round 26 :
(1 sc, dec) x 6 (24)
Round 27 :
12 sc, ch 6, skip next 6 sts, sc to mirror the other side forming a central picot bridge; reposition and continue around (24 + 6 chains for tip)
Round 28 :
Edging: *sc, picot (ch3 sl st in base), sc in next 4 sts; rep around to decorate the outer edge. Fasten off and weave ends. Block flat, stretching the chains and picots to shape.
Info :
Fasten off leaving a 12-15" tail for joining later. Block each leaf to exact shape and pin firmly while damp. Use starch if you want an especially crisp finish.
— Medium Leaf Motif (Make 6-8) :
Round 3 :
(1 sc, inc) x 6 (18)
Round 4 :
(2 sc, inc) x 6 (24)
Round 5 :
1 sc in each st (24)
Round 6 :
(3 sc, inc) x 6 (30)
Info :
Introduce an open lattice: this motif uses elongated chain loops for airy texture. Keep stitches even to make joining predictable.
Round 7 :
*Ch 4, skip next st, sc in next st; rep around to create 10 ch-4 loops and 10 sc anchors (approx. 30 base loops)
Round 8 :
Into each ch-4: (hdc, dc, hdc); sc in each anchor sc (30)
Round 9 :
1 sc in each st (30)
Round 10 :
(4 sc, inc) x 6 (36)
Round 11 :
1 sc in each st (36)
Round 12 :
(5 sc, dec) x 6 (30)
Round 13 :
(3 sc, dec) x 6 (24)
Round 14 :
1 sc in each st (24)
Round 15 :
Edging: *sc, picot, sc in next 2 sts; rep around. Fasten off leaving 10-12" tail for joining.
Info :
Block gently to fan the lattice open and make sure all picots are uniform. Arrange which side will be the 'top' when planning placement in the runner.
— Fan / Petal Motif (Make 6-9) :
Round 3 :
(1 sc, inc) x 8 (24)
Round 4 :
1 sc in each st (24)
Round 5 :
Ch 2, *(3 dc in next st, ch 1) repeat across to form fan ribs; work a sc into the base between fans (24)
Info :
Fans form a scalloped, shell-like structure. Block with pins between fan points to create crisp separation for a ruffled look.
Round 6 :
Round of sc: 1 sc in each st and in each ch-1 space around to tidy edge (approx. 30)
Round 7 :
*Ch 3, sl st at base of each fan to create a small looped fringe; rep around. Fasten off leaving joining tail.
Round 8 :
Optional surface detail: using contrast color, surface sl st across fan ribs to add raised veins. Fasten off and block.
Info :
Make petals in cream or rust to create focal points. When placing, alternate petal orientation for a natural look.
— Round Rosette Medallion (Make 5-7) :
Round 3 :
(1 sc, inc) x 6 (18)
Round 4 :
1 sc in each (18)
Round 5 :
*(ch 3, sl st in next st) x 6 to create 6 small loops. Fasten yarn and rejoin in first loop.
Round 6 :
Into each loop: (5 dc, sl st into base) to create petal; rep around leaving 6 petals (approx. 30 dc total)
Round 7 :
1 sc around entire rosette to tidy (30)
Round 8 :
Decorative round: *ch 5, sl st into space between petals; rep to create lacey ring (6 loops)
Round 9 :
Into each ch-5 loop: (sc, picot, sc) to give small clusters; rep around. Fasten off and weave ends. Block flat.
Info :
Rosettes act as focal joins between leaves and fans. Use bold colors for contrast or muted tones for a subtle look.
— Small Clustered Berry Motif (Make 12-18) :
Round 3 :
12 sc around (12)
Round 4 :
To create bobble texture: *ch 1, work 5 dc cluster (yarn over 5 times, insert, pull up each time, close cluster), sl st in next st; rep around to produce small nodules (approx. 6-8 bobbles)
Round 5 :
1 sc around to secure bobbles (approx. 24)
Round 6 :
Fasten off leaving 8-10" tail for sewing into cluster groups.
Info :
Sew grouped bobbles into tiny clusters of 3-5 for a realistic berry cluster. Use thread tails to stitch clusters into place on the runner during assembly.
— Small Round Motif / Eyelet (Make 8-12) :
Round 3 :
Into each st: (sc, ch 2) repeat around to form airy eyelets; sl st to join (12 eyelet loops)
Round 4 :
In each ch-2 loop: (hdc, dc, hdc) then sc in each sc anchor; fasten off with tail for joining.
Info :
These small rounds are helpful to bridge larger motifs and break up negative space. Work them in contrast or same color as surrounding motifs.
— Connecting Chain Bridges & Join-As-You-Go Network :
Info :
All motifs are joined with a decorative chain system rather than sewing solid edges together. Work long chain bridges and small ring connectors so the runner remains flexible and airy. When joining, use long tails reserved from initial motifs or join with slip stitches using a matching color.
Bridge 1 Round 1 :
Attach yarn to motif A at an anchor point with a sl st. Ch 20 (or required length), sl st into a designated anchor point on motif B. Repeat to connect neighboring motifs into a flowing vine. Repeat for all planned connections.
Bridge 1 Round 2 :
Into each long ch-20 bridge: *sc into each ch for 10 chains, picot, sc remaining chains to tidy (20)
Info :
Adjust ch length to change spacing between motifs. Keep spacing consistent for a uniform runner or vary spacing for a more organic freeform look.
Bridge 2 Round 1 :
To create circular join points: ch 6, sl st to form ring, work 10 sc evenly around ring, sl st to join. Use these rings as hubs where 3-4 chain bridges meet.
Bridge 2 Round 2 :
Decorate ring edges with picots: *sc, ch3, sl st into base; rep around. Fasten off with tail to sew ring into place or use it directly as a connector between motifs.
Info :
When forming multi-branch junctions, tie off each branch before finalizing the ring to keep tension even. Consider alternating ring colors for visual interest.
— Leaf Inner Vein Detailing (Optional Surface Crochet on Leaves) :
Round 1 :
With contrast color, using surface slip stitch or thin slip stitch thread, follow the central chain of leaf from base to tip creating parallel 'veins' by working surface sl sts every 4-6 rows. Secure ends at base and tip with small knots and weave tails into back.
Info :
This adds subtle raised texture. Use a slightly lighter or darker shade of the base color for a natural effect. Keep surface stitches shallow to avoid puckering.
— Edge Motif: Picot Fringe & Final Border :
Round 1 :
After all motifs are joined, work a finishing border along the outermost chain and motif edges: attach yarn with sl st to an outer anchor, *sc in each visible stitch for 12 sts, picot, sc next 6 sts; rep across entire outer edge.
Round 2 :
Work a second finishing round: 1 sc in each st, and where the outer motif edge is scalloped, work (sc, ch3, sc) to emphasize lobes. Fasten off, weave ends, and block the entire runner to final dimensions.
Info :
If you prefer a heavier border, work an additional round of crab stitch (reverse sc) around the outer edge for a subtle twisted rope effect. This provides weight helping the runner lie flat.
— Finishing & Blocking Steps (Important) :
Info :
Once all motifs are joined and ends woven, block the entire runner on a flat surface. Pin motifs carefully to maintain intended shape and spacing. Lightly mist with water and leave to dry completely for hours (overnight recommended). Use starch spray for extra stiffness if required.
Info :
Weave in all tails on wrong side if visible; secure with a few small stitches through motif layers to stop tails from working loose. Trim close to stitches but not flush to avoid cutting yarn fibers that could later pull out.
Info :
Final pressing with steam at low temperature can further flatten chain bridges and secure the overall silhouette; use a cloth between iron and lace to protect delicate threads.
Info :
Care: Hand wash gently in lukewarm water with mild detergent. Reshape and block while damp. Avoid machine washing to preserve shape and picot edges.
Completing this botanical lace runner is a joyful journey through small, meditative motifs that together create a sophisticated centerpiece. Each leaf, fan and tiny berry adds personality and texture, and the join-as-you-go bridges let you design as you go. The final blocking step transforms individual motifs into a flowing, elegant runner that will brighten any table. Enjoy the process and the beautiful results—this piece makes a thoughtful handmade gift or a treasured addition to your home. 🧶🌿