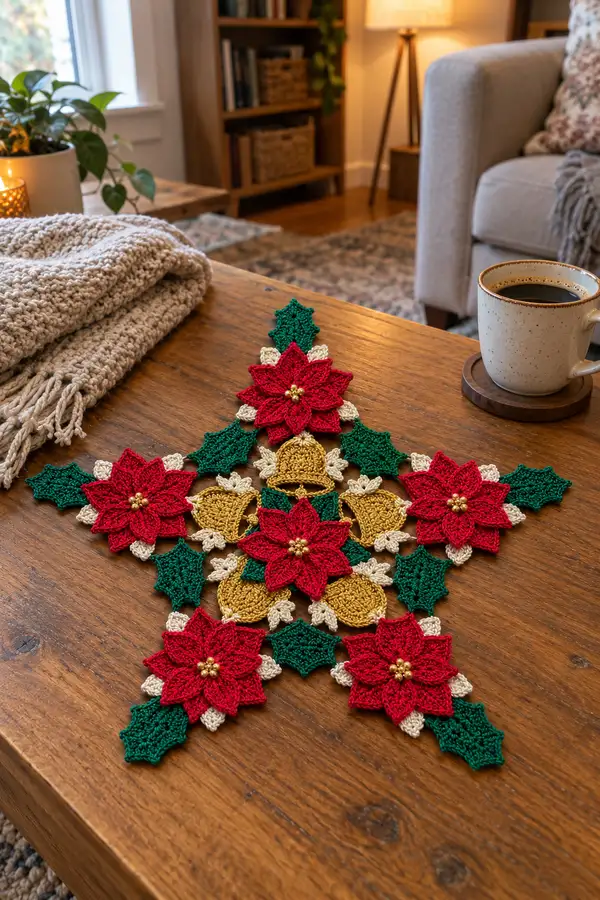
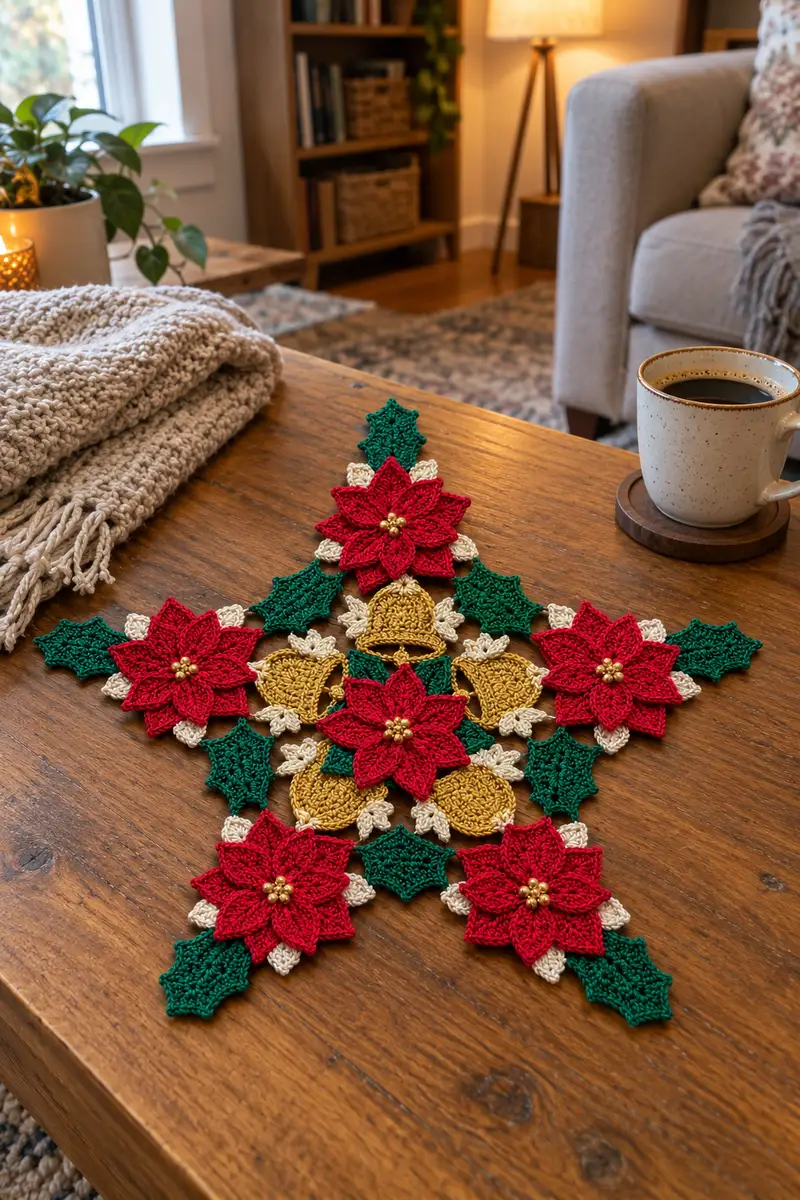
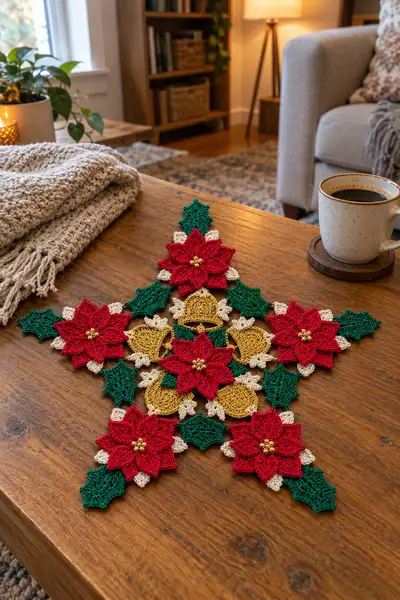
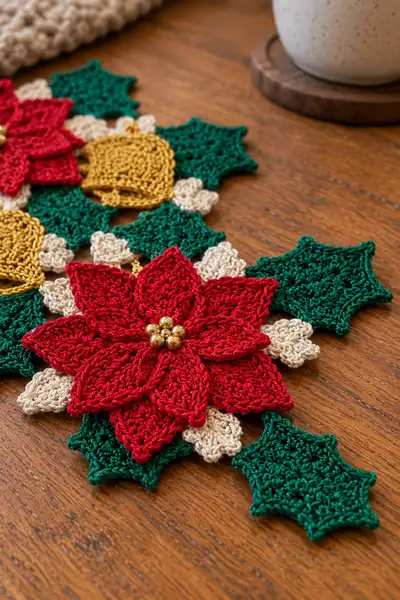
Create a festive five-point star centerpiece made from layered crochet poinsettias, bells, holly leaves and tiny cream spacer leaves. This elegant table decoration features rich red layered petals, deep green holly points, warm gold bells and tiny gold bead centers for a classic holiday look. Designed to be worked in modular motifs and joined into a star shape, this pattern provides clear step-by-step rounds and assembly guidance for a professional finish.
Progress Tracker
0% Complete
— Materials & Gauge :
Info :
Gauge is not critical for this decorative centerpiece but for a similar final size work in sport/DK cotton and use a 3.5mm hook. One finished star (5 points) measures approximately 18-20" across from point to point with the suggested yarn and hook.
— Notes :
Info :
All motifs are worked in continuous rounds unless otherwise noted. Do not join with sl st unless specified. Use stitch markers to mark the first stitch of each round. Block all motifs flat before assembly for best results.
— Large Poinsettia Petal (Make 8 petals per flower; Make 6 flowers total for star points and center) :
Round 1 :
6 sc in magic ring (6)
Round 3 :
(1 sc, inc) x 6 (18)
Round 4 :
(2 sc, inc) x 6 (24)
Round 5 :
(3 sc, inc) x 6 (30)
Round 6 :
1 sc in each st (30)
Round 7 :
1 sc in next 2 sts, hdc in next st, dc in next 3 sts, tr in next 4 sts, dc in next 3 sts, hdc in next st, 1 sc in remaining sts (30) — shape petal tip with taller stitches
Info :
Round 7 builds the rounded base-to-tip shape. Keep even tension so the tip remains flat and does not curl.
Round 8 :
1 sc in each st around (30)
Round 9 :
(2 sc, inc) x 7, 1 sc (37)
Round 10 :
1 sc in each st (37)
Round 11 :
Ch3 (counts as dc), dc in next 3 sts, tr in next 5 sts, dc in next 3 sts, ch2, sl st into center front st to create defined tip, continue 1 sc in remaining sts (37)
Info :
Use the sl st to slightly pull the tip inward to form a pointed look. If your yarn is very springy, use a smaller hook for rounds 7-11 to avoid flaring.
Round 12 :
1 sc in each st (37)
Round 13 :
(4 sc, inc) x 6, 1 sc (43)
Round 14 :
1 sc in each st (43)
Round 15 :
1 sc in next 3 sts, hdc in next 2 sts, dc in next 5 sts, tr in next 7 sts, dc in next 5 sts, hdc in next 2 sts, 1 sc in remaining sts (43)
Info :
Round 15 adds the pronounced petal veining and shape. Use BLO on this round if you prefer a raised vein effect; for raised veins work these increases in FLO instead.
Round 16 :
1 sc in each st (43)
Round 17 :
(5 sc, inc) x 7, 1 sc (50)
Round 18 :
1 sc in each st (50)
Round 19 :
Ch2, hdc in next 3 sts, dc in next 7 sts, tr in next 9 sts, dc in next 7 sts, hdc in next 3 sts, 1 sc in remaining sts (50)
Info :
At this stage the petal has a pronounced pointed tip and wider base. Keep rounds even; block flat along the curve of the petal after finishing to set the shape.
Round 20 :
Fasten off, leave 12" tail for sewing. Weave in end on wrong side after blocking.
— Small Poinsettia Petal (Inner layer) (Make 8 per flower; 6 flowers total) :
Round 1 :
6 sc in magic ring (6)
Round 3 :
(1 sc, inc) x 6 (18)
Round 4 :
(2 sc, inc) x 6 (24)
Round 5 :
1 sc in each st (24)
Round 6 :
1 sc in next 2 sts, hdc in next st, dc in next 3 sts, tr in next 3 sts, dc in next 3 sts, hdc in next st, 1 sc in remaining sts (24)
Info :
This inner petal layer is slightly smaller and tighter than the large petal. Use the 3.0mm hook for crisper edges if desired.
Round 7 :
1 sc in each st (24)
Round 8 :
(3 sc, inc) x 6 (30)
Round 9 :
1 sc in each st (30)
Round 10 :
Ch2, hdc in next 2 sts, dc in next 5 sts, tr in next 5 sts, dc in next 5 sts, hdc in next 2 sts, 1 sc in remaining sts (30)
Round 11 :
1 sc in each st (30)
Round 12 :
Fasten off, leave 10" tail for joining. Block flat, stack under large petals when assembling.
— Cream Spacer Leaf (Make 8 small leaves per flower; 6 flowers) :
Round 1 :
6 sc in magic ring (6)
Round 3 :
(1 sc, inc) x 6 (18)
Round 4 :
1 sc in next 2 sts, hdc in next 2 sts, dc in next 4 sts, hdc in next 2 sts, 1 sc in remaining sts (18)
Info :
These small cream leaves sit between large petals to give a lacy contrast. Use a tighter tension so they sit as a delicate spacer rather than flaring out.
Round 5 :
1 sc in each st (18)
Round 6 :
(2 sc, dec) x 4, 2 sc (14)
Round 7 :
1 sc in each st (14)
Round 8 :
Fasten off, leave 8" tail for sewing after blocking.
— Holly Leaf (Make 10 per star, for points and connectors) :
Round 1 :
6 sc in magic ring (6)
Round 3 :
(1 sc, inc) x 6 (18)
Round 4 :
(2 sc, inc) x 6 (24)
Round 5 :
1 sc in each st (24)
Round 6 :
Ch3, skip 1 st, sl st in next, ch3, return to body and sc in next 3 sts to create leaf lobe base (24)
Round 7 :
Work small scallops along edge: *(sc, hdc, dc) in next st, sk1* rep around for 6 scallops (24)
Info :
Use BLO on round 7 and 8 to make the hollies slightly cupped; this gives a realistic leaf profile that tucks under petals.
Round 8 :
1 sc in each st (24)
Round 9 :
(3 sc, dec) x 5, 3 sc (20)
Round 10 :
Ch1, sl st around edge to define points, fasten off leaving 10" tail. Block into sharp points with pins.
— Gold Bell Motif (Make 5 bells for inner star) :
Round 1 :
6 sc in magic ring (6)
Round 3 :
(1 sc, inc) x 6 (18)
Round 4 :
(2 sc, inc) x 6 (24)
Round 5 :
1 sc in each st (24)
Round 6 :
Ch1, 1 sc in next 2 sts, hdc in next 4 sts, dc in next 8 sts, hdc in next 4 sts, 1 sc in next 6 sts (24) — start bell curve
Info :
Work rounds 6-10 with slight increases or shaping to create the bell cup. Use a smaller hook for a tighter, bell-like curve if desired.
Round 7 :
(2 sc, inc) x 6 (30)
Round 8 :
1 sc in each st (30)
Round 9 :
Ch3, dc in next 4 sts, tr in next 6 sts, dc in next 4 sts, ch3, sl st across to create small loop at bell base (30)
Round 10 :
Working in FLO only for ribbed effect: 1 sc in each st FLO (30)
Round 11 :
Fasten off leaving 12" tail for attaching bell. If you want a hanging loop, use the tail to create a small chain loop and secure at back.
Info :
Optional: add a small bead or a tiny jingle bell at the inside bottom of the crocheted bell for sound. Sew it in before attaching bell to the star.
— Small Connector Leaf / Spacer (Make many for joining motifs) :
Round 1 :
6 sc in magic ring (6)
Round 3 :
1 sc in each st (12)
Round 4 :
Ch3, sl st into center to create small leaf lobe, rep around to make 6 tiny lobes; fasten off leaving long tail for joining.
Info :
These tiny cream leaves (or green connectors) are made in more than needed — they act as buffers and give a lacy feel to the assembled star.
— Center Poinsettia Hub (beaded cluster) :
Round 1 :
Ch6, join with sl st to form ring, ch1 (6)
Round 2 :
Work 6 sc into ring (6)
Round 3 :
(1 sc, inc) x 3 (9)
Round 4 :
1 sc in each st (9)
Info :
Thread beads onto thin thread or dental floss and stitch a cluster of 4-6 beads into the center of each finished poinsettia flower. Secure thread with backstitches on wrong side and weave ends.
Round 5 :
Fasten off, leave tail for sewing. Use a beading needle and thread to attach bead cluster centered on layered petals.
— Blocking & Finishing Motifs :
Info :
Block each motif flat. Pin petals and leaves into desired shapes on blocking mat and lightly spray with water or use a steam iron at low distance. Let dry fully. Blocking makes motifs easier to join and results in a flat centerpiece.
— Assembly Instructions (Joining motifs into five-point star) :
Info :
Layout all motifs on work surface in the star arrangement: five outer poinsettias spaced at the star points, one central poinsettia, five bells positioned between the points, and holly leaves filling outer gaps. Use pins to hold placement before sewing.
Round 1 :
Attach inner small petal layer to wrong side of large petals by aligning bases. Use whip stitch with long tail; make 8 attachment stitches spaced evenly around petal base. Repeat for all petals in each flower.
Round 2 :
Sew the cream spacer leaves between each pair of large petals on wrong side so that cream points show when layered. Use small invisible stitches, pinning each spacer first for symmetry.
Round 3 :
Sew bead cluster to center of each layered poinsettia. Thread beads on thin thread and tack through motif center several times to make beads sit snugly and evenly. Hide knot on wrong side and weave tail through 2-3 motifs for stability.
Round 4 :
With large star layout pinned, attach holly leaves around each poinsettia point: tuck leaf base under petal edges and sew with long tails to body motifs so seams are hidden. Use 4-6 small stitches per leaf base for security.
Round 5 :
Sew gold bells into the inner spaces of the star—each bell is attached by its tail at the top loop to the adjacent motif edges using whip stitch. Ensure bells face outward slightly for visual interest.
Round 6 :
Use small connector leaves or a thin chain of single crochet to bridge gaps and form the star outline. Join motifs by sewing through corresponding rounds on each motif so seams lie flat on wrong side.
Info :
Work slowly and pin often. Use matching thread color for nearly invisible seams. Keep motifs flat while sewing; if one piece shifts, block again before finishing seams.
Round 7 :
Reinforce main joins by going through adjacent motifs again with a second row of stitching if the centerpiece will be handled frequently.
Round 8 :
Weave all ends on wrong side at least 2" through stitches. If desired, secure a small amount of fabric glue on critical joins, allow to dry and trim close to work.
— Optional Edging (Add scalloped star edge) :
Round 1 :
With contrast color, join at any outer join point. Ch1, sc evenly around exposed edges of assembled star (approx 160-200 sc depending on final size)
Round 2 :
*Ch3, skip 2 sc, sl st in next sc* repeat around to create scalloped border. Adjust repeats so scallops land at star points nicely.
Info :
Edging adds a polished finish and hides small join imperfections. Work loosely to avoid flaring; a 3.5mm hook generally works well.
— Final Care :
Info :
Lightly steam or re-block if joins relax. Store flat wrapped in tissue paper. If using beads, avoid washing; spot clean with damp cloth only.
This star centerpiece is a joyful blend of classic holiday colors and hand-stitched detail — each layered poinsettia, holly leaf and gold bell comes together to form an heirloom-worthy table accent. I love that the modular approach lets you craft sections at your leisure, then assemble them all in one satisfying session. The finished piece is delicate enough to display under glass, yet sturdy enough to center your holiday table. 🧶✨🎁