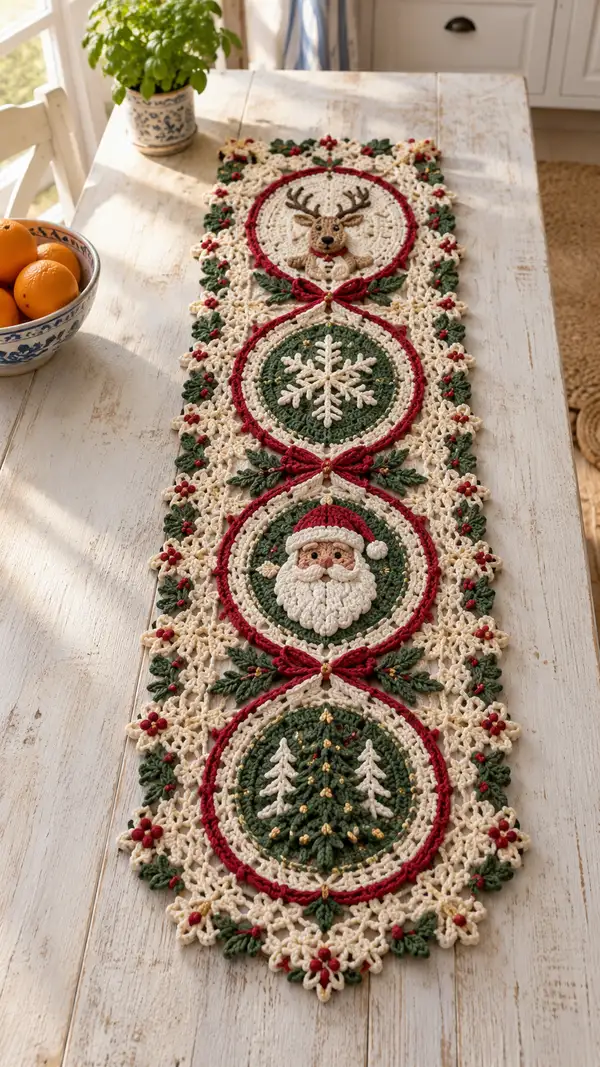
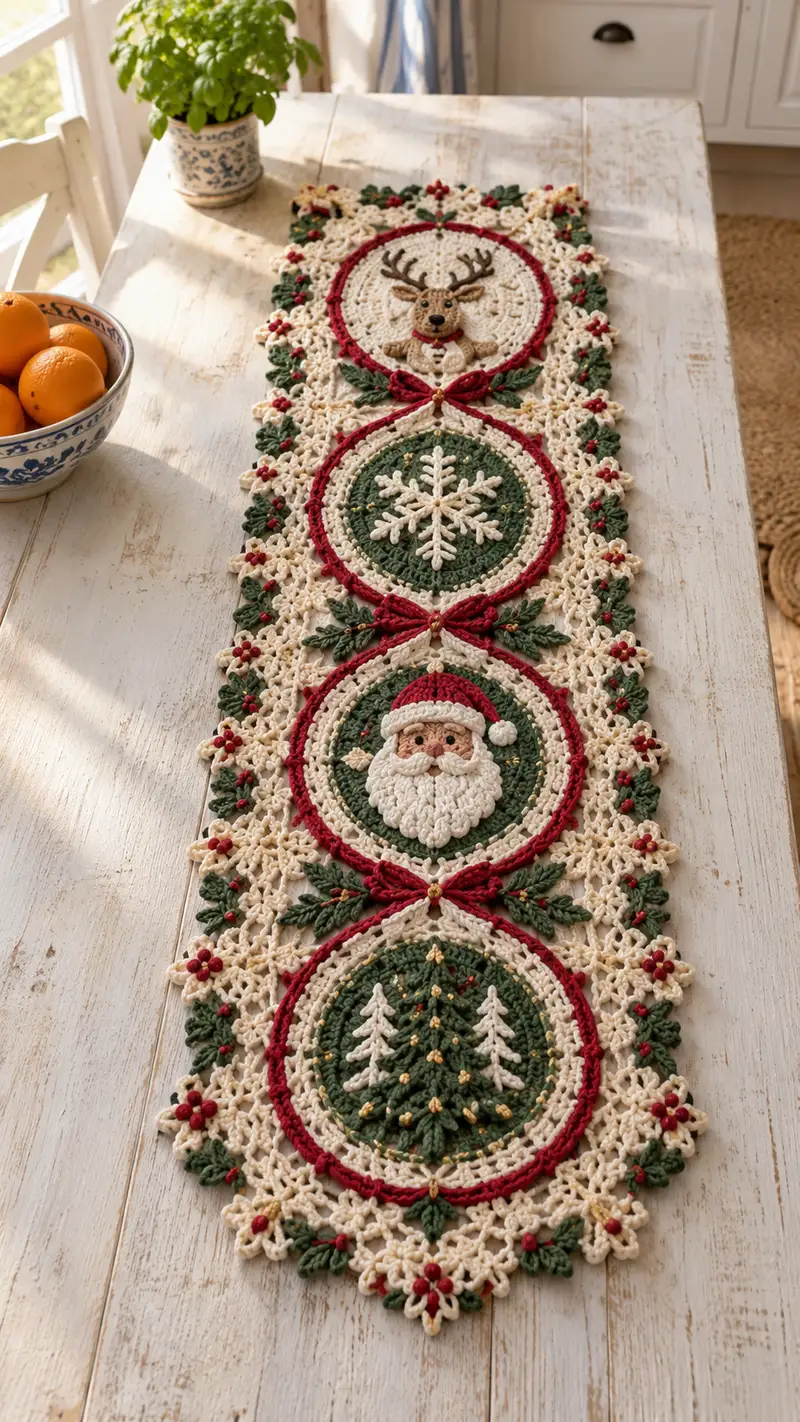
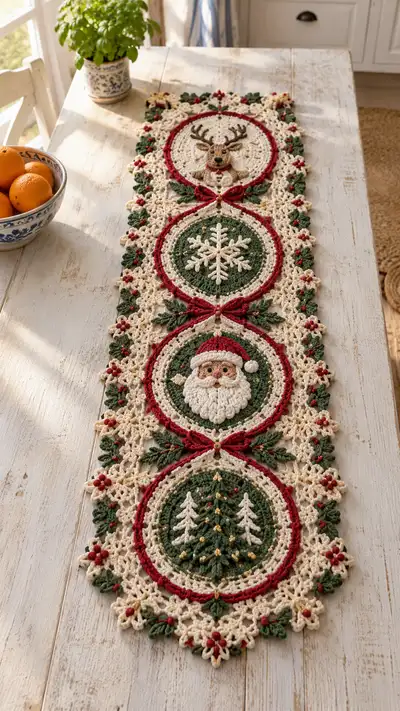
Create a festive, heirloom-quality table runner featuring four linked circular medallions: a decorated forest with trees, a jolly Santa, a snowflake, and a reindeer head — all framed in ivory lace, forest green leaves and deep red bows. The layered motifs combine textured puff and bobble stitches, surface embroidery, and delicate openwork to give a vintage, hand-crafted holiday look. Perfect for a long farmhouse table or dresser, this runner brings classic holiday cheer with rich color accents and dimensional applique9 details.
Progress Tracker
0% Complete
— Materials & Gauge :
Info :
Gauge is not critical for a table runner but aim for balanced tension so medallions align when joined. Using 3.5mm hook and worsted weight yarn the central medallions should measure approximately 16 cm (6.5 in) across when blocked. Adjust hook size if necessary to match measurements.
— Special Stitches & Notes :
Info :
Puff stitch (puff): Yarn over, insert hook, yarn over and pull up loop (repeat 3-4 times depending on puff size), yarn over and pull through all loops on hook, ch 1 to secure. For larger puffs use 4 pulls. Bobble stitch: complete 5 partial dc then close together. Use surface slip stitch to outline and add definition. Carry unused colors loosely along wrong side or weave in ends if not used for many rounds.
— Tree Medallion (lower circle) :
Round 1 :
Make 6 sc in magic ring (6)
Round 3 :
(1 sc, 1 inc) x 6 (18)
Round 4 :
(2 sc, 1 inc) x 6 (24)
Round 5 :
(3 sc, 1 inc) x 6 (30)
Info :
Change to Forest Green yarn now for background rounds. Carry Ivory inside if you will later work a contrasting outer ring, or fasten off and weave in if you prefer cleaner color changes.
Round 6 :
1 sc in each st (30)
Round 7 :
(4 sc, 1 inc) x 6 (36)
Round 8 :
1 sc in each st (36)
Round 9 :
(5 sc, 1 inc) x 6 (42)
Round 10 :
1 sc in each st (42)
Round 11 :
Join a contrast row: *sc in next 3, ch2, skip 1* around to create a delicate lacy ground; adjust repeats to fit (42 total, work pattern evenly)
Info :
Mark the top center of this medallion for tree placement. The central tree is worked as surface and layered pieces; pin leaves and tree tiers before attaching with surface stitches.
Round 12 :
sc around maintaining ch2 spaces as established (42)
Round 13 :
Switch to Ivory for inner ring: (3 sc, 1 inc) x 10 + 3 sc (48) — this evenly expands to create a ring for scrollwork
Round 14 :
1 sc in each st (48)
Round 15 :
Work 1 round in BLO with deep red to create inner trim: 1 sc BLO in each st (48)
Info :
Switch back to Forest Green for tree applique9. The tree is made of layered triangular tiers worked separately and sewn or surface-stitched to the center.
Round 16 - Tree Tier 1 (base) :
Ch 2, 3 dc in next st, *ch1, sk 1, 4 dc in next st* repeat to make a full round semi-circle base; adjust to visually center 3 evenly spaced tiers (work about 12 clusters)
Info :
Work tiers progressively smaller: Tier 2 place above Tier 1 with puff stitch edges to simulate branches. Use surface dc to attach tiers, hiding tails behind small stitches.
Round 17 - Tree Tier 2 :
Using Forest Green, make smaller cluster row: ch2, 3 dc in next cluster top, *ch1, 3 dc* across 8 clusters; fasten off leaving tail for sewing
Round 18 - Tree Tier 3 & Top :
Work tiny top cone: ch2, 5 dc in one spot then fasten off; sew centered at top of Tier 2
Round 19 - Decorating :
Attach small gold beads with short lengths of gold thread around the tiers: sew 12 beads evenly around the tree tiers using beading needle
Round 20 :
Work final contrast ring in Ivory: sc evenly around edge working picot shells every 6 sts to prepare for lace joining (48)
Info :
Block this medallion flat and pin tree tiers so everything lays evenly before joining to runner. Make 4 tree medallions for a runner with four panels or as many as pattern requires.
— Santa Medallion (third circle up) :
Round 1 :
6 sc in magic ring (6)
Round 3 :
(1 sc, 1 inc) x 6 (18)
Round 4 :
(2 sc, 1 inc) x 6 (24)
Round 5 :
(3 sc, 1 inc) x 6 (30)
Info :
Change to Forest Green for base background at Round 6. Work a few rounds of plain sc to build a disk before adding facial applique9.
Round 6 :
1 sc in each st (30)
Round 7 :
(4 sc, 1 inc) x 6 (36)
Round 8 :
1 sc in each st (36)
Round 9 :
Switch to Ivory for face circle: (5 sc, 1 inc) x 6 (42)
Round 10 :
1 sc in each st (42)
Info :
Santa's face components (nose, cheeks, mustache, beard, hat) are made separately and applied. Work them as small applique9 pieces, then use surface slip stitch and embroidery to position eyes and nose.
Round 11 - Nose Applique9 :
Using Light Tan, make a tiny round: 6 sc in magic ring (6), 6 inc (12), sl st and leave long tail for sewing. Stuff lightly with a tuft of fiberfill and sew to center of face at Round 10 area.
Round 12 - Cheeks (Make 2) :
Using light tan or soft pink, make 6 sc in magic ring (6), sl st, leave tail, flatten slightly and sew each cheek to either side of nose; secure firmly.
Round 13 - Mustache (Left) :
Ch 6, sc in 2nd ch from hook, hdc next, dc next 2, sl st to form a curved moustache segment; mirror for right side and sew below nose partially overlapping beard.
Round 14 - Beard Base :
Using Ivory, attach at lower face edge and work 12 dc clusters around lower half of face to create a raised beard base; fasten off leaving tail for attaching a layer of puff curls.
Round 15 - Beard Curls (multiple) :
Make approx 12-16 small puff clusters: puff (4 pull) in chosen stitches along beard base; secure each puff with slip stitch behind the puff to hold position, creating a full curly beard texture.
Round 16 - Hat Brim :
Using Ivory, work a narrow brim across top of face: sc around top edge for 2 rounds, then switch to deep red for hat body.
Round 17 - Hat Body :
Deep Red: work 4-5 rounds of sc increasing slightly to form a dome shape above the brim then decrease to shape hat top: (4 sc, 1 dec) x 6 to taper.
Round 18 - Hat Pom :
Ivory pom: puff (4 pull) in a small circle of 6 stitches, secure and sew to tip of hat. Add a small bead at center if desired.
Round 19 :
Work an outer ring in Ivory around entire medallion joining to the green background: sc evenly to reach 48 sts total; this produces a crisp border for later joining.
Info :
Use surface embroidery to stitch tiny eyes using black thread, and rosy cheeks with a few satin stitches in soft pink. Secure all applique9 pieces neatly using matching thread and weave tails through the backing so the front stays neat.
— Snowflake Medallion (second circle) :
Round 1 :
6 sc in magic ring (6)
Round 3 :
(1 sc, 1 inc) x 6 (18)
Round 4 :
(2 sc, 1 inc) x 6 (24)
Round 5 :
Change to Forest Green: 1 sc in each st (24)
Round 6 :
(3 sc, 1 inc) x 6 (30)
Round 7 :
Change to Ivory for snowflake background ring: 1 sc in each st (30)
Round 8 :
Work a decorative ring: *dc, ch2, sk2* around to create lacy spaces for the snowflake to sit upon (30 stitches adjusted to pattern)
Info :
The snowflake is worked as a separate applique9: create a small central star and 6 identical arms; attach to center with a few secure surface stitches. Use puff and picot edges for crisp points.
Round 9 - Snowflake Center :
With Ivory, ch4, sl st to form ring, ch3 (counts as dc), 11 dc into ring, sl st to join (12 dc total). Fasten off tail for sewing.
Round 10 - Snowflake Arms (Make 6) :
Attach at even points: ch6, 1 sc in 2nd ch from hook, hdc next, dc next 2, picot (ch3, sl st to last dc), sl st back to center. Repeat around to make 6 arms.
Round 11 :
Weave in ends and sew snowflake to medallion center. Add tiny gold beads at junctions of arms for sparkle (6 beads).
Round 12 :
Work outer ring in deep red around medallion: sc around in red forming a ridge (approx 36-40 sts depending on join); this becomes the inside of the red bow later.
Info :
Blocking is essential here: lay snowflake flat and pin points to open shape. When dry, sew in place to help points remain crisp.
— Reindeer Medallion (top circle) :
Round 1 :
6 sc in magic ring (6)
Round 3 :
(1 sc, 1 inc) x 6 (18)
Round 4 :
(2 sc, 1 inc) x 6 (24)
Round 5 :
(3 sc, 1 inc) x 6 (30)
Round 6 :
Switch to Ivory for outer ring: 1 sc around (30)
Round 7 :
(4 sc, 1 inc) x 6 (36)
Round 8 :
1 sc in each st (36)
Info :
Reindeer face is a layered applique9 composed of a tan face disk, darker brown muzzle, embroidered nose and eyes, and separate antlers worked in dark brown and sewn in place. Plan pieces before attaching.
Round 9 - Face Disk :
Light Tan: 6 sc in magic ring (6), 6 inc (12), (1 sc, 1 inc)x6 (18), sl st and leave long tail for sewing; lightly stuff face disk.
Round 10 - Muzzle :
Darker Tan: 6 sc in magic ring (6), 6 inc (12), sl st, flatten slightly and sew to lower center of face disk, embroider nose in dark brown and highlight with small black bead.
Round 11 - Eyes :
Embroider small French knots for eyes in dark brown or use 4mm beads sewn securely at a position approximately 6-8 stitches above the muzzle center. Space evenly across the face disk.
Round 12 - Ears (Make 2) :
Light Tan: ch4, sc in 2nd ch from hook, hdc next, sl st into base to form small ear. Make 2 and sew to top sides of face disk, slightly angled outward.
Round 13 - Antlers (Make 2) :
Dark Brown: ch8, sc across forming a narrow branch, then use short picot branches off the main chain to simulate tines. Make 2 identical and sew behind face disk so antlers sit above and behind the head.
Round 14 :
Sew face disk to green medallion center (work 12 evenly spaced stitches through both layers) and fasten off long tail securely.
Round 15 :
Work an Ivory outer ring of 48 sc around medallion to match other circles; add deep red ridge in BLO to create the red circular trim for bows to attach to later.
Info :
When sewing antlers, position them so they do not obscure the circle border after joining. Reinforce with extra stitches if this piece will be handled often.
— Circle Trim & Red Bows (applied between medallions) :
Round 1 :
For each bow start: ch 12, sc in 2nd ch from hook, hdc next 4, dc next 2, hdc next, sc next, sl st to finish; gather into center to shape bow and secure with small band of deep red and a gold bead at center.
Round 2 :
Sew bow to the junction between two medallions at the red ring position; reinforce by sewing through both medallion borders with 6-8 small stitches.
Info :
Make 3 bows (one between each set of circles) and add deep green leaf applique9s on each side of bow: ch6, sl st back, work 3 hdc on one side to form a small leaf; make two per bow and attach symmetrically.
— Lace Join-As-You-Go Border (Ivory) :
Round 1 :
With Ivory attach to outer edge of first medallion: ch4, 1 tr in same st, *ch2, 1 tr in next 3 sts, ch2, join to adjacent medallion edge when needed* continue to form scalloped loops around edge.
Round 2 :
Work picot shells into each scallop: (sc, ch3, sl st into sc, sc) to give star-like points. Keep tension even so scallops sit flat when blocked.
Round 3 :
When reaching adjacent medallion, use join-as-you-go technique: instead of ch spacing, sl st into the corresponding outer stitch of the other medallion and continue shell. This creates neat joins without sewing later.
Info :
Pin medallions in place before joining. Work slowly at each junction to make sure bows and leaves sit in their intended positions and the overall runner remains straight.
Round 4 :
After joining all four medallions, continue to perimeter: add leaf clusters in Forest Green between lace scallops using 3 hdc leaves placed at even intervals; add tiny red bobbles for berries (bobble stitch of 5 partial dc closed together) at leaf junctions.
Round 5 :
Complete edge by working a final round of sc with small picot points every 8 sts to create a finishing edge and to hold beads more securely if you sew additional embellishments.
Info :
Weave in ends of all joining stitches at the back after blocking. Press carefully with a steam iron at low setting by placing a damp cloth over lace, or use a steamer to avoid crushing puff details.
— Extra Embellishments & Surface Embroidery :
Round 1 :
Use surface slip stitch in deep red to outline each medallion inner ring: starting at a junction, work surface sl st around 1-2 rounds to emphasize the red circle before adding the bow.
Round 2 :
Embroider veins onto each leaf with two strands of forest green yarn using back stitch; add 5-8 tiny gold beads in clusters to look like ornaments on tree medallion and scattered sparkles on green backgrounds.
Info :
To secure beads permanently, sew through bead holes twice and bring needle back inside stitches; tie off and bury ends deep inside medallion bulk to hide knots.
— Finishing Rounds & Blocking :
Round 1 :
Once all medallions are joined, wet-block the entire runner to final dimensions. Pin to a flat surface stretching very slightly to even out rows and to square corners of lace points. Allow to dry fully (24 hours).
Round 2 :
After dry, press lightly if needed and trim any loose threads. Apply small fabric glue dots behind beads if you anticipate heavy use to lock them in place.
Info :
Label your runner with a small fabric tag on the back if giving as a gift, including washing instructions: hand wash cold, lay flat to dry. Avoid machine washing to preserve beads and raised textures.
— Pattern Repeat & Scale Notes :
Info :
You can scale the runner by adding additional medallions (make additional circle units and join in the same lace pattern), or reduce by making only two or three medallions. For a table-width runner add medallions until you reach desired length, keeping symmetry by ending with matching border elements.
Round 1 :
If you want a larger central motif, use hook one size larger for the medallion backgrounds and smaller hook for applique9 pieces to maintain crisp details.
Info :
Keep a notepad of rounds and color choices for each medallion so that if you create multiple runners the color placement and bead pattern remain consistent across projects.
This festive runner brings together classic holiday colors and layered texture to create a show-stopping centerpiece. With careful assembly, delicate blocking and a few golden accents, each medallion becomes a tiny scene to admire. Working it in sections means progress is steady and satisfying — a perfect project to make ahead of the holiday season. 🎁🧶 Display with seasonal greenery and candles for instant table magic!