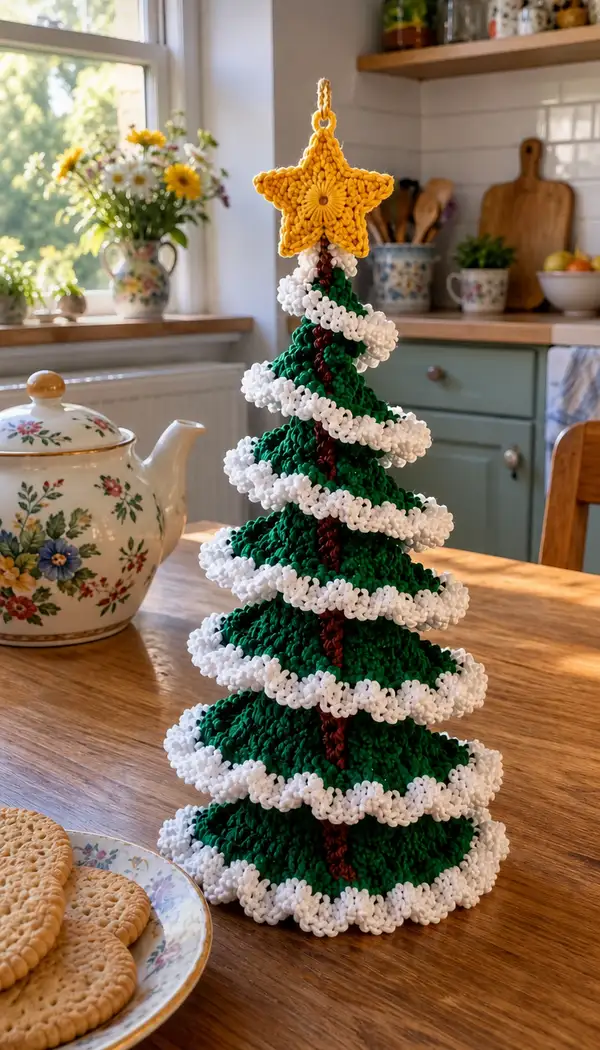
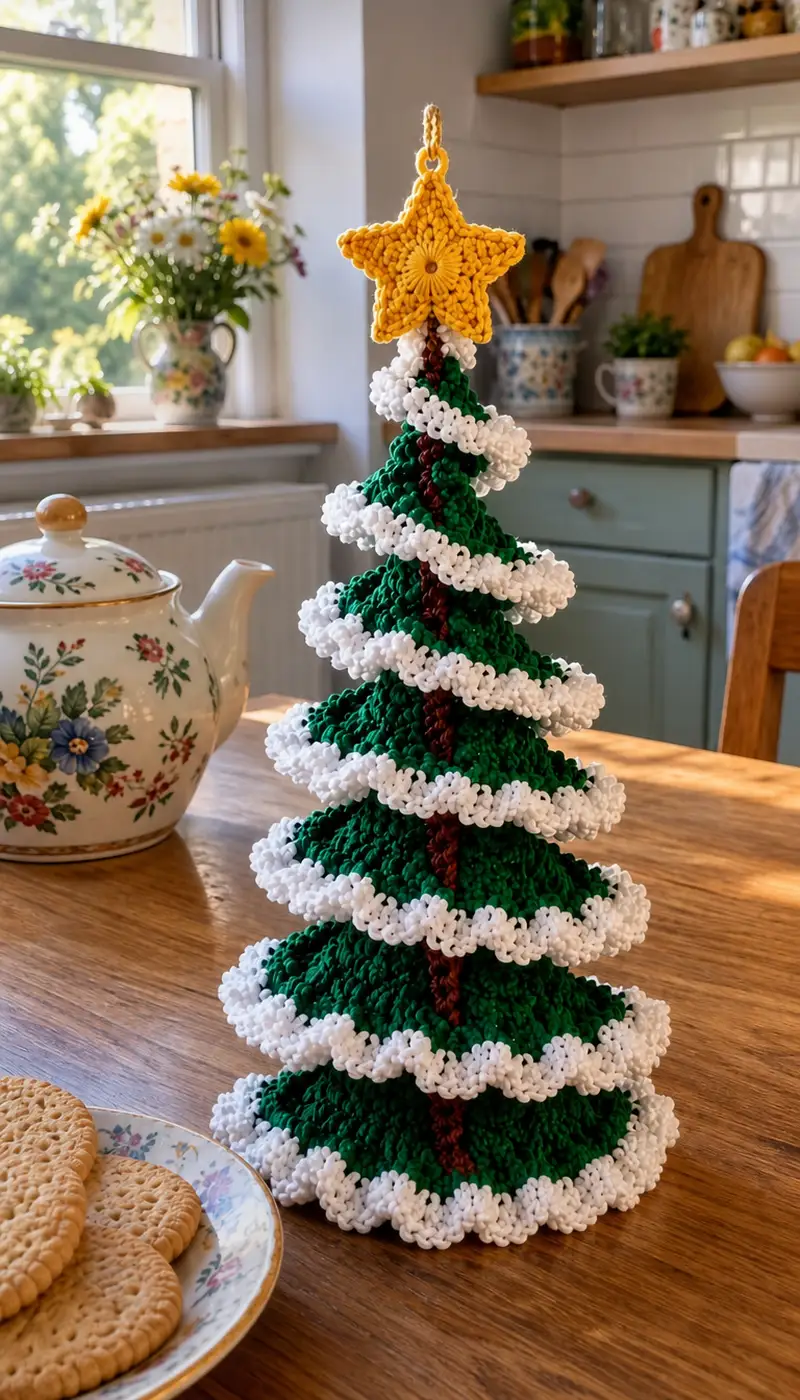
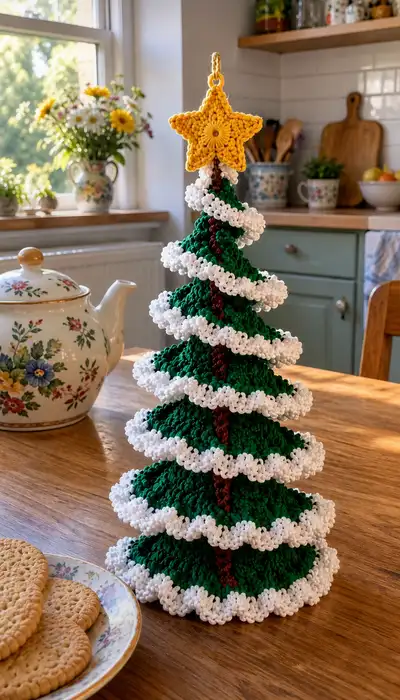
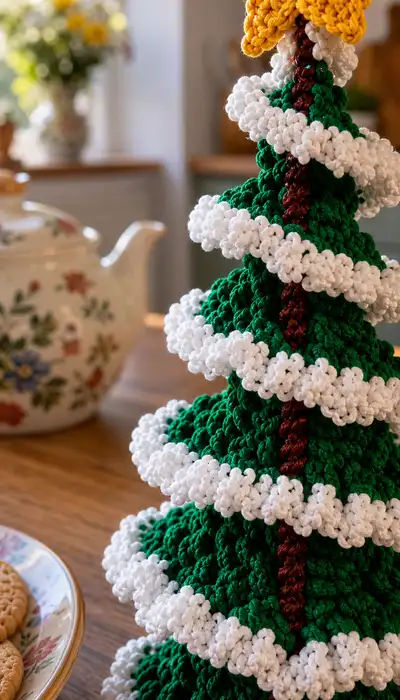
A charming tabletop layered spiral Christmas tree with lush green tiers, snowy white ruffled garland, a rustic brown trunk and a bright yellow star topper. This cozy decorative piece stitches up into a sturdy freestanding tree perfect for mantel, table or windowsill display. The spiral garland and star loop make it ready to hang or display, and the design uses textured stitches and stacked tiers for a handcrafted, vintage-inspired look.
Progress Tracker
0% Complete
— Materials & Gauge :
Info :
Gauge is not critical for this decorative piece but results shown use bulky yarn with 6.0mm hook. Finished height is approximately 11-13 inches (28-33 cm) tall including star. If you change yarn weight, the tree will scale proportionally.
— Notes & Techniques :
Info :
All rounds are worked in continuous spiral unless otherwise noted. Use a stitch marker to mark the first stitch of each round and move marker up as you work. When joining tiers to trunk, use long tails and a blunt tapestry needle to invisible-seam for neat joins. Ruffle garland is made separately and sewn on in a spiral. Puff and bobble clusters are made with 3 or 4 partial yarn-overs pulled through as described in the garland section.
— Base Disc (foundation for Bottom Tier) :
Round 1 :
6 sc in magic ring (6)
Round 3 :
(1 sc, inc) x 6 (18)
Round 4 :
(2 sc, inc) x 6 (24)
Round 5 :
(3 sc, inc) x 6 (30)
Round 6 :
(4 sc, inc) x 6 (36)
Round 7 :
(5 sc, inc) x 6 (42)
Round 8 :
(6 sc, inc) x 6 (48)
Round 9 :
(7 sc, inc) x 6 (54)
Round 10 :
(8 sc, inc) x 6 (60)
Info :
This base disc creates a wide, flat starting point so the bottom tier flares neatly. If your yarn/hook gives a smaller gauge, you can add one more increase round (9 sc, inc) x 6 to reach 66 for a wider base.
— Bottom Tier (Tier 1) :
Round 1 :
Join to base edge with sl st into any st on Round 10 of base (or work this tier as a separate disc by beginning with 6 sc in MR then follow increases as below). For clarity we show Tier worked separately: 6 sc in magic ring (6)
Round 3 :
(1 sc, inc) x 6 (18)
Round 4 :
(2 sc, inc) x 6 (24)
Round 5 :
(3 sc, inc) x 6 (30)
Round 6 :
(4 sc, inc) x 6 (36)
Round 7 :
(5 sc, inc) x 6 (42)
Round 8 :
(6 sc, inc) x 6 (48)
Round 9-12 :
1 sc in each st (48) — work 4 rounds even to build height for the tier (Rounds 9,10,11,12)
Info :
These rounds form a shallow cone surface. When making tiers you can slightly vary the number of even rounds to make the tier taller or shorter; shorter tiers give a compact, spiky tree while taller tiers give a softer silhouette.
Round 13 :
(6 sc, 1 dec) x 6 (42)
Round 14 :
(5 sc, 1 dec) x 6 (36)
Round 15 :
(4 sc, 1 dec) x 6 (30)
Round 16 :
(3 sc, 1 dec) x 6 (24)
Info :
Create a small inner opening at the top of this tier that will slip over the trunk. These decreases form a rim you will use to stack the next tier. Do not fasten off; leave long tail for sewing when you attach to trunk if working tier separately.
— Second Tier (Tier 2) :
Round 1 :
6 sc in magic ring (6)
Round 3 :
(1 sc, inc) x 6 (18)
Round 4 :
(2 sc, inc) x 6 (24)
Round 5 :
(3 sc, inc) x 6 (30)
Round 6 :
(4 sc, inc) x 6 (36)
Round 7 :
(5 sc, inc) x 6 (42)
Round 8 :
(6 sc, inc) x 6 (48)
Round 9-11 :
1 sc in each st (48) — work 3 rounds even to create the flared skirt area for Tier 2
Info :
Tiers are intentionally slightly smaller than the tier below so they stack inward and create the conical profile. Before fastening off, hold Tier 2 over Tier 1 to test fit and adjust even rounds if necessary.
Round 12 :
(6 sc, 1 dec) x 6 (42)
Round 13 :
(5 sc, 1 dec) x 6 (36)
Round 14 :
(4 sc, 1 dec) x 6 (30)
Round 15 :
(3 sc, 1 dec) x 6 (24)
Info :
Leave a long tail for sewing; when stacking tiers you will sew the inner rim of the tier to the trunk so each tier sits securely. If you prefer to join tiers directly to each other, align edges and whip stitch through both rims.
— Third Tier (Tier 3) :
Round 1 :
6 sc in magic ring (6)
Round 3 :
(1 sc, inc) x 6 (18)
Round 4 :
(2 sc, inc) x 6 (24)
Round 5 :
(3 sc, inc) x 6 (30)
Round 6 :
(4 sc, inc) x 6 (36)
Round 7-9 :
1 sc in each st (36) — work 3 rounds even for short tier height
Round 10 :
(4 sc, 1 dec) x 6 (30)
Round 11 :
(3 sc, 1 dec) x 6 (24)
Round 12 :
(2 sc, 1 dec) x 6 (18)
Info :
Tier 3 top rim will be smaller than Tier 2. Continue leaving tails for sewing; test the fit on the trunk tube as you go so tiers stack smoothly.
— Fourth Tier (Tier 4) :
Round 1 :
6 sc in magic ring (6)
Round 3 :
(1 sc, inc) x 6 (18)
Round 4 :
(2 sc, inc) x 6 (24)
Round 5 :
(3 sc, inc) x 6 (30)
Round 6-7 :
1 sc in each st (30) — 2 rounds even
Round 8 :
(3 sc, 1 dec) x 6 (24)
Round 9 :
(2 sc, 1 dec) x 6 (18)
Round 10 :
(1 sc, 1 dec) x 6 (12)
Info :
Smaller tiers create the layered look. Make sure to weave in initial tails for a tidy inside of the tree so the trunk can slide in smoothly.
— Fifth Tier (Tier 5) :
Round 1 :
6 sc in magic ring (6)
Round 3 :
(1 sc, inc) x 6 (18)
Round 4 :
(2 sc, inc) x 6 (24)
Round 5-6 :
1 sc in each st (24) — 2 rounds even
Round 7 :
(2 sc, 1 dec) x 6 (18)
Round 8 :
(1 sc, 1 dec) x 6 (12)
Info :
At the top tiers the opening becomes small; these will sit near the star area. If you prefer a taller top cone, add more even rounds before decreasing.
— Sixth Tier (Tier 6) :
Round 1 :
6 sc in magic ring (6)
Round 3 :
(1 sc, inc) x 6 (18)
Round 4-5 :
1 sc in each st (18)
Round 6 :
(1 sc, 1 dec) x 6 (12)
Info :
Work neat decreases to maintain the cone profile. Close center slightly but leave opening to slide over trunk top as required by your design.
— Seventh Tier (Top Cone) :
Round 1 :
6 sc in magic ring (6)
Round 3 :
(1 sc, inc) x 6 (18)
Round 4 :
1 sc in each st (18) — 1 round even to make a small cap
Info :
The top cone will be covered by the star. Fasten off leaving a long tail for sewing star base to the top cone or slip the star over the trunk if you prefer a removable topper.
— Trunk / Central Column :
Round 1 :
6 sc in magic ring with brown yarn (6)
Round 3 :
1 sc in each st (12)
Round 4-24 :
1 sc in each st (12) — work 21 rounds even to create a long tube approximately 3-4 inches (8-10 cm) tall; add rounds for taller trees
Info :
If you want a rigid trunk, insert a tight-diameter tube (paper towel core) or a strip of cardboard inside while sewing tiers on, or route a length of florist wire through the tube before finishing. For a soft trunk, do not insert anything; the trunk can be curved gently for a whimsical look.
Round 25 :
1 sc in each st (12) — fold bottom edge for a neat base if desired; fasten off leaving long tail for sewing to bottom tier
— White Ruffle Garland (Make 1 long spiral strip) :
Round 1 :
Ch 60 with white yarn (or longer if you want more wraps). Turn, work 3 dc in 2nd ch from hook, *skip 1 ch, 3 dc in next ch; rep from * across (approx 88-90 little clusters depending on chain length)
Round 2 :
Ch 1, sc in first st, *bp (make puff: yo, insert hook, yo, pull through, insert hook, yo, pull through — repeat 3 times until 5 loops on hook, yo and pull through 5 loops), sl st into base between puffs to anchor, sc in next stitch*; rep across to create ruffled edge (this builds a textured ruffle)
Round 3 :
Ch 1, sc evenly across back edge of chain to create a sturdy strip for sewing: 1 sc in each st across (approx 88-90 sc)
Info :
Make garland as long as needed to wrap around tree 4-6 times depending on desired fullness. Alternatively work the garland directly onto the tiers by crocheting puff clusters around edges of tiers in a spiral.
Round 4-7 :
Repeat Round 2 on both sides if you want a double-ruffle effect — make as many rows of puffs as desired to reach fullness. Fasten off leaving long tail for sewing the beginning and end to trunk/tier base.
— Star Topper (Make 1) :
Round 1 :
With yellow yarn, 6 sc in magic ring (6)
Round 3 :
(1 sc, inc) x 6 (18)
Round 4 :
(2 sc, inc) x 6 (24)
Info :
This small disc will become the center of the star. Use a smaller hook (4.0mm) for a tighter star if desired. Stuff lightly with fiberfill to give the star body.
Round 5 :
Ch 3, sl st into next stitch to create five small points: *(Ch 3, sl st in next st) — repeat 4 more times for 5 loops (work evenly so loops are spaced)*
Round 6 :
Working into first ch-3 loop: (sc, hdc, dc, hdc, sc) across loop to form first point; sl st to center stitch; repeat into each loop to form all 5 points (star shape forming)
Round 7 :
Work a round of sc around the whole star joining the bases of points: 1 sc in each base st and 2 sc in point tips where needed to balance shape (approx 40-44 sc depending on shaping)
Round 8 :
Optional: (sl st, ch 1, sc) around outer edge to define points; add small picot at tips by Ch 3, sl st in base if you want decorative points
Info :
Stuff star lightly before finishing edging. Fasten off leaving a long tail to sew star onto the top cone or to stitch star to the trunk. You may also stitch a small loop of chain to the star top center now for hanging.
Round 9 :
Make a small hanging loop: Ch 8, sl st in first ch to make ring; attach ring to top tip of star with slip stitches and secure with tapestry needle. Fasten off leaving long tail for sewing in.
— Attachment Loop (optional extra hanger) :
Round 1 :
With yellow or matching yarn, ch 6, sl st in first ch to form loop. Join loop to star center with sl sts and sew securely with tail.
Info :
If you want to hang the finished tree as an ornament, make sure the trunk and star attachment are reinforced with extra stitching through several layers so the weight is supported.
— Extra Decorative Details (optional baubles) :
Round 1 :
Small baubles: With contrasting color, 6 sc in magic ring, 6 inc (12), 6 sc even, dec rounds to close small 12-6 and stuff lightly, fasten off leaving tail to sew to tiers (approx 4-6 rounds depending on desired bauble size)
Info :
Sew baubles sparingly to tiers; place using pins first to visualize placement. Tiny seed beads can also be sewn as ornaments but ensure they are secure if giving to children.
— Finishing & Weaving In :
Info :
Weave all tails through several stitches inside each tier and trunk tube to hide them. Trim close to your work. Use fabric glue inside the trunk base for added stiffness if the tree wobbles on display.
— Decorative Assembly Sequence :
Info :
Assembly is best done with a flat surface and pins. Build the trunk vertically, then slide the bottom tier over the trunk and sew through trunk and tier rim with long tail to secure. Continue sliding/attaching tiers upward from largest to smallest so they stack snugly. Sew star to top cone or trunk and wrap garland in a spiral, sewing at a few anchor points so it holds shape.
This layered spiral Christmas tree makes a delightful handmade accent for the holidays and a gorgeous gift that shows off texture and personality. Each tier stacks into a lovely conical silhouette, and the fluffy white garland adds nostalgic charm. You’ll enjoy the satisfying assembly and the way the star topper finishes the whole scene — it’s a small project that yields big festive impact. 🧶✨🎄