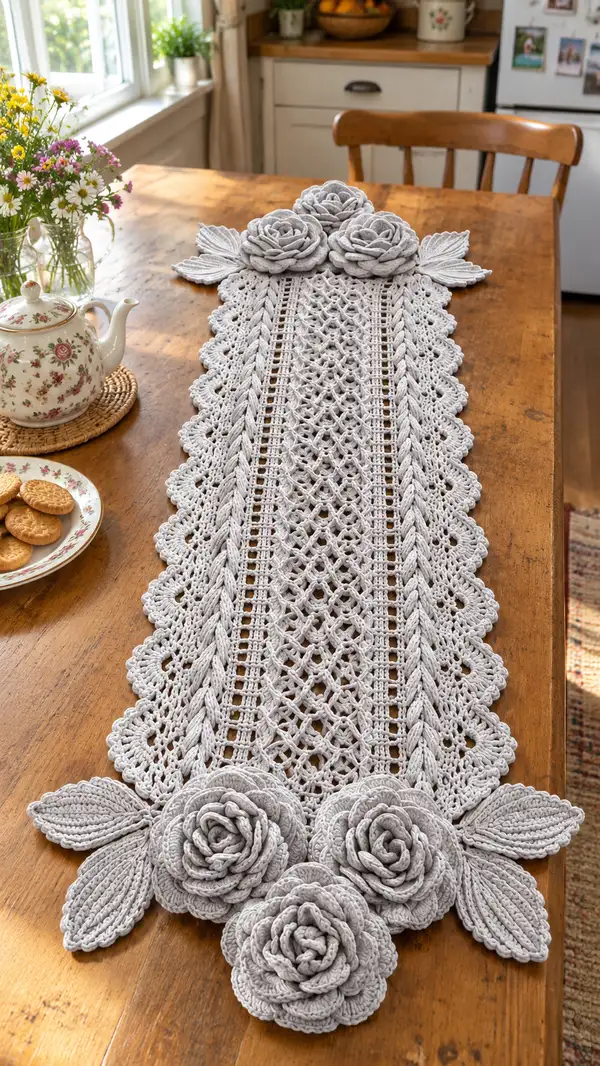
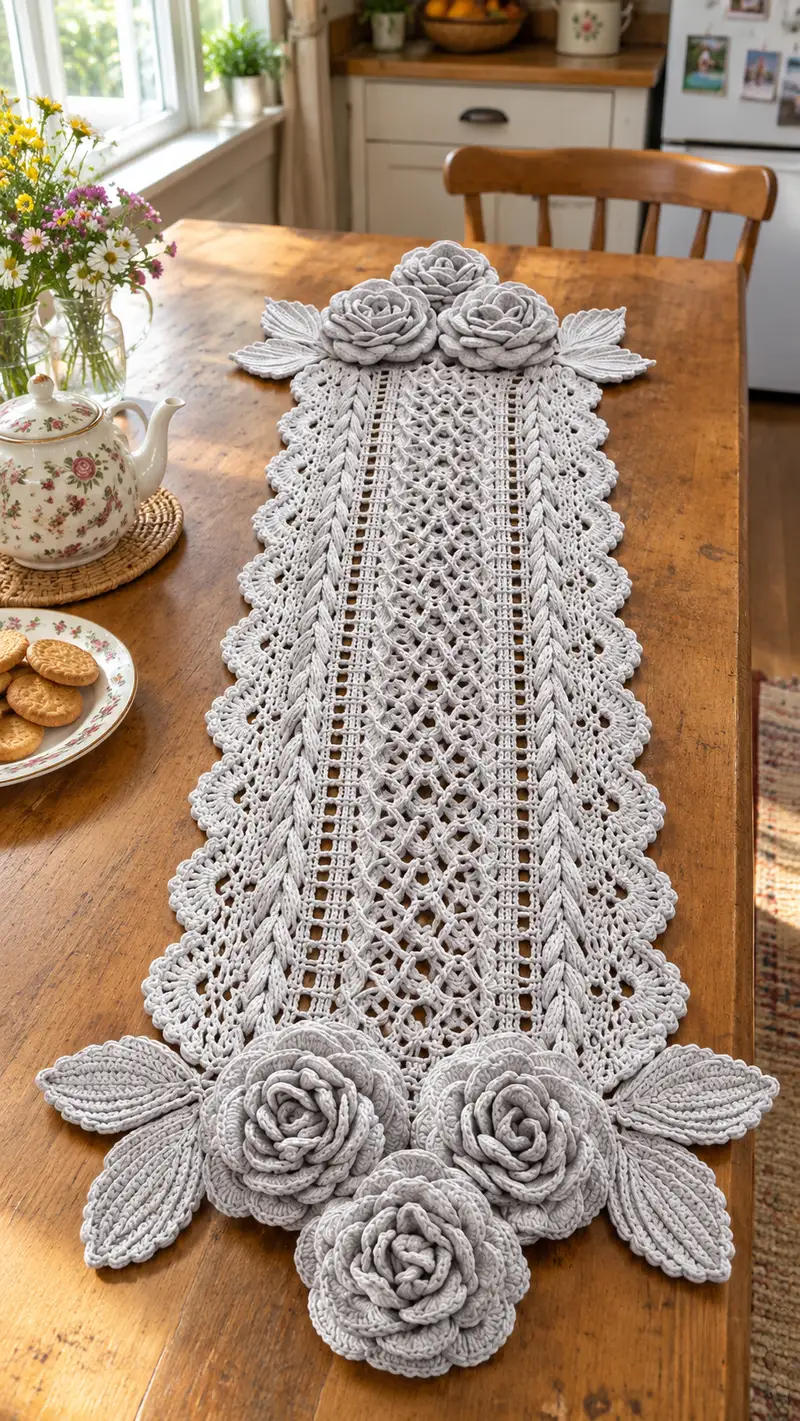
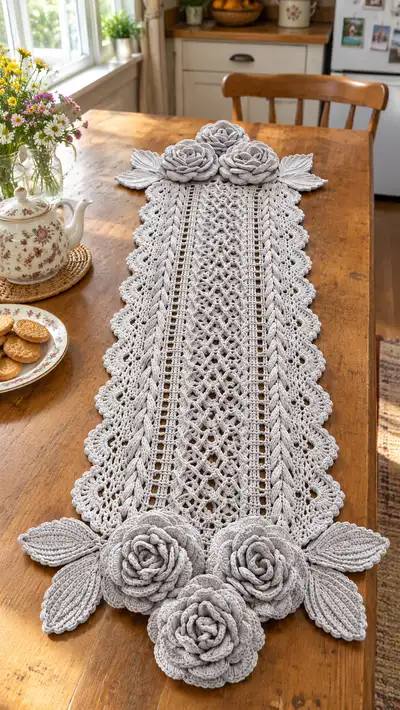
Create an elegant lace table runner topped with sculpted rosettes and leafy appliques, inspired by classic lacework and modern farmhouse style. This runner features a central lacy panel, braided cable borders, scalloped edges and three-dimensional roses for a beautiful centerpiece. Worked in sturdy cotton or cord yarn for crisp stitches and stable shape, it lays beautifully on a wooden table and blocks into a refined finish.
Progress Tracker
0% Complete
— Notes & Gauge :
Info :
Pattern is written for a runner 95cm (37.5in) long by 26cm (10in) wide as photographed, using cotton cord. Adjust length by adding or removing central lace panel repeats in multiples of the stated stitch repeat (16 sts). Gauge is not critical for overall look but affects final size—sample gauge: 10 sc x 10 rows = 10cm in simple fabric with chosen hook and yarn.
— Foundation & Edge Setup :
Round 1 :
Ch 153 (foundation chain; this forms a base width of approximately 26cm with cord yarn). Counted chain: 153 = 5 edge sts + 3 braided panel repeat sets and central lace repeat area + 5 edge sts.
Round 2 :
Row 1: Sc in 2nd ch from hook and in each ch across (152). Turn. This creates a tidy foundation row to work lace against. (152)
Info :
Place stitch markers to mark the following divisions along Row 1: left scallop border panel (15 sts), left braid panel (18 sts), left spacer (6 sts), central lace body (80 sts), right spacer (6 sts), right braid panel (18 sts), right scallop border panel (15 sts). These numbers sum to 158; adjust markers to match your actual chain count proportions indicated above, maintaining central lace repeat in multiples of 16 where possible.
— Main Runner Body (Central Lace Panel and Adjacent Braids) :
Round 3 :
Row 2: Ch 3 (counts as first dc), dc in next 2 sts; *ch 1, sk 1, dc in next 2 sts* across braid spacer areas; in central lace area begin Lace Row A: *ch 3, sk 3, dc in next st* repeating to create open mesh; finish with dc in last 3 sts. This row establishes an openwork mesh and counted dc total will match foundation (approx 152).
Info :
For the central lace section we will work a 16-stitch lace repeat across multiple rows—mark the first stitch of that repeat. Braid panels are worked in a raised cable worked by front post stitches in later rows; keep edge blocks steady.
Round 4 :
Row 3: Ch 1, sc across all stitches and ch spaces to create a tidy even row. (152)
Round 5 :
Row 4 (Lace Row B): Ch 3, *sk 1, (dc, ch 1, dc) in next ch-3 space (V-stitch), sk 1, dc in next dc; rep across central lace area; work braid spacer stitches as dc blocks. (152)
Round 6 :
Row 5: Ch 1, sc in each st and into ch-1 spaces created by Lace Row B. This evens edges and secures lace motif. (152)
Info :
Repeat Lace Row A and Lace Row B sequence for a balanced openwork texture. Work all braid panel stitches in the same rows to keep panels aligned—the raised cable effect will be worked using FPdc/BPdc in the braid panel rows every 6th row to form cable 'twists'.
Round 7-18 :
Rows 6-17: Continue alternating Lace Row A and Lace Row B with a sc tidy row every other row as follows: (Row pattern = sc tidy, Lace A, sc tidy, Lace B) Rep this 6-row sequence twice to build central height. Maintain total stitch count (152) each row.
Info :
At the end of Row 12 and Row 18, work a dedicated braid-row: Braid Row – in braid panels work FPdc and BPdc as described: *FPdc around next dc, BPdc around next dc* alternating over 6 pairs to create the raised cable texture (18 sts panel). On these rows work sc in central lace section into established ch spaces. This creates a visible braid every 6th row.
Round 19-30 :
Rows 18-29: Continue the established 4-row lace repeat (sc tidy, Lace A, sc tidy, Lace B). Insert braid-row every 6 rows to give a braided cable texture along both sides. Work total length so far equals approx 30 rows building a substantial runner body. (152)
Info :
Measure as you go. You can increase runner length by repeating the 12-row lace cycle (four rows times three) as many times as needed. The sample shows three central cycles to reach photographed proportion.
Round 31-54 :
Rows 30-53: Maintain lace pattern, continuing braid rows every 6 rows for raised texture. Work until the runner reaches desired length minus allowance for scalloped end sections (reserve 8-10cm at each end to attach rosettes and leaves). Keep stitch count consistent across all rows (152).
Info :
Before moving to the final border, lightly block the central panel to relax the lace pattern—this will help align scalloped edges later. Use pins and steam or water spray appropriate to yarn fiber.
— Scalloped Lace Edge (Make 2 long strips, one for each side) :
Round 55 :
Row 54: Working along the left edge (pick up 15 sts reserved per row), join yarn with sl st at bottom-left corner. Ch 1, sc evenly across the 15 edge sts to anchor. (15)
Round 56 :
Row 55: Ch 3, *2 dc in next st, ch 1, sk next st* across to create half-shell beginnings; finish with dc in last st. (approx 19-21 dc depending on counts)
Round 57 :
Row 56: Work scallop row: *(2 dc, ch 2, 2 dc) in first shell apex, sl st to join at next shell base* repeat across; end with sc into final join. This defines full scallops. (7-9 scallops per side depending on length)
Info :
Make the same scalloped edge on the right side by mirroring stitches. Keep tension consistent to maintain even scallops; block after finishing to open shells fully.
Round 58-62 :
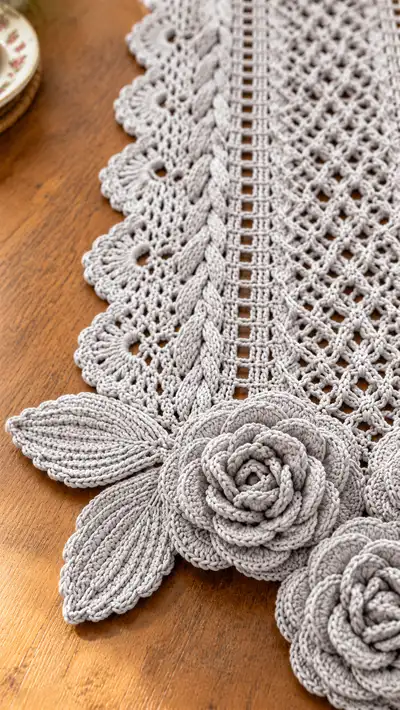
Rows 57-61: Repeat scallop shaping for an additional layered scallop pass: sc around shells, then dc clusters into shell arches to build a triple layered edge. This gives the classic lacy border seen in the photos. (counts vary by length)
Info :
When both sides are complete and blocked, join a tidy sc row around entire runner perimeter to create a neat foundation for attaching rosettes and leaves later. Work in back loops only on the perimeter for a subtle ridge.
— End Panels & Rosette Base (Make 2 sets) :
Round 63 :
End Panel Row 1: At each end of the runner, leave an uninterrupted square of approximately 10-12 rows of solid rows (sc across central area and the two braid panels) to provide support for rosettes. If you did not reserve, create a rectangle by working 10 rows of sc across the full width (152) to form a dense mounting area. (152)
Info :
These denser end panels replace the lace there to create a stable sewing surface for the 3-D rosettes. Work them on both ends before creating appliques.
— Rosette (Make 6 medium-large rosettes, 3 per end as pictured) :
Round 1 :
Ch 40, sl st to join making a loose ring (do not twist). We will work a spiral strip that becomes the rose. (40)
Round 2 :
Row 1 (Spiral foundation): Ch 1, sc in each ch around (40). Do NOT join; place a marker to indicate the start of the spiral. This forms the base strip for petals. (40)
Round 3 :
Row 2: Work a second round of sc in BLO across entire strip to create a subtle ridge that will become petal edges. (40)
Round 4 :
Row 3: Work a decorative petal round: *ch 3, sk next st, sl st in next st* across to create loops to be folded later. (approx 20 loops)
Info :
For a tightly dimensional rose, ensure strip is slightly stiff by working a tighter tension than the runner body. You can block the raw strip flat and lightly starch for crisp petals before rolling.
Round 5-12 :
Row 4-11: Work 8 rounds of sc around the strip in spiral (continue without joining) increasing slightly on each 12th stitch to add natural flare: on every 8th round add 4 increases spaced evenly across the round to create petal flare. After 8 rounds the strip is ready to be spiraled into a rosette of approximately 8-9cm diameter when using cord yarn.
Round 13 :
Forming the Rose: Starting at one end, coil the strip into a spiral, overlapping each petal loop to build a layered rose. Use large tapestry needle and a length of yarn to sew through the base of the spiral as you coiling—catch 2-3 loops per stitch to secure. Continue until the whole strip is coiled and secure the end with a few tight whip stitches. Fasten off and weave ends. Repeat to make 6 rosettes. (Info: final diameter approx 8-9cm)
Info :
For varied sizes, make shorter or longer strips: ch 28 for small roses, ch 52 for extra-large roses. Slightly tighten or loosen spacing to alter petal fullness. Lightly steam or spray and shape petals for a soft curve.
— Rosette Detailed Spiral Alternative (Layered Petal Method) :
Round 1 :
Ch 40, sc across strip as above. Then for a layered petal look work the following sequence along one side: *ch 6, sl st to base, skip 2, sl st* to create petal tabs that will fold outward. Sew center tightly and layer additional strips beneath to thicken the rose for a dimensional sculpted rose. (40)
Info :
Using this method gives deeper, more defined petals that remain visible from all angles. Anchor rosettes firmly to the runner end panel using small, evenly spaced stitches through the dense base rows.
— Leaf (Make 12 leaves total for two ends) :
Round 1 :
Ch 18. Row 1: Sc in 2nd ch from hook and in next 15 ch, ch 1, turn. (16)
Round 2 :
Row 2: Sc across 16 sts. (16)
Round 3 :
Row 3: Work inc shaping for leaf point: (sc, inc) x 8 across to increase to 24 sts. (24)
Round 4 :
Row 4: Ch 1, sc across 24. (24)
Round 5 :
Row 5: Form central vein using FLO: Ch 1, *FLO sc in next 2 sts, sc in next 2 sts* across to create a ribbed appearance. (24)
Info :
Work additional rounds decreasing evenly at each end to create a tapered leaf: on Row 6 dec 2 sts (1 at each end) then Row 7 sc across. Repeat until leaf measures approx 10-12cm length. Finish with a picot or scallop tip for a refined edge.
Round 6-12 :
Rows 6-12: Continue shaping with occasional row of FLO ridges every 2 rows to mimic the real sample's ribbed leaf. Typical sequence: Row even: sc decrease ends (dec 1 at both ends); Row odd: sc full across; after three tapered rows finish with sc round and a decorative sc, ch1, slst picot at tip. Fasten off leaving long tail for sewing. Make 12 leaves total to arrange around rosettes. (Final sts taper from 24 down to 6)
Info :
Block leaves over a light curve to create natural shape. Use a little spray starch if you want them to hold shape more rigidly under rosettes.
— Braided Cable Panel (Worked as a vertical motif, make 2 panels to mirror each side) :
Round 1 :
Ch 18 for braid panel width. Row 1: Sc in 2nd ch from hook and across (17). (17)
Round 2 :
Row 2: Ch 1, sc in each st in back loop only to create a ridge foundation. (17)
Round 3 :
Row 3: Braid foundation row: Ch 3, dc across in pattern replacing every 6th and 12th dc with FPdc to begin cable twist placements. (17)
Round 4 :
Row 4: Ch 1, sc across. (17)
Round 5 :
Row 5: Cable Row A: Work FPdc around st 3 and st 5 then BPdc around st 4 to create a small 3-st cable cluster. Repeat across to create alternating raised rope effect. (17)
Info :
To form a visible braided cable, you will perform crossing rows every 6th row: hold 3 stitches on cable hook or stitch holder, work remaining stitches, then return to work held stitches in crossed order to create a twist. Use FPdc and BPdc to highlight the twist line.
Round 6-22 :
Rows 6-21: Repeat the sequence: sc row, cable pattern row, sc row, cable variant row (crossing). After four full cable sets the braid will reach desired height to match central panel. End with tidy sc row and join into runner body with slip stitches by sewing or crocheting along the reserved spacer area so cables sit slightly raised above the lace.
Info :
When attaching, align cables to run parallel with the center lace—secure with invisible whipstitch or sl st through back loops only to keep front cable ribs prominent.
— Finishing Rows & Perimeter Join :
Round 1 :
Perimeter Round 1: After both sides' scallops and end panels are completed, join yarn at one corner and work 1 sc in each stitch around entire runner edge including into shell arches and into the rows of the end panel (work 2 sc in shell apexes to keep perimeter flat). Place a stitch marker at each corner and work carefully around curves. (Perimeter stitch count will vary by final size)
Info :
Work in BLO for this round to highlight the inner edge ridge. If needed, add a second round of sc in back loops to create a heavier border for stability before attaching appliques.
Round 2 :
Perimeter Round 2: Optional decorative rope: *ch 6, sl st to next st* around perimeter to create tiny looped trim, then secure with a final sc pass. This adds a subtle framed edge as seen in photos. Fasten off and weave in ends long enough to sew rosettes. (Info: hide ends under rosettes)
Info :
Blocking: Wet-block entire runner to final dimensions, pin shells open and pins evenly spaced. Allow to dry completely before attaching rosettes and leaves; blocking defines lace and makes attachment easier and neater.
— Attaching Rosettes and Leaves :
Round 1 :
Placement: Arrange three rosettes at each end in a triangular cluster with leaf sets fanning outward. Use pins to arrange and step back to ensure symmetry. Typical spacing: center rosette anchored at row 4 of end block, two outer rosettes on rows 6 and 8. Leaves tuck under rosette edges and extend 6-9cm beyond runner edge. (Info: adjust per your runner length)
Round 2 :
Sewing: Using a length of main yarn and a yarn needle, whip-stitch around the rosette base through dense end panel stitches. Anchor every 6-8mm; take care to catch runner fabric but avoid visible top stitches. Sew leaves under rosettes by stitching at their base into end panel, then tack leaf tips down in a few places for shape. Fasten off securely and weave in ends. (Info: sew twice through each rosette base for secure attachment)
Info :
For a permanent, stiffened look use a dab of fabric glue under rosette layers before stitching; press and allow to dry. If you want removable decoration, sew with a few long running stitches that can be cut to remove later.
— Extra Decorative Embellishments :
Round 1 :
Optional tiny buds: Ch 8, sl st to form a small rosette bud; flatten and tack in place between main rosettes. Add tiny French knot-style knots using embroidery thread to simulate stamens if desired. These are optional and used sparingly on the sample runner for subtle detail. (Info: use 2-3 buds per cluster)
Info :
Use a matching yarn color for invisible seams, and a contrast color if you want the flowers to pop. The photographed runner uses monotone neutral gray for an elegant, understated look.
— Care & Blocking Instructions :
Info :
Hand wash or gentle machine wash on delicate cycle in cold water. Reshape and wet-block pinned flat. Avoid tumble drying; lay flat to dry. If using cotton cord, steam blocking will open the lace beautifully but test on a small scrap first.
Info :
To restore shape after cleaning, re-block the runner and rosettes separately and reattach if necessary. Store flat or rolled around a tube to avoid creases.
This elegant lace runner brings a timeless, handcrafted centerpiece to your table—an heirloom-style piece that combines delicate lacework with sculptural rosettes and leaves. The textured braided borders give just the right amount of structure while the openwork center keeps the look light and refined. I hope this pattern inspires you to make a beautiful runner to treasure and display—happy stitching! 🌸🧶