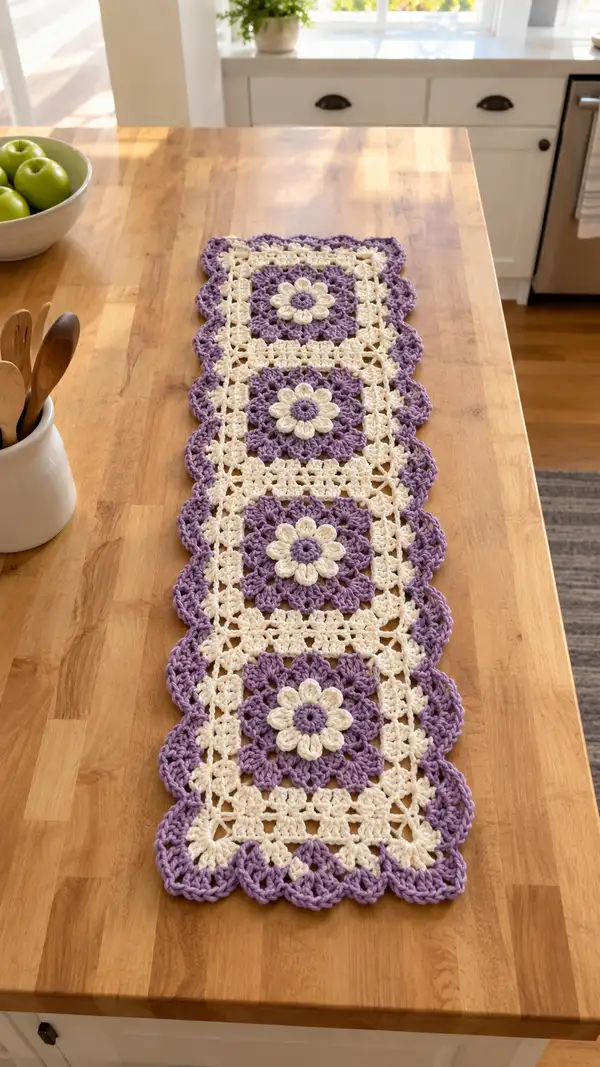
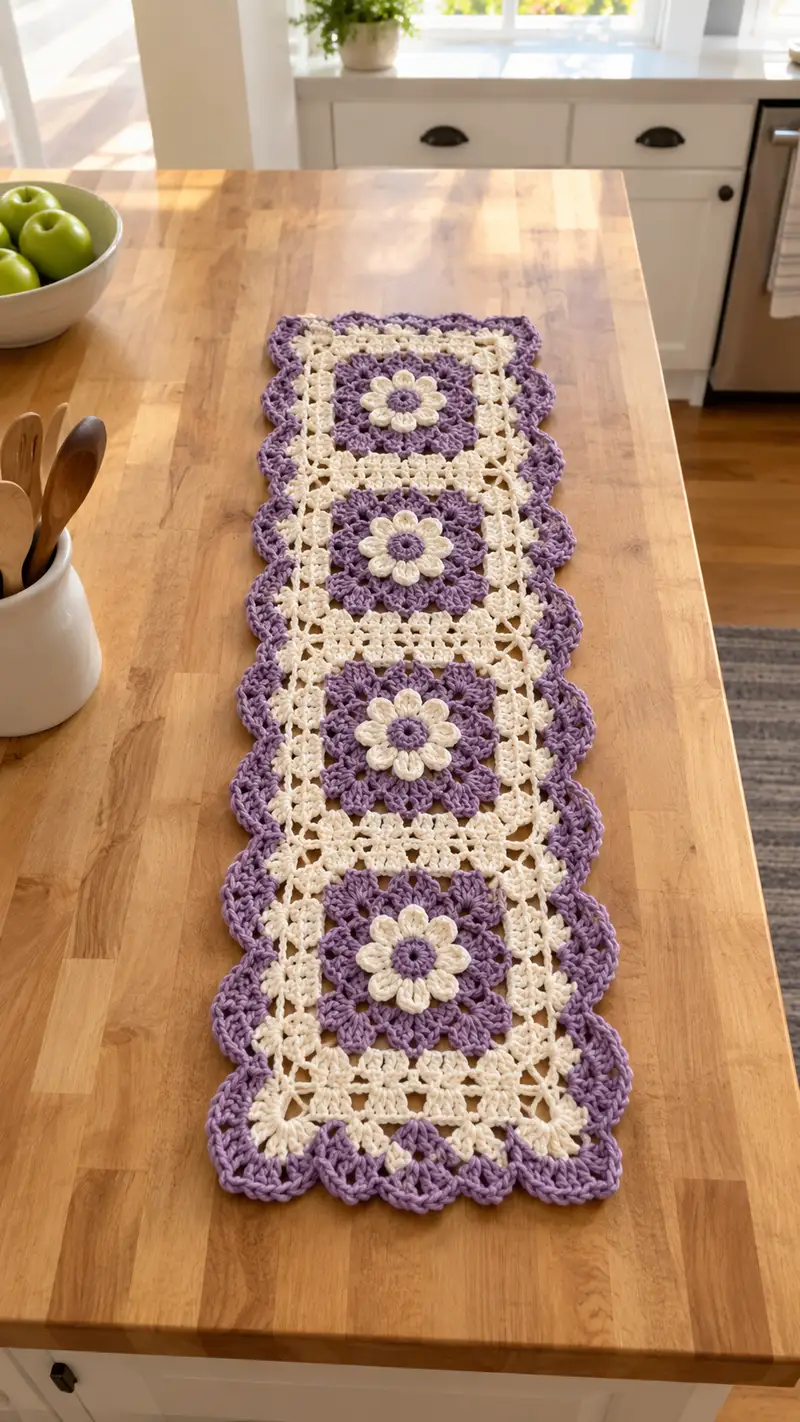
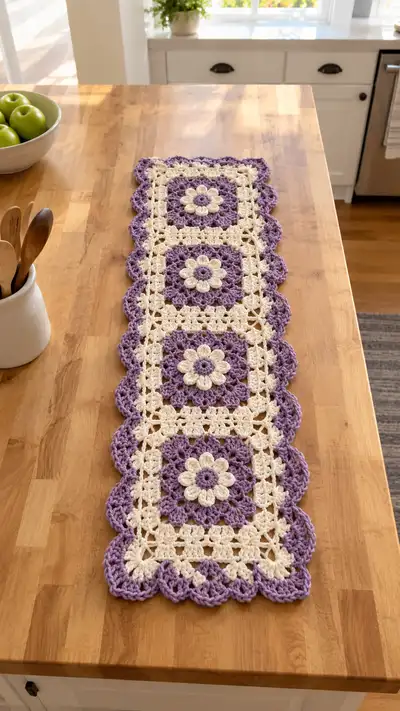
A charming lavender and cream daisy motif table runner worked in soft worsted yarn. Four floral granny squares are joined lengthwise and finished with a scalloped lavender border for a delicate, vintage-inspired look. The lacy motifs and raised daisy petals create lovely texture that brightens any table or dresser. Clear step-by-step instructions and helpful tips make this a satisfying intermediate project.
Progress Tracker
0% Complete
— Motif 1 (Make 4 identical motifs) :
Round 1 :
With lavender, make a magic ring. Ch2 (does not count as st), work 8 dc in ring. Pull ring closed, join with sl st to first dc (8)
Round 2 :
Ch2, (inc) in each st around by working 2 dc in each st (16) Join with sl st to top of beginning ch2
Round 3 :
Ch2, (1 dc in next st, 2 dc in next st) x8 (24) Join with sl st (24)
Info :
Place a stitch marker at the start of each round to keep count. This motif works in 8-sections (petals) and increases by 8 on increasing rounds so math stays consistent
Round 4 :
Switch to cream. Ch1, sc in same st, *ch3, skip next st, sc in next st; rep from * around to create 12 chain spaces and small anchors (count remains conceptually 24 anchor points)
Info :
These ch3 loops will form anchor points for the petal round. Keep loops even in tension so petals sit uniformly.
Round 5 :
Petal round (cream): *Work a puff petal into next ch3 loop: (yo, insert hook, pull up loop) 6 times total on hook, yo and pull through 6 loops, ch1 to close petal, sl st into same ch3 loop; ch1, sl st into next sc to position for next petal; rep from * around to make 8 raised petals (8 petals total). Join with sl st to base stitch (count: 8 petal anchors)
Info :
Puff technique: keep consistent tension and do not over-tighten the final loop. Close each puff with a short ch1 and secure with a slip stitch to maintain a rounded petal.
Round 6 :
Switch to lavender. Ch3 (counts as dc), work *3 dc into the space between petals (cluster), ch2, 3 dc into next space between petals; ch1 between clusters to keep mobility; rep from * around to create 8 small shell clusters with ch2 corners (this round establishes placement for forming the square later). Join with sl st to top of beginning ch3 (approx stitch anchor count equivalent to 24 clusters)
Round 7 :
Ch2, (1 dc in each of next 2 anchors, 2 dc in next anchor) x8 — this increases by 8: 32 dc total (32) Join with sl st
Info :
When working flat-increasing rounds to create a larger motif, space increases evenly around to maintain a circular shape that will later be squared by corner chain spaces.
Round 8 :
Ch3, dc in each of next 3 sts, (2 dc in next st) repeat around (40) Join (40)
Round 9 :
Switch to cream. Ch3, *dc in next 4 sts, ch2, sk 2 dc to form a corner chain, dc in next 4 sts; rep from * to form four sides with ch2 corners. Work evenly to maintain 40 anchor points but create 4 corner chain-spaces for squaring.
Info :
This is the first explicit square-forming round; place corner ch2 spaces roughly every 10 stitches so the motif begins to read as a square not a circle.
Round 10 :
Ch3, (dc in next 5, 2 dc in next) x6 and work additional dc clusters around corners as follows to bring stitch count to 48 (48) Join with sl st
Round 11 :
With lavender, ch3, dc in each st around (48) Join (48)
Round 12 :
Ch3, *dc in next 6, (dc,ch2,dc) into corner ch2 space to form corner shell, dc in next 6; rep around. This keeps the motif square and maintains a multiple-of-8 structure (48 anchors remain)
Info :
When creating corner shells, work (dc,ch2,dc) into the corner ch-sp. This gives a clear right-angle and eases joining later on.
Round 13 :
Switch to cream. Ch1, sc across the top of the previous dc stitches, working (sc, ch3, sc) into each corner shell to create visible squares of chain space; this round produces 12 chain spaces on each side for lacy join opportunities (visual anchor, stitch count conceptually similar to 48)
Round 14 :
Ch3, work 2 dc in each ch3 corner space (forming solid corner posts), dc in each sc across sides. End round with join; final count becomes 56 (56)
Info :
From round 13 onward you are creating a lacy frame around the raised daisy. Keep tension consistent so edges lie flat and square; blocking will help even out corners later.
Round 15 :
With lavender, ch3, dc in each st around maintaining 56 stitches (56) Join with sl st
Round 16 :
Ch1, sc into each st around working (sc, ch3, sc) into each corner to keep corner loops for joining-as-you-go later (56 anchors remain)
Info :
Use this sc round to create defined join points. If you prefer a firmer join later, work this round more tightly or use a smaller hook.
Round 17 :
Switch to cream and work a lacy openwork round: *(ch5, sl st into next spaces as indicated) to produce decorative open squares across sides and accent the runner's lacy look; this round is mainly decorative and retains the motif's outer shape
Round 18 :
With lavender, ch3, dc in each st and in the ch-spaces created in Round 17 so the round reads solid again; this sets a stable outer edge for a neat joining seam (56)
Round 19 :
Switch to cream. Ch1, sc evenly around to tidy edges and match to joining round spacing; work (sc, ch3, sc) into corners (56 anchors)
Round 20 :
Final motif round: With lavender, work a decorative shell placement around external edge to prepare motifs for join-as-you-go: *shell (5 dc) into side spaces, sl st between shells; rep to create scalloped visual texture around motif. Fasten off leaving long tail for weaving (count equals number of shells placed around sides)
Info :
Make 4 identical motifs total. Lay them out in a single column of four to match the photo orientation before joining. We use a join-as-you-go method to produce neat seams with minimal sewing.
— Motif 2 (Repeat motif 1) :
Round 1 :
Repeat rounds 1-20 exactly as Motif 1 using the same color sequence (lavender centers, cream petals, lavender outer rounds). Make sure petals align consistently in each motif.
Info :
As you repeat, keep the same tension and use stitch markers at corner shells to guarantee matching edges for joining.
— Motif 3 (Repeat motif 1) :
Round 1 :
Repeat rounds 1-20 exactly as Motif 1. Make sure to weave in tails as you go to avoid bulk when joining motifs later.
Info :
Weave at least the inner short tails after petal rounds; long outer tails can be hidden in joining rounds but trim ends after blocking.
— Motif 4 (Repeat motif 1) :
Round 1 :
Repeat rounds 1-20 exactly as Motif 1. After completing the fourth motif, arrange motifs in final order and pin on a flat surface to check layout before joining.
Info :
Check right side orientation of each motif so petals face up consistently. Small rotations look odd when motiffs are stacked lengthwise.
— Join As You Go (Joining motifs lengthwise) :
Round 1 :
With right sides facing, position Motif A (top) and Motif B directly below it so cream corner loops match. Attach yarn in end of side of Motif A at a corner ch3 loop. Ch1, work sc evenly across side until you reach the corresponding side of Motif B; for each corner (sc,ch3,sc) join into Motif B by inserting hook through the corresponding stitch on Motif B and completing sc to join. Continue along side creating an invisible seam (this attaches two motifs along one long side). Fasten off (number of joined sc equals number of sc across edge)
Info :
Join-as-you-go technique: when you reach a stitch that corresponds to the adjacent motif, do 'sc through both loops'—insert hook through both motifs and complete sc. This creates flat joins and avoids bulky sewing.
Round 2 :
Repeat Round 1 to join Motif B to Motif C the same way. Work slowly and align corner chains precisely so motifs are square in the finished runner.
Round 3 :
Repeat Round 1 to join Motif C to Motif D. After joining all motifs together you should have a long strip of four motifs joined by their long sides with neat seams (fasten off and weave ends).
Info :
When joining motifs, keep the same stitch height and use the same hook as the motif rounds. Pin each interface before joining to confirm even alignment and prevent ripples.
Round 4 :
Work an even sc round all the way around the entire connected rectangle: Attach yarn at one corner, ch1 and sc evenly along the entire outer perimeter, placing (sc,ch3,sc) into the corner shells. This tidies the seam lines and creates a uniform base for the border (stitch count depends on final perimeter anchors).
Info :
This sc round also balances the tension differences between motif edges and is an excellent place to hide leftover tails by weaving them into the sc row as you go.
Round 5 :
With cream, work a lacy open round: *ch3, skip 2, dc in next; rep across each side and work (dc,ch3,dc) into each corner to create airy squares between the motifs and set up for the scallop border that follows.
Round 6 :
With lavender, ch3, dc in each dc and into each ch3 loop from previous round. Make sure corners are worked as (2 dc,ch2,2 dc) into corner spaces to retain right angles. Join with sl st.
Info :
By alternating cream and lavender on the joining rounds you create visual continuity with the motifs. Keep an extra stitch marker at the midpoint of each long edge to check that sides stay even while you crochet.
Round 7 :
Ch1, sc in each st around to create a firm base for the scalloped border. Place (sc,ch3,sc) into each corner shell. Fasten off and weave in ends loosely for now; they will be secured in the border (perimeter sc count will be used for border repetition).
Round 8 :
Lightly block the connected runner at this stage if desired to square corners and flatten motifs. Pin to measured dimensions, mist with water and let dry before continuing to border for best results.
Info :
Blocking before the border ensures the scallops align and that the runner sits flat on the table. If skipping blocking, proceed but be prepared to gently steam-block after finishing the border.
— Border (Scalloped scallop edging) :
Round 1 :
Attach lavender yarn at any side sc. Ch3 (counts as dc), *skip 2 sc, 5 dc in next sc (shell), skip 2 sc, sl st in next sc; rep along side to create a repeating shell and sl st rhythm. At corners, work: skip 1 sc, (5 dc, ch3, 5 dc) into the corner to create a large corner shell. Continue around entire perimeter following the same shell count; end with sl st to top of beginning ch3 (shells per side will match approximate sc perimeter/9)
Info :
Shell counts vary with your gauge; aim for evenly sized shells and consistent spacing. If you see more shells on one side, you can adjust by adding or removing a sl st between shells to even spacing.
Round 2 :
Ch1, sc in same st, *ch3, sc in middle dc of each shell from previous round to create a neat scallop foundation; at corners (sc,ch5,sc) into the ch3 corner space to form an elevated corner loop. Join with sl st.
Round 3 :
With lavender, work a decorative picot variation on shells: into each shell from Round 1, work (sc,ch2,sc) in the center dc of the 5-dc shell then sl st into adjacent shell base; this creates small picot highlights on each scallop. Fasten off and weave in ends.
Info :
If you prefer a fuller scallop, work an additional full shell (5 dc) on top of each existing shell, offset by sl sts. Keep the pattern symmetrical on both long sides.
Round 4 :
Optional outer accent round: With cream, work sc around the bases of the lavender shells to create a subtle two-tone rim. This is decorative and will reduce curling by flattening shell edges. Fasten off and weave ends.
Info :
Weave ends securely into the border. The border contains the most yarn usage—check your leftover yarn before finishing to ensure you have enough lavender for two full scallop rounds.
Round 5 :
Final finishing: Block runner gently on a flat surface, pin scallops to a uniform measurement and allow to dry. Trim any stray fibers and give a final once-over to ensure all joins are secure.
Info :
Use rust-proof pins and a clean towel or blocking mat. For slight adjustments, steam lightly with an iron held a few inches away; do not press iron directly onto yarn.
Round 6 :
Optional embellishment: Add small crocheted leaves between motifs by working 5 ch, 1 sc in 2nd ch from hook, (hdc, dc, hdc) then sc into base; sew between petals to create trailing greenery if desired.
Info :
Small leaf accents can be added selectively to personalize the runner. Use cream or a pale green for a soft botanical touch that doesn't compete with the daisies.
Round 7 :
Care and maintenance: Hand wash gently in cool water with mild detergent and reshape while damp. Avoid hot water or tumble drying which can distort motifs and scallops.
Info :
Store runner flat or rolled to avoid creasing. If storing long term, place acid-free tissue between folds to protect delicate fibers.
Finishing this Lavender And Cream Daisy Motif Table Runner is such a satisfying feeling—watching the four floral motifs knit together and adding the scalloped border really makes it sing. The raised petals and lacy creams look lovely against the soft lavender border. Block it gently, set it on your favorite table, and enjoy the handmade charm it brings to your home. 🧶🌸 Happy stitching and enjoy every petal you create! 🎀