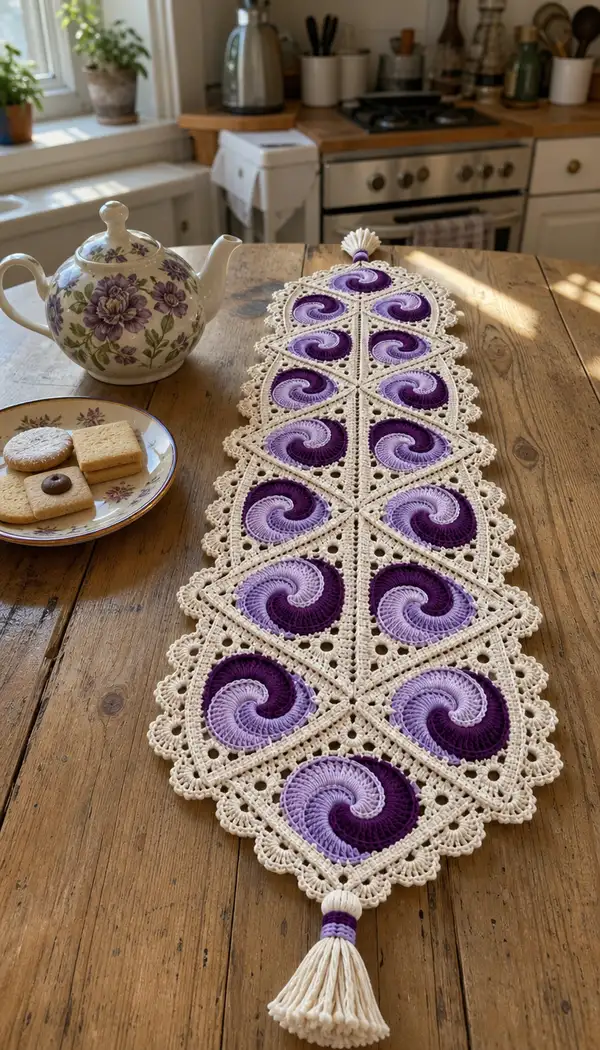
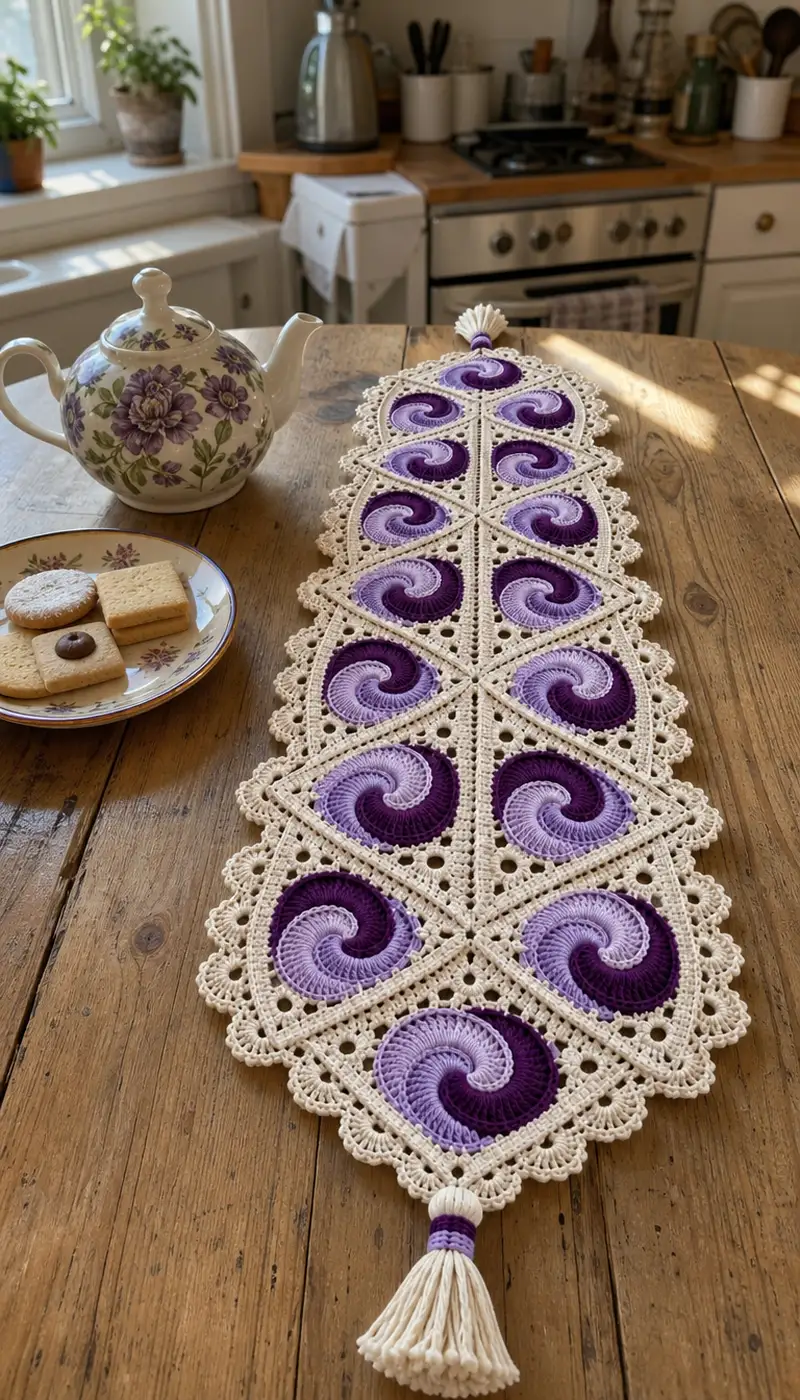
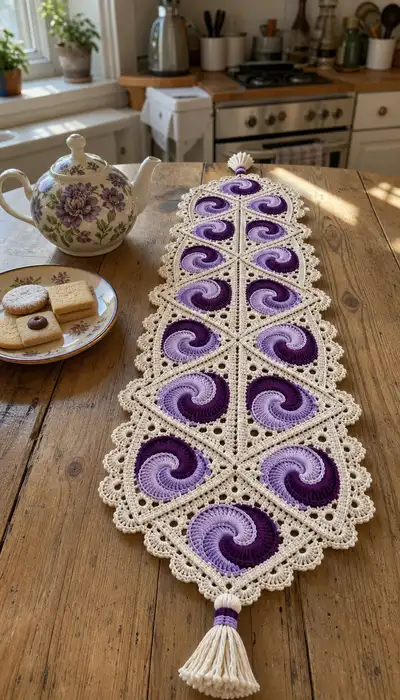
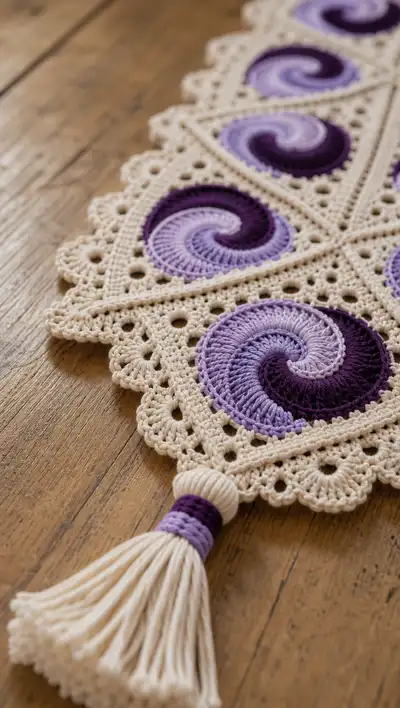
A long, elegant table runner made from repeating lavender swirl motifs framed with a delicate cream lace border. This pattern features gradient purple spirals inset into diamond modules, scalloped edging, and cream tassels at each end for a vintage-inspired finish. Perfect for dressing a wooden table or gifting a handmade accent piece.
Progress Tracker
0% Complete
— Spiral Disc (Make 1 per module) :
Round 1 :
Using color A (deep plum). 8 sc in mr. (8)
Round 3 :
(1 sc, inc) x 8 (24)
Info :
Change to color B (mid-lavender) at the last pull-through of round 3 if you want the gradient to start early. We recommend carrying color or cutting and weaving depending on neatness preference.
Round 4 :
(2 sc, inc) x 8 (32)
Round 5 :
(3 sc, inc) x 8 (40)
Round 6 :
(4 sc, inc) x 8 (48)
Round 7 :
1 sc in each st (48)
Round 8 :
1 sc in each st BLO (48)
Info :
Working this round in BLO establishes a shallow ridge around the disc and helps the spiral overlay sit neatly on top. If you prefer a flatter look, work in both loops.
Round 9 :
Change to color C (pale lilac). 1 sc in each st (48)
Round 10 :
To begin spiral shaping: *Work 10 sc, inc, 4 sc, inc, 6 sc, inc, 8 sc, inc* — this sequence biases increases toward one side to start a subtle spiral bulge. Total (48 + 4 inc = 52)
Info :
The spiral effect is created by placing increases unevenly around the round. Keep a written tally of where each increase sits; use markers if needed to replicate exact placement on each motif.
Round 11 :
1 sc in each st (52)
Round 12 :
Work as follows to accentuate the swirl: *(7 sc, inc) x 4, (5 sc, inc) x 4, (4 sc, inc) x 2* — total increases add 10 sts. New count (62)
Round 13 :
1 sc in each st (62)
Info :
At this stage you will see the disc developing a slight asymmetric mound on one side. This is deliberate; the gradual added stitches shift the fabric to form the swirl path where later stitchwork sits.
Round 14 :
Change back to color B (mid-lavender). *(4 sc, inc) x 12, 2 sc* — increases are concentrated in the same quadrant as previous rounds to deepen the spiral curve. (74)
Round 15 :
1 sc in each st (74)
Round 16 :
Switch to color A (deep plum). Begin a decorative raised spiral ridge: *sc in next 5 sts, ch 3, sk 3, sc in next 4 sts, bobble (3 dc bobble) in next st, sc in next* — work evenly around making 12 chain arches and 12 bobble placements, approximately. Maintain count by substituting sc for ch arches where necessary so total base stitch count remains 74 but texture elements sit on top.
Info :
Use the raised ridge technique sparingly — the bobbles and chain arches create focal highlights that read as the swirl arm. If you prefer a flatter spiral, skip the bobbles and work slip-stitch spiral overlay instead.
Round 17 :
1 sc in each base st, working texture elements as placed (74)
Round 18 :
Fasten off spiral disc, leaving a 30cm tail for sewing into the diamond frame. Weave in short ends. Block flat to a 9-10 cm diameter, pinning the spiral so the curve reads clearly.
Info :
Blocking each spiral disc to the same size is essential for neat assembly. Light steam or wet-block to cotton specifications. Pin center and edges to keep discs circular but show the spiral curve.
— Diamond Frame (Make 1 per module) :
Round 1 :
Using cream yarn. Join with sl st to any point on blocked spiral disc edge (or work frame separately then seam). ch 1, 1 sc in same st and evenly around the spiral disc edge placing approx 60 sc total to create a stable base (count depends on blocked disc measurements — aim for 60 sc). (60)
Info :
If your spiral disc had 74 sts after shaping, reduce or increase sc to about 60 by spacing sc along the disc edge to create a nice circular base for the square frame. You are establishing the base circumference for the square.
Round 2 :
(3 ch, skip 1, sc in next) x around to create an openwork picot foundation; adjust spacing so you get 20 ch-3 loops around. These loops will become corner anchors. (20 loops approx)
Round 3 :
In each ch-3 loop: *(sc, ch 3, 3 dc, ch 3, sc)* to widen loop into a small petal; this will start the triangular shaping. Work evenly to keep 20 petals around the disc.
Info :
We will convert this round into the base for squaring off the disc into a diamond. Count your petals and place markers at every 5th petal; these markers will later become join points to neighboring modules.
Round 4 :
Work in groups to turn the round into 4 triangular flaps that will be trimmed and shaped into diamond arms. *From marker to marker: ch 1, 1 sc in each of next 5 petals, (ch 5, sl st into petal 3 back toward center) repeat across flap* — leave small chain arches between flaps. You should create 4 large flaps (triangular arms) spaced evenly. (structure: 4 flaps)
Round 5 :
In each flap, form the triangular field by working rows outward: Row A: attach cream, ch 3 (counts as dc), 2 dc in same edge, *(dc in next stitch, 2 dc in next) across flap edge*. Turn — this increases edge width to square off the circle. Count per flap will vary; end each flap with 14-18 dc across outermost edge.
Info :
Each flap becomes a diamond point once straightened and blocked. Work the flap rows evenly so that edges are straight; use stitch markers to track row ends and avoid scalloping inadvertently.
Round 6 :
Work back toward center through the top loops to close the triangular field: Row B: ch 1, sc in each dc across, adjusting decreases at the apex so flap tapers neatly toward the center.
Round 7 :
At the end of constructing the 4 flaps, create a stout corner point at each flap outer tip: ch 4, sl st into same spot to make a small chain point, then 3 sc around the point to anchor and create a triangle tip. Repeat for all 4 tips. Fasten off and weave tail to the back. Each completed module should now read as a square rotated 45 degrees (diamond) with a spiral inset at the center.
Info :
Block each diamond into a square rotated shape, pinning along the flap edges so that all diamonds measure the same from tip to tip. Target module size: approx 12 x 12 cm across tip-to-tip after blocking (measure to match your desired runner length).
— Decorative Eyelet Row & Reinforcement :
Round 1 :
With cream yarn, join at a mid-edge point of the diamond. ch 1, sc evenly along side until you reach the corner point, approx 20 sc. (work all four sides)
Round 2 :
Eyelet row: *ch 5, sk 4 sc, sc in next* across each side, making 4 larger ch-5 eyelets per side (or adjust spacing for even count). This produces the decorative open lattice that shows in the photos.
Round 3 :
Reinforce the inner edge where the spiral meets the frame: sc around the spiral circumference inside the diamond with 1 sc into every base stitch to secure seam. (work until spiral is attached smoothly)
Info :
Sew the spiral disc to the diamond frame using the tail left from the disc. Work slip-stitch or whip-stitch neatly on the inside so the front face is tidy. Place extra stitches at the inner spiral curve to emphasize the swirl shape.
— Module Shell Lace Edge (Make 1 per module) :
Round 1 :
With cream yarn, join at a corner point. ch 1, 1 sc in corner point, *ch 3, skip 2, 3 dc in next, ch 3, sc in next*, repeat around whole diamond so that you form small scalloped fans at each join between modules. Aim for 16 scallop units total around each diamond depending on spacing.
Round 2 :
Picot round: in each ch-3 space from previous round work *(sc, ch 4, sl st back into sc) to form a picot loop, then sl st to center of next fan*. This creates a lacy edge that references the finished scallops in the photo.
Info :
Keep this edge light and delicate. If you prefer a heavier border, substitute ch-3 loops with ch-5 and 5 dc fans for a more pronounced edge.
— Module Count and Layout :
Info :
The sample runner in the photos uses 12 diamond modules arranged in a staggered single-column stack with alternating triangular join seams creating an elongated silhouette. You can adapt the number of modules to your desired runner length. For a standard medium runner: use 10-12 modules; for a table centerpiece: 6-8 modules.
Info :
Decide layout prior to joining. Place diamonds tip-to-tip along the long axis to get the elongated diamond chain shown. For a central spine look, align each diamond with its tip touching the next diamond’s tip.
— Joining Diamonds (Join-as-you-go or Sew Method) :
Method A - Join-as-you-go :
Work to the final shell lace edge of the new module, then when you reach the spot that will meet an already-completed module, align them and sl st through both loops to join through the picot or scallop spaces. Work across the side to form a continuous seam. Repeat for all necessary join points.
Method B - Sewing :
Lay completed modules on blocking board in final order. Using tapestry needle and matching cream yarn, mattress stitch or whip stitch through the back loops of edge fans to join modules invisibly on right side. Use small, evenly spaced stitches to maintain flexible seam. Fasten off and weave ends.
Info :
Where two diamond points meet tip-to-tip, join the adjacent picot loops together with 3-4 sl st to create a small reinforced bridge that reads as a decorative bobble in the finished piece. This detail is visible in the sample runner along the central spine.
— Central Connecting Panel (Optional, for added stability) :
Round 1 :
Once your diamonds are joined into a long chain, you may wish to add a narrow lattice strip down the center back for reinforcement. With cream yarn, attach at the back center of one diamond and ch 20, turn and work rows of sc across (20 sc) for 2-3 rounds, then join the strip across adjacent diamonds at regular intervals with sl st.
Info :
This panel is hidden on the reverse but provides added stability to keep the runner flat and prevents modules from twisting when in use.
— Outer Border (Work around entire joined runner) :
Round 1 :
With cream yarn, join at any outer scallop. Ch 1, sc across each outermost picot or scallop space to create a unifying outer edge. Keep stitches even; count total sc across whole runner and make note for subsequent rounds. (example count: 240 sc for 10 modules — adjust to your real count)
Round 2 :
Work an even round in BLO to create a neat ridge: 1 sc in each st BLO (same count as Round 1). This will help the outer scallops stand proud. (repeat count)
Info :
Maintaining the same stitch count across rounds simplifies the decorative rounds that follow. If you have small gaps, use sc2tog or increase strategically to keep the border flat.
Round 3 :
Decorative arch round: *Ch 5, sl st into next base sc, skip 4, sc in next* across. Adjust arch lengths to make sure arches sit evenly around corners and tips.
Round 4 :
In each ch-5 arch work: *sc, ch 3, 5 dc, ch 3, sc* to form an outer scallop fan. At tips allow a slightly larger fan of 7 dc for a defined point. Count per arch and fan to ensure uniformity (adjust number of arches so total fans equals number of outer scallop units on joined runner).
Round 5 :
Picot finishing: In each outer scallop, *sc, (ch 4, sl st back into sc)* to create small picot loops around the runner edge. Work neat consistent picots at every fan tip for the lacy finish seen in the photos.
Info :
Blocking the entire runner after the outer border is essential to settle the lace and set the scallops to the same height. Wet-block and pin each scallop to the same depth from the table for a professional finish.
— Reinforcement Eyelet Row (Across inside of border) :
Round 1 :
With cream yarn and working inside the border near the diamond joins: *ch 6, sl st into next chain base to make larger eyelet; 3 sc between eyelets* — repeat across the length of the runner to create the group of round holes visible between diamonds.
Info :
These large eyelets are visible as the circular holes between each diamond in the photo. Space them evenly and reinforce by working a sc round around the eyelet edge if desired.
— Tassels (Make 2) :
Round 1 :
Make a tassel using cream yarn: wrap yarn 80-100 times around a book or tassel maker to create a dense tassel (length target ~10-12 cm). Slip the wraps off and tie thrice near top using a 10-12 cm length of cream yarn.
Round 2 :
Trim the looped end to form the fringe. Wrap 2-3 times with color A (deep plum) and color B (mid-lavender) yarn alternately to create the banded neck seen in the photos. Secure wraps with tight knots and a dab of craft glue hidden under the wraps if desired.
Round 3 :
If using a wooden bead as tassel head: thread bead onto the tied top before trimming; cover bead with additional wraps to create a smooth covered bead look. Attach tassel to the end tip of the runner by threading the top tail through the motif tip and knotting securely on the reverse side.
Info :
Make two identical tassels and attach one to each runner end for symmetry. Test tassel length against runner length and trim fringes evenly with scissors when satisfied.
— Finishing Rounds and Blocking :
Round 1 :
Weave in all remaining tails across the reverse, keeping threads trimmed short and tidy. Use a tapestry needle and bury ends through the reverse lace for stability.
Round 2 :
Final wet-block the assembled runner: pin to a flat surface, stretching gently so scallops are even and the runner is straight. Allow to dry completely before removing pins.
Info :
Blocking transforms the runner from hand-gathered modules into a crisp cohesive lacework piece. Use rust-proof pins and a supporting surface that can be wet or sprayed.
Round 3 :
Spot-check all joins; reinforce any area that gapes with a row of small invisible whip-stitches on the reverse. Trim stray fibers and press very lightly if needed (follow yarn care instructions).
Round 4 :
Admire your finished Lavender Swirl Table Runner. Lightly steam if necessary and position on a table or dresser.
Info :
For machine-washable yarns, spot test a small scrap before washing the whole runner. Hand wash gently in cool water if needed and re-block while damp to restore shape.
This dreamy lavender runner brings a touch of handmade elegance to any table and is a joy to make from the first spiral to the final tassel. Each step rewards you with texture and color contrast, and blocking transforms the motifs into a refined, lace-like centerpiece. I hope you enjoy making this piece as much as I enjoyed designing the spiral details and delicate borders — it’s a satisfying project that finishes as a true heirloom accent. 🧶💜