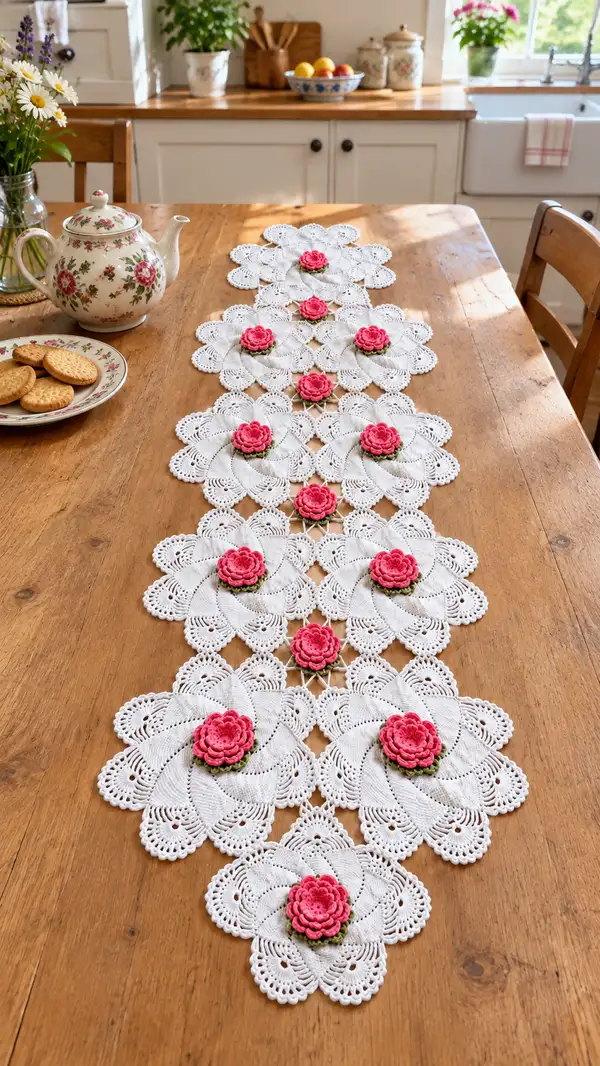
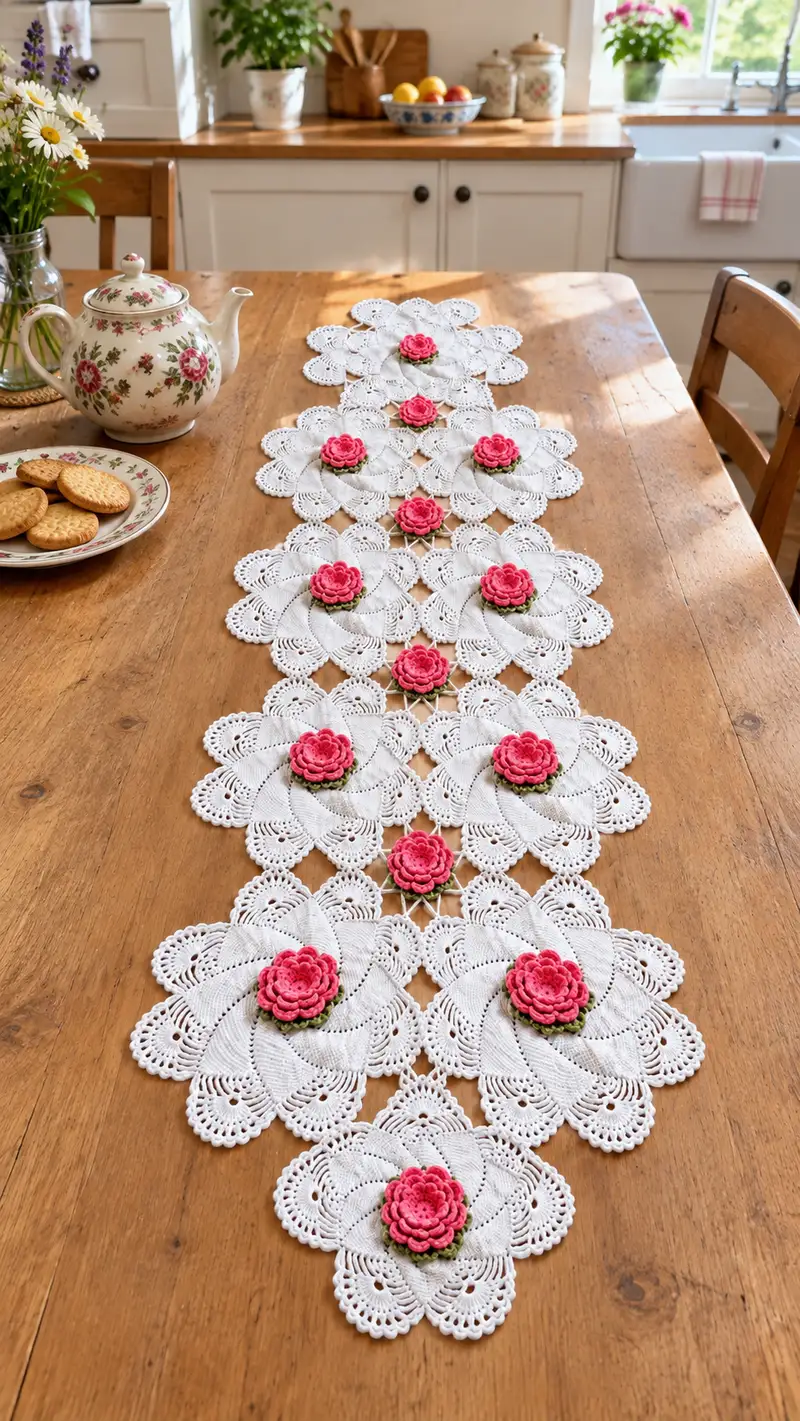
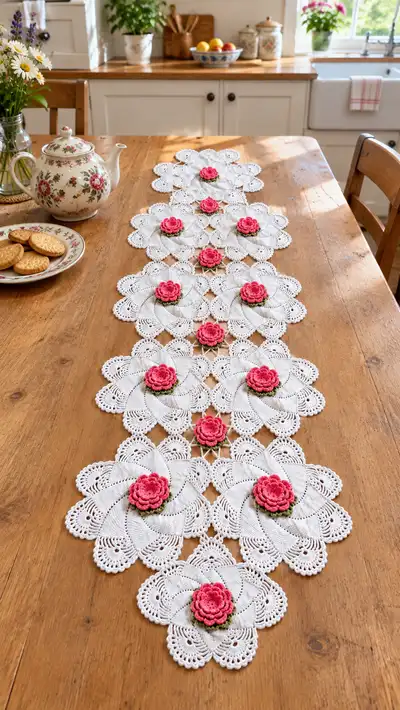
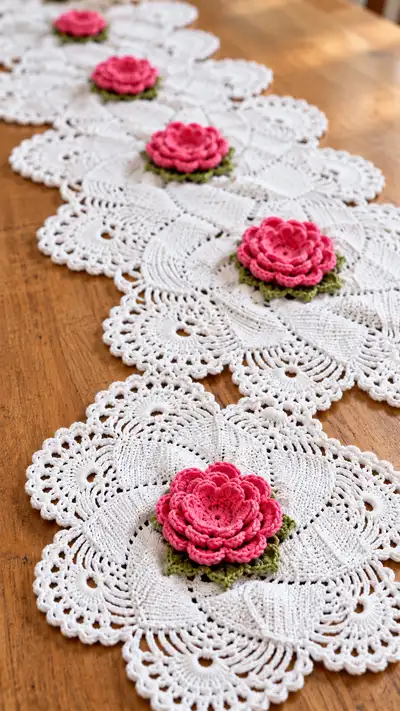
A romantic vintage-inspired lace table runner made from interconnected white lace motifs topped with layered pink crochet roses and tiny green leaf bases. This pretty runner features delicate scalloped edges, swirling petal motifs and three-dimensional roses that add a hand-crafted centerpiece to any table. The pattern uses fine crochet thread and a small hook to achieve crisp, lacy detail — perfect for gift-making or dressing a tea table.
Progress Tracker
0% Complete
— Materials and Gauge :
Info :
Use size 10 crochet cotton thread and a 1.75mm hook for the lacy white motifs to achieve crisp stitches. Gauge is not critical for a runner, but each white motif should measure approximately 18-20cm across after blocking when worked with suggested materials. Adjust hook or thread weight to change motif size uniformly.
— Rose (Make 10 – one per large motif) :
Round 1 :
Make a small ring with pink thread: 6 sc in magic ring (6)
Info :
Keep the first ring tight. These first rounds form the tiny central cup of the rose.
Round 2 :
Inc in each st around (6 inc) (12)
Round 3 :
(1 sc, inc) x6 (18)
Round 4 :
1 sc in each st (18)
Round 5 :
Change to a slightly smaller hook if desired for firmer petals. *Ch2, 3 dc in next st, ch2, sl st in next st* repeat around into each st (work petal clusters in alternate sts) (9 petal clusters)
Info :
Round 5 creates the first ring of miniature petals. You may work into every other stitch to keep the cluster count tidy. Count clusters to ensure consistency — you should have nine small petal clusters around the center.
Round 6 :
Ch3, turn to work into front of clusters: In each cluster space work (sc, hdc, 3 dc, hdc, sc) to form fuller petals (9 petals; total 5 stitches per petal grouped; round count 9x5=45)
Round 7 :
Ch1, sl st to base between petals to begin second petal layer. For each petal: into space at petal tip work (sc, ch2, 5 dc, ch2, sc). This forms a pronounced petal layer (9 petals x 7 sts =63)
Round 8 :
Shift placement slightly outward: sl st into ch2 space from previous round, and in each ch2 work (sc, hdc, 3 dc, hdc, sc) to add shaping (9 petals x 5 sts =45) — note the stitch count changes because we are working into spaces rather than base stitches
Info :
At each petal layer trim and weave in a short tail or leave long tail if you plan to stitch rose to leaf base later. Keep petals slightly folded inwards; use your fingers to shape each petal before moving onto the next round.
Round 9 :
Work a third outer layer: in each petal space work (ch1, sc, ch1, (5 dc in same space) ch1, sc) — this outer ruffle increases the full rose silhouette. Count petals = 9, stitches per petal variable; visually ensure uniformity (approx 9x9=81)
Round 10 :
Finish rose edge: sl st around outer ruffles to tidy, then fasten off, leaving a 20-25cm tail for sewing (no stitch count needed for sl st round)
Info :
For a more compact rose, use a smaller hook for rounds 5-9; for a looser, open rose, use the same hook throughout. Make 10 roses (or as many as motifs you plan to top) and block lightly by pinning petals outward on foam and spritzing with water to set shape.
— Leaf Base for Rose (Make 10) :
Round 1 :
Using green thread: mr, 6 sc into ring (6)
Round 3 :
(1 sc, inc) x6 (18)
Round 4 :
1 sc in each st (18)
Round 5 :
Begin leaf points by working into chain spaces: *(ch3, sk 1 st, sl st) x3* around to create 6 small loops (6 loops)
Round 6 :
In each ch3 loop work (sc, hdc, 3 dc, hdc, sc) to make 6 tiny pointed leaves. Total stitches per round = 6x7=42
Info :
Make the leaf base slightly smaller than the rose bottom so the green peeks out naturally. Fasten off leaving a long tail for sewing to the rose and to the white motif center.
— Small Connector Motif (Diamond Joiner) (Make 8 per join) :
Round 1 :
With white thread: ch6, join with sl st to first ch to form small ring (6 chains)
Round 2 :
Ch2 (counts as first dc), 11 dc into ring, join (12)
Round 3 :
*Ch3, sl st into next dc* repeat around forming 12 chain-loops; join (12 loops)
Round 4 :
In each ch3 loop work (sc, 3 dc, sc) to create scallops. Total approx 12x5=60 sts
Info :
These small diamond joiners sit between large motifs and create the airy lattice seen in the runner. Make 2-3 for every junction depending on layout.
— Large White Motif (Main Lacy Petal Motif) :
Round 1 :
Using white thread: mr, 8 sc in magic ring (8)
Round 3 :
(1 sc, inc) x8 (24)
Round 4 :
(2 sc, inc) x8 (32)
Round 5 :
(3 sc, inc) x8 (40)
Round 6 :
(4 sc, inc) x8 (48)
Info :
Rounds 1-6 establish a neat circular base divisible into 8 segments. Count your stitches to ensure multiples of 8 so petals align evenly.
Round 7 :
1 sc in each st (48)
Round 8 :
*Ch4, sk 4 sc, sl st in next sc* repeat around to create 8 chain loops (48 around, 8 loops)
Round 9 :
Work into each ch4 loop to form initial petal ribs: *(sc, ch1, 6 dc, ch1, sc) in each loop* (8 petals x approx 10 sts each ~80)
Round 10 :
Ch2, in each petal work 2 dc clusters up one side of petal, 1 dc in tip, 2 dc clusters down other side; this creates an elongated petal shape (counts vary; petals x cluster counts = visually ~96)
Info :
Keep petals shaped by gently pinching each petal outward as you work the next rounds. The motif in the photo has a swirling, pinwheel-like appearance; to achieve this, offset petal rows slightly when stitching across petals so they seem to swirl clockwise when viewed from above.
Round 11 :
In the valley between petals work *(ch3, sc into base between petals, ch3)* repeat to make 16 small loops between main petals (16 loops)
Round 12 :
Work into these 16 loops: *(sc, hdc, 5 dc, hdc, sc) in each loop* to form delicate pointed lace edges that will give the motif its airy rings (16 x 9 =144)
Round 13 :
Ch1, make a round of picot accents: *sc 3, picot (ch3 sl st in first ch), sc 3* around following the outer loops (counts variable ~ 144 around)
Info :
The white motif uses a combination of chain-spaces and clusters to create the layered lace effect. Rounds 9-13 add the first outer layer and lacework. Keep tension consistent and block after finishing to open the design.
Round 14 :
Switch to a round of elongated arches: *ch6, sl st into a stitch 4 sts earlier along outer ring* repeat around to form 16 large loops (16 loops)
Round 15 :
In each ch6 loop work: (sc, ch2, 7 dc, ch2, sc) to form pronounced scalloped petals (16 x ~11sts =176)
Round 16 :
Ch1, sc in each st around to tidy and unify the outer ring of arches (approx 176 sc)
Round 17 :
Begin decorative shell border: *(sk 2 sc, 7 dc in next sc, sk 2 sc, sl st in next sc)* around to create evenly spaced shells. Shell count approx 16
Round 18 :
Work small picot finishing on shells: in each shell work *(sl st, ch3, picot, sl st) across the top* to add delicate points (visual finishing — stitch count varies)
Info :
These later rounds create the wide lacy scalloped edge you see in the photos. Blocking at this stage is critical: wet-block each motif and pin to the full width to open the scallops before joining.
Round 19 :
Final tidy round: sc evenly around edges into top loops of shells and picots to create smooth join points for assembly (count depends on motif after blocking — aim for even number divisible by 8)
Round 20 :
Fasten off and weave ends; leave a long sewing tail (approx 20cm) to stitch rose/leaf to center and to facilitate joining motifs
— Small Square/Connector Motif Variation (for ends and transitional joins) :
Round 3 :
(1 sc, inc) x6 (18)
Round 4 :
Change to a chain-lattice: *ch4, sl st into next sc* around to create 6 chain loops (6 loops)
Info :
These small units are worked where motifs meet at four corners or where the runner narrows. Make as many as needed for your chosen layout.
— Joining Motifs (Chain Join Method) :
Info :
Join motifs while blocking whenever possible. Use the long sewing tail left from Round 20 of each white motif. Position two motifs so scallops meet and stitch through corresponding stitches along the scallop ridges using invisible whip stitch or ladder stitch. Alternatively, use slip-stitch join worked on the front by placing motifs right sides together and sl st through corresponding outer loops; this produces a slightly raised seam.
Round 1 :
When joining choose one motif as base. With a tapestry needle and the long tail, pin motifs together matching scallop peaks (work 6 to 8 stitches across each join depending on shell size) — there is no numeric stitch total; maintain even tension
Info :
For the runner shown, motifs are arranged in alternating rows of single and paired units with small diamond joiners between — pin entire layout first to ensure symmetry, then sew sequentially from center outward to keep runner flat.
— Long Runner Layout & Assembly Overview :
Info :
Layout in the photos: 10 large motifs arranged in a long column alternated with diamond joiners centered between motif edges. Each large motif is topped with a green leaf base and a pink rose. Plan the number of motifs to match your desired runner length — add or subtract motif repeats as needed, maintaining the same joining scheme.
Round 1 :
Pin motifs in final layout on blocking board with connectors placed between them. Sew all joins using the long tails and a whip stitch through the back loops of scallops for minimal visibility. Secure each rose/leaf to the center of a motif by stitching through leaf base into motif center and then through the rose center (use long tails to anchor)
Info :
When attaching roses, stitch through several inner rounds of the rose base to make the flower sit flat and stable. Avoid stitching through outer ruffles to keep petals free and three-dimensional.
— Final Edging and Blocking :
Round 1 :
With the entire runner assembled, add a final delicate scallop around the outermost edges. Work white thread: join with sl st to any outer picot, *ch3, (sc in next picot), ch3, sl st in next base stitch* repeat smoothing outer contours. End with sl st and fasten off
Info :
After the edging is complete, wet block the entire runner on a large board or foam mat. Pin each scallop and rose petal outward gently to open the lace. Let dry completely for a flat, professional finish.
— Tips & Techniques (Info heavy section) :
Info :
Always keep stitch counts of base rounds divisible by the number of petals (here, 8) so that petal placement remains accurate. Use small stitch markers at boundaries between petals to keep track. Work roses with slightly firmer tension than motifs so flowers retain shape and do not flatten under their own weight.
Info :
When joining, use thread that matches the motifs to keep joins invisible. Sew with small, even stitches and avoid pulling too tight — pulling will pucker the lace. Use steam-blocking sparingly if your thread allows; always test on a small sample first.
Info :
For color variations: try pale blush roses or ivory petals for a vintage look. If changing motif spacing for a runner of different length, maintain symmetry by adding full motif pairs rather than single motifs in the center.
Info :
When weaving in thread ends on fine thread, thread them under 6-8 stitches across the back to hide and secure them; tie a small knot only if necessary and then flatten with gentle steam from a distance.
Info :
Use gentle hand-washing with mild soap when cleaning; avoid agitation which can fuzz or distort fine cotton thread. Re-block after washing to restore scallops and rose shapes.
You've completed a timeless vintage-style rose lace table runner that will brighten any table setting! Each motif and layered rose combine to create a romantic, hand-made centerpiece you'll be proud to display. Take a moment to admire your blocking work — the scallops and roses breathe after finishing and create a stunning tactile effect. 🧶🌹 Share your creation and enjoy the cozy, floral charm it brings to your home. Happy stitching! ✨