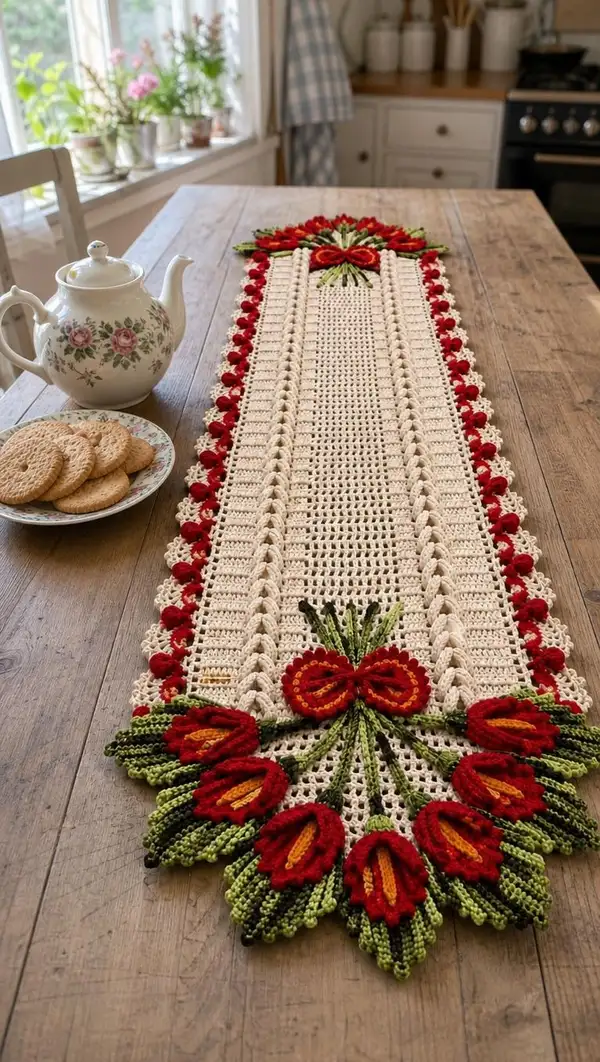
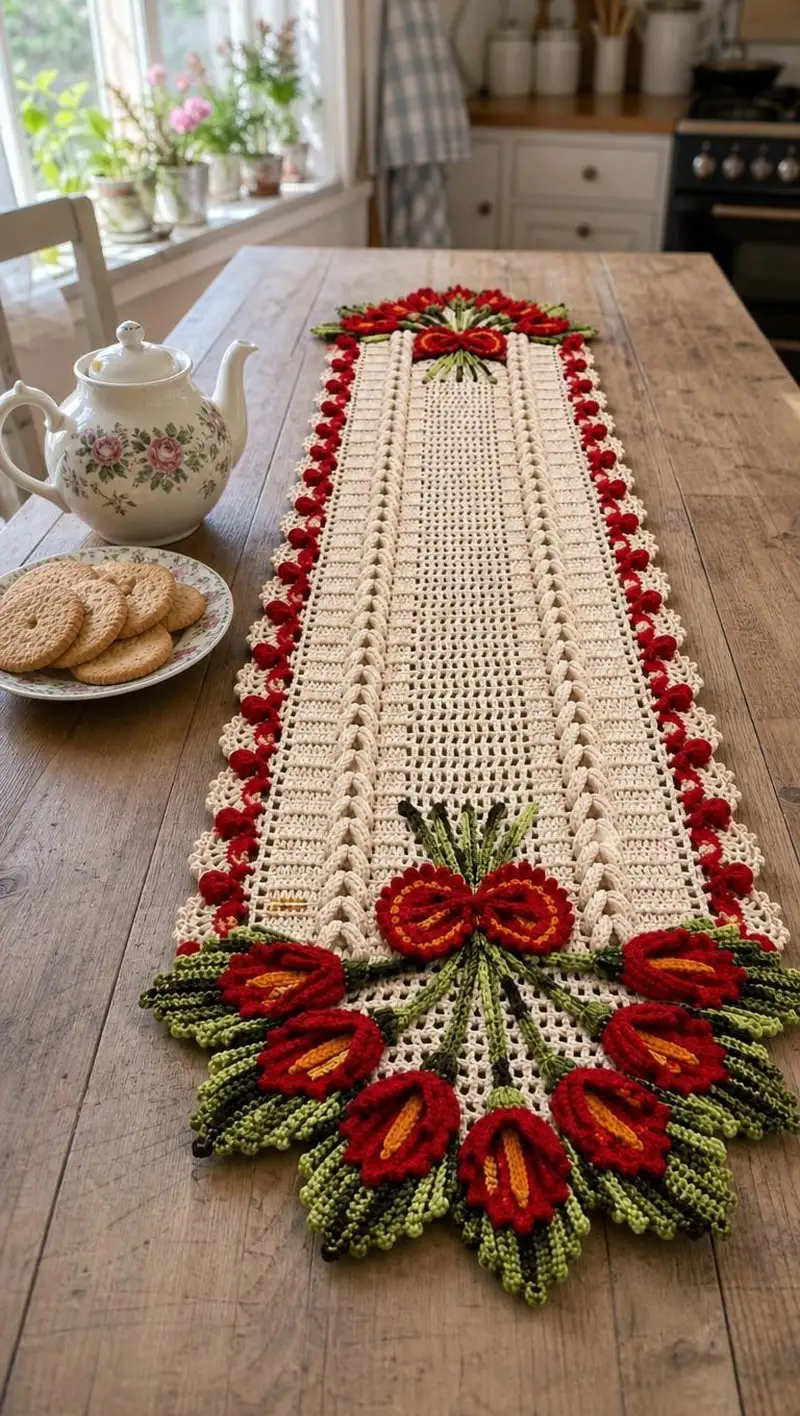
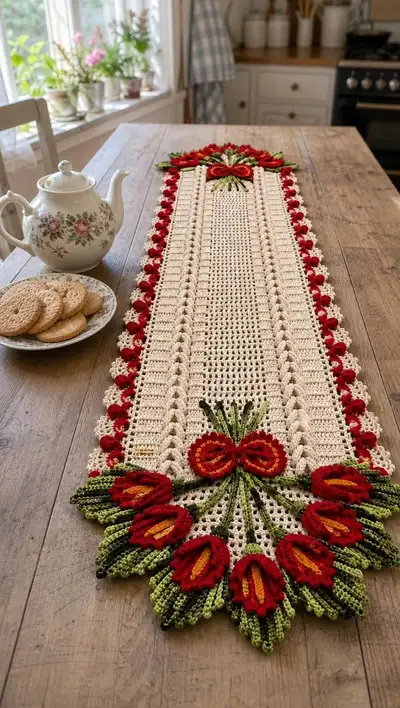
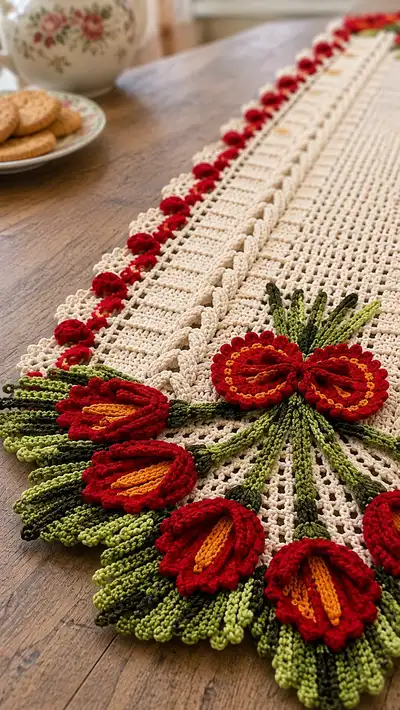
A long, elegant table runner featuring a creamy openwork central panel, twisted rope columns, scalloped red bobble edging, and dramatic red tulip bouquets at both ends. This vintage-inspired runner pairs textured stitches with bright floral appliques for a heirloom look. The design uses layered petals, two-tone leaves and a decorative bow to create a striking focal point for your table. Perfect for a farmhouse or cottage-style dining table.
Progress Tracker
0% Complete
— Notes & Gauge :
Info :
This pattern is worked in sections: a long central panel (worked flat in back-and-forth rows), two twisted rope columns worked into the panel edge, a scalloped bobble border worked around the runner, and multiple tulip appliques plus a decorative bow attached at each end. Gauge is not critical for fit, but consistent tension is essential to create a flat runner. With 3.5mm hook and worsted cotton, 10 x 10 cm = 14 dc x 8 rows in solid dc. Adjust hook if your fabric is too loose or too stiff.
— Foundation & Central Panel (work flat) :
Round 1 :
Foundation: ch 123 (this gives 120 working stitches across after turning chain). Turn, ch 3 (counts as first dc), dc in 4th ch from hook and in each ch across. Total: 120 dc (120)
Round 2 :
Turn, ch 3, dc in each st across to last st, dc in top of turning ch. Total: 120 dc (120)
Round 3 :
Turn, ch 3, dc across (120)
Round 4 :
Turn, ch 1, sc in each st across (120)
Round 5 :
Turn, ch 3, dc across (120)
Info :
From this point the main panel uses a repeated textured mesh: columns of dc separated by chain spaces to create subtle vertical rhythm. Keep edge stitches neat—use the first and last stitch of each row as turning edge, counting them into totals above.
Round 6 :
Turn, ch 3, *dc 3, ch 1, sk 1, dc 3* across to last 2 sts, end with dc in last 2 sts. (120)
Round 7 :
Turn, ch 1, sc in each st and each ch-1 space across (120)
Round 8 :
Turn, ch 3, dc in each st across (120)
Round 9-12 :
Repeat Rounds 6-8 twice: (create subtle mesh and sc row). Maintain 120 sts each row (120)
Info :
Measure the width now: the central dc panel should be approximately 25-30 cm wide depending on yarn. If you prefer a narrower runner, reduce foundation chain by multiples of 4 and adjust counts throughout.
Round 13 :
Turn, ch 3, dc across (120)
Round 14 :
Turn, ch 1, sc across (120)
Round 15 :
Turn, ch 3, dc 2, front post treble cluster (FPtr-cl) spanning 4 sts: *yo twice, insert hook around post of next 3 dc rows from previous row, draw up loop, (yo, draw through 2) three times* (this creates a raised cable-like rope); continue chain spaces and dc rhythm across to create a pair of FPtr-cls centered 5 sts in from each side—work pattern so there is a central field of dc mesh and two rope columns 14 sts in from each edge. Total working sts remain 120 when counting dc anchors.
Round 16 :
Turn, ch 1, sc across, working sc around front post clusters where present to anchor them (120)
Round 17-22 :
Repeat Rows 13-16 and 14 alternating (dc row, sc row, rope row, sc row) for 6 rows total to build height and to lock the rope columns into place. Keep 120 sts each row. (120)
Info :
The rope columns are formed by front-post trebles crossed every 6th row to give a twist. If unfamiliar with front post trebles, practice on a swatch: wrap yarn twice, insert hook around the post of the designated stitch from the right to left, draw up loop and finish treble. Work clusters exactly where noted to form a pair of twisted ropes flanking the center panel.
Round 23-40 :
Continue established repeat: Row Pattern = (Row A: ch 3 dc across, Row B: ch 1 sc across, Row C: ch 3 rope-action row with front post trebles forming twist, Row D: ch 1 sc across). Repeat this 4-row sequence 9 times (36 rows total counting R23-R40). Ensure rope crosses every alternate rope row by working FPtr-cl forward (wrap and pull) and on the next rope row work FPtr-cl behind (to create crossing effect). Maintain 120 stitches per row.
Info :
Stop every 8-10 rows to check that the panel remains flat. If the edges start to ruffle, adjust tension or block lightly. Keep a stitch marker at the position of the rope columns (for example, 14 sts in from each edge) to ensure they remain aligned from row to row.
Round 41-50 :
Continue the 4-row established repeat for 10 more rows to elongate the central panel until the runner measures the desired length minus the space for tulip clusters (approx. 70-75 cm from center to each tulip cluster if making full-length runner). Maintain 120 sts per row.
Info :
At this point decide your final desired length. The sample runner in the photos measures approximately 120-140 cm total length. For a shorter runner reduce the number of central repeats accordingly. The instructions below assume a long runner that will accommodate two full tulip clusters (one at each end).
— Side Rope Columns (worked together with main panel or after; make 2 continuous columns along each side) :
Info :
The rope columns are introduced in the central panel but you can also crochet them separately and sew them in. These instructions give a continuous rope you can work in place as you create the central panel or make separately. Rope width = 6 sts; repeated front post clusters form the twist.
Round 1 :
With cream, at the marked rope position, ch 6 and join with sl st to anchor to side of panel turning edge, turn, ch 3 (counts as first tr), tr in next 4 ch, sl st into panel to anchor. (6 rope sts)
Round 2 :
Turn, ch 1, sc across rope edge, sl st to panel anchor, fasten off or continue. (6)
Round 3 :
Join cream at rope anchor, ch 4 (counts as tr), tr 5 across rope foundation, working FPtr into the central two stitches of the rope every 8th row to create the crossing. Anchor to panel with sl st as you work so rope lies flat. (6)
Round 4-12 :
Repeat rope tr rows and sc anchor rows alternately for the full length of runner on both sides. You will complete approximately the same number of rope repeats as the central panel rows. Keep rope width consistent at 6 stitches and anchor firmly to the panel every 4-6 rows. (6)
Info :
If working ropes separately, leave long tails at each end for sewing into the ends of the central panel where the tulip clusters attach. When anchoring, use sl sts into the edge sts of the panel to avoid gaps.
— Side Scalloped Border with Red Bobbles (work along long sides) :
Round 1 :
With cream, join at one corner edge bottom, ch 1, sc evenly around the runner edge along the long side (including rope anchor), working approximately 120 sc along each long side depending on final length - keep count: sample runner approximate count per long side = 480 sc if counted multiple rows, but for edging treat it as even spacing. Work sc evenly to maintain flat edge.
Round 2 :
Turn, ch 3, dc in same st, *ch 1, sk 1, dc in next st* repeat across to end to form an even dentil edge that gives space for scallops. Maintain even spacing; adjust if needed for final stitch count.
Round 3 :
Switch to Red yarn. Join with a sl st at the base of each scallop spacing, ch 1, (sc, 5-tr bobble cluster, sc) in designated scallop base to create a bobble rose. Each bobble cluster = make 5 partial trebles that join at top: *(yo twice, insert hook, draw up loop, yo and draw through 2) repeat to create tall petals; complete last yarn overs through all loops to close cluster. Anchor with sc each side.* Repeat along the entire long side spacing approximately every 6-8 stitches depending on row width. (Approx 20-30 bobbles per long side for a runner pictured)
Round 4 :
Switch to cream: Work 1 sc in each st and around each bobble base to tidy and anchor. (st count varies)
Round 5 :
Ch 4, *sc in next st, picot (ch 3, sl st in top of last sc), sc in next 3 sts, ch 3, sc in same st* across to create a delicate scallop edge outside the bobble row. Fasten off and weave ends. Repeat on other long side.
Info :
The red bobbles are worked in place around the side border. If you prefer smaller bobbles, reduce to 3 partial trebles per bobble. Space the bobbles evenly — use pins to mark placement before working them to ensure symmetry on both sides.
— Short Edges & Corner Preparation :
Round 1 :
At each short end of runner, work additional foundation rows that will accept tulip clusters. Work 6 extra rows of sc around the short end to create a flat base for sewing motifs. With cream, sc evenly around the short edge, turning tightly at corner to keep a neat 90-degree corner. (st count equals width of runner across short end)
Round 2 :
Work a decorative scallop around these short ends in cream (ch 3, 3 dc in same st, sk 2, sc in next, repeat) to provide an anchor for tulip bases. Fasten off and leave tails for sewing.
Info :
Ensure both short ends are worked identically. These short end scallops will hide and secure the stems and base of the tulip clusters.
— Tulip Motif (Make 14 total; 7 per end) :
Info :
Each tulip is worked in several parts: central stamen / inner petal in golden yellow, inner orange petal tube, outer red petal shell, and a layered leaf cluster. The tulip is slightly three-dimensional and is sewn in a fan to create bouquets. Make 7 identical tulips per end for the pictured look. Work petals tightly with the smaller hook (3.0mm) for crisp shaping.
Round 1 :
Inner Stamen (yellow): mr, ch 1, 6 sc in mr (6)
Round 2 :
(inc) x 6 — 12 sc (12)
Round 3 :
Ch 1, sc in BLO around (12) — creates a subtle ridge to act as the inner core
Info :
Fasten off leaving a long tail for sewing into the inner orange tube later. This stamen will be inserted into the orange inner petal to give the tulip its yellow center.
Round 4 :
Inner Petal Tube (orange): ch 11, sl st to join into a tube ring, round 1: ch 1, sc 11 around tube. (11)
Round 5 :
Round 2: (1 sc, inc) x 3, sc 2 (14) — increase slightly at center back to give fullness
Round 6 :
Round 3: sc in each st (14)
Round 7 :
Round 4: fold tube slightly lengthwise and sc through both thicknesses along the top edge to create a cupped inner petal form. (14)
Info :
Insert the yellow stamen into the orange tube now and use yarn tail to sew the stamen to the tube base. Shape the tube so the stamen peeks just above the top edge when finished. Lightly stuff the tube with a tiny amount of fiberfill before closing to retain shape.
Round 8 :
Inner Petal Edge: With orange, sc around the top edge of the folded tube, ch 1 and fasten off leaving long tail for later assembly. (14)
Round 9 :
Outer Petal Shell (red) - base: mr, ch 1, 8 sc in mr (8)
Round 10 :
Round 2: (inc) x 8 — 16 sc (16)
Round 11 :
Round 3: (1 sc, inc) x 8 — 24 sc (24)
Round 12 :
Round 4: sc across (24)
Round 13 :
Outer Petal Shaping Row 1: *ch 4, sl st into next st to create a scalloped petal edge across the top of the shell* repeat across top to create 6 petal loops. Fasten off and weave ends. If you prefer taller petals work ch 5 loops for slightly higher lobes. This creates the outer petal shell that will cup the inner tube.
Info :
Sew the orange inner tube (with yellow stamen) into the center of the red outer shell using the long tails. Pull gently so the inner tube sits slightly proud and peeks through the red scallops — this creates the layered petal look in the photo.
Round 14 :
Petal finish: With red, work a round of sc around the base of the outer shell to tidy and create a seam for sewing onto the runner or to the stem. (24)
Info :
Make 14 tulips total. You may add an extra round of sc or slip stitches to firm the base where you will sew stems. Keep long tails from all parts to attach to stems and to runner later.
— Tulip Stem & Leaf Cluster :
Round 1 :
Stem: With dark green, ch 24 for a long stem (longer stems can be 30 ch). Work back along chain: sl st in second ch from hook and in each ch across to form a chain tube. Fasten off leaving long tail for sewing. This creates a firm stem you can bend and stitch into place.
Round 2 :
Leaf Base (Light Green): ch 20, sc across back to create a flat leaf tube, fold and sc across top 10 sts to create a thicker end with scalloped teeth by working *hdc, dc, hdc* across the tip to mimic serrations. (20)
Round 3 :
Leaf Detail: Switch to dark green and with FLO work a row of sc across to create a ridge down the center of the leaf if desired. Fasten off leaving tail for sewing. Make 2-3 leaves per tulip arranged in layers behind each flower.
Info :
Make leaves in pairs: one larger leaf (ch 20 base) and one smaller inner leaf (ch 14 base). For the pictured runner each tulip has 2-3 leaves layered and offset. You will create a fan of stems for the bouquet by arranging stems and leaves and sewing them into a small central base.
Round 4 :
Leaf tips: Add a tiny embroidered stitch in black or deep olive at each leaf tip for accent using duplicate stitch or simply weave a darker yarn into the tip for contrast.
Info :
Make all stem pieces for 14 tulips now. For the runner pictured the stems are slightly arced; when sewing into place, position stems so they fan outward from a central tied bow and secure them with small hidden stitches underneath the bow.
— Bow Accent (Make 2 — one per end) :
Round 1 :
Bow Loop (red): ch 30, sc across back to form a loop, fold in half and sc around to create thickness. Make 2 loops per bow. (30)
Round 2 :
Bow Center Wrap: ch 6, sc 6, wrap tightly several times around the center of the two loops and secure with st s. Fasten off leaving long tail for sewing to the base where stems meet. This forms the decorative knot in the center of the bouquet.
Info :
Arrange bow loops and tiny tails in a pleasing bow shape, then secure through the back by sewing the center wrap tightly and tucking ends to hide. The bow will sit at the center top of each tulip fan.
— Assembly of Tulip Clusters (7 tulips per end) :
Round 1 :
Arrange 7 stems in a slight fan shape. Layer leaves behind each tulip head so green shows underneath red petals. Use pins to hold arrangement at short end status on top of the cream scalloped short edge. Center a bow in the middle of the fan. When satisfied, baste the stems together with long tails of green using a whip stitch to hold the fan compact.
Round 2 :
Sew tulip bases to the scalloped short end: from the wrong side of the runner, use the long tails left on each tulip base and stem to sew through the scallop base and the short-edge foundation row. Use small, tight whip stitches and go around the tulip base twice for stability. Hide ends by weaving into adjacent stitches and trimming.
Info :
Make sure the bouquet sits flat against the short end to avoid catch points. If you prefer, tack the back of the bouquet to the underside of the runner to reduce movement. Repeat for opposite end with a mirrored arrangement so the two ends look identical.
— Extra Leaves & Final Touches :
Round 1 :
Add several slender shoots between and behind tulips by chaining 18-30, slip stitching back along chain and sewing the base under the bow. These add natural-looking greenery and echo the spokes visible in the photo.
Round 2 :
Weave any loose yarn tails neatly into the back of appliques and runner interior so nothing shows on the RS. Use small blind stitches to close gaps and reinforce bases of heavy tulips with additional whip stitches if needed.
Info :
Use blocking pins and a damp cloth to steam-block the tulip petals and leaves gently for a crisp, finished appearance. Do not over-wet cotton; a light steam and pinning will shape petals and scallops in place nicely.
— Finishing Border & Final Edging :
Round 1 :
After attaching all tulip clusters and ensuring both ends are symmetrical, work a final slip-stitch round with cream around the entire runner to neaten edges and hide assembly stitches. Work sl st evenly and catch through base loops only for tidiness.
Round 2 :
Embellish the edge with red tiny picot flowers between bobbles by working *(sl st into next space, ch 3, sc in next, ch 3, sl st)* around each area where you want tiny pops of red between larger bobbles. Fasten off and weave in ends.
Info :
Final trimming and light blocking unify the runner—the red bobbles should be evenly spaced and the scalloped cream border lie flat. If needed, adjust spacing by adding small anchoring stitches behind bobbles.
— Care & Maintenance :
Info :
Hand wash gently in cool water with mild detergent; reshape and lay flat to dry. Avoid machine washing which can distort 3D appliques. Store flat or rolled to avoid crush marks on petals. Small repairs: re-sew any loose tulip with matching yarn and a yarn needle; tuck and hide ends inside the runner body.
Info :
Congratulations — you have completed the runner! Take time to check all seams beneath the tulip clusters and reinforce where necessary so the motifs remain secure during use.
You did it! This vintage tulip table runner is a beautiful mix of texture, structure, and bold floral color — a real centerpiece. Each stitch adds character and the layered tulip clusters are truly eye-catching. Display it proudly on your table or give it as a heartfelt handmade gift. 🧶🌷✨ Enjoy every stitch and the warm reactions it will bring!