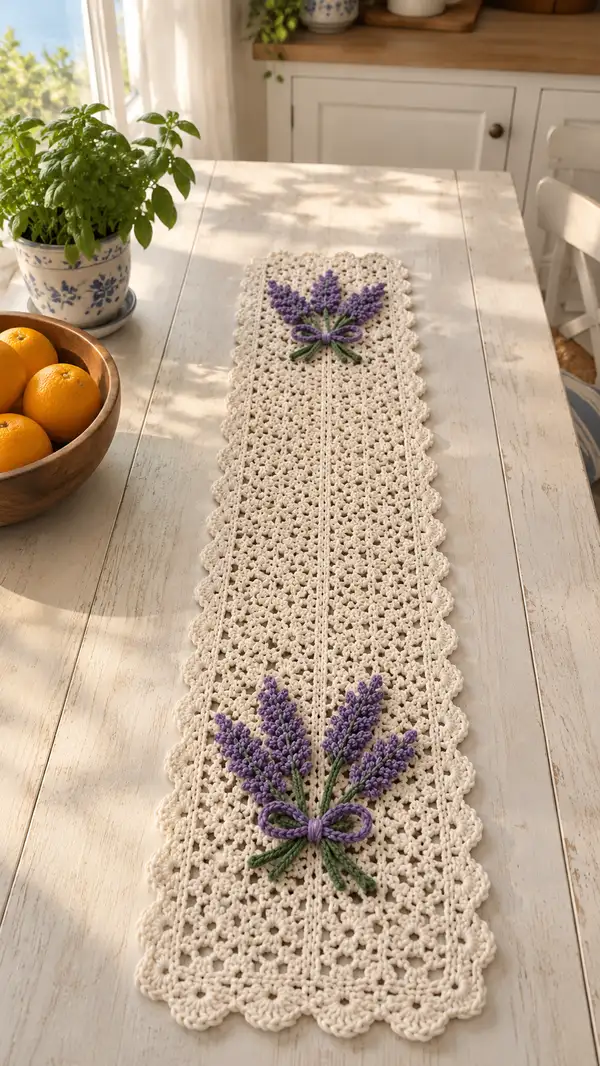
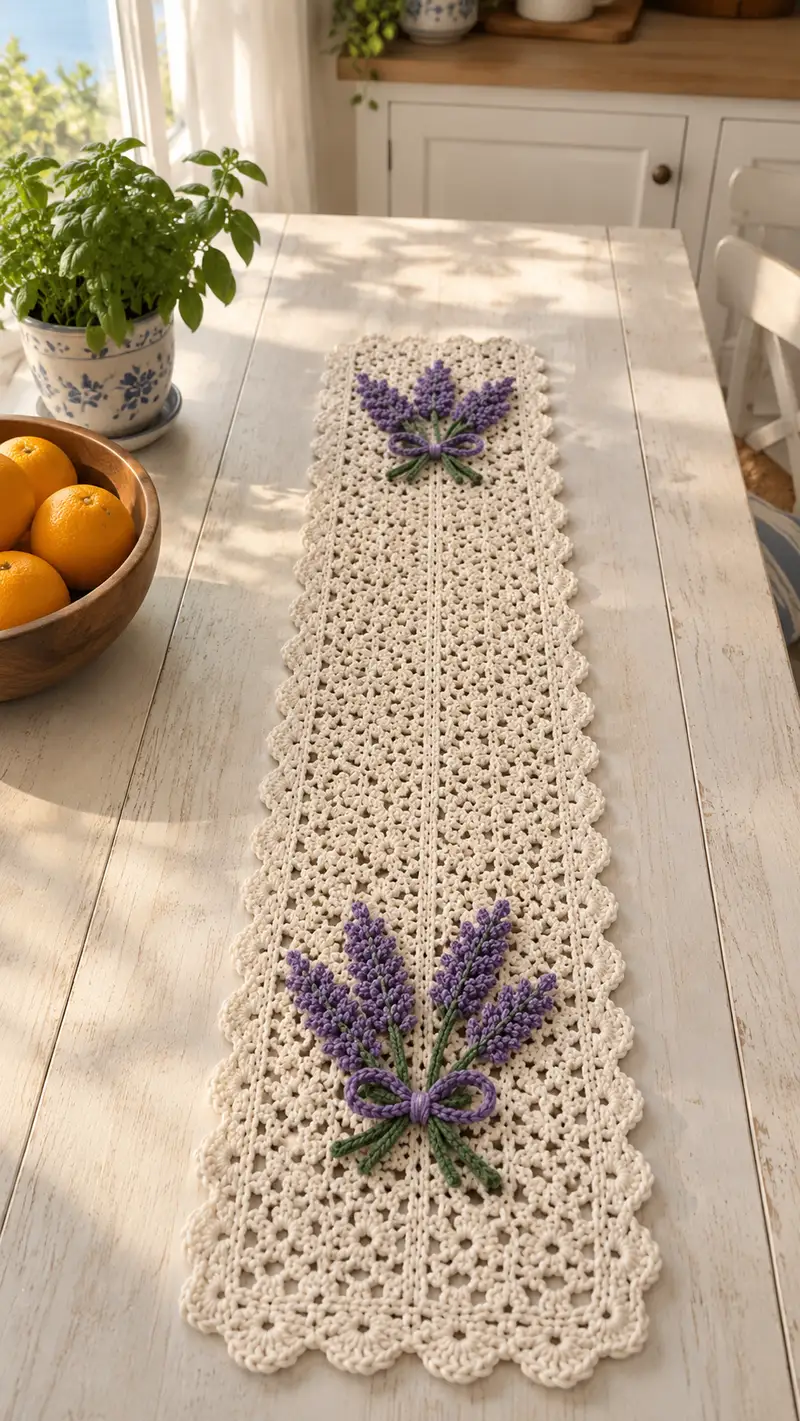
Create a charming vintage-inspired table runner featuring a delicate open lace lattice and two bouquets of lavender applique9s. This runner uses a neutral cream body with scalloped edges and textured purple lavender sprigs tied with a tiny bow. Perfect for a sunny kitchen table or as a thoughtful handmade gift, this pattern emphasizes repeatable lace stitches and tidy applique9 work.
Progress Tracker
0% Complete
— Notes & Gauge :
Info :
Finished runner in the photo measures approximately 36-40" long by 7-8" wide. Gauge is not critical for lace runners but for reference: 18 double crochet stitches = 4" in pattern body using 4.0mm hook. Adjust hook size to match fabric drape. Work loosely for open lace. Pattern works in rows (labelled as rounds for clarity in this instruction set).
— Foundation Chain & Starting Edge :
Round 1 :
Ch 121 (multiple of 6 + 1 for center symmetry). This chain forms the width of the runner. Count twice to ensure 121 chains.
Round 2 :
Row 1: Dc in 4th ch from hook (counts as dc), *ch2, sk2, dc in next ch; rep from * across to last 3 ch, dc in last ch. (approximately 40 dc, 40 ch-2 sps)
Info :
Turn after each row; use a stitch marker to mark center chain (ch 61) so you can align the central seam column later. Keep turning chains tall to match dc height.
— Lace Cluster Pattern (Establishing Repeat) :
Round 3 :
Row 2: Ch 3 (counts as dc), *sk next ch-2 sp, (2 dc, ch2, 2 dc) in next dc (cluster), ch1, dc in next dc; rep from * across to last dc, dc in top of turning ch. (Clusters spaced evenly; adjust count if necessary)
Round 4 :
Row 3: Ch 3, *dc in ch1 sp, ch1, (2 dc, ch2, 2 dc) in center of next cluster, ch1; rep across. End with dc in turning ch top. This forms alternating clusters producing an open lattice.
Round 5 :
Row 4: Ch 1, sc in first dc, *ch3, sk cluster, sc in center dc after cluster; rep across. This secures edge, creating small eyelets between rows.
Info :
Work these 4 rows as the main lace unit. For the photo, this 4-row repeat is worked continuously to create a long strip. Count repeats to reach desired length. Place markers at every 10 repeats for counting convenience.
— Body Lace Repeat (Work until runner reaches desired length) :
Round 6-45 :
Rows 5-44: Repeat Rows 2-5 ten more times (each set of 4 rows = 1 pattern repeat). Continue repeating the 4-row lace cluster pattern until you have completed 40 pattern repeats total, or until the runner reaches approximately 36-40" length. Keep an even tension so motif size stays uniform. (Approx length after repeats: 36-40" depending on hook tension)
Info :
Check your work every 8-10 repeats by laying the runner flat and measuring. If you prefer a shorter or longer runner, add or subtract full 4-row repeats only to keep edge shaping consistent.
— Center Decorative Column :
Round 46 :
Row 41: At the central stitch (marked from foundation), work a column of 1 sc in each row for 12 rows to create a raised center seam effect. To do this, on the right side row, insert hook in the same center stitch and work sc across the row down the runner length for the designated number of rows. This creates a vertical line that runs the length of the runner. (1 sc per row in center column)
Round 47-50 :
Rows 42-45: Continue the 4-row lace repeat pattern around the center column, ensuring the center column sc stitches align and maintain a tidy line. Work row-by-row maintaining the center sc in every right-side row to form the decorative seam.
Info :
To maintain symmetry, if the lace cluster falls on the center, adjust the first cluster of that row by substituting a dc into the center sc to keep the pattern balanced on each side.
— Short End Finishing Preparation :
Round 51 :
Row 46: When runner reaches desired length, work 2 rows of even sc across the final row to create a stable base for scalloped edge. Ch1, sc in each stitch across, turn. (sc count should match current stitch count across; roughly 121 sc)
Round 52 :
Row 47: Repeat Row 46 (1 sc in each st) to strengthen ends and give a neat edge for scallops. Fasten off after this row and weave in ends. Prepare for scalloped edging along both long sides and both short ends.
Info :
Blocking now produces a crisp landscape for scalloped edges and applique9 bloom placement. Pin runner to blocking board or towel at the desired width and length and gently steam or wet-block according to yarn instructions. Let dry completely before adding applique9.
— Scalloped Border (Work along both long sides) :
Round 53 :
Attach cream yarn at one short end corner. Ch1, sc evenly around the runner edge for 3 rounds total to build a firm bordure: Round 1 sc around, Round 2 sc in each st BLO to create a ridge, Round 3 sc in each st. (End counts should be even and consistent along entire perimeter.)
Round 54 :
Scallop Round: *Sk 3 sc, 5 dc in next sc (shell), sk 3 sc, sl st into next sc; rep from * along long side. For corners, work (3 dc, ch2, 3 dc) in corner sc for a smooth turn. Repeat along the opposite long side and both short ends. This produces a neat scalloped edge similar to the photo.
Info :
Adjust spacing by changing 'sk 3' to 'sk 2' or 'sk 4' depending on desired scallop density and stitch count. Keep shells centered over clusters for visual harmony.
— Decorative Picot Row (Optional) :
Round 55 :
Attach yarn to tip of each shell and work: sl st into top center dc of shell, ch3, sl st back into same st (picot), sl st to next shell center. Repeat across for a delicate picot ridge. Fasten off and weave ends.
Info :
Picot row is optional; it adds texture reminiscent of vintage crochet linens. Use a smaller hook (3.5mm) for a tighter picot if preferred.
— Lavender Sprig - Stem (Make 6) :
Round 1 :
With green yarn and 3.5mm hook, ch 18. This chain is the base length of the stem; adjust length if you want longer/shorter sprigs.
Round 2 :
Row 1: Starting in 2nd ch from hook, sc in each ch to end (17 sc). Fasten off and leave a 12" tail for sewing. For a twisted stem texture, you can do a round of hdc in BLO instead of sc.
Info :
Make 6 stems per bouquet as seen in the photo (three main sprigs per bouquet). Vary lengths slightly for a natural appearance. Leave long tails for secure sewing into the runner.
— Lavender Bud Spikelet (Make 6 x 3 per bouquet = 18 total spikelets) :
Round 1 :
With light purple yarn and 3.5mm hook: ch 6, sl st to first ch to form a small ring. (6)
Round 2 :
In ring: ch1, 6 sc in ring. (6)
Round 3 :
*Ch2, 3 dc in next st (tiny puff cluster), ch1; rep from * across all 6 sts to make 6 small clusters around the ring to create a textured spikelet. End with sl st to first cluster. (6 clusters)
Round 4 :
Work a 2nd tier of clusters: Sl st into first cluster base, ch1, (2 dc, ch1) into each cluster base around to give a tapered, conical bud. Fasten off leaving tail for sewing.
Info :
Lightly stuff the bottom of each spikelet with a tiny pinch of fiberfill before closing if you prefer a plump bud. Use varying shades of purple across tiers for a natural look. Make 3 spikelets per lavender stem to mimic the multi-tiered flower look.
— Lavender Small Bud Variation (Optional Accent Buds) :
Round 1 :
Ch4, sl st into first ch to make a ring, ch1, 4 sc into ring, sl st to join. Fasten off. Use these to fill gaps and add texture where needed.
Info :
These tiny buds are handy to tuck between larger spikelets or to create a tapered top to each sprig. Make 6-12 of these per bouquet depending on fullness desired.
— Leaf (Make 6-8 per bouquet depending on fullness) :
Round 1 :
With green yarn and 3.5mm hook, ch 9.
Round 2 :
Row 1: Sc in 2nd ch from hook, hdc, dc, tr, dc, hdc, sc across. (7 sts across leaf body). Do not fasten off.
Round 3 :
Working along the opposite side of the foundation ch: sc in first st, hdc, dc into center st to give leaf profile, hdc, sc to end. Sl st into base to finish. Fasten off leaving long tail for sewing. Shape leaf with fingers or small wet blocking to curve slightly.
Info :
Leaves should be narrow and slightly curved; make several small leaves and a couple of longer ones to position around the base of each lavender bouquet for realism.
— Bow (Make 2 for two bouquets) :
Round 1 :
With purple yarn and 3.5mm hook, ch 21.
Round 2 :
Row 1: Sc into 2nd ch from hook and across (20 sc). Fasten off leaving long tail. Fold the strip to form bow loops, wrap center tightly with yarn tail 3-4 times and knot on reverse. Sew center wrap securely and hide ends.
Info :
Make a slightly smaller bow for the second bouquet to mimic the photo’s staggered bow sizes. You can also create an embroidered bow with satin stitch using yarn if you prefer less bulk.
— Assembly: Attaching Sprigs and Bow to Runner (Placement & Sewing) :
Round 1 :
Info: Decide placement. In the photo, two bouquets are positioned approximately 6" in from each short end and centered side-to-side (center column marks the runner midline). Mark the positions with pins before sewing (pinning coordinates: centerline and 6" from each end along center column).
Round 2 :
Attach stems: Lay stems in a fan pattern (3 stems per bouquet) and pin to runner. Using the long tail from each stem, whip stitch through runner and along the base of the stem 4-6 times to anchor, then knot and weave in ends. Use neat, small stitches to avoid holes in lace.
Round 3 :
Attach spikelets: Position 3 spikelets per stem cluster, staggering length (longer at bottom, shorter near top). Sew spikelets to stems and runner by catching the stem tail and the runner fabric; apply a small dab of fabric glue under stitches if extra security is desired. Avoid visible glue on outer surface.
Round 4 :
Attach leaves and bow: Pin leaves around the base of stems and sew with matching green yarn tails. Place the bow at the center front and sew center wrap through to the runner, adding a couple of stitches at each loop base to stop shifting.
Info :
Work from the back side where possible to hide stitches. Use small, discreet whip stitches and then pull the runner lightly to ensure no puckering. After sewing, press the area gently and spot-block if needed to reshape the lace around applique9s.
— Finishing Touches :
Round 1 :
Info: Weave in all loose ends on the back of the runner using a tapestry needle. Trim any stray fibers. Lightly steam or wet-block the assembled runner again to flatten and set applique9s. If using fabric-safe spray starch, a light application will stiffen slightly and highlight the lace texture.
Round 2 :
Info: For extra longevity, tack the base of each stem in a couple of places with clear fabric glue or small stitches to the runner's underside. This prevents tugging when in use and keeps the bouquet lying flat against the runner.
— Care Instructions :
Round 1 :
Info: Hand wash in cool water with gentle detergent. Lay flat to dry. Avoid tumble drying which may distort the lace and applique9 elements. If ironing is needed, use a low heat iron with a pressing cloth to protect yarn fibers.
Info :
Store runner rolled or flat; folding may leave creases especially where applique9 has dimensional clusters. Consider a protective tray or drawer for storing delicate handmade linens.
— Adjusting Length and Width :
Round 1 :
Info: To lengthen, add full 4-row lace repeats; to shorten, remove full 4-row repeats. To widen, use a foundation chain that is a multiple of 6 + 1 and redistribute cluster placement across the width so center column remains central.
Round 2 :
Info: For a wider version designed for dining tables, consider making the runner in panels: create two strips and seam together with invisible whip stitch along center to double the width. Adjust scallop counts to fit the new perimeter length.
This Lavender Lace Table Runner is a beautiful way to bring vintage charm and gentle floral detail to your home. The airy lace clusters combined with three-dimensional lavender bouquets create an heirloom-quality accent that feels both delicate and durable. Enjoy the process of repeating the lace motif and adding handmade sprigs for a personalized touch. 🧶🌿 Share your finished runner to inspire others — happy crocheting and may many sunny afternoons be spent around your new table accent! 🌸