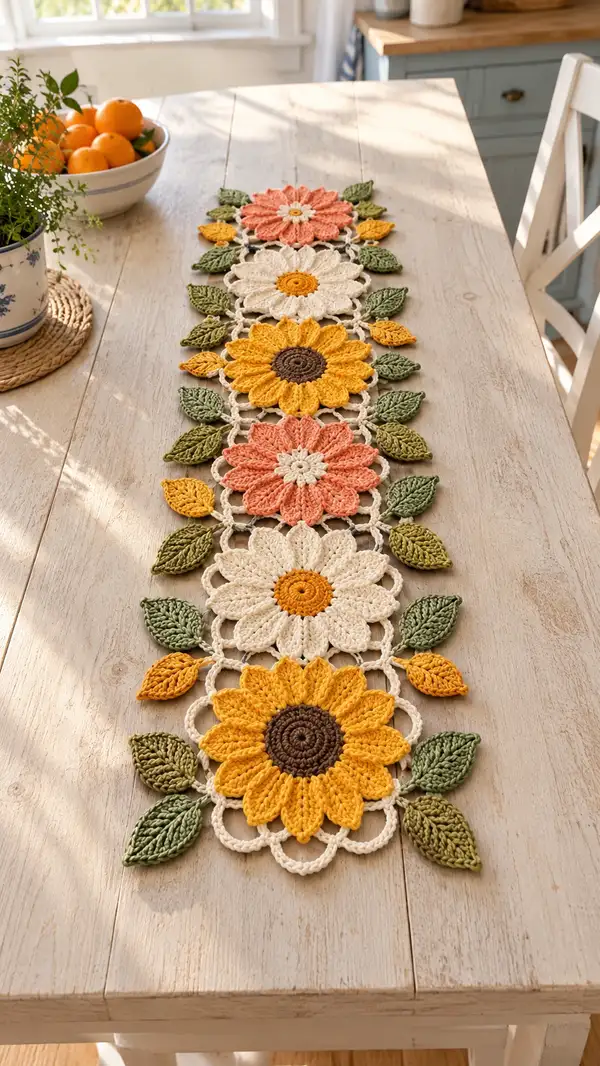
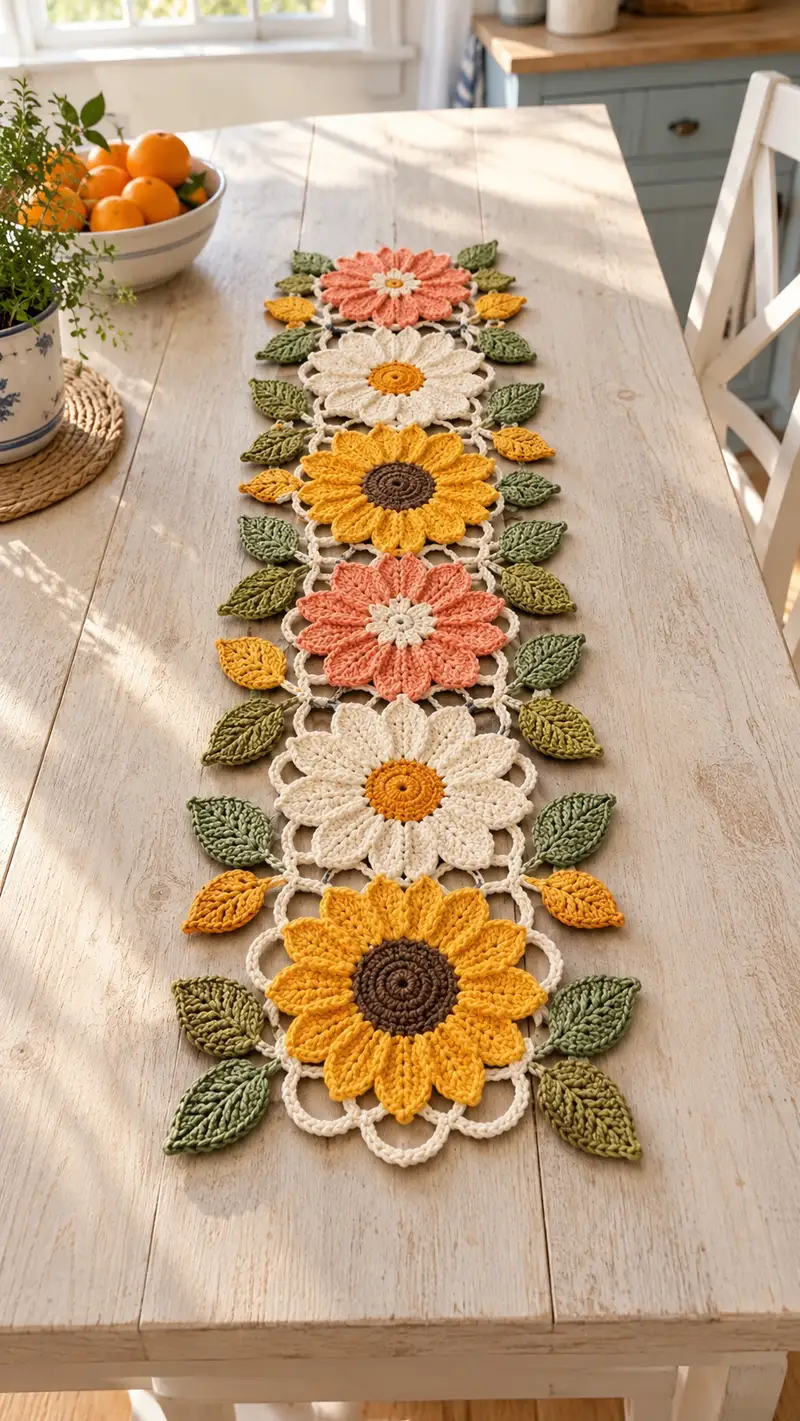
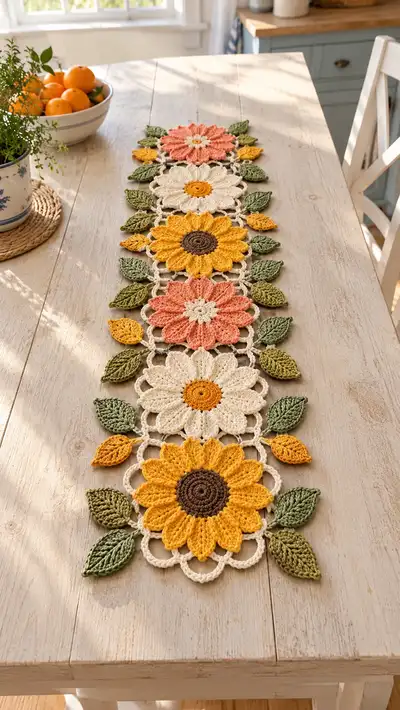
A bright, floral table runner featuring alternating sunflower, daisy and petite-petal motifs joined by a delicate lace lattice and leafy accents. The finished runner showcases warm golden sunflowers, soft cream daisies and coral-pink blooms with layered textured petals and stylized green leaves for a fresh, farmhouse table centerpiece. Detailed motif construction, leaf shapes, and joining instructions make assembly straightforward and satisfying.
Progress Tracker
0% Complete
— Large Flower Motif (Sunflower/Daisy/Coral) - Make 6 motifs alternating colors :
Round 1 :
Using center color (brown for sunflower or mustard for daisy centers), make a magic ring. 6 sc in magic ring (6)
Round 3 :
(1 sc, inc) x 6 (18)
Round 4 :
(2 sc, inc) x 6 (24)
Round 5 :
(3 sc, inc) x 6 (30)
Info :
Keep tension firm in the center to create a dense disk that will support petal clusters. If your center looks wavy, tighten the tension or use a smaller hook for the center only.
Round 6 :
(4 sc, inc) x 6 (36)
Round 7 :
(5 sc, inc) x 6 (42)
Round 8 :
(6 sc, inc) x 6 (48)
Info :
The 48-st round is the base that defines spacing for 12 petals. We will work petals over groups of 4 stitches (48/12=4). If you prefer 16 petals, adjust accordingly with 3 stitches per petal spacing and modify petal repeats.
Round 9 :
*1 sc in next 3 sts, ch 4, skip 1* repeat around to create 12 chain loops for petals (48)
Info :
After Round 9 you will have 12 chain loops around the disk. These loops are the base for the sculpted petals. Ensure loops are evenly shaped by laying the motif flat and gently pulling each loop to an even size before continuing.
Round 10 :
Change to petal color (yellow, cream or coral). Join with a sl st to the first ch-4 loop sp. Ch 1, work 1 sc in same loop sp to anchor (no change to base count).
Round 11 :
Petal foundation: In each ch-4 loop around: (ch 2, 3 dc, ch 2, sl st into loop) to form a tall looped base. Repeat in each loop (12 petal bases)
Info :
These tall looped bases create a petal scaffold. Keep your stitches loose enough so petals lay without puckering but firm enough to hold shape.
Round 12 :
Working into the front face of each petal base: Join yarn at the base of a petal, ch 1, then work the following to shape the petal: (sc, hdc, 5 dc cluster (or puff x5), hdc, sc) all into the top of the looped base, sl st to next base. Work across 12 petals.
Round 13 :
Repeat petal shaping round making petals fuller: In each petal top: (sc, hdc, 7 dc cluster, hdc, sc) to add volume. Fasten off and weave in color change tail. (Petal count remains 12)
Info :
To make the petals more sculpted, you can use puff stitches (yarn over, insert hook, pull through, repeat 3–4 times) then close the puff as one stitch. This produces a chunky, textured petal like in the photo.
Round 14 :
Return to cream/contrast color for outer edging. Join yarn behind any petal gap, ch 3 (counts as dc), then *skip to next petal outer edge, work 3 dc into outer edge base, ch 2, sl st into side of petal* repeat around to produce continuous scallop edge connecting petals (12 scallops)
Round 15 :
Work a reverse picot-edged finish: Join yarn and in each scallop work (sc, ch 3, sl st into top of ch-3) to make decorative loops that mimic the open lace seen between flowers in the runner. Fasten off and weave ends.
Info :
At this point your main flower motif is complete. Make 6 motifs alternating colors: sunflower (brown center + yellow petals), creamy daisy (mustard or golden center + cream petals), coral blossom (mustard or cream center + coral petals). Blocking now will help uniform shape prior to joining.
— Sunflower Center Variation (if you want a spiral textured center) :
Round 1 :
With brown, mr, 8 sc in mr (8)
Round 3 :
(1 sc, inc) x 8 (24)
Round 4 :
(2 sc, inc) x 8 (32)
Round 5 :
(3 sc, inc) x 8 (40)
Round 6 :
(4 sc, inc) x 8 (48)
Info :
Work these rounds tightly to produce a dense center disk. Use short rounds or smaller hook if you prefer a smaller, tighter center.
Round 7 :
Optional texture round: *fpdc around next st, bpdc around next st* repeat around to create ridged spiral texture (48)
Round 8 :
Sl st into next st and fasten off leaving tail to sew onto center of petal disk before working petal foundation.
Info :
Sew centers to flower disk on RS using a mattress or whip stitch. Make sure center placement is centered by counting petals and aligning visually before sewing. Secure knots and weave ends flat to the back so they won't peek through petals.
— Petal Variation: Flat Daisy Petals (for cream flowers) :
Round 1 :
Start from flower disk base (48 sts). Change to petal color, join in any ch-4 loop. Ch 1, sc into loop to secure.
Round 2 :
In each loop work: (ch 2, 3 hdc, ch 2, sl st) to form flatter petals (12 petals)
Round 3 :
Work one more round around petal tips to create a slight overlap: In each petal top: (sc, 2 dc, sc) sl st to next petal. Fasten off and weave ends.
Info :
Flat petals produce a softer, subtle look that pairs beautifully with the textured sunflowers to create visual variety in the runner.
— Small Accent Petal (Make many for staggered small yellow petals) :
Round 1 :
Using mustard yarn, mr, 5 sc in mr (5)
Round 2 :
(1 sc, inc) x 2, 1 sc (7)
Round 3 :
Ch1, turn and work in FLO: (sc, hdc, 3 dc, hdc, sc) across to shape a tiny petal (no global stitch count)
Info :
These small accent petals are worked flat and sewn between larger leaves and between motifs for the sprinkled mustard detail seen in the photograph.
— Large Leaf (Make 12 large leaves in mixed greens) :
Round 1 :
Using green (larger leaf shade), ch 9. 1 sc in 2nd ch from hook, 1 sc in next, 1 hdc in next, 3 dc in next (center ch), 1 hdc in next, 1 sc in next, 1 sc in last - now working on opposite side of foundation chain: 1 sc in same last ch, 1 sc in next, 1 hdc in next, 3 dc in center ch, 1 hdc in next, 1 sc in next, sl st to first sc to form leaf (approx 16 sts around)
Info :
This flat leaf is created from a foundation chain with mirrored stitches on both sides resulting in a stylized leaf shape. Keep increase in the center ch for a pointed tip.
Round 2 :
Work a textured vein row: ch 1, turn, (sc in next 2 sts, hdc in next, 3 dc in center tip, hdc next, sc next 2) sl st at base; finish and fasten off leaving long tail for sewing.
Round 3 :
Optional raised vein: Rejoin at leaf center and work fpdc along center column of leaf to produce a raised vein; fasten off and weave.
Info :
Make 12 large leaves in alternating green shades. For a more sculpted look use a smaller hook for the first round and a larger hook for round 2 to create a cupped shape.
— Small Leaf (Make 12 small leaves in mustard and pale green) :
Round 1 :
Ch 6. 1 sc in 2nd ch from hook, hdc, 3 dc in next, hdc, sl st in last, continue on opposite side 1 hdc, 3 dc, hdc, 1 sc, sl st to join (approx 12 sts)
Round 2 :
Ch1, sc around edge to neaten and create slight ridge; fasten off leaving tail for attaching between motifs.
Info :
Small leaves are intentionally flatter and slightly smaller than large leaves and should be sewn between motif sides to add visual interest just like the photograph.
— Lace Connector & Joining Chains (Join motifs into runner) :
Info :
Lay out your motifs in desired order. The pictured runner alternates: sunflower (gold), cream daisy, coral blossom, cream daisy, sunflower, coral blossom (example order). We will connect motifs with a soft cream yarn to form chain-lattice links between motif scallops.
Round 1 :
Using cream yarn and a 4.0mm hook, join at a scallop point on one motif with sl st. Ch 12, sl st into corresponding scallop on next motif to create a long loop (counts as one long chain connector). Repeat at every scallop position to join motifs in pairs (the runner uses 6 motifs joined in alternating pairs)
Round 2 :
After creating long connectors between motif pairs, go back and work single crochet into the chain loops on both top and bottom of each chain to stabilize: For each ch-12 connector work (sc, ch 4, sc) into center of ch chain to create decorative anchored loops. Repeat for all connectors.
Round 3 :
Work small bridging chains: At the outer scallops that meet two adjacent motifs, join with ch 6 and sl st into the adjacent motif scallop to create the soft openwork grid seen in the photo. Repeat around every touching scallop junction.
Info :
Pin motifs in position on a flat surface before making permanent joins. When satisfied with layout begin joining at the center and move outward so the runner stays even and flat.
Round 4 :
Reinforce joins by weaving tails of chain loops on the back side with a tapestry needle. This prevents connectors stretching over time.
Info :
Because the motifs link with open chain loops, the runner will have a flexible drape. If you prefer a firmer runner, after joining, work a single round in sc around the entire outer edge of the runner to firm the overall shape (optional).
— Decorative Scallop & Border Rounds (optional edge stabilization) :
Round 1 :
With cream yarn, join at any outermost scallop. Ch1, sc evenly around outer edge of entire runner into the scallops and chain loops, working 2 sc in larger scallops to keep edge flat. Count will vary depending on runner length.
Round 2 :
Work one round of picot: *sc in next 2 sts, ch 3, sl st in top of ch-3* repeat around edge to create tiny looped edge.
Info :
This border will slightly reduce the openwork look but stabilizes the runner and prevents connectors from stretching. If you prefer the lacy look in the photo, skip the firming round and simply neaten ends.
— Assembly and Final Placement of Leaves :
Info :
Arrange large leaves on either side of motifs: The photograph shows an alternating pattern of large leaves flanking the motifs with small mustard leaves placed in the gaps. Pin leaves in pairs around each motif - three leaves per side at the larger motif intersections and single mustard leaves at inner joins.
Round 1 :
Sew large leaves: Using long tails left from leaves, position large leaf so its base sits under the outermost petal scallop. With whip stitch or invisible mattress stitch, sew leaf base to the back of petal scallop across 6–8 secure stitches to attach. Repeat for all large leaves (approx 12).
Round 2 :
Sew small mustard leaves in the small gaps where two motif scallops meet. Secure in the same manner but stitch only 3–4 times; weave tails to the back and trim.
Info :
Space leaves to mimic the photo's rhythm: large leaf, small leaf, large leaf down each side to create a natural staggered look. Leave leaf tips free so they lay softly over the table surface.
— Blocking, Finishing, and Care :
Info :
After completing joins and sewing leaves, block the runner to shape: spray lightly with water, pin flat on a blocking mat, and shape petals and leaves to lie flat. Allow to dry completely. For a soft sheen you can press lightly under a cloth with a warm (not hot) iron.
Info :
Weave all tails into the backs of motifs. Trim ends close to the fabric. Handwash the runner in cool water with mild detergent and lay flat to dry. Avoid hot water or rough agitation which can distort cotton motifs.
Info :
Optional adjustments: To lengthen runner add one or more additional motifs and repeat connector pattern. To shorten, remove motif pairs while maintaining alternating leaf placement so edge balance remains symmetrical.
This sunflower and daisy table runner brings an instant burst of garden charm to your table, combining warm yellows, soft cream and blush coral with layered leaves for a handcrafted statement. Each motif is a small work of art, and stitching them together creates a beautiful rhythm down the table. I hope you enjoy assembling and styling it as much as I enjoyed designing the steps — happy stitching and bright days ahead! 🌻🧶