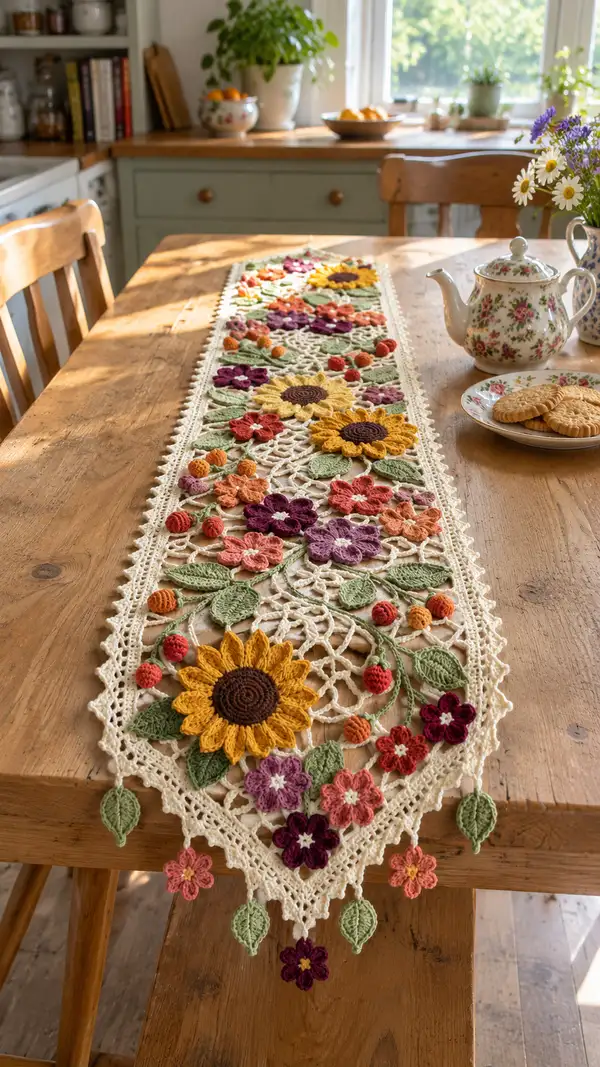
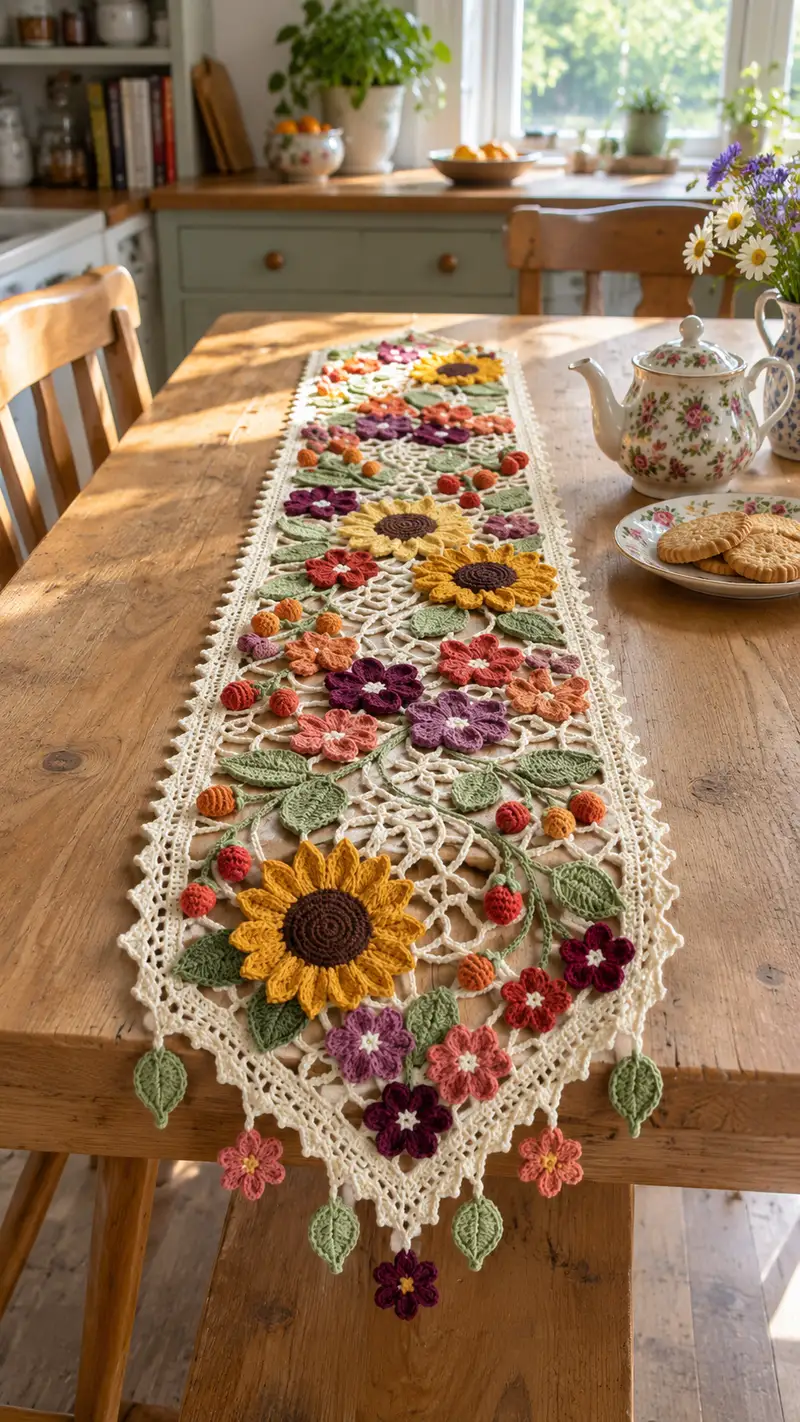
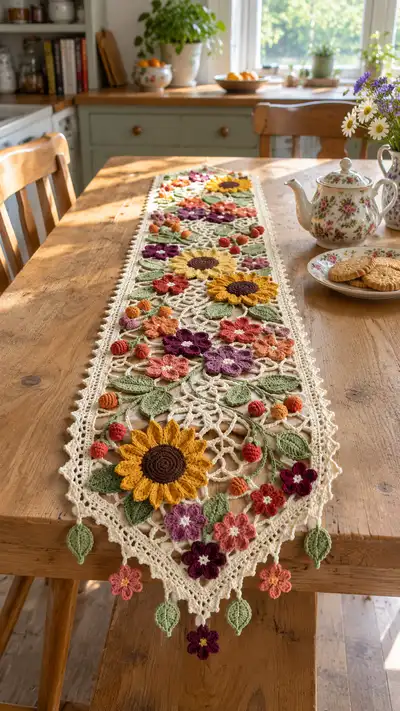
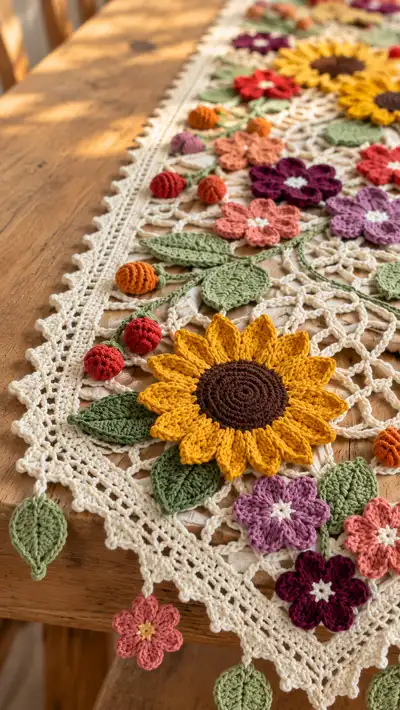
A long, romantic lace table runner embroidered with sunflowers, multicolored blossoms, leafy vines and tiny berries. This pattern combines openwork mesh with appliqued floral motifs for a delicate, cottage-style centerpiece. Colors include warm sunflower yellow, deep chocolate brown, soft greens, and a palette of pinks, mauves and rusts.
Progress Tracker
0% Complete
— Overview :
Info :
This pattern is modular: you will crochet a rectangular open lace foundation, separately make 3 large sunflower motifs, 12 small 5-petal flowers, 18 leaves, 18 small round berries, and several connecting vines. After blocking, motifs are sewn and crocheted onto the lace foundation and finished with a picot scallop border and hanging leaf/flower drops. Read through all sections before starting and assemble motif placement with pins first.
— Sunflower Center (Make 3) :
Round 3 :
(1 sc, inc) x 6 (18)
Round 4 :
(2 sc, inc) x 6 (24)
Round 5 :
(3 sc, inc) x 6 (30)
Round 6 :
(4 sc, inc) x 6 (36)
Round 7 :
(5 sc, inc) x 6 (42)
Round 8 :
(6 sc, inc) x 6 (48)
Info :
Keep rounds worked in continuous spiral if possible to avoid a visible seam. Use chocolate brown cotton here for the seed disk. The center is slightly domed — leave a little tension in your stitches for a neat surface.
Round 9 :
1 sc in each st (48)
Round 10 :
1 sc in each st (48)
Round 11 :
1 sc in each st (48)
Round 12 :
1 sc in each st (48)
Info :
At this point the center measures roughly 6–7 cm across (depending on tension). Fasten off and weave tail; center will be slightly convex. We will attach petals to the outside edge.
Round 13 :
Join mustard yellow to any stitch on outermost round; *(sc in next 3 sts, ch 6, sl st in next st) x 12 to create 12 petal loops (48 + loops)
Info :
We divided 48 stitches into 12 evenly spaced petal placement groups; each group uses 4 stitches (3 sc + 1 joining stitch). The ch-6 loops form a stable foundation for individual petals; keep loops loose to make petal stitching easy.
Round 14 :
Work petals into each ch-6 loop: in next ch-6 loop work (sl st, ch 1, sc, hdc, dc, tr, dc, hdc, sc, ch 1, sl st) to form a pointed petal. Repeat in each loop for 12 petals (12 petals)
Round 15 :
Turn petals to front and edging: *sc around base of each petal into the stitches of round 12 and the first 2 petals’ foundation to stabilize (work 6 sc across base of each petal) x 12; join with sl st (72 sc across petal bases approximately)
Info :
Petals are worked densely to give a sculpted look. If you prefer fuller sunflowers, repeat Round 14 to create a second row of slightly offset petals: attach yarn to back of petal bases and work an inner row of petals following the same sequence, offset between outer petals.
Round 16 :
Optional second petal row: join yarn at base between petals and *(ch 6, sl st in base at opposite point) x 12 then work petals into these ch-6 loops as in round 14 for 12 inner petals (if making single row skip this round)
Round 17 :
1 sc in each base stitch around petal bases to tidy join (count varies depending on one or two rows; plan for 72–96 sc) (see Info)
Info :
If you added a second row, final sc count will increase; ensure the petal rows are staggered so petals fill gaps evenly. Fasten off and weave ends cleanly on back side.
Round 18 :
Optional: Work short surface slip-stitch spiral across brown center for seed texture: join to center, *sl st 3, chain 2, repeat until center is covered; fasten off (cosmetic)
Info :
Block each sunflower flat, pinning petal tips and stretching slightly to make the petals uniform. Press with light steam if cotton yarn permits, or wet-block and dry flat. Arrange centers and petals so they sit naturally rather than stiffly.
— Small Five-Petal Flower (Make 12-16) :
Round 1 :
mr, ch 1, 6 sc in mr (6)
Round 3 :
(1 sc, inc) x 6 (18)
Info :
These centers are worked in a contrasting small-flower center color (soft cream or pale). Keep rounds tight to create a small raised center before petals.
Round 4 :
Join petal color: *ch 6, sl st in next st, repeat across to make 6 loops (6 loops)
Round 5 :
Work petals into each ch-6 loop: (sl st, sc, hdc, 3 dc, hdc, sc, sl st) for each petal; repeat x 6 to form five-petal or six-petal versions (5–6 petals)
Round 6 :
1 sc around petal bases to tidy; fasten off and weave ends (stitch count varies by petal fullness)
Info :
Make a mix of colors (mauve, plum, coral, rose, rust) for an organic meadow look. Block each flower flat and shape petals by pinching gently while wet.
— Leaves (Make 18) :
Round 1 :
ch 8, sc in 2nd ch from hook, sc, hdc, dc, hdc, sc, sc across (7 sts across chain, leaf shape)
Round 2 :
Turn work and work same stitches on opposite side of foundation chain to mirror (15 sts total around) - sl st to join at base
Round 3 :
Edge shaping: *sc, (hdc, dc, hdc) in center, sc around; fasten off (leaf measures approx 5-6 cm)
Info :
For a realistic look, work the leaf with BLO on the final round to create a raised central vein, or embroider a central vein with surface slip-stitch using the same green yarn after blocking.
Round 4 :
Optional vein: join yarn at base and surface sl st down center following leaf length; fasten off
Info :
Block leaves by pinning them flat on a foam board and lightly misting; shape the tip and midrib for a delicate lift that reads well when appliqued to the lace background.
— Small Round Berry (Make 18) :
Round 1 :
mr, 6 sc in mr (6)
Round 3 :
(1 sc, inc) x 6 (18)
Info :
Stuff lightly with a tiny amount of fiberfill as you go to keep berries smooth and firm. Use rust, orange and red shades to vary the clusters.
Round 4 :
(1 sc, dec) x 6 (12)
Round 6 :
Fasten off leaving long tail; close opening with tapestry needle and shape into a neat sphere (6)
Info :
For a ribbed berry look, before finishing, work alternating rows of 1 sc in BLO and 1 sc in FLO for 2–3 rounds to create ridges, then finish decreases.
— Vine Connector (Make several lengths) :
Round 1 :
ch 40 (or desired vine length), sl st to join into a long chain vine if you prefer continuous chain; leave tails for attaching
Round 2 :
Work 1 sc in each ch across to create a rope-like vine; fasten off
Info :
Vines are made in leaf green. Make multiple vine pieces of varying lengths to connect flowers across the mesh; stitch vines in place using matching yarn and small stitches to keep attachments invisible.
— Open Lace Background Panel :
Round 1 :
With cream yarn ch 90 (for runner width approx 18-20 cm) + 3 turning ch, join with sl st to form a long loop if working in rounds for continuous length, or work rows and turn for flat panel
Round 2 :
Row style: ch 3 (counts as dc), *dc in next 3 sts, ch 3, sk 2sts, dc in next 4 sts; repeat across to end, turn
Round 3 :
Ch 3, *dc in each st across to next ch-3 space, ch 3, dc in same space to form a mesh loop; repeat across; turn
Round 4 :
Ch 1, sc in each st across, in each ch-3 space work (ch 5, sl st in same space) to create decorative loop mesh; turn
Info :
We are creating an open lattice that will allow motifs to be sewn on and vines woven around. Adjust starting chain length to match your desired runner width; if you prefer a wider runner, increase ch by multiples of 8 to maintain mesh repeat.
Round 5 :
Repeat rounds 2–4 for a total of 10 repeats to build a long panel height of approx 30–35 cm (adjust to fit table length). Work even mesh until panel reaches desired length for motif placement (maintain stitch counts each repeat).
Round 6 :
At intervals, create larger ch loops to accept vine ends by replacing some ch-3 spaces with ch-7 spaces to give more room to weave vines later; mark these positions as anchors.
Info :
Block your entire background panel flat. Blocking will open the mesh and set the size so motif placement will be accurate. Use plenty of pins to open ch-spaces and square corners if working rectangular repeats.
Round 7 :
Continue mesh repeats until panel length is approx 85–100 cm depending on desired final runner length; keep counts consistent so edges remain straight. Final mesh height should leave room for border rounds later.
Info :
The finished runner shown is long and narrow; if you wish to make it shorter, decrease the number of mesh repeats and scale motifs accordingly. Keep notes of repeats so both sides match.
— Border & Picot Scallop Edging :
Round 1 :
With cream yarn and 3.5mm hook, sc evenly around entire panel edge working 3 sc in each corner to maintain shape; count sts to ensure border is even (sc count depends on panel size)
Round 2 :
Work *ch 3, skip 1, sc in next st across to create small loops (mesh for picots); repeat around, join with sl st
Round 3 :
Picot round: *sc in each loop, (ch 3, sl st in 3rd ch) picot, sc in next loop; repeat around to create delicate points
Info :
For a crisp scallop, block after the picot round. Use a smaller 3.0mm hook for the picot if you want firmer points. The runner shown has elongated picots that become anchor points for the hanging drops.
Round 4 :
Decorative filet row: *ch 4, sl st in next space to form a small chain triangle along edge; repeat creating alternating open triangles for visual interest; fasten off and weave ends
Info :
Count your edge repeats so you can place hanging leaf-and-flower drops evenly. The sample places one drop at each corner point and a regular interval along long sides; adjust to your taste.
— Hanging Drops (Leaf & Small Flower Drops) :
Round 1 :
Make leaf drops as per 'Leaves' section but reduce ch to 6 for mini leaves; block and attach with small chain to create drop loop (mini leaf)
Round 2 :
Make small 5-petal flowers as per small flower section but reduce ch loops to ch-5 for smaller petals (mini flower)
Info :
Attach drops to picot points by crocheting a short chain of 6–8 and sl st into top of leaf or flower. Secure with a few backstitches and weave ends on back of runner to hide them.
— Assembly & Motif Placement :
Round 1 :
Layout all blocked pieces on your mesh panel using pins. Place three sunflowers spaced evenly along the runner with clusters of small flowers and leaves radiating from each sunflower. Vines should connect motifs organically and pass through ch-7 anchor spaces placed earlier.
Info :
Take time to audition placements; this is where the runner gets its unique look. Use pins liberally and step back to view from a distance to check balance and color distribution.
Round 2 :
Sew sunflower centers and petals to mesh with matched cream or green thread using tiny whip stitches through the mesh and the back loops of the center base. Ensure petals curve outward and do not flatten the mesh beneath.
Round 3 :
Sew small flowers in clusters of 3–5 around sunflowers using invisible ladder stitches; place leaves on vine ends and stitch through the center base only so leaves keep a slight lift.
Info :
When sewing, use small stitches through the mesh so the joins are secure but not bulky. For leaves on slotted mesh areas, run a tiny backstitch across two or three mesh threads to hold the leaf stem firmly.
Round 4 :
Attach berries by sewing them with yarn tails through the mesh or onto vine chains; cluster 2–3 berries together for natural berries effect and fill small gaps for visual weight balance.
Round 5 :
Weave vine connectors through selected ch-spaces and stitch vine ends into anchor ch-7 spaces; tack vines at several points to keep them lying naturally across the mesh.
Info :
Make your stitches small and hidden on the back side to avoid visible knobbiness on the right side. Use matching color yarn for attaching to keep joins invisible and tidy.
— Final Edge Reinforcement & Finishing Rounds :
Round 1 :
Once all motifs are attached, work one last sc round around entire runner edge to re-enforce and tidy joining points; sc evenly picking up both mesh edge loops and the tails of motif joinings where needed.
Round 2 :
Work final decorative picot row as earlier to crisp up edge and create final picot points for hanging drops; fasten off and weave all ends on the back for a clean finish.
Info :
Give the completed runner one more gentle blocking to settle all attachments. Use damp blocking for cotton yarn, pin edges and motifs in final position, and allow to dry completely before use.
— Care Instructions :
Info :
Hand wash gently in cool water with mild detergent. Reshape and dry flat away from direct heat. Avoid machine washing to preserve delicate lace and 3D motifs. Iron lightly on low heat with a cloth barrier if desired.
This floral lace table runner blends classic crochet lacework with joyful 3D motifs to create a stunning centerpiece for any table. The sunflowers and tiny berries add tactile charm while the airy mesh keeps the overall look light and elegant. Take your time, block carefully, and the finished runner will be a treasured handmade accent. 🧶🌻✨