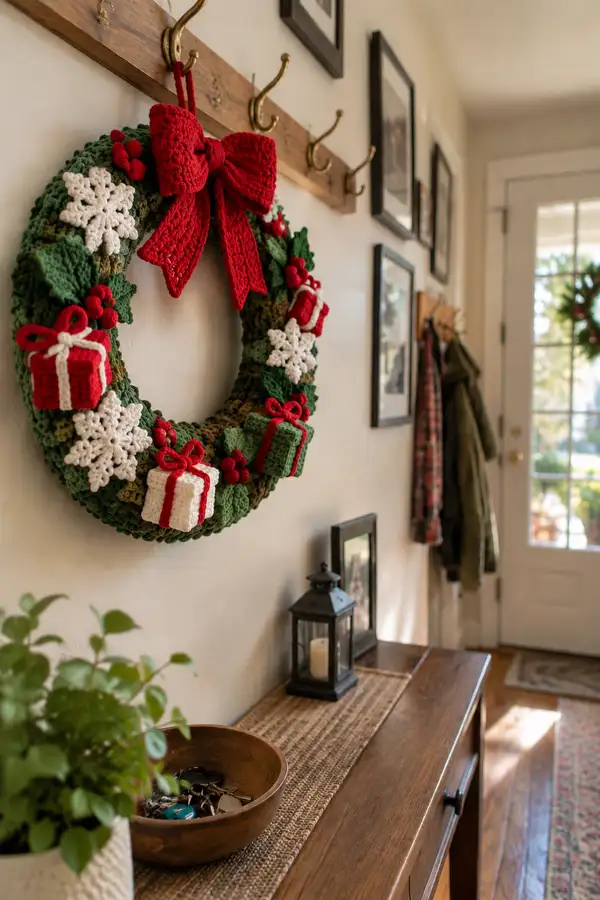
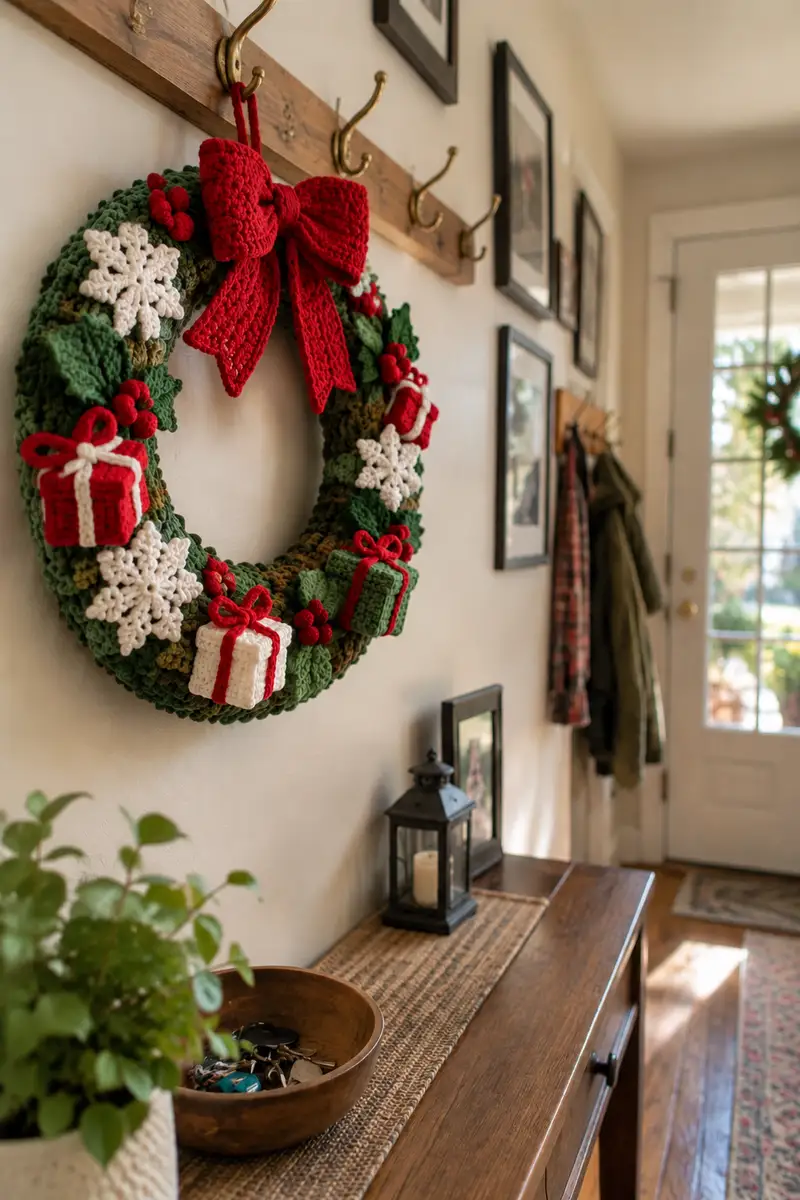
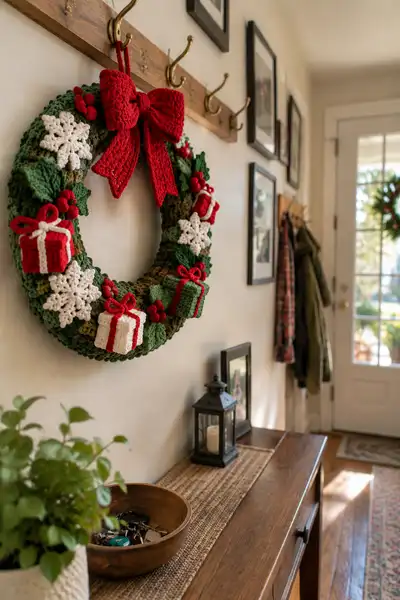
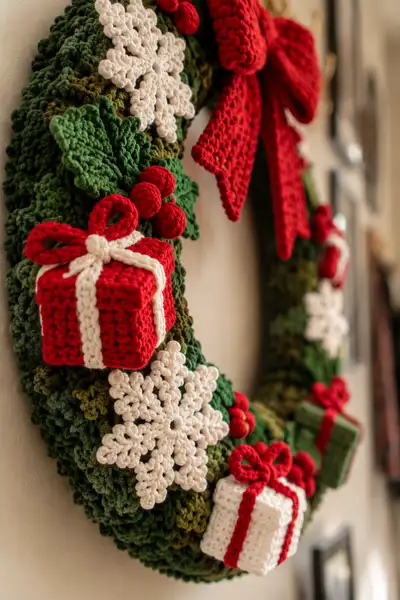
Create a festive, fully crocheted wreath decorated with layered snowflakes, holly leaves and clusters, tiny gift boxes, berries, and a large decorative bow. This pattern yields a plush, three-dimensional wreath perfect for an entryway or mantel. Uses textured stitches and small amigurumi-style motifs for dimensional accents. Detailed step-by-step instructions and assembly notes guide you through each motif and construction technique.
Progress Tracker
0% Complete
— Wreath Base (Stuffed Torus) :
Round 1 :
6 sc in magic ring (6)
Round 3 :
(1 sc, 1 inc) x 6 (18)
Round 4 :
(2 sc, 1 inc) x 6 (24)
Round 5 :
(3 sc, 1 inc) x 6 (30)
Round 6 :
(4 sc, 1 inc) x 6 (36)
Round 7 :
(5 sc, 1 inc) x 6 (42)
Round 8 :
(6 sc, 1 inc) x 6 (48)
Info :
This creates the inner solid tube that will become the torus core. If you are using a 12-14" foam wreath form, work until circle fits around the form. Adjust rounds 1-8 by adding increases in multiples of 6 to reach desired inner circumference.
Round 9 :
1 sc in each st (48)
Round 10 :
1 sc in each st (48)
Round 11 :
1 sc in each st (48)
Round 12 :
1 sc in each st (48)
Info :
Work several even rounds until the flat circle is the diameter you want for the central hole of the wreath. 4-6 even rounds gives a stable base before we begin building up height.
Round 13 :
(6 sc, 1 inc) x 6 (54)
Round 14 :
1 sc in each st (54)
Round 15 :
(7 sc, 1 inc) x 6 (60)
Round 16 :
1 sc in each st (60)
Round 17 :
1 sc in each st (60)
Round 18 :
1 sc in each st (60)
Info :
These increases start to turn your flat disc into a shallow bowl; we will transition into working in the round to create height. Place a stitch marker at the start of each round and move it up as you progress.
Round 19 :
(9 sc, 1 inc) x 6 (66)
Round 20 :
1 sc in each st (66)
Round 21 :
1 sc in each st (66)
Round 22 :
1 sc in each st (66)
Info :
Now we will start building height around the base to form a tube that will be stuffed. Use the same number of stitches for a few rounds to build vertical height, then work shaping rounds as needed to get the wreath thickness you want.
Round 23 :
(10 sc, 1 inc) x 6 (72)
Round 24 :
1 sc in each st (72)
Round 25 :
1 sc in each st (72)
Round 26 :
1 sc in each st (72)
Info :
Start stuffing lightly through the opening—aim for an even, plush torus. Add small amounts of fiberfill and distribute it while the tube is still open. The aim is firm but resilient so decorations sit well.
Round 27 :
(10 sc, 1 dec) x 6 (66)
Round 28 :
1 sc in each st (66)
Round 29 :
(9 sc, 1 dec) x 6 (60)
Round 30 :
1 sc in each st (60)
Round 31 :
(8 sc, 1 dec) x 6 (54)
Round 32 :
1 sc in each st (54)
Round 33 :
(6 sc, 1 dec) x 6 (48)
Round 34 :
1 sc in each st (48)
Info :
Keep stuffing as you complete decreasing rounds so the torus retains a round cross-section. The goal is a smooth, even donut shape about 1.5-2" thick. If you are using a foam wreath form, stop stuffing and leave a slightly looser tube to slip over the form.
Round 35 :
(4 sc, 1 dec) x 6 (36)
Round 36 :
(3 sc, 1 dec) x 6 (30)
Round 37 :
(2 sc, 1 dec) x 6 (24)
Round 38 :
(1 sc, 1 dec) x 6 (18)
Info :
Fasten off leaving a long tail for sewing the tube closed or for sewing the tube seam when forming a ring. If you made two slightly flattened halves, sew them together around the central hole; if you made a single torus, join ends invisibly and finish stuffing before closing.
— Small Holly Leaf (Make 12) :
Round 1 :
6 sc in magic ring (6)
Round 3 :
(1 sc, 1 inc) x 6 (18)
Round 4 :
ch 1, turn, 1 sc in next 9 sts in rows to shape leaf tip (work flat) - this marks the start of shaping the tip
Info :
Switch to working flat to form the point and lobes. The leaf is worked in short rows for a pointed shape. Use deep green yarn and a slightly smaller hook than the wreath base for defined edges.
Round 5 :
Starting at tip: sc dec, 3 sc, sc dec, sl st in next (7) - creates a tapered tip
Round 6 :
Fold leaf and working along edge: (sc, hdc, dc) across to form textured lobe edges then sc to finish (approx 10 sts)
Round 7 :
Repeat shell edge on opposite side: (sc, hdc, dc) across back edge; sl st to join (approx 10 sts)
Round 8 :
Work 1 sc evenly around whole leaf edge in BLO to create ridge and definition (approx 24)
Round 9 :
1 sc around ridge, add 3 extra sc at base to create slightly cupped base (approx 27)
Round 10 :
Fasten off leaving tail for sewing. Weave a running stitch down center with matching yarn to create subtle vein and curve the leaf slightly when pulling thread tight.
Info :
Make multiple leaves in two sizes: for large leaves follow the same sequence but increase the length and add an extra shell row for fuller lobes.
— Large Holly Leaf (Make 8) :
Round 1 :
6 sc in magic ring (6)
Round 3 :
(1 sc, 1 inc) x 6 (18)
Round 4 :
(2 sc, 1 inc) x 6 (24)
Round 5 :
Turn and work flat forming a longer tip: ch 1, sc in next 14 sts, turn (14)
Round 6 :
Edge shaping row: sc, hdc, (2 dc in same st) repeat across tip row to create three lobes (approx 20)
Round 7 :
Work back down other side mirroring lobes: (2 dc, hdc, sc) repeat until meeting base (approx 20)
Round 8 :
1 sc in each st around edge in BLO to form crisp outline (approx 48)
Round 9 :
Work a second ridge: 1 sc in each st FLO to create a raised central vein (approx 48)
Round 10 :
Fasten off leaving long tail. Using yarn needle, stitch a central vein and pull slightly to cup the leaf for realistic shape.
Info :
Block leaves flat if using cotton yarn for crisp edges. Make the large and small leaves in combinations to cluster around berries and snowflakes.
— Berry (Make clusters of 3 x 8 clusters = 24 berries) :
Round 1 :
6 sc in magic ring (6)
Round 3 :
1 sc in each st (12)
Round 4 :
(1 sc, 1 dec) x 4 (8)
Round 6 :
2 dec (2) - stuff lightly, fasten off leaving tail for sewing
Info :
Stitch berries together in clusters of three for a classic holly look and attach to leaf clusters. For denser clusters, make 4-5 berries per cluster and sew tightly together with a short tail used as the seam.
— Snowflake Motif (Make 4) :
Round 1 :
6 sc in magic ring (6)
Round 3 :
(1 sc, 1 inc) x 6 (18)
Round 4 :
ch 4, sl st in next st x6 to create 6 chain points (18 base sl st)
Round 5 :
On each chain point: (sc, hdc, 3 dc, hdc, sc) - repeat for all 6 points to form arms
Round 6 :
Working back to the center: sc around the center ring to tidy joins (18)
Round 7 :
ch 6 on each arm, sl st back into arm base to make picots and extended points (6 arms)
Round 8 :
Work 1 sc around each arm join to secure picot loops (approx 36)
Round 9 :
Optional: add small decorative puff in center - make 6 dc cluster, fasten and finish (keeps center raised)
Round 10 :
Fasten off, block snowflakes flat by pinning to a board and lightly steaming or wet-blocking if yarn allows. Use starch or fabric stiffener if you want snowflakes rigid for a crisp look.
Info :
Use a smooth cotton or cotton-blend yarn in cream to achieve clear stitch definition. Blocking is highly recommended to show off the delicate arms and points.
— Gift Box Body (Make 5 small boxes) :
Round 1 :
6 sc in magic ring (6)
Round 3 :
(1 sc, 1 inc) x 6 (18)
Round 4 :
(2 sc, 1 inc) x 6 (24)
Round 5 :
(3 sc, 1 inc) x 6 (30)
Round 6 :
1 sc in each st (30)
Round 7 :
1 sc in each st (30)
Round 8 :
Fold and work in rows to form sides: sc across 12 sts, ch 1 turn repeat to form a rectangular panel approximately 12 x 6 for a small cube side
Round 9 :
Work in continuous rounds along edges joining to create squared corners: sc evenly around outer rectangle to create side walls (approx 48)
Round 10 :
1 sc in each st (48)
Round 11 :
1 sc in each st (48)
Round 12 :
Begin slight stuffing of box bottom if desired, continue to build walls while maintaining rectangular shape
Round 13 :
(7 sc, 1 dec) x 6 (42) - shaping corners slightly inward toward top
Round 14 :
(6 sc, 1 dec) x 6 (36)
Round 15 :
1 sc around (36)
Round 16 :
Fasten off leaving long tail. Close top by sewing remaining opening with whip stitch to make a compact box. If making a two-color present, change to contrasting color for the next section to form a ribbon.
Info :
For a crisp cube, work tightly and weave in corners with extra reinforcement stitches. Make boxes in red, white and green and vary the size by stopping increases earlier or later.
— Gift Box Ribbon & Bow (Per Box) :
Round 1 :
Using contrast color, ch 25, sl st back along chain to form a flat ribbon strip. Fasten off and leave tail for sewing (approx 25 ch strip)
Round 2 :
Sew ribbon strip around box with a single vertical seam crossing at top and bottom. For cross ribbons, add a second strip perpendicular to first.
Round 3 :
Make bow loop: ch 20, sl st back along chain to create a sturdy loop; fold into two loops and stitch center with a short contrasting piece (make 2 loops per bow)
Round 4 :
Make tail pieces: ch 12, sc back along chain to form tapered tails; sew under bow center
Round 5 :
Fasten off and sew bow firmly to top of box. Use small stitches through the box top to anchor bow so it will not pull loose.
Info :
For a neat professional finish, wrap the ribbon strip around the box and tack it in place with small invisible stitches before sewing the bow. You can also attach a dab of craft glue under the ribbon to keep it utterly secure.
— Large Red Decorative Bow :
Round 1 :
With red yarn ch 60, sl st to join forming a loop for the main bow body (60)
Round 2 :
Work 1 sc in each ch around (60)
Round 3 :
Work second round of sc (60)
Round 4 :
Fold loop into two equal loops and pinch center; wrap a separate small scrap of yarn around center tightly and secure with a few stitches (no change in count)
Round 5 :
Create tails (make 2): ch 40, sc back along chain for a dense tail; sl st to join at tail base; fasten off leaving long tail
Round 6 :
Edge each tail with 1 round of sc in BLO to create a neat rib and prevent curling (approx 40 per tail)
Round 7 :
Make center knot: ch 12, wrap around bow center and sew end into knot to secure. Tuck ends under bow and stitch firmly so center sits flat against wreath.
Info :
This bow is intentionally large and decorative. You can adjust size by changing chain length for the loops and tails. Use a slightly larger hook for a looser, more flowing bow or a smaller hook for a firm, sculpted bow.
— Small Decorative Loop Bows (Make 6) :
Round 1 :
ch 12, sl st to join to make small loop (12)
Round 2 :
sc around loop x2 rounds to bulk up (12)
Round 3 :
Fold and stitch loop center forming small bow; wrap center with contrast yarn and tack down (no change)
Info :
These small bows are used on tiny presents or as accents near berries. Make them in red or cream to coordinate with boxes and bow.
— Assembly & Decorative Placement :
Info :
Before attaching any motifs, lay out all pieces on a flat surface and plan placement. Balance heavier items (large bow, gift boxes) with clusters of leaves and snowflakes. Step back frequently to check symmetry.
Step 1 :
Position the large decorative bow at the top of wreath centered over the inner hole. Pin in place with several pins through the bow center into the wreath base to hold while sewing.
Step 2 :
Sew the bow center to the wreath using small neat stitches, passing through the wreath core to anchor; secure with a double knot and weave ends into the wreath body.
Step 3 :
Arrange gift boxes around the wreath evenly spaced. I placed five boxes in alternating colors (red, white, green) around the lower half and sides, leaving space for snowflakes and holly clusters.
Step 4 :
Sew each gift box with its base to the wreath body. Pass the yarn tail through the wreath core and back through the box bottom several times to anchor each box; finish with several secure knots and weave in tails.
Step 5 :
Pin and sew large and small leaves in clusters around boxes and snowflakes. Use three leaves per cluster (two small + one large) and stitch through the leaf base firmly to the wreath so clusters keep their shape.
Step 6 :
Sew berry clusters near the leaves using the berry tails. Group berries as threes and secure them so they sit slightly above leaf surfaces for dimensionality.
Step 7 :
Attach snowflakes in the open spaces between boxes and clusters. If snowflakes were blocked with starch, tack with a few stitches near the center and one at each arm to keep flat.
Info :
Use leftover green scrap yarn to invisibly stitch underneath larger items so the wreath surface texture is preserved. Hide ends and knots inside the wreath where the core is dense.
— Hanging Loop and Final Finishing :
Round 1 :
ch 25, sl st to join forming a hanging loop. Position at top behind bow and stitch through core in several places to anchor (25)
Round 2 :
Wrap a small scrap of red yarn around the top seam between loop and wreath to recess the join visually and stitch securely
Info :
After all motifs are sewn on, trim any visible tails and weave remaining ends into the wreath. If any motifs wobble, reinforce with extra stitches or a dab of craft glue on the underside.
Round 3 :
Lightly steam or shape wreath to even out texture (only for yarns that allow steaming). Adjust bow tails and flatten snowflakes if needed.
Info :
Your finished wreath should be approximately 12-15 inches in overall diameter depending on wreath core size and how many rounds you added to the base. If you'd like a larger wreath, increase the base rounds evenly in early increase rounds to expand overall diameter.
This festive wreath project brings together small amigurumi-style motifs and classic holiday colors to create a cheerful entrypiece! With textured greens, crisp cream snowflakes, and tiny wrapped gifts, every detail adds holiday charm. It makes a wonderful handmade focal point for your home or a thoughtful seasonal gift. 🎁🎀 Make extra motifs and personalize colors to match your decor — enjoy each stitch as you build something bright and lasting. 🧶