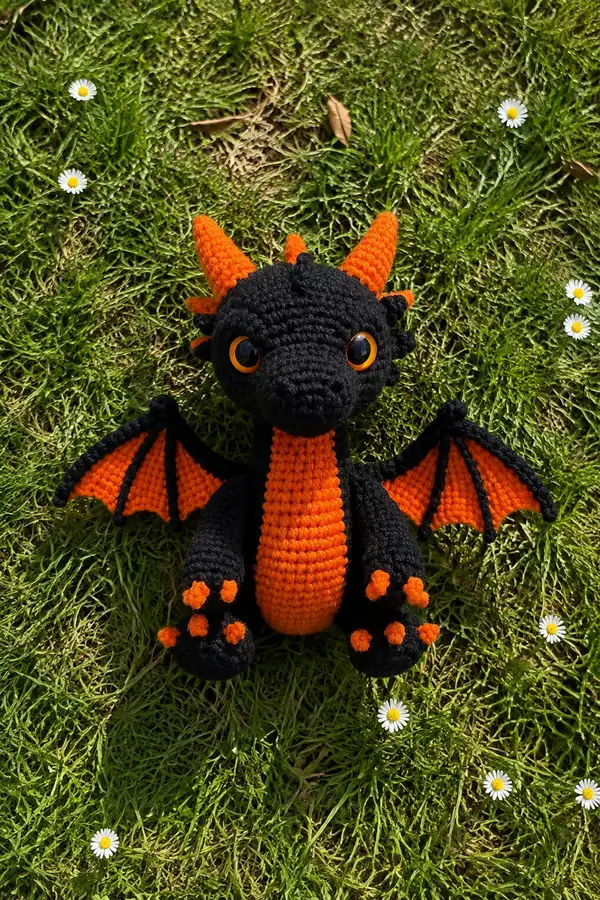
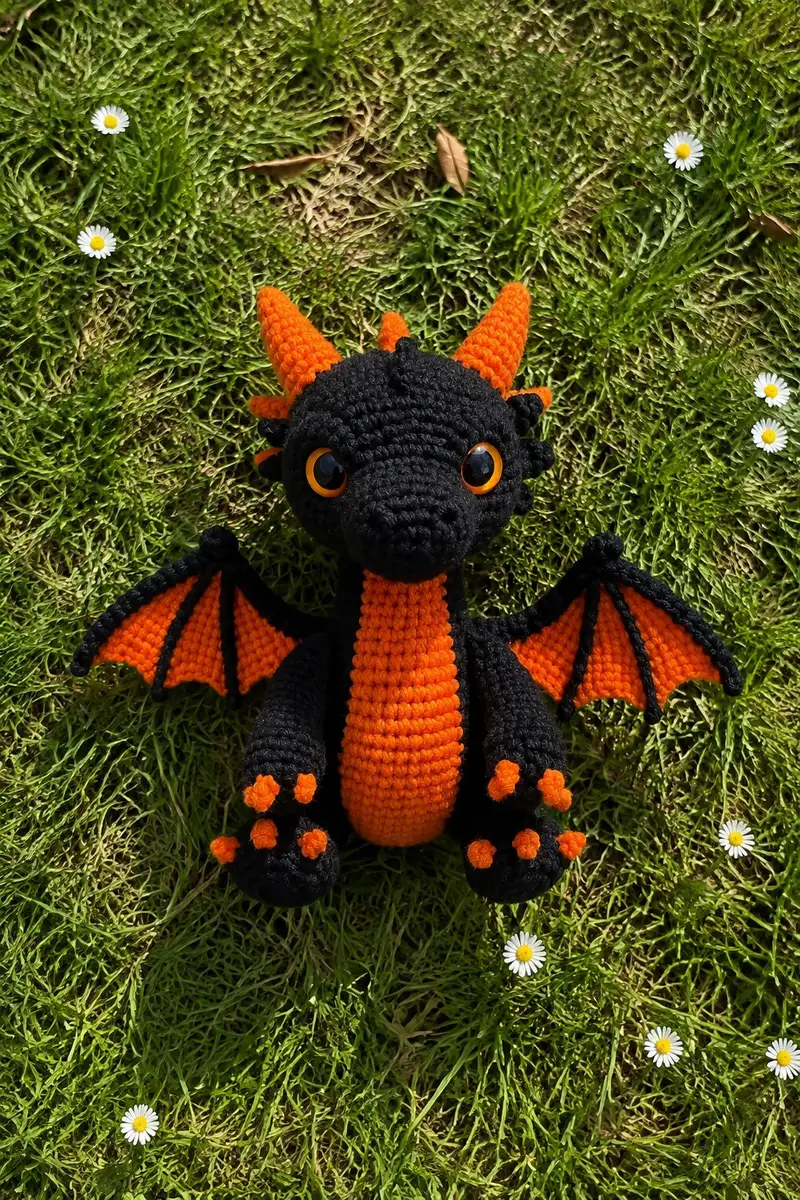
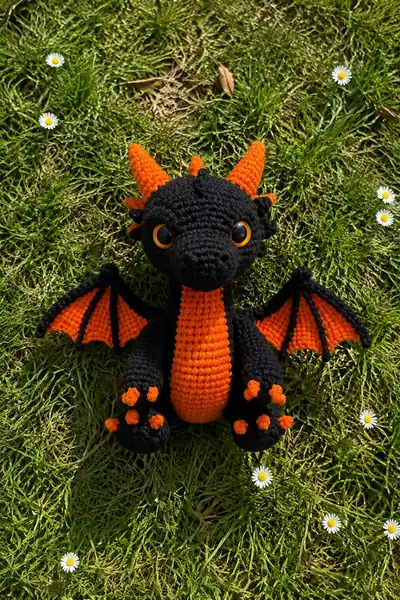
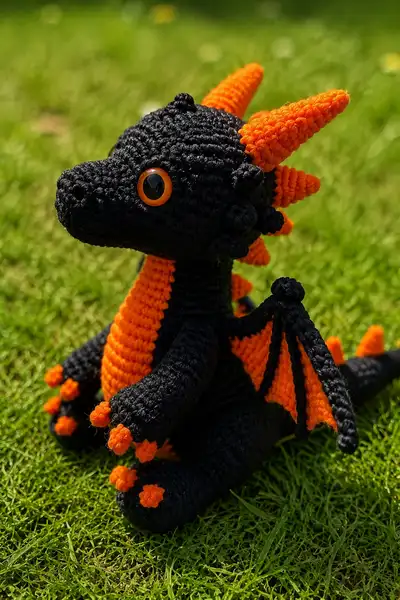
Create an irresistibly cute mini spooky dragon with this detailed amigurumi pattern. The finished dragon features contrasting black body with bright orange belly, wings, horns and toes, expressive safety eyes, and a playful row of spikes down the back. Clear, step-by-step round instructions and frequent tips help you shape the head, snout, wings and tail for a professional finish. Perfect for Halloween decor, gifts, or a portable pocket pal.
Progress Tracker
0% Complete
— Head :
Round 1 :
6 sc in magic ring (6)
Round 3 :
(1 sc, 1 inc) x 6 (18)
Round 4 :
(2 sc, 1 inc) x 6 (24)
Round 5 :
(3 sc, 1 inc) x 6 (30)
Round 6 :
(4 sc, 1 inc) x 6 (36)
Round 7 :
(5 sc, 1 inc) x 6 (42)
Round 8 :
(6 sc, 1 inc) x 6 (48)
Round 9-13 :
1 sc in each st (48)
Info :
Place safety eyes between rounds 11-12, approximately 10-12 sts apart depending on desired expression (standard placement for a slightly wide-eyed look). Mark the first eye stitch then count stitches across for the second. If using 8mm eyes, place them 12 sts apart; for 10mm eyes place 10 sts apart.
Round 14 :
(6 sc, 1 dec) x 6 (42)
Round 15 :
(5 sc, 1 dec) x 6 (36)
Round 16 :
1 sc in each st (36)
Info :
Begin shaping the base of the snout attachment by noting front center (midway between eyes). Keep rounds even for 1-3 rounds so you have a stable edge to sew the muzzle on later.
Round 17 :
(4 sc, 1 dec) x 6 (30)
Round 18 :
1 sc in each st (30)
Round 19 :
(3 sc, 1 dec) x 6 (24)
Info :
Start stuffing the head lightly to maintain shape. Use small bits of fiberfill so you can get into the cheeks and around the eye sockets. Stuff firmly but leave some give so the muzzle can be sewn on without stress.
Round 20 :
(2 sc, 1 dec) x 6 (18)
Round 21 :
(1 sc, 1 dec) x 6 (12)
Info :
Fasten off leaving a long tail for sewing the muzzle. Finish stuffing the head through the neck opening, ensuring the shape is round and the eye area is supported. We will close this opening after the muzzle is attached - this keeps the seam tidy.
— Snout / Muzzle :
Round 1 :
6 sc in magic ring (6)
Round 3 :
(1 sc, 1 inc) x 6 (18)
Round 4 :
(2 sc, 1 inc) x 6 (24)
Round 5-8 :
1 sc in each st (24)
Info :
The muzzle is an elongated tube that will be sewn to the front of the head. Keep the fabric tight so the muzzle keeps its long snout shape. If you prefer a slightly shorter snout, stop after Round 6.
Round 9 :
(3 sc, 1 dec) x 6 (18)
Round 10 :
1 sc in each st (18)
Round 11 :
(2 sc, 1 dec) x 6 (12)
Round 12 :
1 sc in each st (12)
Round 13 :
(1 sc, 1 dec) x 4, 4 sc (8)
Round 14 :
1 sc in each st (8)
Info :
Stuff the muzzle firmly but not overstuffed; it needs to keep an elongated, slightly tapered shape for a smooth join to the head. Leave long tail and position the muzzle under the eyes, aligning the front center of muzzle with the head's front center. Sew around using whip stitch and adjust to keep symmetry.
— Neck :
Round 1 :
6 sc in magic ring (6)
Round 3 :
(1 sc, 1 inc) x 6 (18)
Round 4-6 :
1 sc in each st (18)
Info :
Work the neck as a short tube that will be sewn to the body opening. Stuff lightly; the neck should be firm but compressible so it can be sewn flush into the top of the body opening. If you want the dragon to sit with a tilted head, stuff one side slightly firmer and slip-stitch the neck to the body with a slight angle.
Round 7 :
1 sc in each st BLO (18) (creates a defined collar ridge)
Round 8 :
1 sc in each st (18)
Info :
Fasten off leaving a long tail for sewing. When attaching the neck to the body, pin the neck into the body opening and sew with the long tail using small whip stitches for an even join.
— Body :
Round 1 :
6 sc in magic ring (6)
Round 3 :
(1 sc, 1 inc) x 6 (18)
Round 4 :
(2 sc, 1 inc) x 6 (24)
Round 5 :
(3 sc, 1 inc) x 6 (30)
Round 6-9 :
1 sc in each st (30)
Info :
Change to orange yarn for the belly stripe starting in Round 10. Carry the black yarn inside the body or fasten off and rejoin black after the stripe is in place. Working the belly in orange creates the signature look seen in the photos.
Round 10 :
Change to orange yarn. 1 sc in each st (30)
Round 11-18 :
1 sc in each st (30) (work these rounds in orange for belly extension)
Info :
To create a clean wedge of orange on the underside, work Rounds 10-18 in orange and keep the black yarn for the sides and back. Use stitch markers to mark the edges of the orange panel so you sew the body to the belly panel smoothly later.
Round 19 :
Change back to black yarn. 1 sc in each st (30)
Round 20 :
(3 sc, 1 dec) x 6 (24)
Round 21 :
(2 sc, 1 dec) x 6 (18)
Info :
Begin stuffing the body moderately at this stage. Add stuffing gradually so shape remains rounded at the bottom and firm enough to support the head. If you plan to pose the dragon sitting, stuff the lower body firmer to give stability.
Round 22 :
(1 sc, 1 dec) x 6 (12)
Info :
Fasten off leaving a long tail for sewing. Leave the top opening slightly larger if you are inserting the finished neck into the body; otherwise close and then sew the neck on. When joining, match orange belly center with front center of neck.
— Arms (Make 2) :
Round 1 :
6 sc in magic ring (6)
Round 3 :
(1 sc, 1 inc) x 6 (18)
Round 4-6 :
1 sc in each st (18)
Info :
These first rounds form the paw. We will add small orange bobble toes by creating tiny flower/puff motifs later and sewing them onto the tips.
Round 7 :
(2 sc, 1 dec) x 6 (12)
Round 8-12 :
1 sc in each st (12)
Info :
Stuff the paw firmly: the paw should be filled to feel solid. Use a chopstick or stuffing tool to push filling into the fingertips area. This gives the arms weight and helps the toy to sit nicely.
Round 13 :
(1 sc, 1 dec) x 4, 4 sc (8)
Round 14-16 :
1 sc in each st (8)
Round 17 :
1 sc in each st BLO (8) (creates a defined wrist ridge)
Round 18 :
Fasten off leaving long tail for sewing
Info :
Sew the arms to the sides of the body at approximately body rounds 10-12 (counting from the base upwards) so they align with the belly panel. Pin first to check spacing; the arms should sit slightly forward so the tips are visible from the front.
— Legs (Make 2) :
Round 1 :
6 sc in magic ring (6)
Round 3 :
(1 sc, 1 inc) x 6 (18)
Round 4 :
(2 sc, 1 inc) x 6 (24)
Round 5-8 :
1 sc in each st (24)
Info :
The foot is shaped with a rounded front. Keep these rounds fairly firm so the dragon can sit. You can insert a small felt piece or plastic circle into the sole for added stability (glue or sew in place) if you plan to display the dragon frequently.
Round 9 :
(3 sc, 1 dec) x 6 (18)
Round 10-16 :
1 sc in each st (18)
Round 17 :
(2 sc, 1 dec) x 4, 10 sc (14)
Round 18-20 :
1 sc in each st (14)
Round 21 :
(1 sc, 1 dec) x 4, 6 sc (10)
Round 22 :
1 sc in each st (10)
Round 23 :
Fasten off leaving long tail for sewing
Info :
Stuff the foot firmly, especially the toe and heel areas. Position legs so the dragon can sit: attach to the base of the body evenly spaced left and right with about 6-8 stitches between them (pin to check). Sew securely using a ladder stitch or whip stitch, reinforcing the seam for durability.
— Wing (Make 2) :
Round 1 :
With orange: ch 4, sc in 2nd ch from hook, sc, sc (3) turn into small curve
Round 2 :
Work along edge: 1 sc in each st across, then 2 sc in last st, continue around the other side of chain to make a small oval (7)
Round 3 :
(1 sc, inc) x 2, 1 sc in next 3 sts, (inc, 1 sc) x 2 (11)
Round 4 :
1 sc in each st (11)
Round 5 :
Change to black at last st. 1 sc in each st (11)
Info :
We are building a shaped wing membrane. The orange panel will be the inner membrane. The black will form the outer edge and ribs. Keep tension tight for crisp edges.
Round 6 :
Using black: sc along outer edge adding 1 sc increase at tip to shape curve (approx 13)
Round 7 :
Work 1 sc in each st (13)
Round 8 :
Create wing ribs: ch 20, sl st to base at even intervals to form 3 ribs (work 3 chains then sl st across to create three ribs), repeat on other side (this creates the spine and ribs)
Round 9 :
Attach ribs: surface crochet 3 lines from base to tip using black yarn to define ribs (or embroider with a yarn needle)
Round 10 :
Fasten off leaving long tail for sewing
Info :
Alternatively, make a flat semicircular orange membrane and finish with a black outer edging by working sc in BLO to create a ridge. If you plan to wire the wings for posing, slip a thin wire inside the outer black edge before finishing seams: fold the black edge and stitch closed over the wire.
— Horns (Make 3 - 2 large, 1 small) :
Round 1 :
6 sc in magic ring (6)
Round 3 :
(1 sc, 1 inc) x 6 (18)
Round 4 :
(2 sc, 1 inc) x 6 (24)
Round 5-9 :
1 sc in each st (24) (work 5 rounds for large horns; stop earlier for the small one)
Round 10 :
(3 sc, 1 dec) x 6 (18) (taper)
Round 11 :
(2 sc, 1 dec) x 6 (12)
Round 12 :
(1 sc, 1 dec) x 4 (8)
Round 13 :
Fasten off leaving tail for sewing
Info :
Sew two large horns to the top rear of the head and one small horn centered between them slightly lower. Position the base of horns on the crown and stitch securely, slightly tilting outward for a dynamic look.
— Spine Spikes (Make 6 small spikes) :
Round 1 :
4 sc in magic ring (4)
Round 3 :
1 sc in each st (8)
Round 4 :
(1 sc, 1 dec) x 2 (6)
Round 5 :
1 sc in each st (6)
Round 6 :
Fasten off leaving tail for sewing
Info :
Sew the spikes in a line from the back of the head down the body and onto the tail. Space them evenly (approx 6-8 stitches apart). For the look in photos, start with a spike just behind the head and place 5 more evenly along the spine.
— Tail :
Round 1 :
6 sc in magic ring (6)
Round 3 :
(1 sc, 1 inc) x 6 (18)
Round 4-12 :
1 sc in each st (18) (work longer for a longer tail; taper toward the tip)
Round 13 :
(2 sc, 1 dec) x 4, 6 sc (14)
Round 14 :
(1 sc, 1 dec) x 4, 6 sc (10)
Round 15 :
1 sc in each st (10)
Round 16 :
Fasten off leaving a long tail for sewing
Info :
Sew small spine spikes along the tail, spacing them slightly closer toward the tip. If you want a curled tail, insert a thin wire before final stuffing then shape and stitch the tail closed over it.
— Toe / Claw Bobbles (Make 10-12 small orange bobbles) :
Round 1 :
With orange yarn: ch 2, 6 sc in 2nd ch from hook (6)
Round 2 :
Sl st in next st, fasten off leaving tail; pull tight to create a small puff and sew to toe tip (no counts required)
Info :
Create three bobbles for each foot and three for each hand as seen in photos. Sew each bobble to create little rounded claws. Use a small dab of fabric glue if you want extra security on top of sewing.
— Wing Finishing & Ribs :
Round 1 :
Once both wing membranes are complete, use black yarn to single crochet around the outer edge, picking up both orange membrane and black outer row where applicable to create a neat border (work evenly; expected final count approx 30)
Round 2 :
Surface crochet or embroider three ribs starting at wing base and extending toward tip using black yarn. Space them evenly and use a tapestry needle or slip stitch surface crochet for neat ribs.
Info :
If you want stiff wings, place a thin wire along the outer black edge and stitch closed over it. The photograph shows strong rib lines and a slightly rigid wing silhouette — wiring helps replicate this look.
— Assembly Notes & Final Touches :
Info :
Before sewing pieces together, arrange them around the body and pin in place. Use contrasting thread or a removable basting stitch to preview placements. Sew the neck into the body opening first, then attach head to neck if worked separately. Sew horns and spikes on the head, then attach the spine spikes along the back and tail. Attach wings to the upper back between body rounds 6-9 to align with shoulder area.
Info :
Embroider nostrils if desired using a matching black yarn with a yarn needle. Add slight blush to cheeks with fabric chalk or pastel for a cute finish. Weave in all ends and trim close to work. If using safety eyes, ensure washers are firmly secured and consider adding a dab of fabric glue for extra safety if the toy will be handled by children.
Info :
Final adjustments: pinch and shape any seams so that the belly panel sits centered, and ensure the legs are evenly spaced so the dragon sits without tipping. If any limbs feel loose after sewing, reinforce with extra stitches and weave through to hide knots.
This adorable mini spooky dragon is a fun mix of simple construction and cute details that really pop in orange and black 🧶. Each stitch brings the dragon to life — horns, wings, belly stripe and bobble claws make this a charming seasonal friend. Whether you gift it or keep it on your shelf, you’ll enjoy the process and the end result 🎃🖤.