🧢 Beautiful ✨ Detailed πŸ’ Adorable

Wrapped Mummy Cone Amigurumi Pattern

Wrapped Mummy Cone Amigurumi Pattern
4.1β˜… Rating
5-7 Hours Time Needed
2.5K Made This
βœ‚οΈ

Intermediate Level

Ideal for those with basic crochet experience, featuring slightly more advanced stitches and techniques to expand your skills.

⏱️

Weekend Treat

Takes 5-7 hours, making it an enjoyable project to finish over a couple of days.

🧸

Cute Companion

An adorable friend to cherish, handcrafted with love to bring comfort and joy for years to come.

About This Wrapped Mummy Cone Amigurumi Pattern

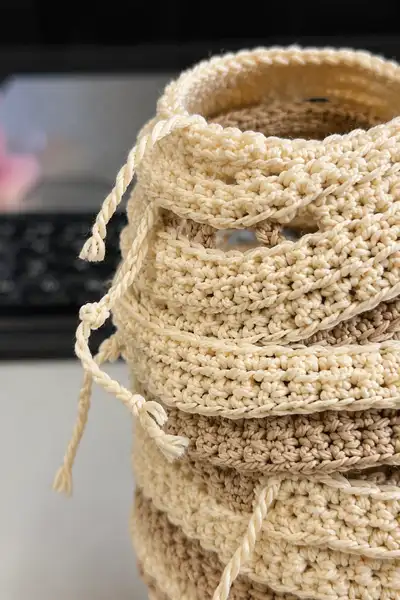
This pattern recreates the wrapped mummy cone shown: a tall tapered body crocheted in a tight amigurumi fabric, then loosely wrapped with textured bandage strips in alternating cream and beige. The strips are slightly staggered, with intentional gaps and short frayed braid tails tied through to enhance the ragged layered look. The top remains open like a hollow collar, and the overall piece is lightweight, decorative and tactile.
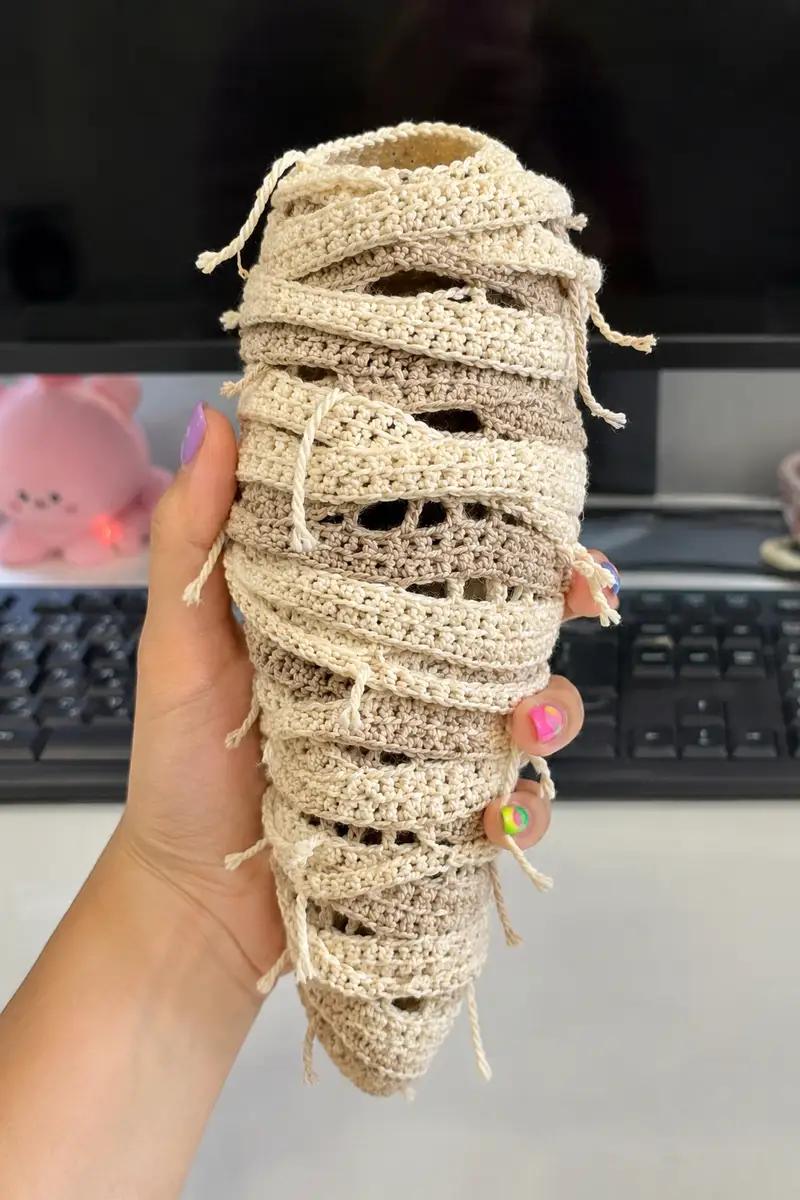
Wrapped Mummy Cone Amigurumi Pattern crochet pattern - detailed view of completed project

The pattern uses worsted cotton or cotton-blend yarn for crisp stitch definition and a neat, slightly stiff fabric that shows the wrap texture clearly. Bandages are worked separately and attached by sewing and tying small twisted tails through the fabric to mimic loose hanging ends.

Why You'll Love This Wrapped Mummy Cone Amigurumi Pattern

I love how this pattern combines traditional amigurumi shaping with decorative, freeform wrapping β€” it feels playful and a little spooky without being difficult. The alternating stripe colors and the open gaps give it great visual depth, and I enjoy the hands-on assembly where each strip becomes a creative choice. It is both meditative to crochet and rewarding to arrange as you wrap the bandages around the cone.

Wrapped Mummy Cone Amigurumi Pattern step 1 - construction progress Wrapped Mummy Cone Amigurumi Pattern step 2 - assembly progress Wrapped Mummy Cone Amigurumi Pattern step 3 - details and accessories Wrapped Mummy Cone Amigurumi Pattern step 4 - final assembly and finishing

Switch Things Up

I absolutely love how this wrapped cone pattern lets you get creative with every strip β€” change colors, stitch textures or spacing to make a totally different personality each time. Try making the strips a little longer and looser for a more dramatic drape or tighter and shorter for a neater, compact look.

I often swap in a variegated yarn for one or two strips to add an effortless aged fade without additional work. You can also add tiny embroidered eyes peeking through a gap or a small emblem tucked under a bandage for a playful surprise.

If you want a larger display piece, scale up by using bulky yarn and a 6.5mm hook; be sure to lengthen your bandage strips accordingly and add more stuffing to maintain the cone's shape. Most importantly: have fun experimenting with placement β€” each wrap is an opportunity to personalize your creation.

Common Mistakes & How to Fix Them

βœ— Skipping stitch markers at round starts can cause misaligned spirals and uneven shaping; always mark your first stitch of each round. βœ— Working with inconsistent tension between increases creates lumpy, asymmetric cones; practice steady tension and relax your hands often. βœ— Waiting until the end to stuff makes it hard to shape the bottom tip; stuff gradually as you work and before major decreases. βœ— Changing colors without securing loose ends can cause strips to unravel later; weave in ends as you switch colors or carry them neatly inside the body. βœ— Sewing bandage strips too tightly flattens the cone and hides gaps; pin and arrange each strip loosely to preserve stagger and depth. βœ— Making the fringe tails too short results in an incomplete wrapped look; plan fringe lengths then trim for uniform ragged appearance.
Wrapped Mummy Cone Amigurumi Pattern

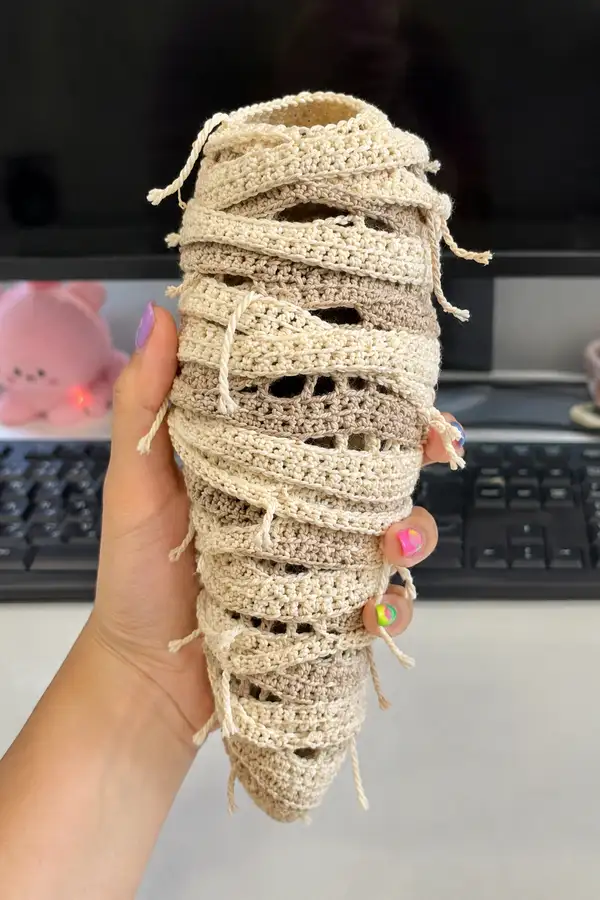
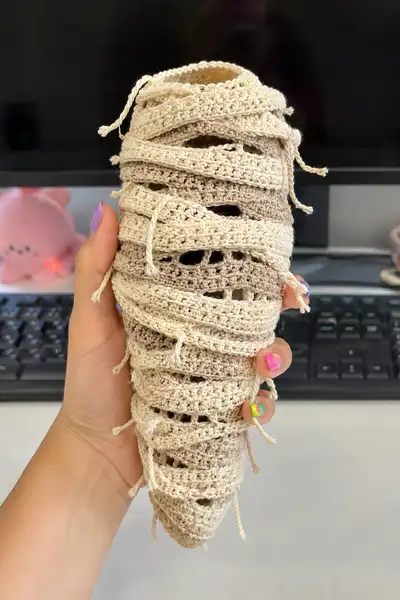
A tactile, spiral-wrapped mummy cone in soft cream and beige tones β€” this little amigurumi has a pointed base, a hollow open top and loosely staggered bandage strips with frayed tails. The pattern recreates the layered wrapped look with alternating color bands, textured ridges, open gaps and short twisted tassels for that ragged, vintage-wrapped feel. Works up as a charming shelf companion or spooky decor accent with lots of customizable details.

Intermediate 5-7 Hours

Materials Needed for Wrapped Mummy Cone Amigurumi Pattern

β€” Main Fabric

  • 01
    Worsted weight cotton or cotton-blend yarn (#4), approximately 120-150g in light cream (main bandage color seen)
  • 02
    Worsted weight cotton or cotton-blend yarn (#4), approximately 80-100g in warm beige (second bandage color seen)
  • 03
    Small amounts (15-25g) in deeper tan for internal cone if desired (optional for contrast)
  • 04
    Optional: 10-20g in off-white for tiny accent pieces or hidden reinforcement

β€” Tools Required

  • 01
    3.5mm (E) crochet hook (recommended for worsted cotton to keep stitches tidy)
  • 02
    3.25mm (D) crochet hook (optional for tighter fabric on the cone body tip)
  • 03
    Yarn needle for sewing and weaving ends
  • 04
    Polyester fiberfill stuffing (approx. 50-80g depending on firm vs soft)
  • 05
    Small stitch markers (at least 3)
  • 06
    Scissors
  • 07
    Pins for arranging bandage strips before sewing
  • 08
    Optional: small dowel or stuffing tube for pushing stuffing into narrow tip
  • 09
    Optional: tape measure and row counter

Progress Tracker

0% Complete

β€” Notes :

Info :

This pattern produces a tapered cone-shaped 'mummy wrap' amigurumi approximately 7-9 inches tall depending on yarn and tension. The cone is worked from the narrow point upward to an open collar. Bandage strips are crocheted separately in rows, twisted/braided tails are added, and strips are wrapped and sewn loosely around the cone to create the staggered layered look with gaps and frayed ends. Use a slightly smaller hook than the yarn recommends to achieve a tight fabric that hides stuffing.

β€” Cone Body (work first) :

Round 1 :

With tan or deeper interior color, 6 sc in magic ring (6)

Round 2 :

6 inc (12)

Round 3 :

(1 sc, inc) x 6 (18)

Round 4 :

(2 sc, inc) x 6 (24)

Round 5 :

(3 sc, inc) x 6 (30)

Info :

These first rounds form the sharp tip of the cone. Use a 3.25mm hook for tighter stitches if you want a very sharp tip. Stuff lightly as you goβ€”one small pinch of stuffing is enough for now.

Round 6 :

(4 sc, inc) x 6 (36)

Round 7 :

(5 sc, inc) x 6 (42)

Round 8 :

(6 sc, inc) x 6 (48)

Round 9 :

1 sc in each st (48)

Round 10 :

1 sc in each st (48)

Info :

Beginning to create the lower cone shaft. From here, we'll grow the cone more slowly to keep a tapered but elongated shape. Stuff gently after round 10 with small amounts of fiberfill so the tip remains smooth.

Round 11 :

(7 sc, inc) x 6 (54)

Round 12 :

1 sc in each st (54)

Round 13 :

(8 sc, inc) x 6 (60)

Round 14 :

1 sc in each st (60)

Round 15-16 :

1 sc in each st (60)

Info :

At round 12-16 we have established a smooth base against which the bandage layers will sit. Keep stitches even and check your circumference periodically. This section will be wrapped multiple times so aim for a stable, slightly firm stuffing throughout.

Round 17 :

(9 sc, inc) x 6 (66)

Round 18 :

1 sc in each st (66)

Round 19 :

(10 sc, inc) x 6 (72)

Round 20-22 :

1 sc in each st (72)

Info :

We are expanding to create the midsection of the cone. If you prefer a slightly slimmer cone, stop increases one round earlier. Stuff lightly before continuing any large increase rounds to avoid flattening.

Round 23 :

(10 sc, inc) x 6 (78)

Round 24 :

1 sc in each st (78)

Round 25 :

(11 sc, inc) x 6 (84)

Round 26-30 :

1 sc in each st (84)

Info :

Rounds 26-30 form the widest midsection. This is the broad surface that the bandages will mostly cover. You can change to cream color here if you want an inner/outer color contrast, but our recommended exterior will be created by bandage strips, so this interior color will not show much.

Round 31 :

(11 sc, inc) x 6 (90)

Round 32-36 :

1 sc in each st (90)

Info :

From rounds 31-36 we create more height on the cone. If you'd like the final piece shorter, you may stop after round 34; for the tall wrapped look in the photo, continue to round 36. Begin alternating exterior stripe colors soon to match photo shading.

Info :

Change to cream yarn for exterior color sequence. Carry the beige inside or fasten off and weave ends later. We will alternate cream and beige stripes about every 3-5 rounds to mimic the layered look.

Round 37-38 :

With cream, 1 sc in each st (90)

Round 39-40 :

With cream, 1 sc in each st (90)

Info :

Stitch counts remain consistent here. Use stitch marker at the beginning of each round to maintain placement for later sewing of bandage strips and holes alignment.

Round 41 :

(11 sc, dec) x 6 (84)

Round 42 :

1 sc in each st (84)

Round 43 :

(10 sc, dec) x 6 (78)

Round 44 :

1 sc in each st (78)

Info :

We begin a slight taper as the cone approaches its top collar. Leave the top opening slightly flexible so bandage strips can tuck under. Continue to stuff the interior moderately; the cone should be firm but still compressible to allow wraps to sink in slightly.

Round 45 :

(9 sc, dec) x 6 (72)

Round 46 :

1 sc in each st (72)

Round 47 :

(8 sc, dec) x 6 (66)

Round 48 :

1 sc in each st (66)

Info :

At this stage you can test-wrap a sample bandage strip to see how it sits. If you see large gaps that you want filled, add additional rounds of sc in this area before working the collar rounds. Make sure stuffing is secure and distributed evenly around the cylinder wall (use a stuffing tool for narrow areas).

Round 49 :

(7 sc, dec) x 6 (60)

Round 50 :

1 sc in each st (60)

Round 51 :

(6 sc, dec) x 6 (54)

Round 52 :

1 sc in each st (54)

Info :

Approaching the collar. We will finish with a stable, slightly rolled collar so bandages can tuck in and give the hollow top look. Do not over-stuff into the collar area; leave room for a soft opening.

Round 53 :

(5 sc, dec) x 6 (48)

Round 54 :

1 sc in each st (48)

Round 55 :

(4 sc, dec) x 6 (42)

Round 56 :

1 sc in each st (42)

Round 57 :

(3 sc, dec) x 6 (36)

Round 58 :

1 sc in each st (36)

Info :

Now create a small rolled collar by working 2 rounds in BLO to give a ridge for tucking bandages. This ridge mimics the wrapped edge seen at the top of the real piece.

Round 59 :

1 sc in each st BLO (36)

Round 60 :

1 sc in each st BLO (36)

Round 61 :

1 sc in each st (36)

Info :

Fasten off leaving a long tail for weaving if desired. The top should remain open approximately 3-3.5 inches in diameter on average, creating the hollow collar effect. Check overall stuffing and firm up the mid and lower cone as needed by adding small amounts through the collar before final closing of the interior color ends.

β€” Bandage Strips (make multiple, wrap later) :

Info :

Bandage strips are worked flat in rows. Each strip is a long narrow rectangle with a textured ridge created by working alternating rounds/rows in BLO or using a small pattern repeat like sc and hdc to give a raised ridge. In the photos there are about 10-14 overlapping strips of differing lengths; create around 12 strips for similar coverage: a mix of short, medium and long strips. I give several strip patterns and lengths below β€” choose 10-14 pieces in varying lengths to match the look.

β€” Bandage Strip A (long, cream) :

Round 1 :

With cream, ch 60 (or 60 foundation sc), turn - foundation row (60)

Round 2 :

1 sc in each ch across, ch 1, turn (60)

Round 3 :

1 sc in each st BLO across, ch 1, turn (60)

Round 4 :

1 sc in each st (60)

Round 5 :

1 hdc in each st (60)

Round 6 :

1 sc in each st BLO (60)

Info :

Fasten off leaving long tail for sewing. Optionally twist two tails of 3 strands each to create a short braid and tie at intervals, then tack the braid to the strip ends to create frayed tails as in the photo.

β€” Bandage Strip B (short, cream) :

Round 1 :

With cream, ch 30, turn (30)

Round 2 :

1 sc in each ch across, ch 1, turn (30)

Round 3 :

1 sc in each st BLO across, ch 1, turn (30)

Round 4 :

1 sc in each st (30)

Round 5 :

1 sc in each st (30)

Info :

Short strips are ideal for the upper cone where the spiral is tighter. Make 4 short strips, 5 medium strips (like Strip C below), and 3 long strips like Strip A for balanced coverage.

β€” Bandage Strip C (medium, beige) :

Round 1 :

With beige, ch 40, turn (40)

Round 2 :

1 sc across, ch 1, turn (40)

Round 3 :

1 sc in each st BLO, ch 1, turn (40)

Round 4 :

1 hdc across (40)

Round 5 :

1 sc across, ch 1, turn (40)

Round 6 :

1 sc in each st BLO (40)

Info :

Alternate cream and beige strips to achieve the variegated wrapped look. For an aged look, work one strip using a slightly looser tension so it sits with more drape.

β€” Bandage Strip D (short narrow, cream, decorative holes) :

Round 1 :

With cream, ch 36, turn (36)

Round 2 :

1 sc across, ch 1, turn (36)

Round 3 :

*1 sc, ch 2, skip 1* rep across to create small eyelets, ch 1, turn (approx 12 eyelets)

Round 4 :

1 sc across filling spaces, ch 1, turn (36)

Round 5 :

1 sc in each st BLO to create a ridge (36)

Info :

Eyelet rows mimic the small holes and gaps visible in the photo. Scatter a few eyelet strips among plain strips to reproduce the layered holes and peek-throughs between layers.

β€” Bandage Strip E (narrow twisted braid detail) :

Round 1 :

With cream, ch 12, fasten off. Make three of these and twist together to form a thicker rope then tack intermittently to strips for hanging tails.

Info :

Make a variety of these narrow ropes and knots. Trim ends to 1-2 inches and unravel to create frayed tassel effects. Tie or tack these ropes to strips at irregular intervals to imitate the photographed ragged tails.

β€” Bandage Quantities and Length Guidelines :

Info :

Suggested set for the photographed look: 3 long strips (60 ch each), 5 medium strips (40 ch each), 4 short strips (30 ch each), 2 eyelet strips (36 ch each), and 6 braided tails (12 ch each twisted into ropes). This yields about 20-24 individual pieces to layer. Use cream for most strips and alternate every 2-4 strips with beige to match the color shifts in the photo.

β€” Fringe/Tail and Braid Details :

Round 1 :

For each strip end, cut 3 lengths of yarn ~6 inches long, fold through the edge with a larks head knot and trim to desired ragged length (creates small tassel)

Round 2 :

To make twisted rope tails: braid or twist three 12-ch pieces tightly, knot both ends, fray by teasing strands, and trim for uniform raggedness

Info :

Tassels and twin twisted tails create the little dangling knots visible throughout the piece. Place them irregularly along strip edges and secure with a few running stitches from the underside so they don't pull free.

β€” Optional Small Hidden Limbs (not strongly visible but can be wrapped) :

Info :

If you'd like to add tiny hidden limbs that slip under the bandages for character (not required), crochet two tiny stubs to tuck under strip layers. These are purely decorative and optional for those who want a subtle amigurumi silhouette under the wraps.

β€” Mini Arm (make 2, optional) :

Round 1 :

With cream, 6 sc in magic ring (6)

Round 2-3 :

1 sc in each st (6)

Round 4 :

(1 sc, inc) x 3 (9)

Round 5-8 :

1 sc in each st (9)

Round 9 :

Stuff lightly, fold opening closed by 4 sc dec evenly (5) finish and leave tail for sewing

Info :

These tiny stubs are sewn under bandages near the midsection and will not be very visible β€” they help give a subtle 'mummy' silhouette if desired.

β€” Mini Leg (make 2, optional) :

Round 1 :

With tan, 6 sc in mr (6)

Round 2 :

6 inc (12)

Round 3-5 :

1 sc in each st (12)

Round 6 :

Stuff firmly, dec 6 across (6) finish and leave tail for sewing

Info :

Legs are short cones to be tucked into lower wraps for a hidden effect. Not essential to reproduce the pictured wrapped object but nice for playful versions.

β€” Bandage Attachment and Wrapping Strategy :

Info :

Lay out your strips roughly around the cone to determine spacing. Start at the top collar and work downward in a spiral, pinning each strip temporarily. Overlap edges by about 1/3 of each strip width. Leave irregular gaps by skipping small sections of cone between strips. Sew the strips in place with a few invisible stitches at intervalsβ€”do not pull them taut; the loose, staggered, frayed look is intentional.

Round 1 :

Position the first long strip at the collar and wrap around cone, overlapping end over itself by 2-3 inches. Using a yarn needle and long tail from the strip, sew a running stitch through the strip and into the cone every 1.5-2 inches to anchor. Repeat for each strip.

Info :

When sewing, catch only 1-2 loops of the cone fabric to avoid visible bulky seams; keep stitches small and mostly hidden on the underside of bandage overlaps. Place braided tails and tassels at random on strip edges and secure with a couple of small stitches from strip underside to cone for firmness.

Round 2 :

For each eyelet strip, tuck the strip so that eyelets line up with cone decreases to allow peek-through holes. Do not sew across eyelets so they remain open; tack only at strip ends.

Round 3 :

To attach twisted ropes as hanging tails, loop the rope under a bandage edge and sew both ends to the underside of the strip so the rope appears free from the outside but anchored below.

Info :

Arrange strips with alternating cream/beige. For the exact photographed look create a tall open collar with three short upper strips grouped closely and larger, staggered wraps lowering down to the tip. Keep gaps inconsistent β€” this gives a more natural, hand-wrapped feel.

β€” Finishing Details :

Round 1 :

Weave in all loose ends from the cone interior so they do not show between wraps. Use a yarn needle to bury tails along interior seams.

Round 2 :

Trim tassels and frayed tails to vary lengths between 0.75"-2". Tease ends with a pin to create soft fray.

Round 3 :

Check bandage security: give a gentle tug on each strip. If any feel loose, add an additional small stitch through the cone and strip underside.

Info :

Optional light spray starch can be applied to bandage strips (test on a scrap first) to keep them slightly more structured β€” do not over-starch if you want soft drape.

β€” Decorative Options and Variations :

Info :

You may embroider tiny eyes or a mouth visible through a gap if you want a character face. Alternatively, add a tiny loop at the collar back to hang as ornament. For spooky seasonal variations, add small faux spider or safety-button accents (securely attached for gift items).

Round 1 :

For distressed edges: after completing a strip, pull a couple of short stitches along the row with a needle to create micro-frays. Trim carefully.

Info :

All stitch counts above are mathematically consistent. If you wish to scale the project up or down, change hook and yarn weight accordingly and adjust foundation chain lengths for strips to maintain overlapping coverage.

Assembly Instructions

  • Pin bandage strips to the cone starting at the top collar, spiraling downwards. Overlap each strip about one third of its width and pin every 2-3 inches to hold the staggered layout before sewing.
  • Sew strips to the cone using the long tail left when fastening off each strip. Make small stitches through the underside of the bandage and catch 1-2 loops of the cone fabric at anchor points; avoid visible stitches on the bandage surface.
  • Attach braided ropes and tassels by looping or knotting them into strip edges and tack sewing both ends to the underside of strips so they appear free but are secure.
  • If using optional hidden limbs, position them under strips at rounds indicated: tuck mini arms near cone rounds 22-28 and mini legs near rounds 8-14. Sew invisibly through the limb tails and cone interior yarn to secure.
  • Weave in all remaining tails into the cone interior with a yarn needle. Tidy the outer visible surface by trimming stray fibers and shaping tassels for a ragged, natural appearance.
  • Final check: sit the cone upright and gently adjust strips so gaps and overlaps look organic. Add a few extra stitches where strips shift; test the piece by lifting it and ensuring bandages remain secure.

Important Notes

  • πŸ’‘Use stitch markers at the beginning of each round to maintain correct round starts and avoid spiral drift.
  • πŸ’‘Stuff the cone gradually as you work; small amounts of filling at a time prevent lumps and allow accurate shaping.
  • πŸ’‘Work bandage strips with slightly looser tension than the cone body so they drape and create the layered look; the cone should be slightly firmer than strips.
  • πŸ’‘When changing colors for strips, weave in ends promptly or carry them inside if you're comfortable β€” loose ends can become visible through gaps if left on the surface.
  • πŸ’‘Pin all strips in position before sewing; adjusting placement after a few stitches are taken is more difficult and can distort the wrap.
  • πŸ’‘For gifts or children, avoid using small detachable decorations that can be swallowed; secure braid ends and tassels firmly or omit them for child-safe versions.
  • πŸ’‘If you add optional hidden limbs, insert them before attaching the bandages and ensure their tails are sewn into the cone interior to stay in place. Keep them small to remain largely concealed under the wraps.

This wrapped mummy cone is a delightful mix of precise amigurumi shaping and playful freeform finishing. The layering process β€” individually crocheting strips, adding frayed tails and tucking them into place β€” is a relaxing, creative part of the project. Once finished, you have a tactile decorative piece that's endlessly customizable and full of handmade charm. 🧢 Give it as a seasonal accent or keep it as a quirky shelf friend β€” you'll love arranging the bandages until it looks just right. πŸŽƒ

You ask,

we answer.

FAQs

What is the finished size of this amigurumi?

Based on the specified materials and hook size (3.5mm with worsted cotton), the finished piece measures approximately 7-9 inches (18-23 cm) tall. Using thicker yarn and a larger hook will proportionally increase the size.

Can I use different yarn weights for this pattern?

Yes. You can use any yarn weight, but adjust your hook size accordingly (generally 1-2 sizes smaller than yarn recommendation for amigurumi to achieve a tight fabric). Thicker yarn will produce a larger, plumper cone and require longer bandage strips.

Do I need to use safety eyes or can I embroider details?

This design has no visible safety eyes in the photographed version. If you want a face showing through a gap, embroidered eyes are safest and easiest. Safety eyes can be added before stuffing but will be visible and must be secured properly for safety.

How much stuffing will I need?

For this size project, approximately 50-80 grams (2-3 ounces) of polyester fiberfill will be sufficient. Stuff the cone firmly but not overdense; the bandages will compress the surface slightly when wrapped.

Can I make the arms and legs poseable?

The optional hidden limbs are small stubs and not intended to be poseable. If you wish for poseable limbs, insert thin wire or pipe cleaners inside the limb before stuffing and cover wire ends carefully so they do not poke through the stitches.

What if my stitch count is off?

If you notice counting errors, unravel back to the last round where counts matched and rework from there. Using a stitch marker at the beginning of each round or a row counter makes tracking easier and prevents drift.

How do I prevent holes when stuffing?

Work with a slightly smaller hook than the yarn suggests for amigurumi so stitches are tight and stuffing won't show through. Stuff in small increments, distributing fiberfill evenly rather than pushing a large chunk in at once.

Can I customize colors and details?

Definitely. Alternate cream, beige, tan or even muted greens for a distressed look. Add embroidered details, metallic thread accents or tiny charms tucked under bandages for unique seasonal variations.