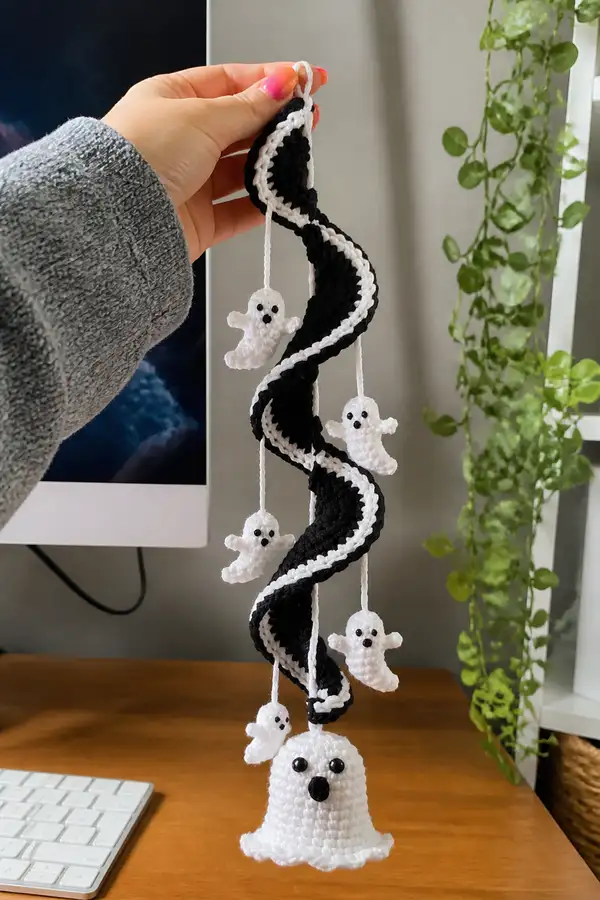
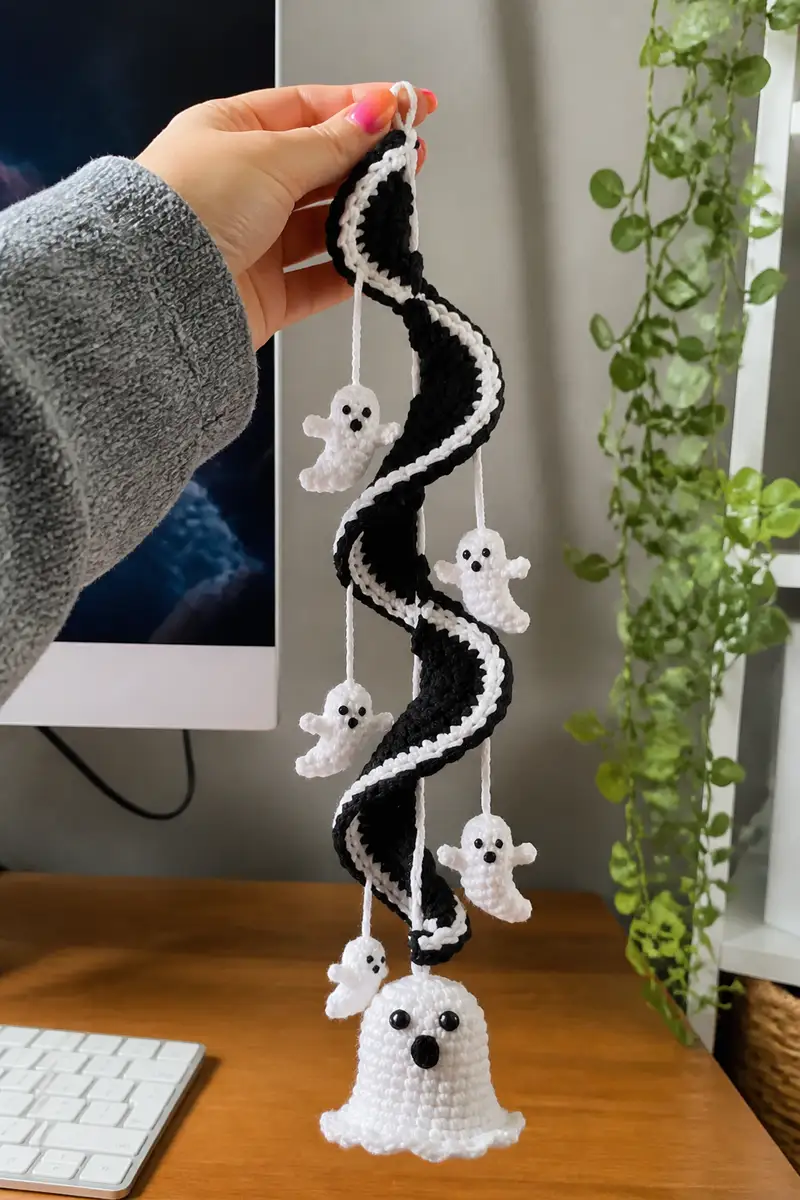
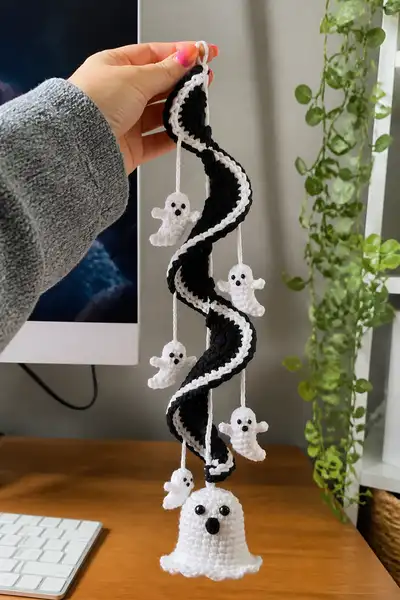
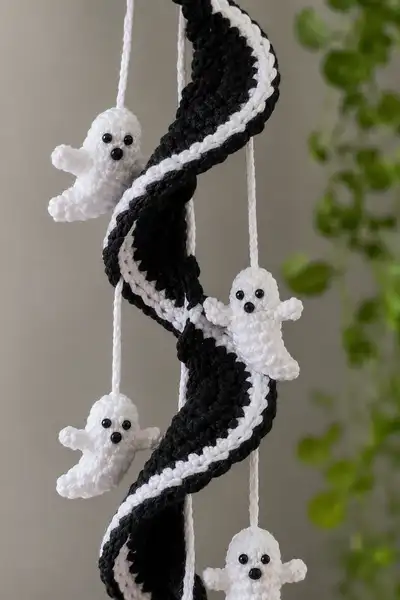
Create a dramatic black-and-white spiral garland dotted with tiny floating ghosts and a bell-shaped ghost at the base. This Halloween decoration hangs as a twisting ribbon with multiple small amigurumi phantoms suspended along its length, perfect for doorways, windows, or party displays. The finished piece uses bold contrast and simple shapes to achieve maximum spooky charm. Clear step-by-step instructions guide you through every section from the spiral ribbon and edging to the tiny ghosts and final assembly.
Progress Tracker
0% Complete
— Big Bell Ghost (Head & Body) :
Round 1 :
6 sc in magic ring (6)
Round 3 :
(1 sc, 1 inc) x 6 (18)
Round 4 :
(2 sc, 1 inc) x 6 (24)
Round 5 :
(3 sc, 1 inc) x 6 (30)
Round 6 :
(4 sc, 1 inc) x 6 (36)
Round 7 :
(5 sc, 1 inc) x 6 (42)
Round 8 :
(6 sc, 1 inc) x 6 (48)
Round 9 :
(7 sc, 1 inc) x 6 (54)
Round 10 :
(8 sc, 1 inc) x 6 (60)
Round 11-18 :
1 sc in each st (60)
Info :
Place the 6mm-8mm safety eyes between rounds 12-13 approximately 12-14 stitches apart for a sweet, centered face. Mark location with pins before securing. If using beads instead of safety eyes, leave a small space for bead placement after stuffing.
Round 19 :
(8 sc, 1 dec) x 6 (54)
Round 20 :
(7 sc, 1 dec) x 6 (48)
Round 21 :
(6 sc, 1 dec) x 6 (42)
Round 22 :
(5 sc, 1 dec) x 6 (36)
Info :
Begin stuffing the body firmly but not overfilled; the bell ghost should hold shape while still being soft. Stuff gradually through rounds 21-24, pushing fiberfill into the top and sides for even distribution.
Round 23 :
(4 sc, 1 dec) x 6 (30)
Round 24 :
(3 sc, 1 dec) x 6 (24)
Round 25 :
(2 sc, 1 dec) x 6 (18)
Round 26 :
(1 sc, 1 dec) x 6 (12)
Info :
At this point you have shaped a neck. Fasten off leaving a 30 cm tail for later sewing if you plan to anchor the bell ghost to the base of the spiral. If you want a flared skirt (ruffled edge) for the bell shape, do not close here; instead go to the bell skirt shaping below.
Bell Skirt Option - Join & Flare :
Instead of closing at round 27, rejoin in next st and continue to create a flared ruffle to form the bell bottom.
Round 28 :
Join white yarn in any st. 6 sc in each st around to expand base visually (work 6 sc evenly into 6 available loops by placing stitches between existing rounds) - this will visually expand and even out into 36 points (36). Use careful placement to make 36 even loops.
Round 29 :
1 sc in each st (36)
Round 30 :
*(sc in next st, ch2, sl st in same st)* x 36 - creates a decorative scalloped edge (36 scallops)
Info :
Finish stuffing as needed before completing the scallop round; make sure the bottom opening is wide enough to shape the ruffle. Fasten off and weave in ends neatly on the inside.
— Spiral Ribbon (Main Body of Garland) :
Construction Note :
The spiral is worked as a long joined-round tube: 30 stitches circumference (approx) is a comfortable width for a strong visible spiral. Work the black core first, then add a white edge along both sides after the tube is complete. You may adjust length depending on desired twist; sample length uses 80 rounds to yield a 50-60 cm hanging piece.
Round 1 :
Ch 31, join with sl st to first ch to form a loop (do not twist). 1 sc in each ch around (30) - this is counted as rnd 1 of the tube
Round 2-80 :
1 sc in each st (30) - continue for 79 more rounds to create a long tube (30 sts)
Info :
Keep the stitch marker at the beginning of each joined round; the tube will be long. If you prefer a longer spiral, add more rounds in multiples of 5 to keep proportions. Maintain slightly tighter tension to encourage the tube to hold the twist.
Round 81 :
Change to white yarn. Working along one long edge of the tube, pick up loops by inserting hook under the side loops and work 1 sc in each st around the long edge to create the white border. Aim to place 30 sc along the edge (30)
Round 82 :
Turn work and sl st back along the same edge to neaten if desired, or continue directly to other side after a small join. 1 sc in each st along edge to form a neat ridge (30)
Round 83 :
Move to the opposite long edge; 1 sc in each st (30)
Info :
Optional: For a stronger border, work a second white ridge by repeating sc rounds along each edge. You can also use hdc for a taller edge. Carry unused yarn on the inside of the tube to avoid many ends.
Finishing the Tube :
Weave in long tails every 10 rounds to keep inside tidy. After completing white edging, press the tube flat on the wrong side and curve gently into a natural spiral shape; if needed, insert a thin craft wire or pipe cleaner down the inside before closing the ends to help the ribbon hold an open spiral (optional but helpful for display).
— Small Ghost Charm (Make 5 identical) :
Round 1 :
6 sc in magic ring (6)
Round 3 :
(1 sc, 1 inc) x 6 (18)
Round 4 :
(2 sc, 1 inc) x 6 (24)
Round 5 :
1 sc in each st (24)
Info :
Place small safety eyes (4mm) approximately between rounds 3-4, spaced 4-6 stitches apart for a curious expression. If using beads, sew them on after stuffing.
Round 6 :
(3 sc, 1 dec) x 6 (18)
Round 7 :
(2 sc, 1 dec) x 6 (12)
Round 8 :
1 sc in each st (12)
Info :
Stuff the charm lightly — small ghosts should be soft and flexible; a firm stuffing will make the tiny charms look bulky. Add fiberfill now to get a smooth body shape.
Round 9 :
(1 sc, 1 dec) x 4, 4 sc (8) - shape top of body and prepare for arms
Round 10 :
Work small arm 1: sl st to next st, ch 1, 3 sc in same st, sl st to base (this forms a little wing/arm). Fasten off and weave in tail or continue to work second arm in next round depending on preference
Round 11 :
Work small arm 2: rejoin in opposite side st, ch 1, 3 sc in same st, sl st to base. Fasten off leaving a 20 cm tail for sewing if you prefer to make arms separately and sew later.
Round 12 :
For the tail/ruffle: join white yarn (if body already white continue) and do *(sc in next st, ch 1, sl st in same st)* around to create a small wavy bottom edge. Fasten off and weave in ends (8 groups)
Info :
Make five of these small ghosts. Keep them consistently stuffed for balanced hanging. Attach small black bead as nose beneath eyes (approx 2.5 mm bead) using strong thread or glue for extra security.
— Ghost Arms (Alternate Method - Make 10 if sewing separately) :
Round 1 :
Ch 4, 3 sc in 2nd ch from hook, 1 sc in next ch, 3 sc in last ch, turn and sl st along underside to form small curved arm (7 sc)
Round 2 :
1 sc in each st (7)
Info :
Stuff arms very lightly or leave flat for sewing. Sew to the small ghost body at the shoulder area between rounds 7-9. Use a ladder stitch to hide seams for a clean look.
— Hanging Cord (Make 5 cords of varying lengths) :
Step :
Cut white yarn length to desired hanging length for each ghost. Sample lengths: 6 cm, 12 cm, 18 cm, 24 cm, and 30 cm for graduated effect. Fold in half if you want doubled cord strength and whip knot at top loop for hanging.
Info :
Slip one end through the top of each small ghost by threading the yarn tail through the top center. Secure with a few invisible stitches inside the top round, or tie a small knot and pull into the body to hide it.
— Assembly of Small Ghosts to Spiral :
Step 1 :
Decide positions along the spiral where each ghost will hang. Mark positions with pins along one side (center channel works well) spaced evenly or staggered to taste.
Step 2 :
Thread the hanging cord through the spiral tube by opening a small hole in the inner seam (where you joined rounds). Secure cord inside with several small stitches, anchoring it to internal stitches so ghosts hang from the center.
Info :
Place heavier or larger ghosts lower on the spiral to balance weight. If using craft wire inside the tube, avoid piercing wire when attaching cords; feed cord beside wire or remove wire temporarily to sew then reinsert.
— Bottom Hanging Bell Ghost (Attachment) :
Step 1 :
Use the long tail left from the bell ghost (big bell) to sew it to the bottom center of the spiral tube. Insert needle through bottom ring of the spiral tube and through the top center of the bell; sew firmly with 8-12 passes to secure.
Step 2 :
For extra stability, tie a small knot inside the top of the bell and apply a tiny drop of fabric glue to secure the knot. Weave remaining tails along inside of spiral to hide them.
Info :
If you prefer a removable bell ghost (for washing or storage), secure it with a small loop of yarn or a button-and-loop closure so it can be detached from the spiral when needed.
— Eyes, Nose, and Face Details :
Step :
Sew on small black beads for eyes and a slightly larger bead for the nose using strong thread. For the small ghosts use two 4mm beads for eyes and a 2.5-3mm bead for the nose. For the bell ghost use two 6-8mm beads and one 4-6mm bead for the nose. Secure beads with multiple passes and knot thread inside the body; apply a tiny dab of glue on the back of beads for extra security if the item may be handled by children.
Info :
If you prefer embroidered features, use black yarn and a yarn needle to stitch 'O' shaped mouths or tiny eyebrows. Embroidery allows for safer child-friendly toys but is less glossy than beads.
— Final Touches & Blocking :
Step :
Once all charms are attached, gently shape the spiral by wrapping it around a cylinder (paper towel tube or dowel) and letting it rest so it holds the spiral shape. If you inserted optional wire, bend the wire inside to create even curves.
Info :
Trim stray fibers and weave in all ends. If using paint or blush for cheeks, apply a tiny amount of fabric-safe paint or eyeshadow and seal with a fixative suitable for yarn (optional).
— Variations and Size Adjustments :
Note :
To make a larger or smaller garland, adjust tube circumference (increase or decrease the initial ch by multiples of 2) and number of rounds. Keep ghost proportions consistent: increase small ghost body rounds by adding 1-2 even rounds for a slightly larger charm.
Info :
For a multi-colored spiral, work alternate color stripes every 4-6 rounds instead of the white edge. Use tapestry crochet or surface slip stitch for simpler color accents along the tube.
This spooky phantom spiral garland is a delightful blend of drama and charm, combining a bold black spiral ribbon with tiny playful ghost charms to add instant Halloween personality to any space. I love how the crisp white edge makes the whole piece pop, and how the little ghosts look like they're floating down a ribbon of shadows. It's a satisfying project that knits simple techniques into a show-stopping seasonal accent. 🧶👻🎃