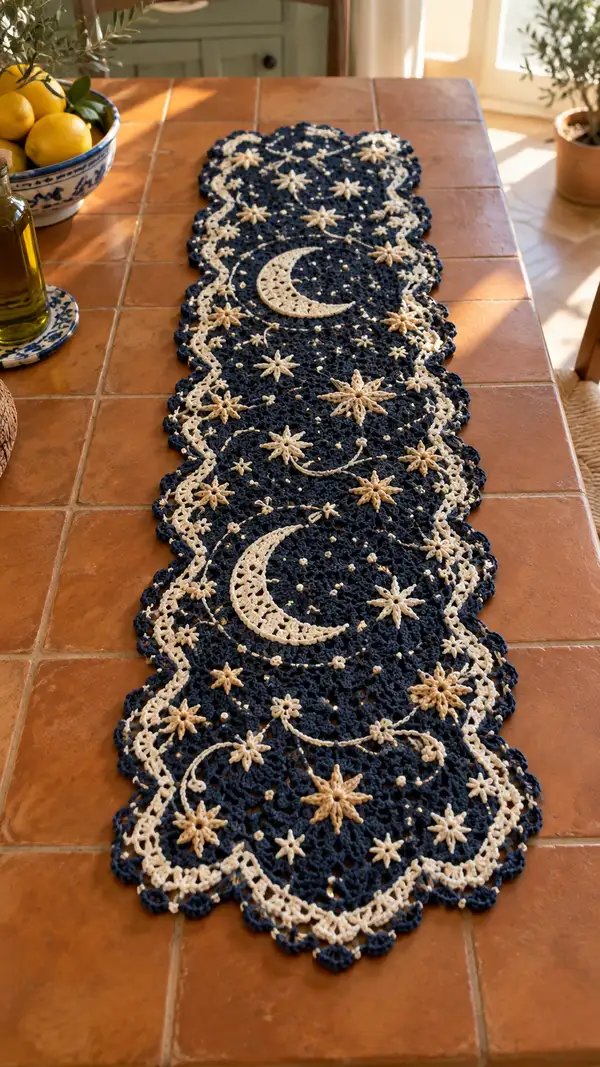
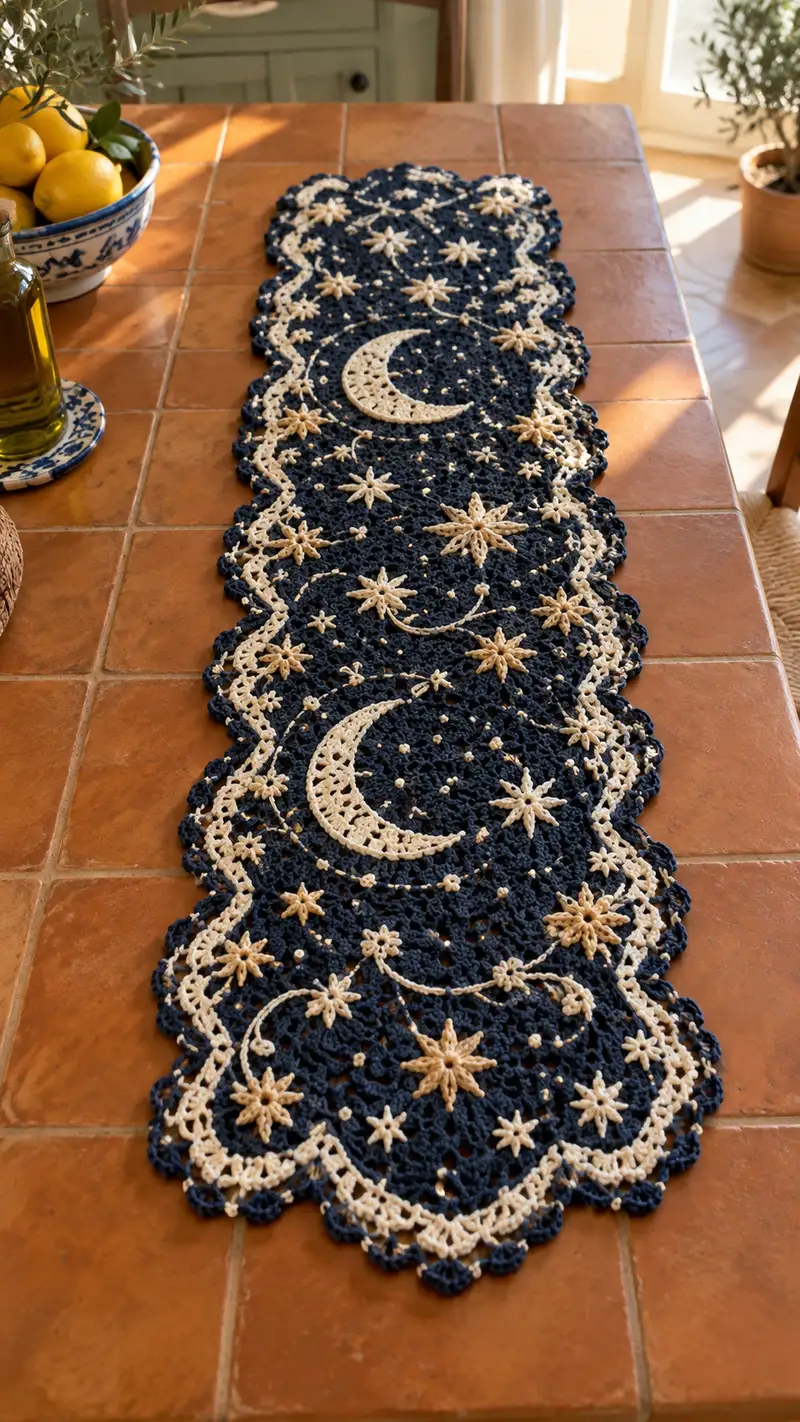
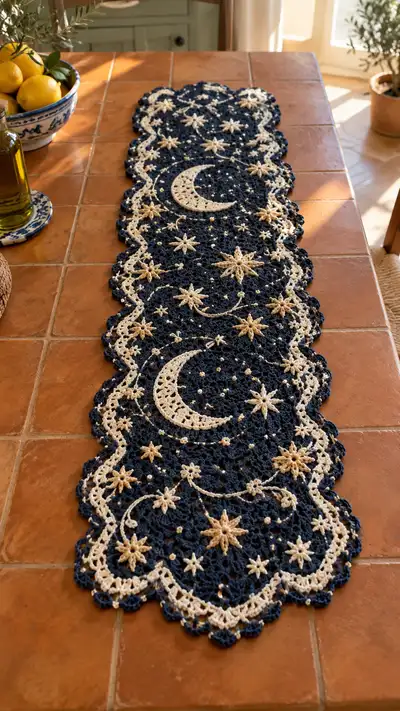
Create a stunning navy-and-cream lace table runner inspired by night skies—moons, layered stars, and delicate scrolling vines. This detailed pattern combines crocheted motifs, appliqued crescents, and a scalloped border for a finished look that lays beautifully down the center of a table. Perfect for seasonal decor, a special dinner, or a thoughtful handmade gift.
Progress Tracker
0% Complete
— Materials & Gauge :
Info :
Gauge is not critical for lace runner but will affect final width and drape. Using sport/DK cotton with 2.75mm hook, one repeat module approx 9.5cm (3.75 in) wide. Make a small swatch of mesh to check desired openness.
— Central Crescent Moon Motif :
Round 1 :
Make a magic ring, ch2 (counts as first tr), 11 tr into ring, join with sl st to top of ch2 (12)
Round 2 :
Ch2, 1 tr in same st, 2 tr in each tr around, join with sl st to top of ch2 (24)
Round 3 :
Ch2, *1 tr in next 2 sts, 2 tr in next st* rep around, join (32)
Round 4 :
Ch2, *1 tr in next 3 sts, 2 tr in next st* rep around, join (40)
Round 5 :
Ch2, *1 tr in next 4 sts, 2 tr in next st* rep around, join (48)
Info :
Keep counts accurate; moons are built as crescent arcs by later skipping sections and shaping with chains. Work these rounds in cream for the crescent.
Round 6 :
Ch1, sc around first 16 tr evenly (16), ch6, skip next 8 tr (forming inner hollow), sc in next 24 tr evenly (24), sl st to first sc of round
Round 7 :
Turn into chains: from sl st, ch1, sc in next 15 sc, [ch3, skip 1 sc] x 4 across the 6ch space to form scalloped inner edge, sc in remaining sc to end, sl st to first sc (total main sc count remains ~39)
Info :
After round 7, check crescent curvature by folding slightly; if too closed, next round will open with picots and chain spaces. Block flat to shape crescent curve.
Round 8 :
Ch3 (counts as tr), *tr in next 2 sts, ch1, skip 1 st* along outer arc to create lacy outer rim, when reaching inner scallop, work [sc, ch3, sc] into each ch3 space to accent inner arc, finish with sl st (maintain approximately 44 total points)
Round 9 :
Ch1, sc evenly in outer tr and picot peaks, place small picots at interval: [sc, ch3, sl st in 3rd ch] every 6th st to create tiny points (approx 44)
Round 10 :
Edge: Work a firm sc round around entire crescent with small filler loops into outer chain spaces: sc in each st and work 3 sc in each picot to anchor motif (approx 50)
Info :
Finish crescent motif by weaving ends and blocking onto template to achieve smooth curve. Make two large crescents for the runner layout, mirrored if needed.
Round 11 :
Optional embroidered detail: Using cream or antique cream, embroider a line of tiny lazy-daisy stitches across the concave side to simulate carved detail. Use 6-8 evenly spaced stitches.
— Large Star Motif (Make multiple) :
Round 1 :
Magic ring, ch2 (counts as first hdc), 11 hdc into ring, join with sl st (12)
Round 2 :
Ch2, (hdc, inc) x6 around (18)
Round 3 :
Ch2, (1 hdc in next st, inc) x6, 18 + 6 = 24 (24)
Round 4 :
Ch1, sc around the circle (24), join, sl st to first sc
Round 5 :
Form 8 rays: *[ch6, sl st in 3rd ch from hook to form small loop, ch3, dc in loop, tr in next chain 2] rep around* to create initial points; space rays by skipping 3 sc between each ray (8 rays total)
Info :
Each ray will be made in 3 rounds to form layered petals. Work tightly to maintain sharp points. Use cream yarn for raised contrast against navy mesh.
Round 6 :
Working into each ray loop: ch1, sc in loop, hdc in next, dc in next, tr in top; secure with sl st into base sc. Repeat for all rays (8 completed)
Round 7 :
Add secondary petals: Into the base space between rays, [ch4, sl st into base sc] x 8 to form filler loops, then sc around to tidy (approx 40)
Round 8 :
Optional bead anchor: Add small bead to center by stitching through bead then through central stitches, finish with secure knot and weave in tail
Info :
Make a variety of large stars with 8 or 9 rays to add visual diversity. Slight variations in ray length add handcrafted charm.
— Small Star / Spark Motifs (Make many) :
Round 1 :
Ch6, sl st to form ring, ch1, 10 sc into ring, join (10)
Round 2 :
*Ch5, sl st to next sc* rep 5 times to form small 5-pointed star loops, finish with sl st (5 tiny points)
Round 3 :
Ch1, sc around to secure loops, adding a tiny picot at each point: [sc, ch3, sl st in 3rd ch] (10)
Info :
Small stars are used as filler to dot the mesh. Make 20–40 depending on runner length and desired density. Sew these on after blocking the background.
— Lace Background Panel Module :
Info :
The runner is built from repeating 12cm x 12cm square-style modules worked in navy. Join modules lengthwise; each module is worked in rounds to form an open floral-lace medallion, then joined with a small connector ring.
Round 1 :
Ch6, sl st to form ring, ch3 (counts as dc), 15 dc into ring, join sl st (16)
Round 2 :
Ch4, *dc in next st, ch2* rep around to form chain spaces between dcs, join (16 dc and 16 ch2 sps)
Round 3 :
Ch3, *2 dc in ch2 sp, ch1, sk dc* rep around creating 16 clusters separated by ch1, join (32 cluster dcs)
Round 4 :
Ch2, 1 hdc in top of each dc and ch1 space forming a ring of small arches (approx 48 hdc total), join
Round 5 :
Ch3, (dc in next 2 sts, ch2, sk 1) repeat around to make outer chain loops for joining (maintain approx 32 loops)
Info :
Work these rounds flat and check that module edges are even. Use stitch markers to mark cardinal points (top, bottom, sides) to aid joining later.
Round 6 :
Ch1, sc in each dc and sc into chain loops as follows: [sc, ch3, sl st into 3rd ch] in each ch2 loop to tidy edge (approx 64 sc including loops)
Round 7 :
Ch3, *tr in next 3 sc, ch2, sk 2 sc, sl st in next sc* rep around to create lacy scallop texture for module (approx 40 tr)
Round 8 :
Ch1, sc around into tr and ch2 sp, work [sc, picot, sc] in each ch2 to emphasize openwork (approx 64)
Info :
Make enough modules to reach desired runner length: each module roughly 9–10cm width. Alternate module orientation to create scalloped runner edge.
Round 9 :
Join modules lengthwise: While working the last round of a module, sl st into the adjacent module's edge loops at the cardinal points to join them: join on side edges every 2–3 loops to create a flexible seam
Round 10 :
When joining, alternate joined and free loops to allow scalloped edge to show; aim to join modules in rows of three modules across the width for the runner pattern shown (three modules across, many down length)
— Extended Mesh & Filler Rounds (to create overall background) :
Round 1-4 :
Work continuous open mesh between joined modules: ch5, sk 2, sc into next space forming alternating chain arches. Continue evenly for 4 rounds to even out joins (mesh count remains consistent with previous joins)
Info :
Every 4th round of mesh, add a compacting round of sc to stabilize structure. This reduces stretch and creates a stable background for applique.
Round 5 :
Ch1, sc in each sp and around join seams, placing 1 sc every time two modules meet to anchor the seam (count varies by modules used)
Round 6-12 :
Continue mesh repeats: ch4, dc into next sc, ch1, sk1; on each round the stitch count is multiplied by module count; keep consistent pattern to preserve lace geometry
Info :
After mesh rounds, lay out the runner flat and place crescent moons and large stars as shown in photo: two crescent moons centered along runner alternating with large star clusters. Use pins to secure placement before sewing.
— Applique Placement & Decorative Embroidery :
Info :
Arrange motifs: place first large crescent at approx module rows 3–4 from one end, then a star cluster at rows 6–7, repeat mirrored toward the opposite end. Place large stars and small stars in interstitial spaces and along vine lines.
Round 1 :
Sew crescents to mesh along inner and outer edges using matching cream yarn. Use slip-stitch or whip-stitch through both motif edge and mesh loops; ensure all picots are secured.
Round 2 :
Sew large stars flat to mesh by anchoring center first then each ray base; work from center out to avoid warping. Use small hidden stitches on mesh to keep attachments invisible.
Info :
Embroider trailing vines in cream using surface chain stitch: bring yarn up at vine start, chain over surface by skipping a stitch with yarn on top, anchor every 6–8 mm. Drape vines with a gentle curve connecting stars and moons.
Round 3 :
Embroider tiny dot stars by French knot or small cluster: insert needle, wrap yarn twice, pull through to form a small raised dot; anchor on backside firmly. Space dots evenly to simulate distant stars (approx 2–3 per module cluster).
Info :
When embroidering, do not pull too tight; allow small raised buds that sit on top of mesh to catch light. Keep the cream yarn ends woven and hidden to backside.
— Border Preparation & Scalloped Edge :
Round 1 :
With navy, work one round sc around entire runner edge to tidy and create full base for scallop (work 2 sc in corners/points where modules create curvature). Stitch count varies with layout.
Round 2 :
Change to cream yarn. Ch3, *skip 1, 6 dc cluster in next sc (shell), skip 1, sl st in next sc* rep around to create large shell scallops; in shallow corners work 4 dc cluster to keep curvature balanced.
Info :
Alternate shell clusters with sl st anchors so border lies flat. If scallops flare, reduce cluster size to 4 dc in problem areas. Pin and block border as you finish to set shape.
Round 3 :
With cream still, ch1, sc in each dc of shell and work picot points: *sc in next 3 dc, picot (ch3 sl st in 3rd ch), sc in remaining dc of shell* rep around to add delicate points (approx 3-5 picots per shell)
Round 4 :
Switch to navy. Work small scalloped edge: *[ch4, sl st in 2nd ch from hook] into the outer loops between cream shells creating a layered two-color scallop.* Slip stitch to finish and weave ends.
Info :
Two-tone scallop gives the runner that defined framed look. Keep tension even. If border pulls in, add one extra sc into some shell bases to relax tension.
— Final Edging Detail (Beaded Accents and Tiny Stars) :
Round 1 :
Use cream. Attach small 3-round mini star motifs and tiny dot beads at scallop valley points alternating every other shell. Sew them with a single securing stitch and hide ends on the back.
Round 2 :
With navy, pick up tiny filler loops and picots along scallop edge to even the silhouette: ch2, sl st into base every 4th stitch for a subtle finished line.
Info :
Blocking is essential at this stage. Wet-block the entire runner gently, pin to desired dimensions and let dry for 24 hours. This will open mesh pattern and set scalloped edge beautifully.
— Assembly & Joining Notes :
Round 1 :
As you join modules, use a combination of slip-stitch join and whip stitch to secure. Slip-stitch for temporary joining while you evaluate layout, then remove temporary sl sts and sew with mattress or whip stitch for durability.
Round 2 :
When sewing crescents, ensure inner concave edge sits over mesh without pulling. Anchor at 8–12 points along crescent arc to avoid sagging.
Info :
Sew all appliques with yarn needle and matching cream. Keep stitches small and enter through mesh loops, not through large chain arches which may distort the lace pattern.
— Finishing Touches :
Round 1 :
Weave all yarn tails at least 5cm into the back of seam lines. Use a small drop of fabric glue at ends if runner will be laundered frequently to prevent fraying.
Round 2 :
Press lightly with steam from steam iron through a pressing cloth to flatten any embroidery and set shape further after blocking.
Info :
Label your runner with a care tag if gifting: hand wash cold or delicate cycle, reshape while damp, lay flat to dry to maintain border shape and prevent stretching of mesh.
Completing this Moon and Stars table runner is so satisfying—each crescent, star, and vine comes together into a luminous, heirloom-worthy piece. The contrast of deep navy and soft cream gives a timeless, elegant look that transforms a table into a night-sky tableau. Blocked edges and a scalloped border make it look professionally finished. 🧶🌙✨