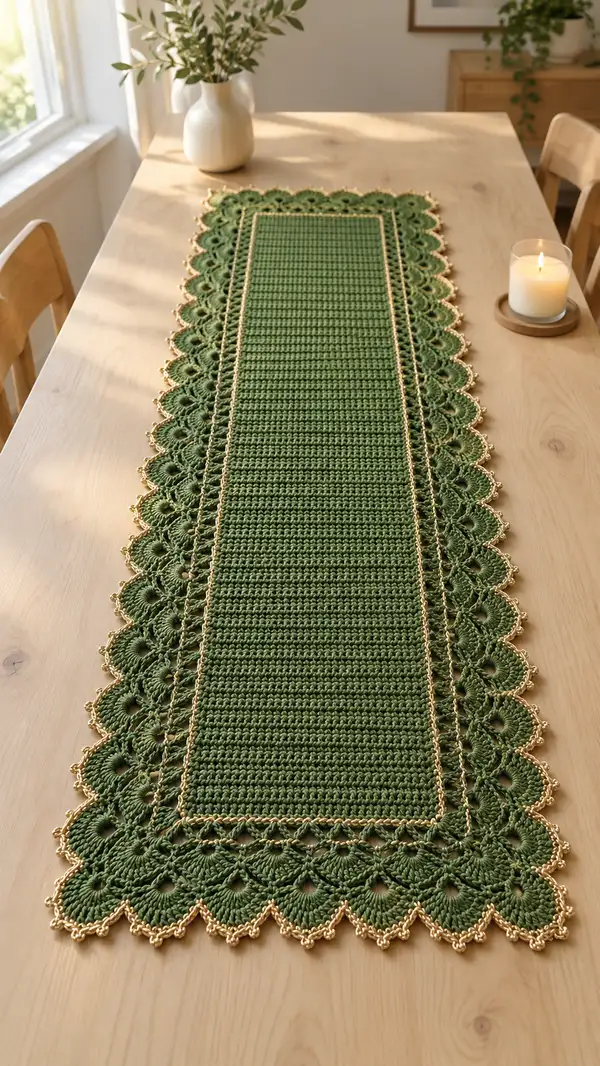
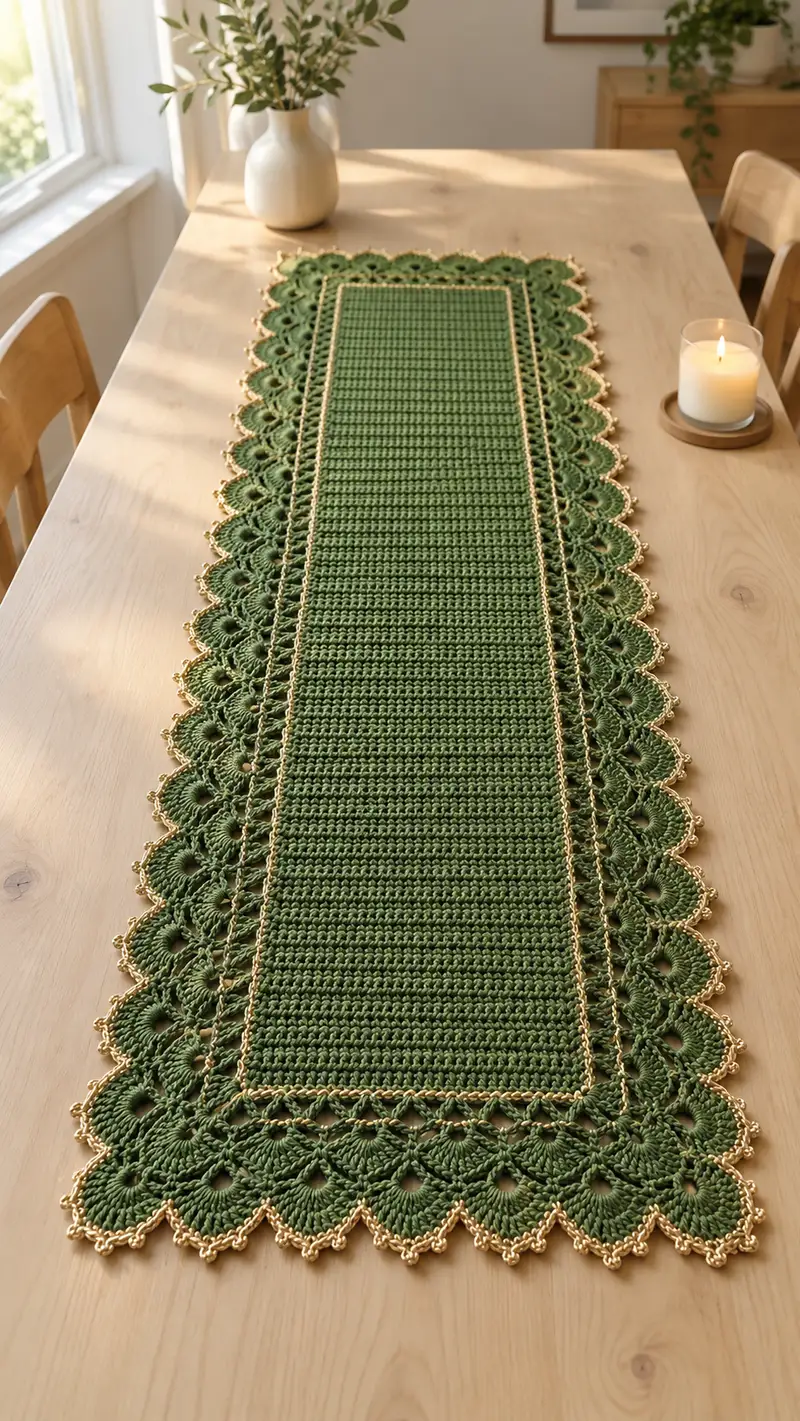
Create a long, elegant table runner worked in a deep green with a metallic gold scalloped lace border. This rectangular runner features a dense, tidy central panel of single crochet rows and a layered shell-and-picot border that frames tables beautifully. The design balances simple repetitive stitching with a decorative edge for a polished tabletop accent. Perfect for seasonal or everyday styling, this pattern uses clear row-by-row instructions and helpful tips.
Progress Tracker
0% Complete
— Finished Size & Gauge :
Info :
Finished size shown approximately 14" (35.5 cm) wide by 48" (122 cm) long. Gauge for center panel: 16 sc and 9 rows = 4" (10 cm) in single crochet using 4.0mm hook and worsted cotton yarn. Adjust hook or yarn to match gauge.
— Notes Before You Begin :
Info :
This runner is worked in two major parts: a long rectangular center panel worked flat in rows, followed by several rounds worked in the round to create the lace border. Maintain consistent tension for the center; switch to a slightly smaller hook if you want a denser edge. Place stitch markers at each corner when you begin the border rounds to ensure even corner shaping. The pattern uses single crochet for the main body and a mixture of dc clusters, chain loops and picots for the edging. When changing to metallic yarn for the gold edging, carry tails to the back and weave in securely.
— Foundation & Center Panel :
Round 1 :
Chain 61 (this gives 60 foundation stitches, adjust by multiples of 2 if you want a wider runner). Row 1: Sc in 2nd ch from hook and in each ch across. (60 sc)
Info :
Count carefully when working the foundation chain. If you prefer a slightly narrower runner, use ch 51 for 50 sc; for wider, add increments of 10-12 chains. Maintain the same stitch count across rows to keep edges straight. Mark the first stitch of each row with a removable marker to avoid drift.
Round 2 :
Ch 1, turn. 1 sc in each st across. (60 sc)
Round 3-110 :
Ch 1, turn. 1 sc in each st across. (60 sc per row) Repeat Rows 3 through 110 to reach desired length (this instruction gives 110 rows total including Row 1). For shown runner length use 110 rows; to lengthen, continue in pattern until you reach desired measurement.
Info :
Work the center in even single crochet rows for a dense, protective surface. Keep your turning chain low (ch 1) to maintain a flat edge. Check width occasionally; if the fabric starts to ripple, adjust tension. Use a stitch marker at the beginning of each row to keep a consistent turning point and measure length after every 20 rows.
Round 111 :
Fasten off and weave in tail if you will join the edging separately. If working the border immediately, do not fasten off — instead prepare to work around the perimeter by turning your work 90 degrees to begin working along row ends.
— Border Setup Round (Join To Work In The Round) :
Round 112 :
Working with main color (Green), join with sl st to the last row's last stitch or the right-hand corner to begin working around the rectangle. Ch 1, work 1 sc into the same stitch to anchor. Then work sc evenly along the edge: 1 sc in each sc along the top short edge (60), place (sc, ch 3, sc) in each corner (4 corners total), and 1 sc into the end of each row along the long sides (110 each). Continue around to last corner and join with sl st to first sc. Count: 60 (top) + 110 (side) + 60 (bottom) + 110 (side) + 4 corner anchors = 344 sc including corner scs and ch3 loops. (344)
Info :
When working along the long sides you will be inserting sc into the turning chain or into the side ridge of each row — these are legitimate stitches and will result in an even border. Keep the same number of stitches on opposing sides. Use a marker to mark start of round and each corner so you can check counts as you go.
Round 113 :
Ch 1. 1 sc in each sc around, placing (sc, ch 3, sc) in each corner chain space (the ch3 space created in the previous round). Join with sl st to first sc. (344)
Info :
If you prefer a slightly narrower border foundation, you can instead place (sc, ch2, sc) for smaller corner loops. The ch3 corner gives more room for later shell placement.
— Border Round 2: Preparing Edge For Lace :
Round 114 :
Ch 1. *Sk 2 sc, 5 sc in next sc (creates a base cluster to help form shells later), sk 2 sc, 1 sc in next sc; rep from * around, placing 1 sc in corner spaces (sc, ch3, sc) as anchors. This evens out the stitches and spaces where lace will attach. Because we are working groups, count will vary slightly; aim to create 10 evenly spaced shell bases along each long side and 3-4 along each short side. After working around join with sl st to first sc. Approx total stitches: 344 but distributed into groupings for shell placement.
Info :
This round is forgiving — your objective is to make small sockets or risers where shell units will be worked. If you end up one or two stitches off, adjust spacing slightly at corners to keep shells even across each side. Mark the centers of long sides to help count shells.
— Shell Foundation Round (Begin Lace Motifs) :
Round 115 :
Change to a 3.5mm hook if desired for a crisper lace edge. Ch 3 (counts as first dc), *sk next sc, (7 dc) all in next sc or designated shell base, sk next sc, ch 3, sl st into next sc to anchor (creates open space between shells); rep from * across each short edge and long edge, working (sl st, ch 3) to turn corners and maintain rhythm. On long sides you will work 10 shell clusters per side. Join with sl st to top of starting ch-3. Total dc clusters: 40 (10 per long side x 2, 5 per short side x 2 approximated depending on spacing).
Info :
Shell clusters are large fans made of 7 dc to give a deep scallop. If your gauge produces tighter or wider shells, adjust the number of dcs in the fan (5–9 dc) to fit the number of desired repeats per side. The ch-3 between shells gives an airy scallop entrance; you may use ch-4 if more openness is desired.
Round 116 :
Sl st into center of first shell fan (into the 4th dc of the 7-dc fan). Ch 1, work 1 sc into center of same fan to anchor. *Ch 4, sk to next shell center, 1 sc in center of next shell fan; rep from * across each shell fan and around corners. At corners, work (1 sc, ch 4, 1 sc) into the shell center to allow the row to turn gently. Join with sl st to first sc. This creates chain arches above each fan for the next decorative row. Count: number of chain arches equals number of shells (approx 40).
Info :
Maintain tension on chain arches so they are even and not overstretched; this row sets the position for the secondary lace row that will create the diamond openings between shells.
— Decorative Arch Row :
Round 117 :
Ch 3 (counts as dc), 2 dc into same shell center, *skip ch-4 arch, into next ch-4 arch work (3 dc, ch 2, 3 dc) to make a small diamond shell bridge, sk next shell center and work 1 dc into center of next fan to anchor; rep from * around including corners, working (3 dc, ch 2, 3 dc) in corner arches to keep shape. Join with sl st to top of starting ch-3. Approx total dcs will vary—this round forms bridging diamonds over arches.
Info :
Work the bridging (3 dc, ch2, 3 dc) into arches to create a lattice that visually separates the main fans from the outer picots. Count repeats on a long side to be consistent — target 10 repeats on long sides and 3-4 repeats on short sides.
Round 118 :
Ch 1, 1 sc in same st, *ch 5, sk to center dc of next diamond, 1 sc in center dc; rep from * around, placing (1 sc, ch 5, 1 sc) into corner diamond centers to maintain shape. Join with sl st. Number of chain-5 arches will equal number of diamonds (approx 40).
Info :
This round prepares the perimeter for the outer shell scallops; keep chain loops uniform. If chain-5 feels too tall, reduce to ch4 for a subtler look; ch5 gives more pronounced openwork before the scallops.
— Outer Scallop (Shell Layer 2) :
Round 119 :
Switch to metallic gold yarn for contrast if desired. Join gold yarn in a center dc of a diamond. Ch 1, 1 sc in same st, *into next ch-5 arch work (sc, ch 2, 7 dc, ch 2, sc) all into the arch to create a scallop; rep from * around. At corners work (sc, ch2, 9 dc, ch2, sc) to give additional fullness at corners. Join with sl st to first sc. Approx scallops: 40 (10 per long side, 5 per short side) depending on spacing.
Info :
Changing to gold at this point gives a crisp metallic outline to each scallop. Carry the tail and weave through the back or use an invisible join to begin. If your metallic yarn is slippery, you may want to use a smaller hook for this round for more control.
Round 120 :
Ch 1. Work 1 sc in base of each scallop to anchor, then *ch 3, picot, ch 3, sl st into the 4th dc of scallop (center top) to form a beaded picot cluster; rep across each scallop. At corners work (ch 4, picot, ch 4, sl st into center) to maintain the corner peak. Join with sl st. This begins to add the beaded crown that outlines each scallop in tiny loops and picots.
Info :
Picots can be worked as (ch3, sl st into 1st ch) for a firmer picot or (ch3, sl st into 3rd ch) for a more delicate picot. Keep them even and do not tug hard when forming them; slight slack will be corrected when blocking.
— Beaded/Loop Round (Gold Detail) :
Round 121 :
With metallic gold: *Into the top center of the scallop (the same center dc used last round), work (ch 1, 1 sc, ch 3, sl st), then ch 5 and sl st into the outermost dc on the next scallop to create a small chain beading between scallops; rep from * around to connect scallops with decorative chain picot bridges. Join with sl st. This will create elegant little chain link details between each scallop point. Approx count equals number of scallops (approx 40 link bridges).
Info :
These chain bridges are decorative and optional. If you prefer a simpler edge, you may skip this round and go straight to finishing picots. The chain bridges help visually tie scallops together and look particularly lovely in metallic yarn.
Round 122 :
Ch 1. Working into each chain bridge, make (1 sc, ch 3, picot, ch 3, 1 sc) to form a tiny shell and bead detail. At corners make (1 sc, ch4, picot, ch4, 1 sc). Join with sl st. This reinforces the delicate beaded edge and gives the gold a lacy, raised profile.
Info :
Keep your metallic yarn loops gentle; too tight will pucker the scallop and too loose will droop. Consistent picot height is the key to a professional finish. If your metallic yarn is prone to splitting, use a second plain cotton strand with it for stability or work the metallic as a surface slip-stitch instead of full rounds.
— Final Picot Crown & Finishing Rounds :
Round 123 :
Ch 1, 1 sc in each sc and in the base of each picot across the edge to tidy and flatten the gold detail. At corners work 2 sc to help the border sit flat. Join with sl st. Count will roughly equal the number of scallop centers minus bridging loops (approx 80 sc when counted across both sides of the scallops).
Info :
This tidy round evens the edge and prepares the runner for blocking. If any scallops feel loose, use this round to gently pull them into alignment. Use stitch markers temporarily to hold scallop peaks while you check for evenness.
Round 124 :
Optional finishing round in gold: Ch 1, (sc, picot, sc) in every other sc along the edge to produce a tiny beaded finish. Alternatively, work a reverse single crochet (crab stitch) around the whole edge for a sturdy finish. Join and fasten off. Weave in ends thoroughly.
Info :
Reverse single crochet (crab stitch) gives a rope-like edge that sits tightly; picot clusters give a decorative beaded finish. Choose based on whether the runner will see frequent use (choose crab stitch) or be decorative (choose picots).
— Blocking & Final Assembly :
Info :
Wet-block the runner gently: soak in lukewarm water with a touch of mild soap, press out excess water (do not wring), lay flat on a blocking mat and pin the scallop points evenly to shape. Allow to dry fully. This step opens the lace and helps the gold to sit crisply against the green. If using stiff yarn or metallic, consider steaming lightly after pinning to set shape. Weave in all tails securely at the wrong side and trim.
— Alternate Length/Width Adjustments :
Info :
To lengthen the runner: continue working additional rows in the center panel (Round 3-110 pattern) until desired length before beginning the border rounds. For every additional 10 rows you add, expect to repeat the lace repeat count across long sides approximately the same; you may add an extra shell or increase spacing slightly when working the border. To widen: increase the foundation chain in multiples of 2 (preferably multiples that accommodate your shell repeat). Remember to adjust counts and distribution of shells per side to maintain symmetry.
— Tips & Troubleshooting :
Info :
If you find shells bunch at the corners, add two extra dc in corner shells (work 9 dc instead of 7) to ease curvature. If scallops appear too small, increase fan dcs by 2 each; if too large, reduce by 2. Always make the same adjustment on all sides to keep symmetry. Check your work after the outer shell round — if spacing seems off, unpick one repetition and re-space to match the opposite side. Blocking is the final correction for small discrepancies.
This elegant green-and-gold table runner blends simple structure with ornate edging to create a heirloom-ready accent for any table. The dense single crochet center protects surfaces while the layered scallops and picots add a delicate, decorative flourish. Blocking brings out the lacework fully and gives a polished, professional finish. I hope making this runner brings both a sense of calm and a gorgeous finished piece to celebrate at your table! 🧶✨