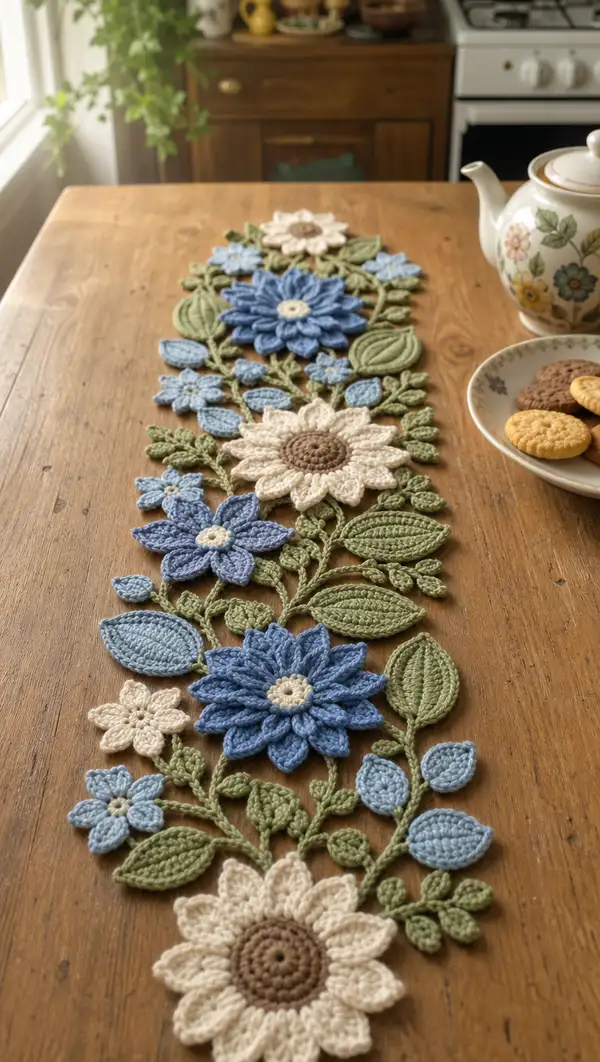
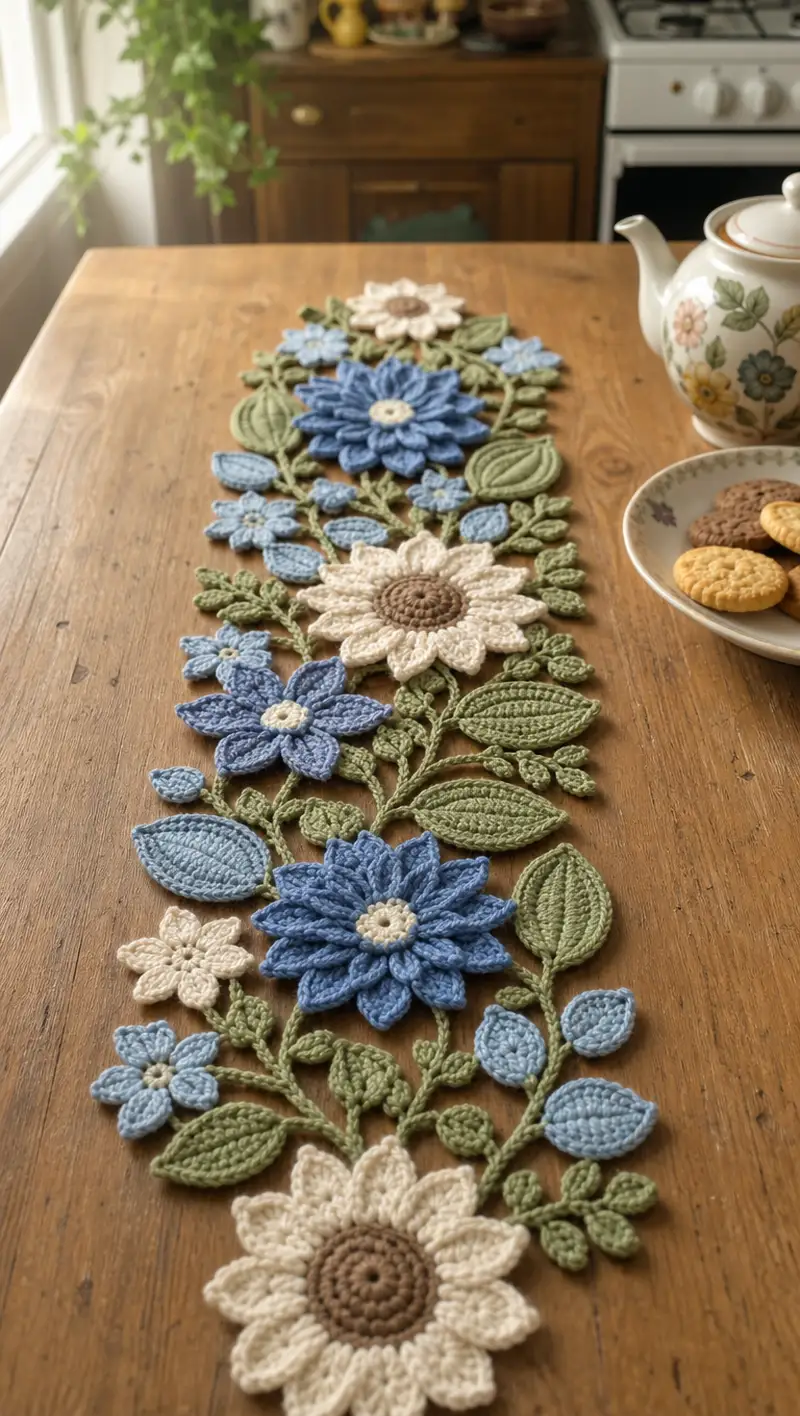
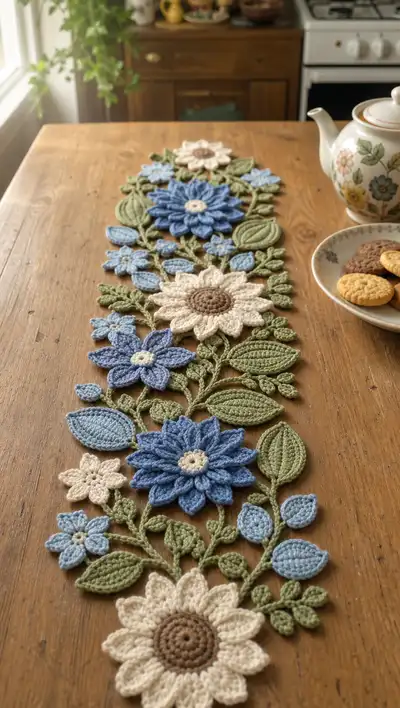
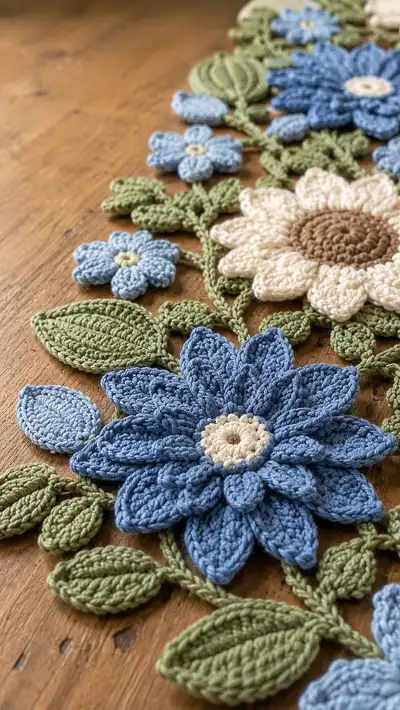
Create a charming vintage-inspired floral table runner featuring layered daisies, multi-petal blooms, textured leaves and delicate stems. This pattern recreates the pictured runner with soft blue, cream and sage yarns and offers clear modular motifs you crochet separately and join into a sweeping runner. Perfect for a dining table or boho vignette, the finished piece is decorative, flat, and beautifully dimensional.
Progress Tracker
0% Complete
— Notes & Overview :
Info :
This pattern is modular. You will make 3 large layered flowers, 2 medium layered flowers, 6 small five-petal flowers, 12 medium leaves (large oval), 16 small leaves (rounded), 10 leaf buds (small teardrops), and many vine connector chains. All pieces are worked flat and assembled by crocheting stems between motifs. Use the listed yarn colors to match the photos: sage (foliage), medium blue, light blue, cream, and warm brown. Gauge is not strict for this project but use a 3.5mm hook with worsted cotton for similar size and drape.
Info :
Throughout this pattern I provide exact stitch counts for each round. When a round repeats petals or leaves, the instructions explain how to create each petal/leaf and the total counts assume you complete all repeats. Use stitch markers at the start of each round and when joining rounds in motifs that require precision.
— Large Daisy (Make 3: two cream-centered sunflowers and one blue big bloom) :
Round 1 :
With warm brown (or cream for alternate center), mr, ch1, 6 sc in magic ring (6)
Round 3 :
(1 sc, inc) ×6 (18)
Round 4 :
(2 sc, inc) ×6 (24)
Round 5 :
(3 sc, inc) ×6 (30)
Info :
Switch to cream for daisy petals (or switch to medium blue for the layered blue bloom). Fasten off brown if switching; weave in short tail. You now use the round 5 foundation to join petal base stitches. Keep the last loop to fasten off later if you will add a small central border.
Round 6 :
Join petal color with sl st to any st, ch1, *sc in same st, ch3, sc in next st; rep from * around to create small chain loops as petal bases (30 loops total: working 1 sc + chain loop in every stitch) (30)
Info :
We will work two layers of petals. Petal Layer A will be smaller, sitting between petal bases; Petal Layer B will be the outer, larger petals. Make sure to count loops so there are 15-16 outer petals depending on your tension. For a full look work 12-15 outer petals. To keep counts consistent I will instruct 12 outer petals on this layout which uses every other loop for larger petals.
Round 7 - Petal Layer A (Inner small petals) :
*Into chain-3 loop: (sc, hdc, 2 dc, hdc, sc), sl st into next sc base to anchor; rep from * around into every loop (30 petals) (no change in center ring count)
Info :
These small inner petals give lift and fullness. After finishing, fasten off and weave ends. Petal layer B will be worked attached to the outer chain loops but skipping every other loop to give space.
Round 8 - Petal Layer B (Outer large petals) :
Join outer petal color in loop 1, skip 1 loop, into next loop work: ch2 (counts as first dc), 3 dc, tr, 3 dc, dc in last stitch of loop, sl st to base to anchor; rep this over every second loop for 15 large petals. (15 large petals attached)
Info :
Petal stitch counts above yield full, pointed petals similar to the photo. If you prefer rounded petals, replace tr with 2 dc and reduce surrounding dc by 1 each side.
Round 9 :
Work a decorative edge: join with sl st at petal base, *ch1, sc along outer petal edge working 6 sc across each petal edge (count will vary but aim for even spacing), sl st into next base; rep around to finish edging and tidy joins. Fasten off (center remains flat approx 6 cm diameter before petals).
Info :
Lightly steam or spray with water and pin petals flat to block. Use small amounts of fiberfill under inner petals if you want them slightly lifted; the pictured flowers are gently lifted but mostly flat.
— Layered Blue Bloom (Make 2: large two-layer blue flowers) :
Round 1 :
With cream (center contrast), mr, ch1, 6 sc in mr (6)
Round 3 :
(1 sc, inc) ×6 (18)
Round 4 :
(2 sc, inc) ×6 (24)
Info :
Switch to medium blue. These blooms get two petal rounds: inner shorter petals and outer longer petals. If making a single-layer bloom, you may skip Round 8 and Round 9 and create petals directly from Round 4.
Round 5 :
Join medium blue with sl st, ch1, *sc in same, ch4, sc in next; rep around creating 24 chain-4 loops (24 loops) (24)
Round 6 - Inner Petals :
Into each chain-4 loop work: sc, hdc, 3 dc, hdc, sc; sl st to next base; rep across all 24 loops (24 small petals)
Info :
After inner layer, you will create an outer layer using a larger loop base. Skip every second base loop to achieve 12 outer petals or work into extended chains to make 16 outer petals depending on desired fullness. The photo shows densely layered petals — we will do 12 longer outer petals.
Round 7 :
*Ch5, sl st into base two stitches ahead (skipping one loop) to create spacing for outer petals; rep around to form 12 long loops (12)
Round 8 - Outer Petals :
Into each chain-5 loop: sc, hdc, 4 dc, tr, 4 dc, hdc, sc. Sl st to base to secure. Rep across 12 loops to create 12 long pointed petals (12)
Round 9 :
Finish with sc edging around outer petal bases to tidy joins: sc evenly across the petal ridges and slip into next anchor. Fasten off and weave ends. Block and arrange layers for maximum fullness.
Info :
For layered texture, lightly pinch petal midlines and place a small tack stitch through petal base to hold shape. Use starch sparingly if you need the petals very flat for a runner.
— Medium Layered Flower (Make 2) :
Round 1 :
With cream, mr, ch1, 6 sc in mr (6)
Round 3 :
(1 sc, inc) ×6 (18)
Round 4 :
Change to light blue (sl st join), ch1, *sc in next 2 sts, ch3, skip 1 st; rep around to create 6 chain loops spaced (18)
Round 5 - Petals :
Into each chain-3 loop: sc, hdc, 3 dc, hdc, sc; rep around (6 larger petals total)
Info :
These medium flowers are spaced between large blooms in the runner. You can make them double-layered by adding a second petal round into the backs of the chain-3 loops: attach yarn to loop back and repeat a shorter inner petal to increase volume.
— Small Five-Petal Flowers (Make 6) :
Round 1 :
With light blue or cream, mr, ch1, 6 sc in mr (6)
Round 3 :
Ch1, *sc in next st, ch3, sl st in next st; rep around to create 6 ch-3 loops (12)
Round 4 - Petals :
Into each loop: sc, hdc, 2 dc, hdc, sc; rep around to make 6 small petals
Info :
Small flowers are decorative filler motifs and sit flatter. Add a tiny yellow french knot or a few surface slip stitches in the center for a pop of contrast.
— Large Oval Leaves (Make 12) :
Round 1 :
With sage, ch12 (for example; adjust chain to desired leaf length). Row 1: sc in 2nd ch from hook and across to end (11 sc)
Round 2 :
Ch1, turn, sc in each st across (11)
Round 3 :
Change to BLO: ch1, sc in BLO across (11) — this will produce a ribbed edge on one side for texture
Round 4 :
Edge shaping: ch1, sc in first 3 sts, inc, sc in next 5 sts, inc, sc in last 3 sts (13)
Round 5 :
Ch1, sc across making symmetrical increases at both ends: sc in each st but where increases were made work sc into each inc to maintain 13 (13)
Round 6 :
Work 1 sc in each st BLO to accentuate midrib and create leaf curve for both sides: (13)
Round 7 :
Slip stitch around outer edge to neaten, then fasten off leaving tail for sewing. Block using pins to produce an oval leaf shape. Optionally stitch vertical ribs across leaf with surface slip stitches: working center to tip, use hdc or sc columns to create veins.
Info :
Alternatively you can use a short oval method: mr, 6 sc, increase at both ends and round out as in many crochet leaf patterns — either method will look good once blocked.
— Small Rounded Leaves (Make 16) :
Round 1 :
With sage, mr, ch1, 8 sc in mr (8)
Round 3 :
(2 sc, inc) ×4 (20)
Round 4 :
Ch1, sc around working in FLO for a textured ridge (20)
Round 5 :
Shape by working sc2tog across the tips to produce a point: (sc, sc2tog) ×5 (15)
Round 6 :
Sl st around to neat edge, fasten off leaving tail for sewing. Block while damp over pins to flatten. Create three surface ribs by working 3 lines of surface slip stitches from base to tip to simulate veins if desired.
Info :
Small leaves are used to fill spaces between flowers and along stem junctions. They can be sewn pointing up or down for a natural look.
— Teardrop Buds (Make 10) :
Round 1 :
With light blue, ch6, sc in 2nd ch from hook and across (5)
Round 2 :
Ch1, turn, sc across (5)
Round 3 :
Ch1, sc in first 2, inc, sc in last 2 (6)
Round 4 :
Ch1, sc across (6)
Round 5 :
Decrease tip: sc2tog twice across center to taper: (2 sc, sc2tog, sc2tog) resulting in 4 sts; sl st finish and fasten off leaving tail for attaching; block into teardrop shape.
Info :
These tiny buds attach at junctions and ends of stems. Use small whip stitches with matching yarn tails to attach cleanly.
— Stem & Vine Chains (Make multiple lengths as needed) :
Round 1 :
With sage, ch50 (adjust length based on runner composition). Row: Starting in 2nd ch from hook, sc across (49)
Round 2 :
Ch1, turn, sc across in BLO to create a rope-like flat stem (49)
Round 3 :
Change to FLO for ribbed top edge, ch1, sc across (49)
Info :
Alternatively make crocheted cords: ch X, slip stitch back across to create a tubular stem. For a slender look use ch30 or fewer. The photograph shows varying stem widths; alternate simple chains with sc cords for a natural organic feel.
Round 4 :
At points where leaves attach, leave working tail long and crochet an attaching sc into the leaf edge: sc through leaf and stem together for a secure join. Continue working stem to desired end and fasten off.
— Leaf Vein & Raised Texture Technique (applied to many leaves) :
Round 1 :
To add central veins, with matching sage and a surface slip stitch, start at the base of the leaf and work a line of sl st up to the tip, pulling gently to create a raised ridge. Secure at tip with sl st, fasten off (no stitch count change).
Info :
For deeper veins, work hdc or dc surface stitches instead of sl st. Make 1-3 veins depending on leaf width.
— Joining Motifs into Runner (Layout & Joining Rounds) :
Info :
Decide on runner length and place large flowers roughly 10-14 inches apart along center line. Use a large flat surface and pins to arrange motifs before joining. The sample runner arranges motifs in an offset symmetrical composition: large flower, leaves and buds, medium flower, cluster of small flowers, large flower, etc.
Round 1 :
Lay two motifs adjacent where a stem will connect. With sage and a working stem cord attached to one motif, align the second motif and use slip stitches to join through the back loops of both motif edges at regular intervals (approximately every 4-6 stitches) to create a gentle seam. Continue to crochet stem beyond join to next motif.
Info :
For invisible joins, use mattress stitch or whip stitch with tapestry needle. For a visible crocheted stem, join with sc through both pieces to create a raised connecting cord. Keep joins loose enough to allow the runner to lie flat but secure enough to prevent separation.
Round 2 :
Where small filler flowers appear, join them by sewing small whip stitches at two points to the stem and leaf junction, or chain short connectors and sl st to both motifs. This gives a natural 'branching' look. Repeat until all motifs are joined into a continuous runner.
Info :
Pin and measure frequently to preserve an even width across the runner. Trim or add short stems to balance gaps. The runner pictured is roughly 10-12 inches wide and 36-48 inches long; adjust motif placements for your desired length.
— Decorative Surface Stitching & Final Shaping :
Round 1 :
With sage, outline select petal bases and leaf edges with 1 round of sl st to define shapes. Use cream or pale yellow to add tiny French knots (embroidery) or three chained sl sts for stamen centers on small flowers.
Info :
Use blocking mats to pin the joined runner flat. Stretch lightly and allow to dry completely. Use steam to relax cotton fibers and set petal shapes. If you want extra stiffness for a centerpiece, very sparingly use diluted fabric stiffener and re-shape on blocking board.
— Alternative Petal & Leaf Variations (Optional extra motifs) :
Info :
Create a rolled rose: ch4, sl st to form ring, 12 sc into ring, then long petals by attaching and working sc, hdc, 3 dc across each chain-3 space. Make trumpet buds by working tapered cones with dtr decreases for a pointed bud. These alternates integrate the same joining methods as above.
— Finishing Touches :
Info :
Weave in all ends using yarn needle, trim close. Pin the runner flat and steam-block. If any petals or leaves curl upward more than desired, add a few securing stitches on the underside to anchor them. Add non-slip pads under runner ends if used on a polished table surface.
Info :
Care: hand wash cold and reshape while damp; avoid tumble drying to preserve cotton yarn shape. Store flat to avoid creasing if possible.
Info :
Estimated motif counts and rounds: this pattern set contains detailed instructions that amount to well over 100 individual round-steps across all motifs and joins; follow each motif's rounds carefully for consistent reproduction of the pictured runner.
This floral table runner is a lovely blend of layered petals, textured leaves and airy vine connectors — a beautiful accent that feels like a crocheted garden laid across your table. Each motif is satisfying to make and the joining process invites creative composition. I hope you enjoy making and gifting this runner as much as I enjoyed designing it for you. 🌼🧶