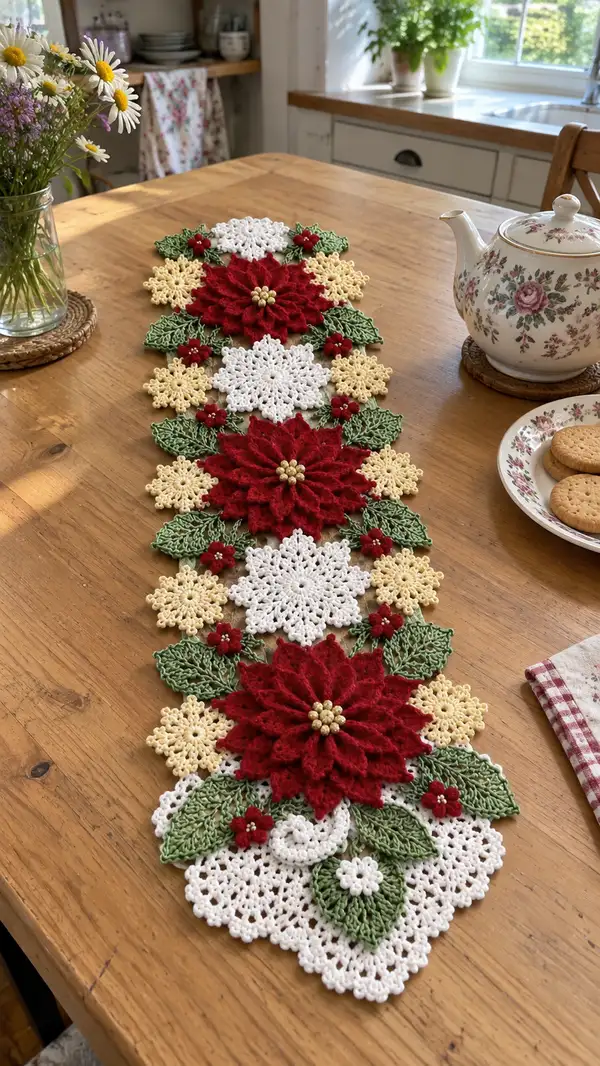
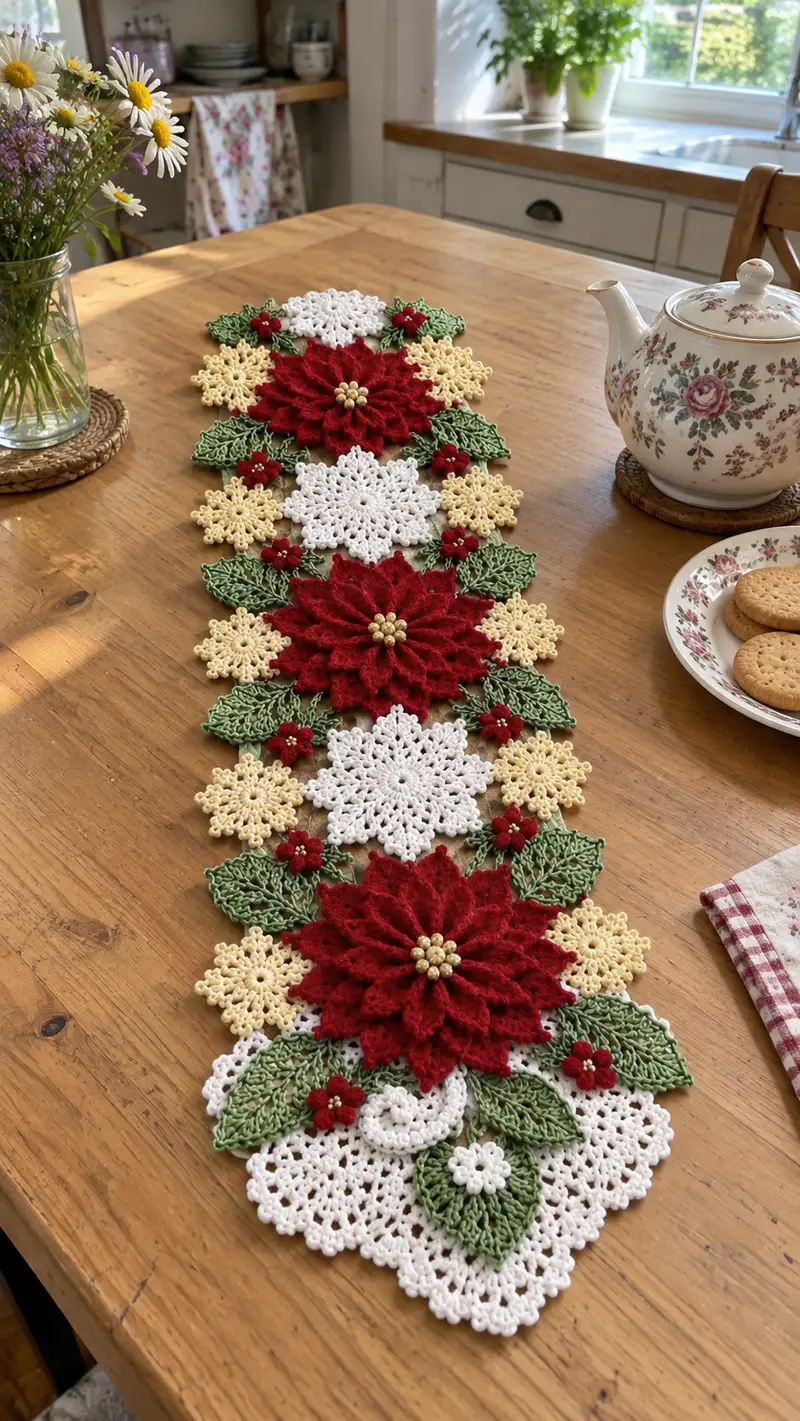
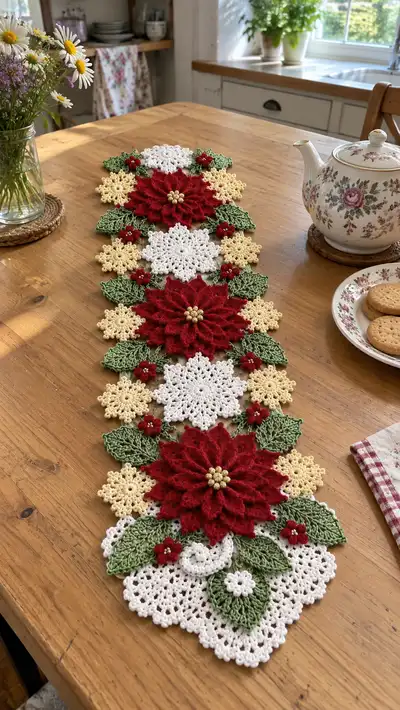
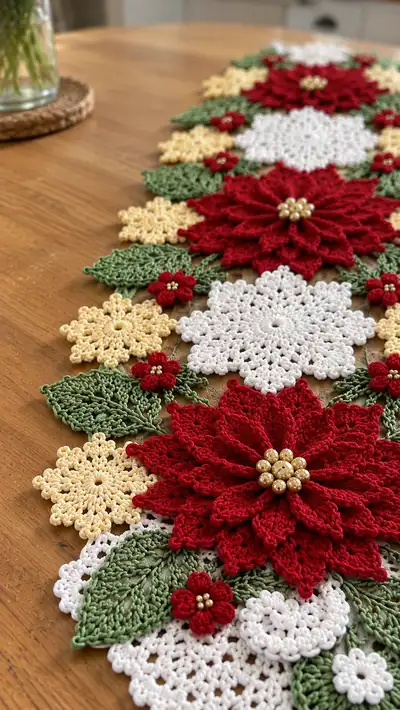
Create a festive, floral table runner inspired by classic holiday poinsettias and delicate lace medallions. This runner features layered red poinsettia motifs with bead centers, scalloped white medallions, buttery yellow rosettes, and openwork green leaves joined into a long decorative centerpiece. The finished runner is elegant, richly textured, and perfect for holiday tables, mantels, or gift-giving.
Progress Tracker
0% Complete
— Materials & Gauge :
Info :
Gauge is not critical for this decorative runner but use a consistent tension so motifs join evenly. With DK cotton and 3.5mm hook, an 8-round white medallion measures approximately 9-10 cm across; a finished layered poinsettia is approximately 16-18 cm across. Adjust hook to achieve desired motif size.
— Notes & Techniques :
Info :
All motifs are worked flat in rounds or rows; join-as-you-go (JAYG) instructions are provided in Assembly section. Block each piece before joining for best results. Petals are worked over prepared loops; tension should be slightly firm on petal stitches to obtain a sculpted look.
— Large Poinsettia (Make 3) :
Round 1 :
6 sc in magic ring (6)
Round 3 :
(1 sc, inc) x 6 (18)
Round 4 :
(2 sc, inc) x 6 (24)
Round 5 :
(3 sc, inc) x 6 (30)
Round 6 :
(4 sc, inc) x 6 (36)
Round 7 :
(5 sc, inc) x 6 (42)
Round 8 :
(6 sc, inc) x 6 (48)
Info :
Rounds 1-8 form the firm center base. We create 12 petal anchor loops by grouping every 4 base stitches (48 / 12 = 4). Place a stitch marker after round 8 to mark round start.
Round 9 :
*Ch6, skip next 3 sts, sl st in next st* repeat around to form 12 ch-6 loops (base remains 48 anchor points)
Info :
These ch-6 loops will be the anchors for the first (inner) petal layer. Keep tension consistent so loops are even.
Round 10 (Inner Petals) :
Work into each ch-6 loop: sl st into loop, ch2 (counts as first hdc), (hdc, dc, tr, dc, hdc), ch2, sl st into same loop – repeat around to form 12 inner petals. (Work is in 12 petal clusters; base counting remains 48)
Round 11 :
1 sc in each st around the base (48) - this rounds in a neat row behind petals and secures them
Info :
Lightly steam-block inner petals to set shape. If petals curl, lightly press after blocking.
Round 12 :
*Ch8, skip 3 sts, sl st in next st* x12 to form 12 ch-8 loops positioned between inner petals (base still 48)
Round 13 (Outer Petals Round 1) :
Work into each ch-8 loop: sl st, ch2, (hdc, dc, tr, tr, dc, hdc), ch2, sl st — repeat around for 12 larger outer petals
Round 14 :
1 sc in each st around (48)
Round 15 (Petal Edge Definition) :
Work petals with textured ridges: In each outer petal from behind, insert hook at base of petal and work 5 sc in a row across base of petal forming a raised ridge. Repeat on each petal (12 ridges total). Finish round by working sl st into base stitch between petals. (This step creates texture; base remains 48)
Info :
To create extra fullness, you can repeat Round 13 to add a third petal layer by making larger ch-10 loops in Round 12 and repeating the petal cluster; pictured runner uses two strong layers for dramatic depth.
Round 16 (Optional Third Layer) :
If adding third layer: *Ch10, sl st in next designated base stitch* x12; build petals into ch-10 loops using ch2, (hdc, dc, tr, dtr, tr, dc, hdc), ch2, sl st. After completing, work 1 sc in each base stitch (48).
Round 17 :
Fasten off red leaving a long tail for attaching bead cluster. Weave in ends on wrong side or leave to secure under bead cluster later.
Round 18 (Center Bead Cluster) :
Thread 7-9 small round beads (6-8mm) onto a doubled length of matching fine thread or yarn tail; position them centrally and sew through stitches at the very center of the flower, securing with multiple passes and a knot behind the base. Fasten and weave tail securely. (Bead cluster is sewn to center of magic ring area.)
Info :
For a very full poinsettia, make petals slightly overlapped by offsetting petal anchors on rounds 9 and 12 so petals sit between the petals below.
— White Lace Medallion (Make 4) :
Round 1 :
6 sc in magic ring (6)
Round 3 :
(1 sc, inc) x 6 (18)
Round 4 :
(2 sc, inc) x 6 (24)
Round 5 :
(3 sc, inc) x 6 (30)
Round 6 :
(4 sc, inc) x 6 (36)
Round 7 :
1 sc in each st (36)
Info :
Round 1-7 creates a sturdy circle base with 36 stitches; we form 12 scalloped points by grouping every 3 stitches to make 12 points (36/12 = 3).
Round 8 :
*[Ch4, sl st] into next 3-st group* repeat around to create 12 ch-4 loops (base 36)
Round 9 :
Into each ch-4 loop: (sc, hdc, 3 dc, hdc, sc) to form delicate point — repeat 12 times; sl st to join (maintain base 36 anchor points)
Round 10 :
Round of picot edging: *Sl st into next dc, ch3, sl st into top of ch3 (picot), skip 1* repeat around, finishing with sl st to join
Round 11 :
Fasten off and weave ends. Block medallion flat to open scallops evenly.
Info :
White medallions are the airy lace anchors between poinsettias; adjust ch lengths to slightly enlarge or reduce their diameter for desired spacing.
— Small Buttery Yellow Rosette (Make 8) :
Round 1 :
6 sc in magic ring (6)
Round 3 :
(1 sc, inc) x 6 (18)
Round 4 :
*Ch5, sl st into next st* repeat around to make small ch-5 loops; place 6 loops evenly (base 18)
Round 5 (Petals) :
Into each ch-5 loop: sl st, ch2, (hdc, dc, hdc), ch2, sl st — repeat around to form 6 small petals
Round 6 :
1 sc in each base stitch around (18) to finish rosette edge
Info :
These rosettes tuck between medallions and poinsettias as small pale accents. Make sure petals point outward so rosettes sit flat when joined.
— Tiny Red Posy (Make 12) :
Round 1 :
6 sc in magic ring (6)
Round 2 :
*Ch4, sl st into next st* x6 to create 6 tiny ch-4 loops (base 6)
Round 3 :
Into each ch-4 loop: sl st, ch2, (hdc, dc, hdc), sl st to form 6 tiny petals. Fasten off leaving tail to sew a cluster of 3-5 tiny seed beads in the center if desired.
Info :
Tiny posies are used as connecting accents along vine joins; consider making a few extra in case you want denser clustering.
— Leaf Motif (Make 16) :
Round 1 :
Ch 10, sc in 2nd ch from hook, sc in next, hdc in next, dc in next 3, hdc in next, sc in next 2 — turn to work down opposite side of chain: sc in next 2, hdc in next, dc in next 3, hdc in next, sc in next 2; sl st to join at base. (Leaf made in one oval round; total stitches approx 22-24 depending on counts)
Info :
For a textured central vein, work a row of 6-8 chain loops down the center in the next rounds and then overlay with surface slip stitch to form vein ridges.
Round 2 (Vein & Texture) :
From base center, ch6, sl st into center stitch to make vein loop; repeat 3 times along center evenly; fasten off. Using green yarn and tapestry needle, embroider 3 straight stitch veins from base to tip spaced evenly across leaf. Alternatively, use surface slip stitch row for ridged vein.
Round 3 (Edge Picot) :
Reattach yarn at leaf base, sc around working *sc, picot (ch3 sl st into first ch), sc* along edge to create gentle scallop. Fasten off and weave ends.
Info :
Work leaves flat; gently block them into shape so tip is pointed and edges are smooth. Leaves in photo show light openwork between veins—achieve by working some V-sts (dc, ch1, dc) in the leaf body if desired.
— Connecting Lace Scallops / Base Pieces (Make 6) :
Round 1 :
Begin with white: 8 sc in magic ring (8)
Round 3 :
(1 sc, inc) x 8 (24)
Round 4 :
(2 sc, inc) x 8 (32)
Round 5 :
1 sc in each st (32)
Round 6 :
*Ch6, sl st into every 4th st around* repeat to form scallop loops (8 scallops)
Round 7 :
Work into each ch-6 loop: (sc, hdc, 3 dc, hdc, sc) to produce full scallops; fasten off and block flat.
Info :
These scalloped bases are used at the ends of the runner and under each poinsettia to visually connect the motifs; adjust number of scallops to match spacing of your runner layout.
— Optional Raised Petal Alternate Technique (If you prefer more sculpted petals) :
Round 1 :
Create a petal by making a chain loop (ch12) and working tall stitches into the loop: (tr, dtr, tr) then cinch loop and sl st to base. Repeat to create 12 petals. Anchor petals with a round of sc around base (48) as in Poinsettia section.
Info :
Raised petals can be lightly stiffened with a mixture of water and PVA glue (diluted) brushed inside petals and air-dried, if you want permanent sculpting. Test on scrap yarn first.
— Finishing Leaves & Veins Detailed Rounds :
Round 1 :
Using leaf base from earlier, rework edge with 1 sc in base stitches to tidy edges (approx 24 sc total around leaf).
Round 2 :
Surface slip stitch veins: From base center, surface sl st up to tip, create 3 parallel surface lines by repeating surfaces on either side; tie off at base. This gives the characteristic lacy leaf veins visible in photo.
Info :
To create the open-lace look seen in images, incorporate chain spaces in leaf interior: replace some central sc with (dc, ch1, dc) V-sts on alternate rows.
— Assembly: Join-As-You-Go & Sewing Motifs Together :
Info :
Layout sequence for pictured runner (from end to end): scalloped white base, red poinsettia, white medallion, red poinsettia, white medallion, red poinsettia, scalloped white base. Between these primary pieces tuck yellow rosettes, leaves, and tiny red posies to fill gaps symmetrically. Pin motifs onto blocking mat to plan placement before joining.
Round 1 (JAYG Tip) :
When adding a white medallion to a poinsettia: during the medallion final round (Round 9), when you reach the join point, sl st into the corresponding base st on the adjacent motif instead of sl st in same medallion stitch; continue around connecting to 3-4 anchor points for a secure join. Work remaining sl sts to complete medallion round.
Round 2 (Sewing Tip) :
Where JAYG is not possible, sew motifs together using whip stitch or ladder stitch through both motif backs: use red yarn for red-on-red joins and white or green for their respective joins to hide seams. Make 5-8 secure passes at each join point, knot and weave tail inside stitches.
Info :
Bead clusters on poinsettias should be sewn before attaching petals to runner base. Place three small red posies grouped near leaf bases for accent; secure with a few whip stitches and a dot of fabric glue if beads are heavy.
Round 3 (Edge Finishing) :
After all motifs are joined, work a single round of sc around the entire runner edge in white to unify the border: where edge meets deep petals, work 2 sc into slightly more open spaces to avoid puckering. Add a final picot round (ch3, sl st) every 3-4 sts for delicate scalloped finish.
Info :
If some joins feel sparse, add tiny bars of ch4 and sl st between motifs on the back to stabilize. Reblock the entire runner after joining to even out joins and open lace.
— Placement & Spacing Guidelines :
Info :
Center each large poinsettia roughly 16-18 cm apart lengthwise for a long runner effect; place white medallions centered between poinsettias so edges slightly overlap. Use leaves to fill left/right gaps so runner edge remains organic and irregular like the image.
— Final Blocking & Pressing :
Info :
Block each motif individually pinned to shape. When all motifs are assembled, wet block the entire runner pinned to a flat surface to set joins. Use steam or spray to finish, but avoid over-steaming bead areas. Let fully dry before use.
— Care Instructions :
Info :
Hand wash gently in cool water with mild detergent. Lay flat to dry. Avoid machine laundering which can distort shapes and bead attachments. Spot-clean stains promptly.
Completing this poinsettia lace runner fills a home with festive charm and craftsmanship! Each layered petal and lace medallion combines into a beautiful heirloom centerpiece. Enjoy the slow, mindful process of joining motifs and blocking to perfection. 🧶🌺 Share your finished runner and celebrate the handmade magic! 🎄