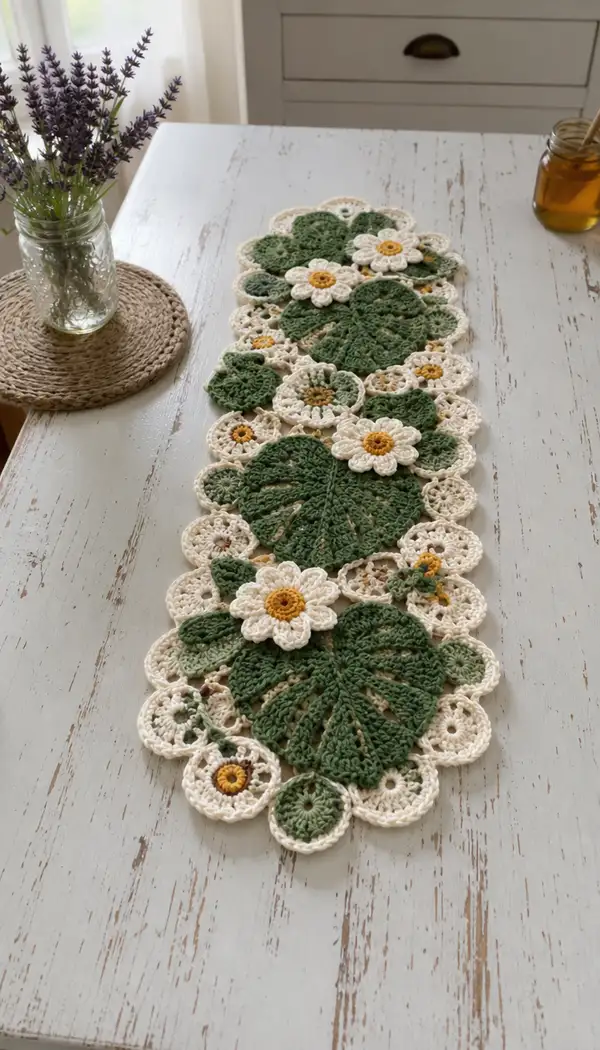
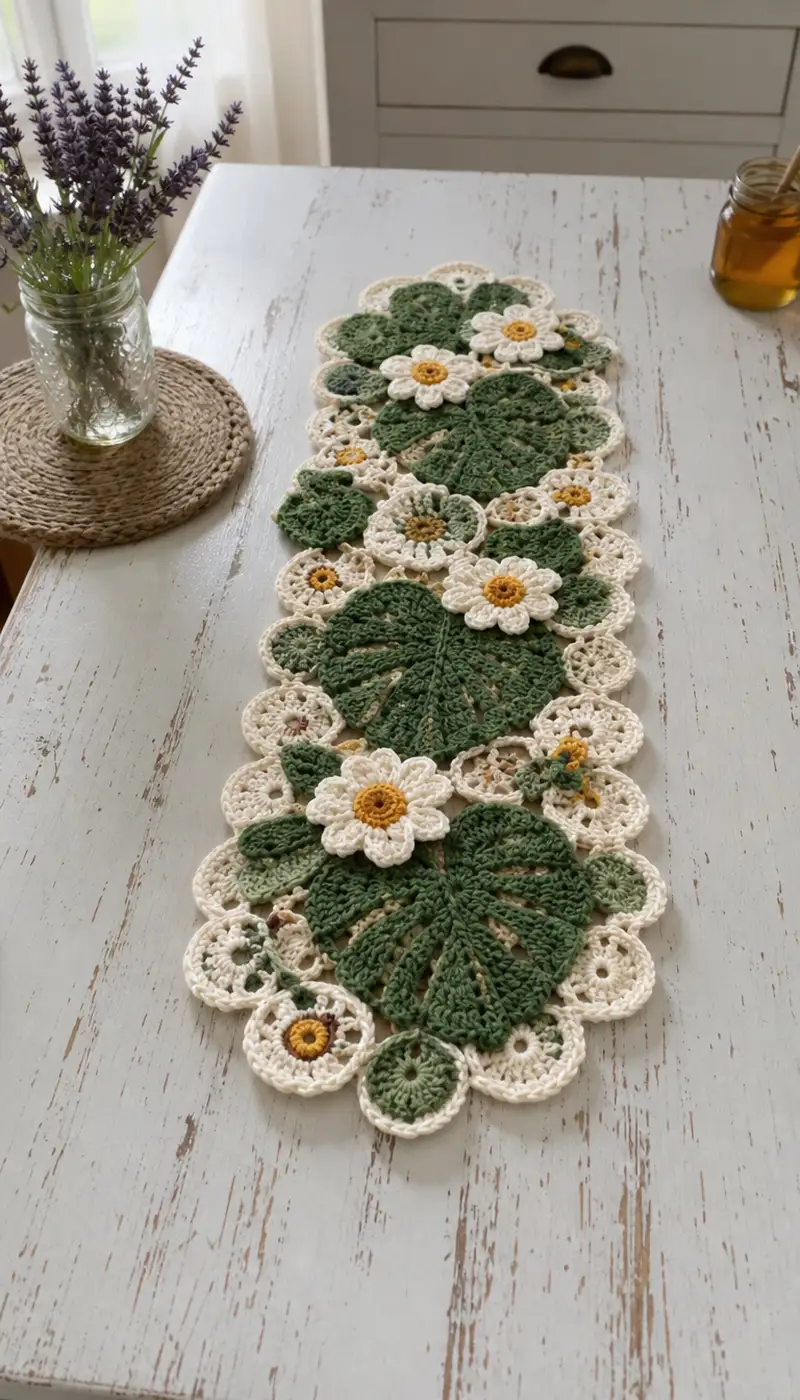
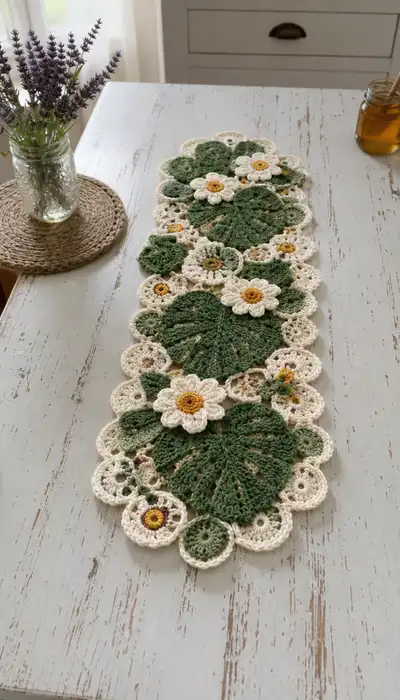
A charming table runner composed of crocheted lily pads, daisies and small circular motifs in olive green, cream and sunflower yellow. The design features large textured lily-pad motifs, layered daisies with raised petals, and delicate cream-filled circles that lace the composition together. Finished with a soft scalloped cream border, this runner brings a botanical, cottage-core touch to any table.
Progress Tracker
0% Complete
— Notes & Gauge :
Info :
Make one large lily pad motif and block to check gauge. Gauge is not strict for this decorative runner, but a large lily pad should measure approximately 17-18 cm (6.5-7") across when worked in worsted cotton with a 3.5mm hook. Adjust hook size to match your desired size and drape. Work tightly enough so that motifs hold shape but not so tight that texture is lost.
Info :
Throughout this pattern each motif begins with a magic ring unless otherwise noted. Use stitch markers at the start of each round. The runner in the photo is made with repeating sets of large lily pads, medium pads, small filler rounds and daisies; the pattern below gives full instructions for each motif type plus joining and border rounds.
— Large Lily Pad (Make 4-5 depending on length) :
Round 1 :
6 sc in magic ring (6)
Round 3 :
(1 sc, inc) x 6 (18)
Round 4 :
(2 sc, inc) x 6 (24)
Round 5 :
(3 sc, inc) x 6 (30)
Round 6 :
(4 sc, inc) x 6 (36)
Round 7 :
(5 sc, inc) x 6 (42)
Round 8 :
(6 sc, inc) x 6 (48)
Info :
At this point the motif is a flat circle. Switch to FLO (front loops only) for one round if you want a slight ridge to help the veins read later. Keep tension even to preserve a flat surface.
Round 9 :
1 sc in each st (48)
Round 10 :
1 sc in each st (48)
Round 11 :
(7 sc, inc) x 6 (54)
Round 12 :
(8 sc, inc) x 6 (60)
Round 13-14 :
1 sc in each st (60)
Info :
We will now form the signature wedge and veins of the lily pad by creating 6 wedge spaces around the edge and working special cluster/elongated stitch groupings to form lobes. Mark the center top of the motif (this will be used to orient the wedge when assembling the runner).
Round 15 :
*5 sc, ch6, skip next 6 sts* repeat from * to * 6 times. (30 sc + 6 ch-6 spaces)
Info :
The ch-6 spaces create 6 evenly spaced wedge openings. Count base scs; stitch count shown excludes ch spaces. If your ch spaces are tight, use ch8 for more dramatic wedge gaps.
Round 16 :
Join with sl st into first sc. Work into each sc between ch-spaces as follows: (sc, hdc, 2 dc, hdc, sc) in each sc group (30 groups worked across the 30 sc positions) to create a slightly raised outer ring. (30 clusters/150 total stitches worked in cluster pattern)
Round 17 :
Into each previously made ch-6 sp work: sl st, ch3 (counts as dc), 3 dc, ch3, sl st into same ch-6 sp to form a small arch bridging the gap—do this into each of the 6 ch-6 spaces creating 6 arches. Continue with 1 sc in each sc between arches to maintain shape. (30 sc + 6 small arches)
Round 18 :
Working toward creating veins: *work 1 sc in next 4 sts, fpdc around next dc (front post double crochet) three times to create a raised post cluster, 1 sc in following 6 sts* repeat from * to * 6 times. (60 sc base count plus 18 fpdc posts counted within these stitches)
Info :
Front post stitches create subtle ridges that read as veins on the lily pad. Keep the posts evenly spaced; if you find the posts pulling, block the motif gently after finishing to coax the shape flat.
Round 19 :
1 sc in each st (60)
Round 20 :
Work an eyelet/vein round: *ch3, skip 2, sc in next 3 sts, ch3, skip 2* repeat 6 times creating evenly spaced eyelets forming vein slits. (60 sc worked overall with 12 ch-3 eyelets)
Round 21 :
1 sc in each st working carefully around eyelets; where needed 2 sc in a st to maintain evenness (60)
Round 22 :
Edge shaping round: (2 sc, dec) x 20 to slightly scallop and stabilize the edge (40)
Round 23 :
1 sc in each st (40)
Round 24 :
Optional decorative round — BLO: 1 sc in each st BLO (40)
Info :
Fasten off and weave in ends. Block the lily pad flat, stretching the wedge slightly if you want a curved lily shape. Make 4-5 large lily pads for a runner of standard length; adjust count for longer or shorter tables.
— Medium Lily Pad (Make 4-6) :
Round 1 :
6 sc in magic ring (6)
Round 3 :
(1 sc, inc) x 6 (18)
Round 4 :
(2 sc, inc) x 6 (24)
Round 5 :
(3 sc, inc) x 6 (30)
Round 6 :
1 sc in each st (30)
Round 7 :
(4 sc, inc) x 6 (36)
Round 8 :
1 sc in each st (36)
Round 9 :
Form 6 small ch-4 wedge spaces around the edge: *4 sc, ch4, skip 3* repeat. (24 sc + 6 ch-4 spaces)
Round 10 :
Into each ch-4 space work (sl st, ch3, 2 dc, ch3, sl st) to form arches. In remaining sc spaces work 1 sc. (24 sc + 6 arches)
Round 11 :
1 sc each st around to stabilize (30)
Round 12 :
Edge round: (2 sc, dec) x 10 (20)
Info :
Make 4-6 medium pads to nestle between large pads. Slight size variation gives a natural clustered look.
— Small Round Filler Motif (Make many) :
Round 1 :
6 sc in magic ring (6)
Round 3 :
1 sc in each st (12)
Round 4 :
*sc in next st, ch3, sc in next* repeat around to create 6 ch-3 picots (12 sc + 6 ch-3 spaces)
Round 5 :
Work into ch-3 spaces: (sl st, ch3, 3 dc, ch3, sl st) to make petite rosettes; sc in sc spaces between. Result reads as a small lacy disk. (12 sc + 6 rosettes)
Info :
These small circles are economical and quick — make 12-18 of these to lace between pads. Use cream for most, and a few in sage or olive for variety.
— Daisy Flower (Make 6-8 full daisies) :
Center Round 1 :
6 sc in magic ring with Sunflower Yellow (6)
Center Round 2 :
6 inc (12)
Center Round 3 :
1 sc in each st (12)
Info :
Fasten yellow center off and weave tail to the back, or carry into petal rounds if you prefer no join. The yellow centers in the photo are slightly raised; you can add an extra puffy round by working a round of pb puff stitches into the center before adding petals.
Petals Round 1 :
Join Cream to any st on the center, *ch2, (2 dc, ch2, sl st) into same st to make a petal base, skip next st, sl st into next* repeat around to form 6 petals. (12 petal bases made around 12 center sts)
Petals Round 2 :
Into each petal base work: (sl st, ch1, 5 dc, ch1, sl st) to puff up the petal and give a rounded appearance. Repeat around to make 6 raised petals. (6 petals)
Info :
If you prefer a layered look, after petals are made add a second petal round offset between petals with smaller 3-dc petals. Fasten off and weave ends to the back. Make 6-8 daisies and 3-4 small daisies (use a smaller center and 5 petals) for added interest.
— Small Daisy Accent (Make 3-4) :
Round 1 :
6 sc in magic ring Sunflower Yellow (6)
Round 3 :
Join Cream: *(ch2, 3 dc, ch2, sl st) in same st, sl st in next* repeat to make 6 small petals. (6 petals)
Info :
These tiny daisies are great tucked midway between lily pads or used as centers in cream circles for diversity.
— Decorative Leaf Accent (Make pairs) :
Round 1 :
Ch 10, sc in 2nd ch from hook, hdc in next, dc in next 3, hdc next, sc next, sl st to base to form one side of leaf; repeat on other side back along chain to tip; sl st to join. (shaped leaf approx 10 sts)
Info :
Work 10-12 small leaves in moss green; sew or tack these into clusters near daisies for a natural composition.
— Join-As-You-Go Layout & Joining Rounds :
Info :
Before permanently joining, arrange motifs on a flat surface in the order you want. The runner pictured alternates large lily pad, cluster of small circles and daisies, medium pads and then repeats. Pin motifs with T-pins or sewing pins. Decide whether you prefer sewn joins for durability or join-as-you-go (JAYG) slip stitch joins for a cleaner crocheted seam.
Joining Round 1 :
With Cream yarn and right side of motifs facing you, align a small circle to the edge of a lily pad so 3-4 stitches overlap. Join with sl st through both motif edges: *sl st in motif A edge, sl st in motif B edge* across the overlapping area to attach. Repeat for each adjoining spot. (stitch count varies by join area)
Joining Round 2 :
To strengthen joins, work a round of sc across the seam: working through both loops of both motifs where joined, sc through each joining stitch around the seam line. This tidies edges and gives a subtle raised ridge. (count depends on seam length)
Info :
Where 3 motifs meet (T-junction), use a small slip stitch triangle to reinforce: join in the central gap and work 6 sc in a small circle then fasten off — this fills the gap and stabilizes the layout.
Joining Round 3 :
For an all-crochet continuous seam around motif clusters: once the bulk of joins are made, work a single crochet join across the outer edges of the assembled row, sc in each outer stitch catching the edges of two motifs at once to unify the runner. (outer stitch count equals perimeter stitches of runner)
Info :
If you prefer a sewn join, use tapestry needle and matching thread to whip stitch motifs together following the same overlapping points. Sew through the back loops of both motifs for a flatter seam, or through both loops for a thicker join.
— Outer Scalloped Border (Work after all motifs joined) :
Round 1 :
With Cream yarn, join anywhere on the outer edge and work 1 sc in each outer edge stitch around, working evenly to maintain shape. (perimeter stitch count varies; aim for even coverage)
Round 2 :
*(3 sc, ch3, 3 sc) in next st for a large scallop, skip 4 sts, sc in next 3 sts* repeat around to create scallops. Adjust skip count to smooth corners. (scallop pattern repeated evenly around)
Round 3 :
1 sc in each stitch around to tidy scallops and even the edge. (perimeter count)
Round 4 :
Optional picot edging: *sc, ch3, sl st in top of sc (picot), skip 1* repeat around for delicate points. Fasten off and weave in ends. (perimeter count)
Info :
Blocking: Once border is complete, wet-block entire runner or lightly steam-block. Pin scallops out and allow to fully dry; this evens shape and allows lily pad veins to relax flat. If you want a stiffer runner, apply a light fabric stiffener following product instructions after blocking.
— Alternative Joining: Sewn Invisible Join Method :
Info :
To sew an invisible join, place motifs RS together and use a blunt tapestry needle with matching yarn. Whip stitch just under the outer loops (through the back loops) of each motif, pulling snug but not tight. This method produces nearly invisible joins and is excellent for heirloom cotton yarns.
— Finishing & Assembly Tips :
Info :
Weave all tails neatly into the back of motifs. Where decorative small daisies are layered on top of lily pads, attach them with a few catch stitches through the center only; this secures them but lets the petals arch up for dimension. Add a few tiny leaves around daisies for a natural cluster. Use blocking to flatten seams and shape wedges.
Info :
Adjust runner length by adding or subtracting large lily pad motifs and corresponding filler motifs. A standard table runner in the image is approximately 30-36 inches long; add or remove groupings to reach your desired length.
Info :
Care: hand wash or machine wash on gentle with mild detergent and lay flat to dry to keep cotton yarn looking its best.
This lily-pad-and-daisy table runner brings garden charm inside with soft layers and timeless textures. Each motif is a little piece of botanical art waiting to be arranged and joined. Enjoy the meditative rhythm of making circles, petals, veins and scallops come together. 🧶🌼 Display it on a dining or console table — it makes a beautiful handmade gift or centerpiece. Happy crocheting and enjoy the floral vibes! 🌿✨