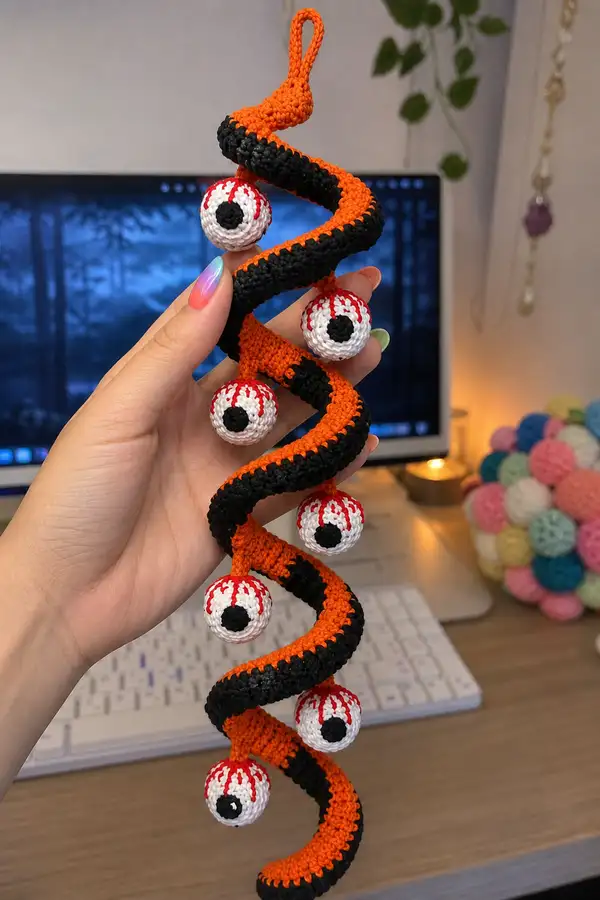
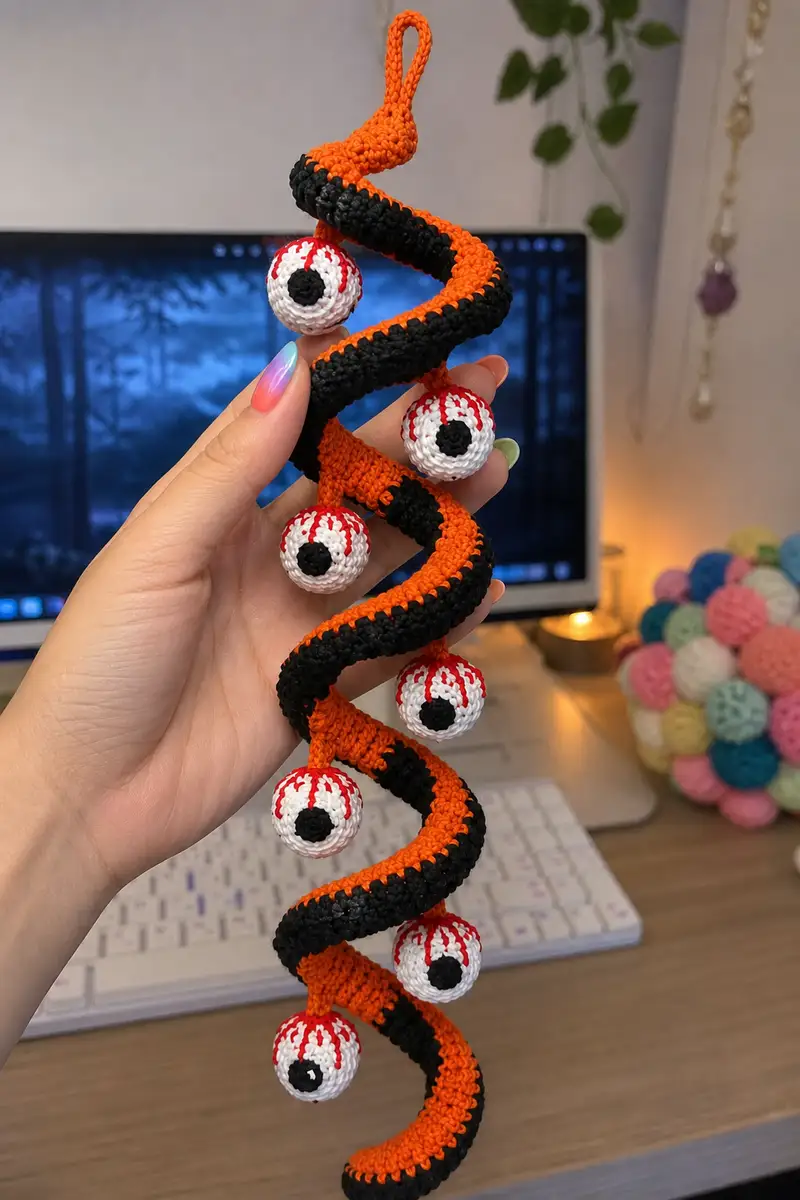
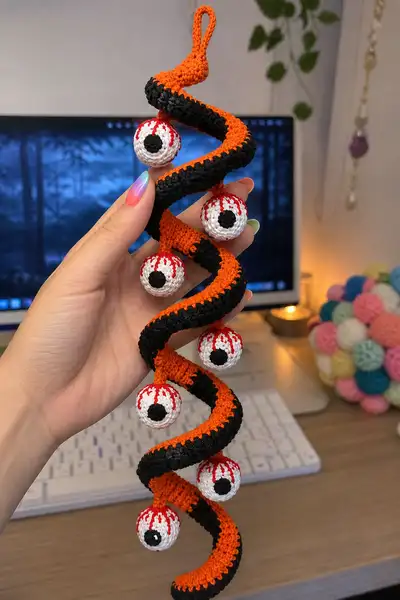
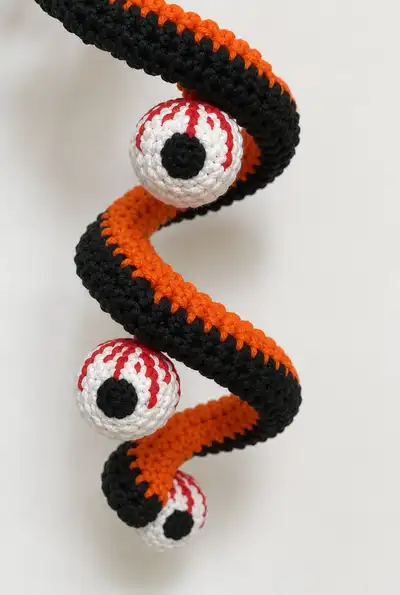
Make a spooky, spiraled Halloween garland featuring a twisted orange-and-black spiral strand dotted with hanging bloody eyeballs. This hanging decoration is crocheted in rounds with alternating color stripes, a firm internal wire for shaping, and six small amigurumi eyeballs with embroidered blood streaks. The finished garland is lightweight, dramatic, and perfect for doorways, mantels, or as a seasonal ornament.
Progress Tracker
0% Complete
— Materials, Gauge & Notes :
Info :
Gauge is not critical for decorative items but using worsted weight yarn with a 3.5mm hook produces a firm fabric. Work tightly for amigurumi-style pieces so stuffing does not show through. The pattern is written in continuous rounds for tubular pieces; use a stitch marker to mark the first stitch of each round. Where color changes are specified, fasten off or carry the unused color neatly along the inside edge as directed.
Info :
Plan: You will crochet one long tubular spiral (the 'Spiral Tube') with alternate color stripes. Insert a flexible wire core as you go (or after finishing, if preferred) to hold the spiral shape. Make six eyeballs using the Eyeball section and attach them with short connectors tied and sewn to the inner side of the spiral.
— Spiral Tube (work in continuous rounds) :
Round 3 :
(1 sc, inc) x 6 (18)
Round 4 :
(2 sc, inc) x 6 (24)
Round 5 :
(3 sc, inc) x 6 (30)
Round 6 :
(4 sc, inc) x 6 (36)
Round 7 :
(5 sc, inc) x 6 (42)
Round 8 :
(6 sc, inc) x 6 (48)
Info :
At this point the tube circumference is 48 sts. This is the base circumference for the spiral. If you prefer a slimmer tube, stop increasing earlier to 36 sts (round 6). If you want a thicker spiral, continue increasing one more round: (7 sc, inc) x 6 = 54 sts (not used in this pattern).
Round 9-12 :
1 sc in each st (48)
Info :
Establish your stripe pattern now. The finished spiral shows alternating bands of orange (inside) and black (outside). We'll work pairs of rounds: 2 rounds orange, 2 rounds black, repeated along the length. Carry the unused color inside the tube if you want a tidy inside, or fasten off/back on for cleaner edges. Place a marker at the first stitch of round 9 and keep it there to track stripes.
Round 13-14 :
Change to ORANGE. 1 sc in each st (48) (work two full rounds in orange for a thicker orange band)
Round 15-16 :
Change to BLACK. 1 sc in each st (48) (work two full rounds in black)
Round 17-18 :
Change to ORANGE. 1 sc in each st (48)
Round 19-20 :
Change to BLACK. 1 sc in each st (48)
Info :
Continue alternating 2 rounds orange / 2 rounds black to build the full spiral length. Every 10 rounds or so re-check tension. If you are carrying yarn, make sure the carried strand isn't visible from the outside. If it shows, fasten off and rejoin instead.
Round 21-40 :
Repeat rounds 13-20 sequence (2 orange rounds, 2 black rounds) for a total of 10 color-pair repeats (20 rounds) giving added length (48)
Info :
If you plan to make a medium-length garland (shown in photo), work approximately 80 rounds total after the initial shaping (this results in about 10 color-pair repeats). For a shorter garland, stop earlier; for a longer one, continue the 2-orange/2-black repeats. Remember the spiral photographed is about 9-10 inches long; adjust length to suit your space.
Round 41-60 :
Continue alternating 2 rounds ORANGE and 2 rounds BLACK (48)
Info :
At roughly 40-60 rounds you should be deciding where your eyeballs will hang. Mark 6 evenly spaced stitch positions along one long side (the inner curve side) to attach connectors for eyeballs. I recommend spacing them every 8-10 color rounds for even distribution. Use pins to mark positions or hold the spiral in a gentle curve to decide by eye.
Round 61-80 :
Continue alternating 2 rounds ORANGE and 2 rounds BLACK; maintain (48)
Info :
Insert your flexible wire core: slide a length of floral wire through the tube's center. If your wire is longer than the tube, trim to length leaving approximately 1/2 inch at each end to fold over. Fold each end of the wire flat against the inside fabric and secure by wrapping a few stitches of scrap yarn around or tucking the ends into the stuffing area and stitching closed. This wire will allow shaping into a spiral. If you prefer no wire, stiffen the tube by crocheting more rounds and stuffing firmly; shape will be softer.
Round 81-84 :
Work 4 rounds to finish: 2 rounds ORANGE, 2 rounds BLACK (48)
Round 85 :
Change to ORANGE. 1 sc in each st BLO (48)
Info :
Working the next round in BLO creates a slight ridge along the edge which looks tidy on the inner curve of the spiral and gives a subtle seam for attaching the hanging loop. If you prefer a flat finish, omit BLO and work normal sc's.
Round 86 :
1 sc in each st (48)
Round 87 :
Fold the end of the tube flat, slip stitch through both layers around to close the tube end for about 12 sts to create a small tapered cap (48 -> 36 after closing)
Round 88 :
Fasten off leaving long tail for finishing. Use tail to close final opening neatly with mattress stitch; weave in securely. Fold and stitch remaining end to create a small cap and a top hanging loop.
Info :
Create the hanging loop: with ORANGE yarn make ch 25-35 depending on desired loop size. Join ends at the top cap with sl st and sew securely into the inside of the cap with the long tail. Reinforce by sewing through the cap several times and knotting firmly. Optionally, form a small cone as a top finishing piece: sc around the join for 6 rounds decreasing gradually to close.
— Connector Stem (make 6) :
Info :
Short stems connect each eyeball to the inner curve of the spiral. Make 6 small tubes about 8-12 rounds long depending on desired hanging length. These are worked in ORANGE to match the inside of the spiral.
Round 3-10 :
1 sc in each st (12)
Info :
Adjust length to position eyeballs precisely along the spiral. Leave a long tail at the top for sewing to the spiral. When attaching, sew into the inside of the tube at your marked spots. If you want the eyeballs to hang farther away, add additional rounds or a short chain loop before attaching the eyeball.
Round 11 :
Fasten off leaving long tail for sewing (12)
— Eyeball (Make 6) :
Info :
Each eyeball is a small spherical amigurumi worked in continuous rounds in white with a small black pupil crocheted separately and sewn on. Add red embroidery for blood streaks after assembly. Work tightly with small amounts of stuffing to create a smooth round surface. I recommend using a 3.0-3.5mm hook for a firm fabric. Make 6 eyeballs identical in size for symmetry.
Round 1 :
6 sc in mr with WHITE (6)
Round 3 :
(1 sc, inc) x 6 (18)
Round 4 :
(2 sc, inc) x 6 (24)
Round 5 :
(3 sc, inc) x 6 (30)
Round 6 :
(4 sc, inc) x 6 (36)
Info :
At round 6 the eyeball is roughly palm-sized small; continue increasing to round 8 to reach a 48-st circumference for a bigger eyeball. Decide now the size you want: the photographed eyeballs were worked to 48 stitches at the widest point for a plump sphere.
Round 7 :
(5 sc, inc) x 6 (42)
Round 8 :
(6 sc, inc) x 6 (48)
Round 9-12 :
1 sc in each st (48)
Info :
Place the small black pupil now or crochet and attach later. To place safety eyes instead of a sewn pupil, insert them between rounds 10-11. For this design we will crochet a black pupil disk and sew it centered on the surface then embroider red veins afterward.
Round 13 :
(6 sc, dec) x 6 (42)
Round 14 :
(5 sc, dec) x 6 (36)
Info :
Begin stuffing the eyeball firmly at this stage. Small balls require firm stuffing to smooth the surface; push fiberfill into the center and distribute evenly with a blunt tool or chopstick. Continue stuffing as you decrease to avoid dimples.
Round 15 :
(4 sc, dec) x 6 (30)
Round 16 :
(3 sc, dec) x 6 (24)
Round 17 :
(2 sc, dec) x 6 (18)
Round 18 :
(1 sc, dec) x 6 (12)
Info :
Fasten off leaving a long tail. Use tail to close the opening securely with a yarn needle. Smooth the surface and shape the eyeball with your hands if needed. Repeat to make six eyeballs. Before fully closing, ensure the stuffing is evenly distributed and the sphere is firm but not rock-hard.
— Pupil Disk (Make 6) :
Round 1 :
6 sc in mr with BLACK (6)
Round 3 :
(1 sc, inc) x 6 (18)
Info :
Fasten off leaving long tail for sewing. Flatten the disk and sew it centered onto the eyeball surface using small invisible stitches, being careful not to catch too much of the white so the pupil appears crisp. Secure with several passes and weave in ends.
— Embroidered Blood Veins (6 eyeballs) :
Info :
Using bright red yarn and a yarn needle, embroider a few jagged downward lines radiating from near the top of the eyeball to mimic drips. Start with a short stitch near the top, then bring the needle out further down for a longer drip. Knot securely inside the eyeball and weave in ends. The references show 3-4 distinct drips per eyeball; vary placement so each looks unique and a little messy in a spooky way.
— Assembly & Placement :
Info :
Before attaching eyeballs, shape the spiral into its final twisted shape: hold the wire core and gently spiral around a cylindrical form (a bottle or dowel works well) to get an even, open spiral. Once you are satisfied with the curve, pin the spiral shape while attaching connectors and eyeballs.
Attach Connectors :
Pin each connector stem onto the inner curve of the spiral at the previously marked positions (approximately every 8-10 color rounds). Sew the top tail of the connector securely through the spiral's inner fabric for 6-8 stitches, then knot and weave the tail into the inside. Reinforce with back-and-forth stitching. Ensure all connectors hang the same distance when spiral is laid flat to avoid lopsided look.
Attach Eyeballs :
Sew the top of each eyeball to the bottom of its connector stem with several passes through both pieces; make sure the pupil faces outward consistently. Use a ladder stitch or whip stitch to make a neat seam and reinforce with a small dot of fabric glue inside the join, if desired.
Info :
Trim all loose tails, weave ends thoroughly into the inner tube, and hide them next to the wire or in the connector seam. Test the hanging loop by applying gentle weight to ensure the wire ends and cap are secure.
Final Shaping :
Bend the wire core into an even spiral. Start at the top loop and make consistent turns so the eyeballs dangle in successive bays of the spiral. You can tighten turns to make a compact spiral or open them for a long corkscrew. When satisfied, pinch the wire ends into the cap and secure further with a few stitches through the cap to hide them.
Finishing Touches :
If desired, add small embellishments (mini felt bats, sequins inside spiral edges) with thread or small safety pins. Spray lightly with a fabric-safe stiffener if you want a more permanent rigid shape (test on scrap yarn first).
Info :
Care: store flat or hung by the loop to retain spiral shape. Spot clean with damp cloth and mild soap if necessary; do not submerge if wire is not stainless to avoid rust risk.
This spooky spiral garland is a playful mix of colorwork and small amigurumi details that make Halloween extra fun! Each eyeball adds personality and the twisted orange-and-black tube creates dramatic movement — a perfect seasonal accent to hang in doorways or from a mantel. The pattern is satisfying to stitch and quick to assemble, giving you a standout handmade decoration for the holidays. 🎃👁️✨