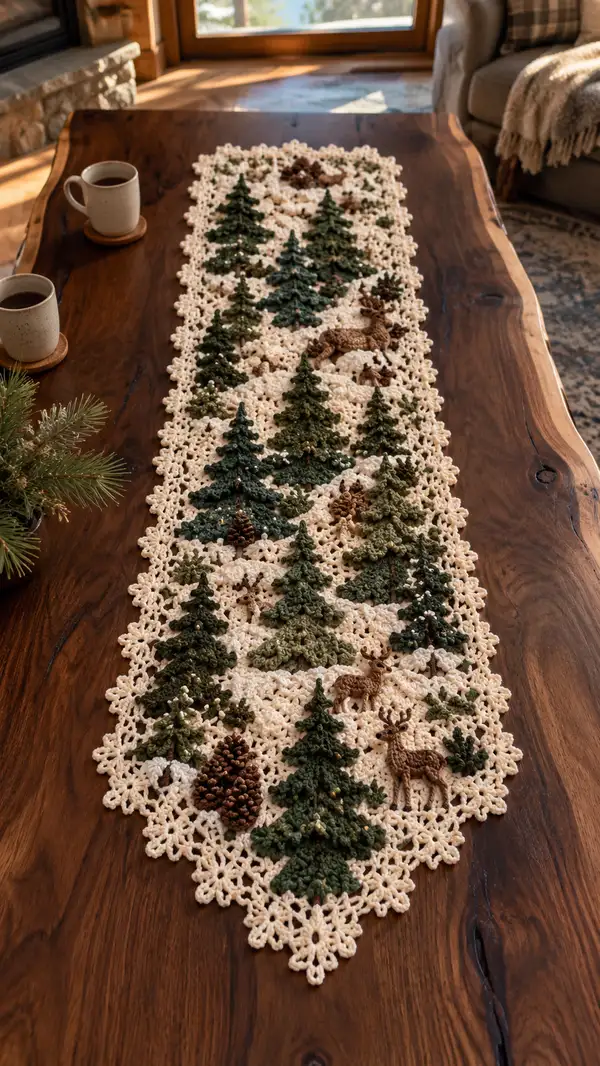
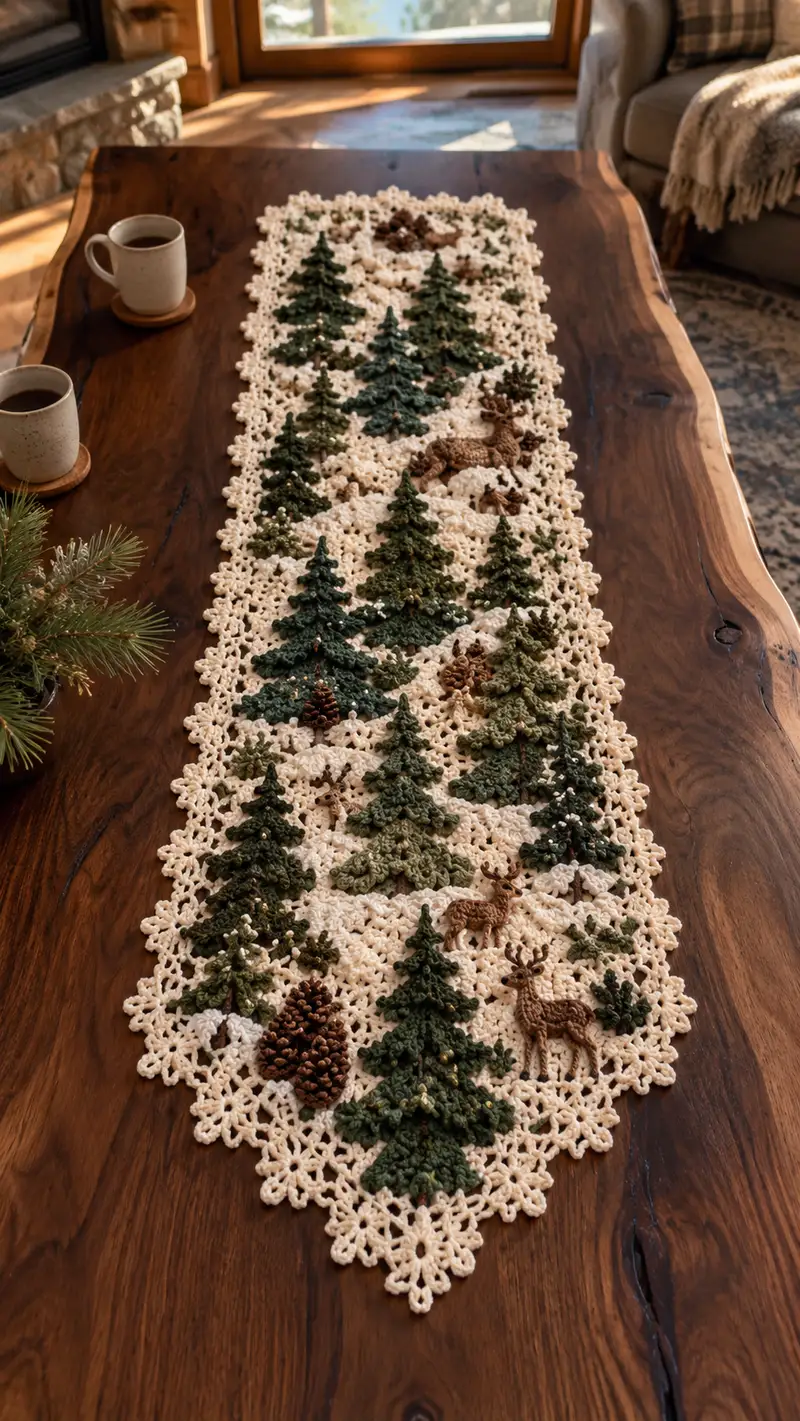
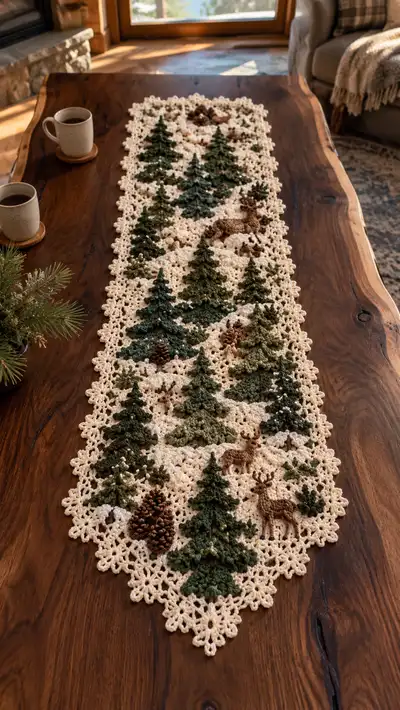
Create a woodland-inspired table runner featuring raised pine trees, pinecones and tiny deer set against a lacy cream snowflake background. This pattern uses layered tree motifs and small appliques to build a three-dimensional forest scene that sits beautifully along a dining or console table. Perfect for seasonal decor or a year-round nature vignette, the runner pairs texture, subtle color shifts, and an open lacy border for a handcrafted heirloom look.
Progress Tracker
0% Complete
— Background Snowflake Motif (Make 24 - layout as 6 columns x 4 rows) :
Round 1 :
Ch 6, join with sl st to form a ring. Ch 3 (counts as first dc), 15 dc into ring, join with sl st (16 dc)
Round 2 :
Ch 1, sc in same st, (ch 3, sk next dc, sc in next dc) around to form 8 ch-3 loops, join with sl st (8 loops)
Info :
Switch to cream yarn if not already; keep tension even to create a flat circular base for lace points
Round 4 :
Into each ch-3 loop: (sc, hdc, 3 dc, hdc, sc) to create pointed petals. Join with sl st (8 petals)
Round 5 :
Ch 4 (counts as tr), 2 tr in base of next petal, ch 3, 3 tr in next petal base, *ch 1, sc in petal tip, ch 1, skip to next petal base and 3 tr* rep around, join with sl st. (8 clusters)
Round 6 :
Ch 2, in each ch-1 space around work (2 dc, ch 2, 2 dc), at petal tips work (sc, ch 3, sc) to make decorative loops, join with sl st
Info :
Use BLO on this round to create a slightly raised seam where appliques will sit later. Blocking this motif slightly will help the overall runner lie flat.
Round 8 :
Ch 1, sc in each st BLO around making 64 sc total (count your sts from previous round to keep consistent). Join with sl st (64)
Round 9 :
Ch 3, dc in next 2 sts, *ch 2, sk 2, dc in next 3* rep around finishing with dc pattern to create small open clusters (64 dc spaces as worked)
Round 10 :
Into each ch-2 space: (sc, ch 3, sc) to make small picot-like points. Join with sl st (32 picot points)
Round 11 :
Ch 1, sc around making 64 sc total (work evenly around each previous element to maintain shape), join with sl st (64)
Info :
If you prefer a larger background square, repeat rounds 5-11 once more before forming the corner shaping. For this runner we keep motifs modest to maintain lacy openness.
Round 13 :
Ch 4, in next space work (dc, ch 2, dc), *ch 1, sc in next st, ch 1, sk 1, (dc ch2 dc) in next space* rep around to shape corners for square connectivity
Round 14 :
Ch 1, sc evenly around working into dc and ch spaces to total approximately 72 sc. Join and fasten off, leaving long tail for joining. Block square flat (approx 4.5" across depending on tension)
Info :
Make 24 of these motifs. Arrange them in 6 columns by 4 rows for layout pictured. Slight variations from gauge will change final runner size. Pin each in position before joining.
— Small Pine Tree Motif (Make 8) :
Round 1 :
With dark forest green, mr, ch 1, 6 sc in mr (6)
Round 2 :
Inc in each st around (12)
Round 3 :
(1 sc, inc) x 6 (18)
Info :
We will build a layered triangle by alternating shell rounds and short decreases to create three tiers of branches. Use a 3.5mm hook for leafy texture.
Round 5 :
Ch 2, turn: In FLO around, work shell around: (2 dc, ch 1, 2 dc) in next st, sk 1, sc in next; repeat to create a small scalloped round that flares (approx 12 shells)
Round 6 :
Ch 1, sc around in each st to tidy shell bases (36 sc). Join (36)
Round 7 :
(Sc2tog, 5 sc) x 6 to slightly taper towards top (30)
Round 8 :
Shell round: *(sc in next st, ch 1, 3 dc in next st, ch 1, sc in next st)* around creating leaf points (repeat 12 times) (approx 48 sts in counting dc as separate posts)
Round 9 :
Ch 1, sc in each visible st to compress shell (48)
Info :
Transition to a narrower top: change to olive green here for subtle shading if desired, or continue in dark forest green for uniform trees.
Round 11 :
(4 sc, sc2tog) x 8 (40)
Round 12 :
Small leaf shell: in every 5th st work (sc, ch 2, sc) to create evergreen tips. Join and fasten off leaving long tail for sewing to background motif
Info :
Sew small trees centered on background motif intersections or grouped as in photo. Use a few stitches through the BLO round of the background square to anchor firmly.
— Medium Pine Tree Motif (Make 8) :
Round 1 :
With olive/medium green, mr, ch 1, 6 sc in mr (6)
Round 2 :
Inc in each st around (12)
Round 3 :
(1 sc, inc) x 6 (18)
Round 4 :
Ch 2, FLO shell round: (2 dc, ch 1, 2 dc) in next st; rep to create 9 shells (9 shells)
Round 5 :
Ch 1 sc around (36 sc) to stabilize shells
Round 6 :
(2 sc, sc2tog) x 12 (24)
Round 7 :
Shell tier: *(sc, ch 2, 5 dc, ch 2, sc) in next st* repeat 6 for large branch lobes (visual cluster each repeat)
Round 8 :
Ch 1, sc evenly around compressing large lobes (approx 72 sts in working terms) join with sl st
Info :
Stagger color here by switching to dark forest green for the lower tier of branches to create depth. Carry color up the back and secure when sewing in place.
Round 10 :
(3 sc, sc2tog) x 12 (36)
Round 11 :
Final tip shaping: (1 sc, sc2tog) x 12 (24). Fasten off, leaving tail for sewing.
Info :
Stuff a tiny bit inside the lower center to give a slight mound under the tree for realistic shadowing when sewn to background. Do not overstuff—trees should be flat enough to lay on table.
— Large Pine Tree Motif (Make 4) :
Round 1 :
With dark forest green, mr, ch 1, 6 sc in mr (6)
Round 2 :
Inc in each st (12)
Round 3 :
(1 sc, inc) x 6 (18)
Round 4 :
Ch 2, shell round in FLO: (2 dc, ch1, 2 dc) in each of 6 shells to create deep tier 1
Round 5 :
Ch 1 sc around compressing shells: (36 sc) join
Round 6 :
(2 sc, inc) x 12 (48)
Round 7 :
Large branch round: *(sc, ch 2, 7 dc, ch 2, sc) in next st* repeat 12 for broad sweeping branches
Round 8 :
Ch 1, sc around to tidy and connect lobes (approximately 120 working posts when counted as separate)
Round 9 :
(4 sc, sc2tog) x 12 (48)
Round 10 :
Shell detail round: In chosen spaces work (sc, ch3, sc) to create pine tips around the silhouette; join and change to moss green for topmost tier
Round 11 :
(1 sc, sc2tog) x 16 (32)
Round 12 :
Final shaping: sc around once to strengthen edge then fasten off leaving long tail for sewing (approx 32 sts around top tier). Do not overstuff; just a hint of fill at the base for lift.
Info :
Large trees are focal pieces and should be placed near the center channels of the runner. Pin them to background squares first to find balanced placement before sewing.
— Pinecone Applique (Make 6) :
Round 1 :
With brown, mr, ch 1, 6 sc in mr (6)
Round 2 :
Inc into each st around (12)
Round 3 :
(1 sc, inc) x 6 (18)
Round 4 :
Switch to 2.75mm hook and work in FLO: (sc, ch1, 3 dc in next st, ch1, sc) around creating scale-like lobes (18 lobes)
Round 5 :
Ch 1, sc around through the backs of the lobes to compress shape and create cone texture (approx 54 sc if counting posts). Stuff lightly.
Round 6 :
Decrease round: (4 sc, sc2tog) x 3 (15)
Round 7 :
Sc around and fasten off leaving tail for sewing to background; add a few French knots with embroidery floss for pinecone accents if desired
Info :
Sew pinecones into gaps between tree clusters or at motif corners. Use 2-3 secure passes so they do not rotate when handled.
— Deer Applique: Body (Make 2) :
Round 1 :
With brown, mr, ch 1, 6 sc in mr (6)
Round 2 :
Inc in each (12)
Round 3 :
(1 sc, inc) x 6 (18)
Round 4 :
Ch 1, sc around making 18 sc to form a small oval body base for the adult deer torso
Round 5 :
Shape round: (2 sc, sc2tog) x 4, sc 2, inc (total 16) to flatten one side for belly
Round 6 :
Ch 1, sc in each st for 16 sts raising sides of torso
Round 7 :
Increase back slope: sc in next 6, inc, sc in next 9 (17)
Round 8 :
Ch 1, sc around (17)
Round 9 :
Back shaping: (sc3tog, sc 4) x 2 to create rear tuck and curve (10)
Round 10 :
Fasten off leaving long tail. Stuff lightly near the belly and rear. This body will receive legs and head sewn into position.
Info :
Deer are delicate; use embroidery to mark spots and eyes instead of safety eyes to keep them child-safe and small-scale for table decor.
— Deer Head :
Round 1 :
With tan, mr, ch 1, 6 sc in mr (6)
Round 2 :
Inc in each (12)
Round 3 :
(1 sc, inc) x 6 (18)
Round 4 :
Ch 1, sc around (18)
Round 5 :
(3 sc, sc2tog) x 4 (14)
Round 6 :
Ch 1, sc around (14)
Round 7 :
Fasten off leaving tail for sewing. Add embroidery for eyes and nose with dark brown thread; embroider small curved mouth and tiny nostrils.
Info :
Sew head to the flattened front of the body on the raised side. Place just above the belly tuck so the deer's stance looks natural when attached to runner.
— Deer Legs (Make 4) :
Round 1 :
With brown, ch 6, sc in 2nd ch from hook and across (5 sc), turn and work along opposite chain to form a tube: 10 sc total in round (10)
Round 2 :
Work sc in each around for 6 rounds to form leg length (10)
Round 3 :
Decrease to form hoof: (sc2tog, sc 8) repeat on next round to bring count to 6. Fasten off leaving tail.
Info :
Sew legs to the underside of the deer body. Front legs slightly forward and close together, back legs toward the rear tuck for a standing pose. Stuff only the top part of legs for a slight stiffness.
— Small Shrub / Moss Accent (Make 12) :
Round 1 :
With moss green, mr, ch 1, 8 sc in mr (8)
Round 2 :
Shell round in each st: (sc, ch2, 3 dc, ch2, sc) around to create a tiny puff shrub (8 shells)
Round 3 :
Ch 1, sc around under shells to stabilize then fasten off leaving tail for sewing
Info :
Sew these into gaps to give a naturally overgrown look and hide small joins between background motifs and tree bases.
— Joining and Layout :
Info :
Block all background motifs lightly to uniform size. Lay the 24 square motifs in a 6 x 4 layout (6 across, 4 down) or adjust for your table length. Place large trees on central columns, medium trees staggered, small trees filling gaps as in photo.
Round 2 :
Joining method 1 - whip stitch seaming: With cream yarn and tapestry needle, place two squares right sides facing and whip-stitch through the back loops of both motifs along the connecting edge. Use even 4-5 mm spacing for clean join.
Round 3 :
Joining method 2 - crochet join: With cream yarn and 3.5mm hook, place motifs right side up. Insert hook through sp on motif A and sp on motif B and sl st to join; ch 1 between joins for decorative picot-like seam. Repeat across entire runner.
Info :
Lay motifs flat and pin joins gradually to prevent distortion. Use a thin row of blocking water or steam to encourage flat seams before finishing joins.
Round 5 :
Edge join across short sides: when your columns are joined into strips, join strips side-to-side with continuous slip-stitch seam that mimics the lace scallops to avoid a bulky seam.
Round 6 :
Once all squares are joined, weave in tails and tidy seams with small whip-stitches on the wrong side to avoid lumps on the surface.
— Attaching Tree and Applique Elements :
Round 1 :
Place your large trees centered on selected motifs and pin through the BLO round of each background motif so they sit snugly. Using long tail, sew tree bases to background with invisible ladder stitch: run needle through base loops and background BLO round in alternating passes until secure.
Info :
For layered trees, place medium and small tree motifs overlapping lower branches of larger trees by 6-10 stitches to create a stacked effect. Sew partially through the back layer so the front branches remain free for depth.
Round 3 :
Sew pinecones into natural gaps using a long tail; pass through several times in a spiral pattern to prevent rotation. Place deer where you want focal points - secure with multiple fine stitches at the belly and neck points.
Round 4 :
Embellish trees with tiny beads or french knots to mimic berries or snow. Secure beads with embroidery thread tied down twice and dab a tiny amount of glue if desired for permanence.
— Border and Edging :
Round 1 :
With cream throughout, attach yarn to any corner of the joined runner. Ch 1, sc evenly along the runner edge around entire border to tidy joins (work approx 1 sc per motif picot or scallop—expect to work 300-420 sc depending on layout).
Round 2 :
Shell edging round: *skip 2 sc, (5 dc, ch 1, 5 dc) in next st, skip 2 sc, sl st in next sc* repeat around to create large scallops that echo the background snowflake pattern. Join and fasten off.
Round 3 :
Delicate picot finish: Reattach cream yarn and work into each ch-1 of shell edging: (sc, ch 3, sl st into sc) to form little picot points for an intricate finish. Fasten off and weave in ends.
Info :
Use a smaller hook (3.0mm) for edging if you want a tighter, crisper finish that will hold shape when placed on a table under items.
— Finishing Touches :
Round 1 :
Inspect runner for loose threads; weave in all tails with tapestry needle taking care to hide ends in seam channels. Block entire runner to final dimensions using pins and steam or damp spray; shape trees to stand up slightly while drying for three-dimensional effect.
Info :
To protect your table and runner, place a thin felt or non-slip liner under the runner. Avoid heavy liquids on the appliques. For cleaning, hand wash gently in cool water and dry flat.
Round 3 :
Optional: add a row of slip-stitch reinforcement along inner joins on the wrong side to prevent stretching if runner will be used frequently.
Round 4 :
Final inspection: fluff tree tiers slightly with a pin or small comb to highlight branch separation and ensure pinecones and deer are firmly attached. Enjoy your finished Pine Tree Forest Runner!
This Pine Tree Forest table runner brings cozy woodland charm to any table — layered pines, tiny deer and textural pinecones create a handcrafted centerpiece. Each motif is made with care and assembled for a three-dimensional, heirloom-quality result. The lacy cream background balances the rich greens and browns so the piece feels both rustic and refined. 🧶🌲 Add this runner to your seasonal decor (or keep it out year-round) and enjoy the little forest you created. ✨