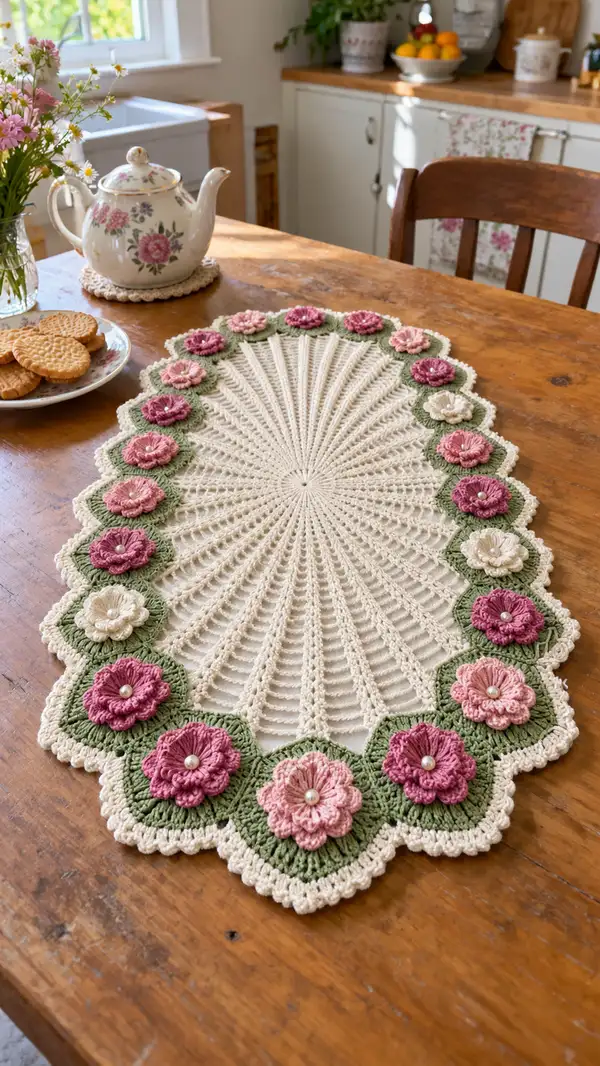
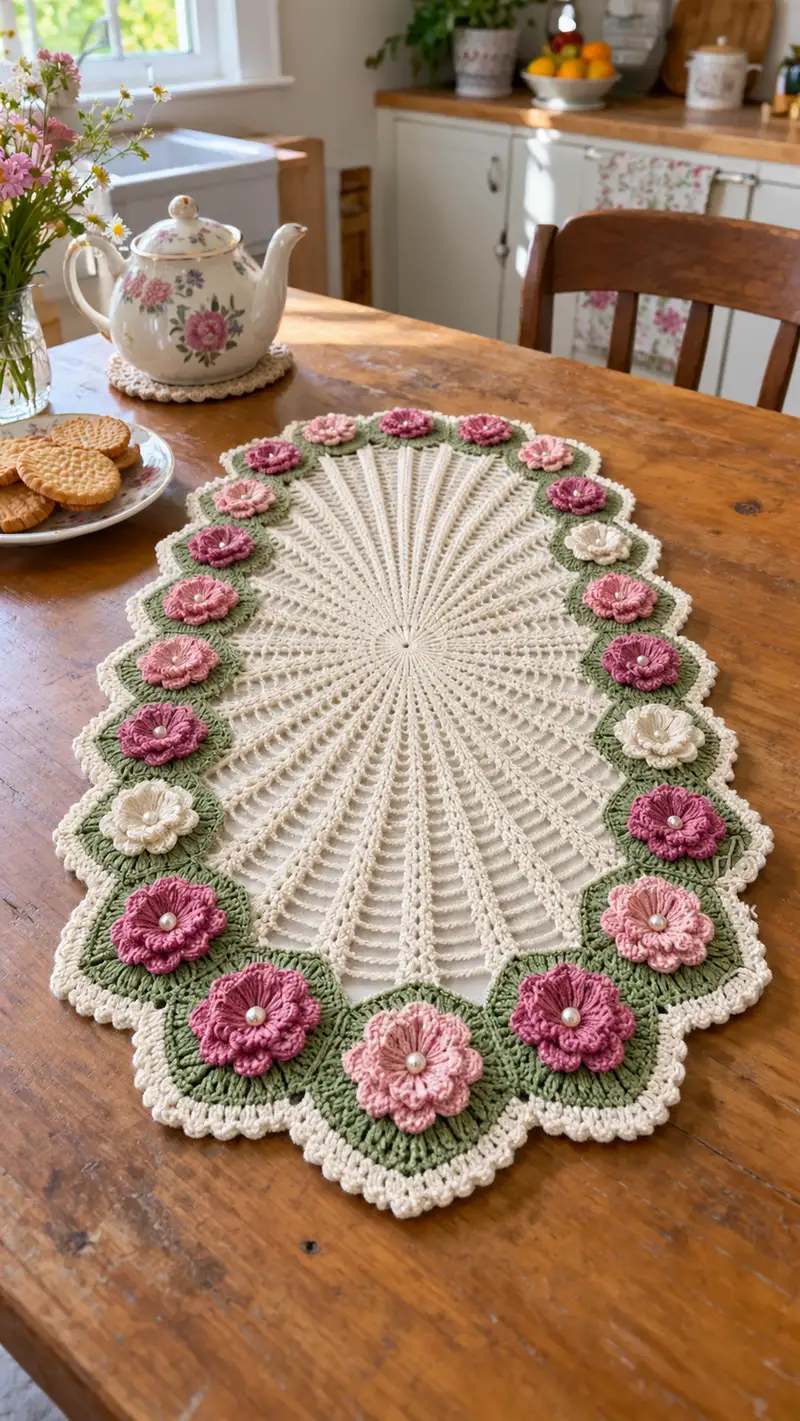
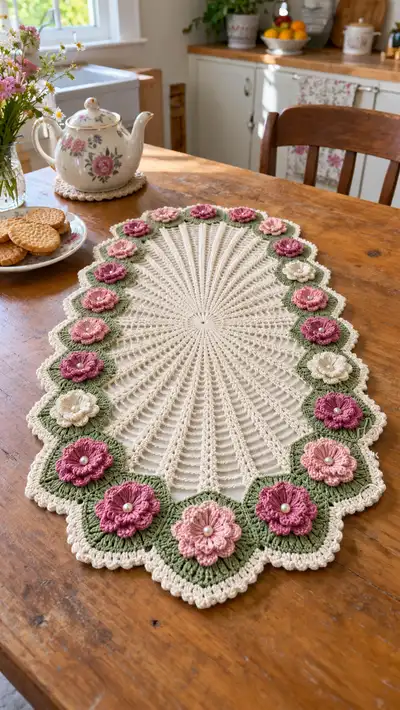
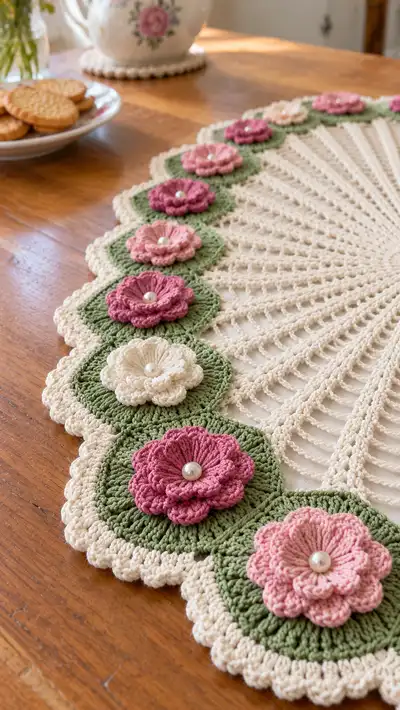
A delicate oval table runner with radiating lacy ribs, scalloped edge and hand-sewn layered floral motifs. The center is worked in a soft cream lace with elegant vertical ribs, surrounded by green rounded motifs topped with two-layered pink and cream flowers finished with pearl centers. This pattern recreates the vintage-inspired crochet runner pictured—perfect for a tea table, dresser or special gift.
Progress Tracker
0% Complete
— Center Oval Base :
Round 1 :
Make a magic ring. Ch1 (does not count as st), work 12 sc into magic ring. Pull tight (12)
Round 2 :
Inc evenly around: 12 inc (24). Work each stitch into next available stitch: (2 sc in each st) x12 (24)
Round 3 :
(1 sc, inc) x12 (36)
Round 4 :
(2 sc, inc) x12 (48)
Info :
These first rounds build a round base. Keep tension even to avoid warping. Use a stitch marker at round start and move it each round.
Round 5 :
(3 sc, inc) x12 (60)
Round 6 :
(4 sc, inc) x12 (72)
Round 7 :
(5 sc, inc) x12 (84)
Round 8 :
(6 sc, inc) x12 (96)
Info :
At this point the work will be a fairly large flat round. To begin shaping an oval and introducing ribs, we will create 32 regularly spaced points to form the ribs. Mark every 3rd stitch (96/32=3) so you have 32 marked stitches around.
Round 9 :
Ch3 (counts as dc), *sk 2 sts, in next st work (dc, ch3, dc) to form a small rib base; sk 2 sts, dc in next st (continue)*. Repeat from * to * 31 more times to create 32 rib anchors. Join with sl st to top of starting ch3. You should still have 96 total stitch anchors (96)
Round 10 :
Working into each rib anchor: sl st into ch3 sp, ch1, (sc, hdc, 3 dc, hdc, sc) in each ch3 sp. This forms a small fan at each anchor; maintain 32 repeats (32 fans)
Info :
Fans created here will become the vertical ribs. Ensure each fan is worked tightly and evenly. Use the markers placed previously to find anchors if your count shifted.
Round 11 :
Ch1, sc in each stitch and across each fan keeping the spacing consistent. If needed, add extra sc between fans to retain 96 stitches overall. Aim for 1 sc into top of each fan cluster and evenly between (96)
Round 12 :
Ch4 (counts as tr), *sk to base of next fan, tr in space between fans; rep around creating tall posts that will form rib columns. Join with sl st to top of starting ch4 (32 tall posts)
Round 13 :
Into each tall post: (fpdc around the post made in previous round) x 3 to thicken post appearance, then 2 sc across the small gaps between posts. Work evenly around to maintain the 32-rib structure. Adjust tiny increases so total stitch count is approximately 96 but focus on consistent rib intervals (approx 96)
Info :
Use front post double crochet (fpdc) around the tall posts to create raised ribs. These ribs are the defining feature: keep tension consistent and check flatness periodically.
Round 14 :
Ch3, *between each rib post work: (ch4, sc) to create elongated mesh channels; place sc into small gap between rib columns. Repeat around to form 32 chain arch spaces. Join to starting ch3 (approx 96 anchors including ch-sps)
Round 15 :
Work 1 sc into each sc and 3 dc into each ch4 arch to build faned arches between ribs. Maintain symmetry (approx 96 total stitches across anchors)
Round 16 :
Ch1, sc in each st around to even out base and prepare for continued rib elongation (96)
Round 17 :
Ch5 (counts as tr+ch2), *work dc3 clusters into each arch space to gradually elongate the ribs, ch2 between clusters. Repeat around and join (32 clusters)
Round 18 :
Sc evenly across clusters and ch2 spaces to tidy the round. Aim to maintain consistent stitch height across the oval; adjust where necessary so runner remains flat (96)
Info :
Begin working extra mesh rounds to create the elongated lacy ribs effect. At this stage you will see the oval shape elongate—if it pulls too much, add a round of sc to flatten; if it buckles, reduce tension or use a smaller hook for following rounds.
— Radiating Rib Rows (build height and lace) :
Round 1 :
Ch1, sc evenly across the round counting into top of each dc cluster and into ch spaces: work 1 sc for each anchor (96)
Round 2 :
Ch3 (counts as dc), *in gap between ribs work (dc, ch3, dc) to create taller arch; in top of rib post work 3 dc to maintain column height. Repeat around (32 arches + 32 rib clusters)
Round 3 :
Ch1, sc in each st around to stabilize pattern (96)
Round 4 :
Ch3, *work a dc shell (5 dc) into each arch space to build a faned lacy effect. Work 3 dc over the top of each rib column to keep columns raised. Repeat around (32 fans + 32 columns)
Info :
Alternate rounds of fans and sc to create a repeating lace texture. Take time to block lightly between sections if stitches begin to lie unevenly.
Round 5 :
Ch1, sc in each st and also into the front loops of each previous round fan to help connect the lace consistently (approx 96)
Round 6 :
Ch4, *dc2tog over the next two dc of fan, ch2, dc into next arch base; rep around to create subtle decreases across fans while maintaining ribs. Join with sl st (approx 96)
Round 7 :
Ch1, sc in each st across to maintain flatness and keep the runner sitting evenly (96)
Round 8 :
Ch5 (counts as tr+ch2), *work 3 tr in the top of each rib column, ch2, skip to next column top and repeat. This lengthens the ribs and begins the elongated vertical look pictured. You will have 32 tr groups (32)
Info :
If you prefer fewer ribs, work the pattern with 24 repeats instead of 32—adjust initial markers accordingly and work math for anchors evenly at start.
Round 9 :
Ch1, sc in each stitch around, working 1 sc into each tr and into each ch2 space to create a tidy row (approx 96)
Round 10 :
Ch3, *into each ch2 space work (dc, ch3, dc) to create deep arch channels between ribs; into the top of tr groups work 3 dc. Repeat around. Join (32 arch channels)
Round 11 :
Ch1, sc evenly around (96). Check flatness and add a tidying sc round if edges twist slightly.
Info :
From here you will repeat cycles of arch-building and sc stabilization to achieve the length of lacy ribs seen. For the photographed runner we repeat similar cycles 6 more times to reach the desired oval length.
Round 12 :
Repeat Round 8 pattern (Ch5, 3 tr groups over ribs, ch2 between) across the round (32 tr groups)
Round 13 :
Sc evenly around in each stitch and top of each tr to stabilize (96)
Round 14 :
Repeat Round 10 pattern (dc fans into arch spaces) (32)
Round 15 :
Sc evenly around (96)
Round 16 :
Repeat Round 8 once more to lengthen ribs (32 tr groups)
Round 17 :
Sc evenly around (96)
Round 18 :
Work one more cycle of shallow arches (ch3 dc cluster fans) then sc round: this evens height before adding perimeter motifs (approximately 96)
Info :
At the end of radiating rib rows measure the runner length. The number of repeats above will create a medium-large oval. If you want a shorter runner, stop the rib cycles earlier and proceed to motif joining.
— Mesh Rows and Perimeter Preparation :
Round 1 :
Ch1, sc all around working 1 sc into each stitch and into top of each fan cluster/ch sp to collect the perimeter into a uniform edge (96)
Round 2 :
Ch3, *work (dc, ch2, dc) into each ch2 space to create a series of decorative loops around the edge. In between fans, work 2 sc to keep spacing even. Repeat around. Finish with sl st (approx 96 spacing points)
Info :
These perimeter loops become points where the green round motifs will be joined. Make note of 16 evenly spaced points around the long edge—mark them with pins. The photographed runner has 16 rounded motifs around the long edge (8 each side).
Round 3 :
Ch1, sc evenly, placing a slightly larger sc (or hdc) at each of the 16 marked join points to make solid anchors for joining motifs (approx 96, with 16 anchor points emphasized)
Info :
Measure and mark 16 join points: evenly space 8 along each long side and 2 at each short end (or adjust to your preference). Pin each marker and count the intervals to confirm even spacing before making motifs.
— Green Round Motif (Make 16) :
Round 1 :
With moss green yarn, make a magic ring. Ch1, work 8 sc into ring, pull tight (8)
Round 2 :
Inc in each st around (16)
Round 3 :
(1 sc, inc) x8 (24)
Round 4 :
(2 sc, inc) x8 (32)
Info :
Round 4 produces a small flat circle—this will act as the green base for the flower. Keep stitches flat and avoid cupping by blocking if necessary after completing motifs.
Round 5 :
Ch3, *sk1, in next st work (dc, ch2, dc), sk1, sc in next st. Repeat around to create 8 wide arches around your circle. Join with sl st to starting ch3 (32 anchors including scs)
Round 6 :
Into each ch2 space work: (3 dc, ch1, 3 dc) to make small faned petals forming a rounded scallop; between fans work 1 sc into top of next sc from previous rnd. Complete around (8 large fans)
Round 7 :
Ch1, sc into each dc across fans and into scs between to tidy edges and hold a flat round (approx 32-40 depending on counts)
Round 8 :
FLO: Work 1 sc in each st FLO to create a ridge that the flower layers will sit on (approx 32-40)
Round 9 :
Ch1, sc around making sure to keep the motif flat. If your motif sits cupped, block it with steam or wet-block and pin flat before attaching petals (approx 32-40).
Info :
Make 16 motifs following these rounds. Leave a long tail when fastening off on each motif to help with sewing to the runner. Arrange the motifs around the pinned anchor points on the runner and adjust spacing before sewing.
— Flower Layer A (Bottom Petals) (Make 16) :
Round 1 :
With the lighter pink (rose blush), ch2, work 10 hdc into a magic ring or work into a 10-st foundation circle (10)
Round 2 :
(1 hdc, inc) x5 (15)
Round 3 :
*Into each stitch of round 2: work (ch3, 2 dc, ch3, sl st into same st) to form a petal loop. Repeat for all 15 stitches to form 15 small petals or alternate to 10-12 depending on look. (15 petals)
Info :
These petals will be overlapped by the smaller top petal layer. Keep petals evenly sized. If 15 is too many, work 10 evenly spaced petals by skipping sts as needed; in the pictured runner petals are slightly overlapping and generally 10-12 per layer.
Round 4 :
Ch1, working around the base chain for petals, sc around to tidy and create a stable circle for the next layer to attach (15 sc)
Round 5 :
Make a second row of petals to add volume: *ch3, in next st work 3 dc, ch3, sl st; rep into each of 15 sc (15 larger petals). Fasten off leaving a 15–20 cm tail for sewing.
Info :
Stagger the petals of this bottom layer so they sit between the top petal points you will later create. Block lightly before sewing onto green motif if petals curl.
— Flower Layer B (Top Petals) (Make 16) :
Round 1 :
Using the darker pink (muted rose), ch2, work 8 sc into magic ring (8)
Round 2 :
(1 sc, inc) x4 (12)
Round 3 :
*Work into each stitch: (ch3, 3 dc, ch3, sl st) to form a petal cluster. Repeat for all 12 stitches to make 12 small top petals (12 petals)
Round 4 :
Ch1, sc around the petal bases to tidy the circle and create a secure base for sewing (12 sc). Fasten off leaving a 15–20 cm tail.
Info :
Make 16 of these top petals. The two-layered petals produce the dimensional look shown. If you prefer a single-layer flower, skip Layer A and work a larger single-layer flower instead.
— Pearl Centers and Assembly of Flower Motifs :
Step :
Place Layer A (bottom) centered over the green round motif (work previously), then place Layer B centered over Layer A. Use the long tails from each layer to sew through the green motif base and runner when attaching (do not cut tails until sewn). Align petals so top layer sits slightly forward of bottom layer for depth.
Step :
Thread a pearl bead on strong sewing thread or embroidery floss. From the underside of the green motif, sew through the center of the flower layers, through the pearl, then back down through all layers. Repeat through the pearl 2-3 times, knot securely on the back, and weave in the tails through the green motif to secure. Trim close.
Info :
Sew the assembled motifs to the runner anchor points now: pin each motif centered over the marked join points, check spacing visually, then use mattress or invisible stitch to attach using the tails left on green motif round. Attach all motifs before finishing the outer scallop so you can use the scallop rounds to tidy joins.
— Attaching Motifs Around Perimeter :
Step 1 :
Place the runner on a flat surface. Starting at one short end, pin the first green motif to the first anchor point with the flower layered on top. With matching cream yarn and long tail from motif (or a new length of yarn), use small whip stitches through the back loops of the motif into the runner edge anchors. Sew around the base of each motif with 8-12 small stitches, pulling just snug.
Step 2 :
Work around the runner attaching motifs at each of the 16 anchors. Keep the top edges of motifs flush with one another for a continuous border. On the short ends where motifs meet, overlap slightly and tack with an extra stitch to avoid gapping.
Info :
Before finishing the join, try to space motifs so the scallops will align—adjust motif placement to form even scallops and lay flat. Blocking the runner slightly at this point helps motifs conform to the shape.
— Scalloped Edge Finish :
Round 1 :
With cream yarn and the 3.5mm hook, pick up stitches around the outer edge of the attached motifs and the runner. Work 1 sc evenly around the entire edge, placing 2 sc in tight corners between motifs to avoid puckering. Join with sl st (approx 120-140 sc total depending on motif overlap)
Round 2 :
Ch3, *skip 2 sc, 5 dc in next sc (shell), skip 2 sc, sl st in next sc; repeat across each motif to create a scallop aligned with each round motif. Continue around and join. You will create one scallop per motif face (16 large scallops)
Info :
The pictured scallop shows an outer picot/dentil trim. If you want the same finish, work a small picot round next.
Round 3 :
Ch1, sc in each stitch across shell peaks, sc2tog at corners where motifs meet to tidy joins (approx 120)
Round 4 :
Picot finish: *ch3, sl st into third ch from hook to make a picot, sc into next st; repeat around creating a delicate beaded edge. Join and fasten off. Weave in ends.
Info :
If you prefer a heavier scallop, increase shell count to 7 dc and use ch3 picots. Adjust spacing as needed to keep scallops even.
— Optional Decorative Ridge (Final Round) :
Round 1 :
Using cream yarn, work 1 round of BLO slip stitches (or crab stitch worked in reverse sc) around the very outer edge to create a subtle raised ridge and a finished hand-look. This helps disguise join tails and firms the edge.
Info :
The reverse single crochet (crab stitch) works well here if you like a twisted rope look. Use a smaller hook if you want a tighter, neater finish.
— Blocking & Finishing :
Step :
Gently wet-block the runner: lay on a foam board or towel, pin the oval into shape, and place pins at each scallop peak and in the center to flatten ribs slightly. Leave to dry overnight. This evens ribs and sets motifs flush with the base.
Info :
Weave all tails into the back of motifs and center base. For long seams where motifs join the edge, use a small amount of fabric glue under the seam for extra security if desired (test on scrap first).
Step :
Finally, check all pearl centers are secure. If any feel loose, re-sew with additional knots and hide tails inside the green motif. Gently steam press if needed but do not iron directly onto pearls.
Info :
Store flat to maintain shape. Hand wash gently and re-block after washing to refresh shape.
This vintage floral runner brings a touch of handmade elegance to any table. Each lacy rib and layered flower is a small celebration of texture and color. Working this project is a satisfying mix of meditative lacy rounds and small assembly steps—perfect for a weekend craft that leaves you with a table-ready heirloom. Pin it, gift it, or keep it for cozy tea afternoons! 🧶🌸