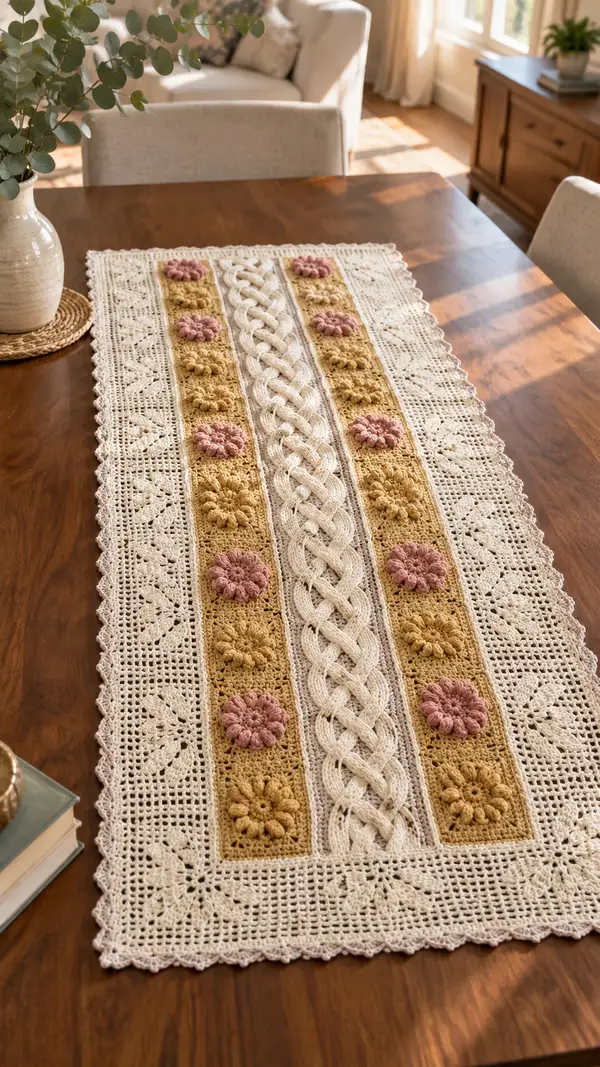
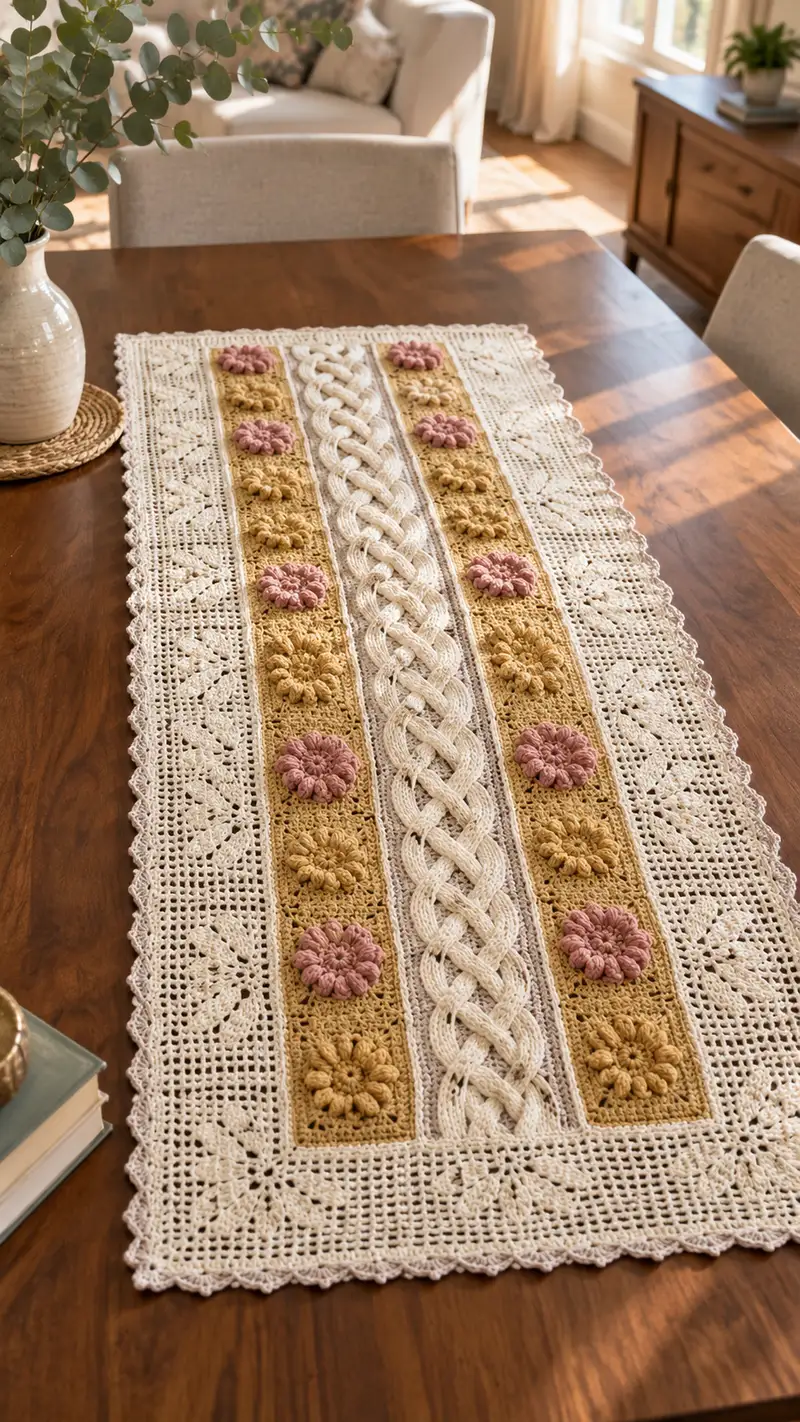
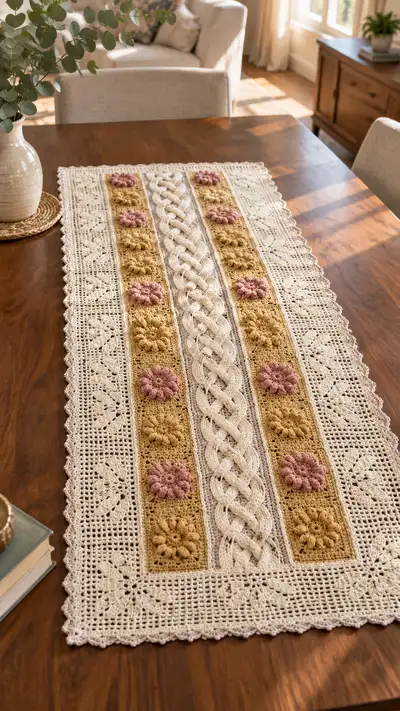
A timeless crochet table runner featuring a central braided cable panel, two columns of textured floral squares in warm mustard and dusty rose accents, and delicate lacy cream borders with scalloped edging. This elegant runner combines raised puff flowers, openwork mesh, and cable-like braid stitches for a layered, heirloom look. Perfect for dining tables, sideboards, or seasonal centerpieces, the runner showcases a soft neutral palette with pops of color and rich texture.
Progress Tracker
0% Complete
— Notes & Special Stitches :
Info :
This runner is constructed from three central vertical units: a central braided panel, and two columns of textured floral squares, each column containing 6 square motifs stacked vertically. Outside these columns are two lacy side panels. All pieces are worked flat and joined, then the lace border is worked into a continuous round around the assembled rectangle. Gauge is approximate; maintain consistent tension throughout. Puff stitch is described below.
Info :
Puff stitch (used for flower petals): yarn over, insert hook into stitch, yarn over, pull up a loop (repeat 4 times total to have 9 loops on hook), yarn over and pull through all loops, ch 1 to close puff. For a taller petal, use 5 partials (11 loops) before closing; be consistent per motif.
Info :
Central braid effect uses crossed front-post and back-post dc and occasional crossed trebles to mimic a 5-strand braided look. Work with a slightly tighter tension to keep braid defined.
— Central Braided Panel :
Round 1 :
Ch 36, turn. Row 1: Dc in 4th ch from hook and in each ch across. (34 dc)
Round 2 :
Ch 3 (counts as dc), turn. Dc in next 3 sts, *fpdc around next dc, bpdc around next dc; rep from * across to last 4 sts, dc in remaining 4 sts. (34 sts; pattern of fpdc/bpdc creates texture)
Round 3 :
Ch 3, turn. Dc in first 4 sts, *bpdc around previous fpdc, fpdc around previous bpdc; rep from * across, dc to end. (34)
Info :
Rounds 2 and 3 form the basic corrugated fabric for the braid. Work these two rounds evenly until you reach a base height of approximately 4 cm (about 10 repeats). This gives a stable foundation for crossover rows.
Round 4 :
Ch 3, turn. Dc in first 4 sts. To create the first crossover section for the braid: skip next 8 sts, join by working 4 dc cluster across next 8 sts as follows: (dc in st, ch 1, dc in next st) repeat to create ridged cluster; ch 2, return to skipped section and work 4 dc cluster across those 8 skipped sts; continue across creating mirrored clusters. Dc to end. (34)
Round 5 :
Ch 3, turn. Dc in first 4 sts. Using fpdc and bpdc, work 8 sts of crossing panel over the clusters: fpdc around each cluster front post, bpdc around flanking posts to lock cluster; dc to end. (34)
Round 6 :
Rep Round 3 to re-establish background rows and lock the previous cross. (34)
Info :
Start working the braided cross pattern now. The braid is constructed from repeating groups of 6 rows (2 background, 2 cross, 2 settle) that form the appearance of a multi-strand braid. Maintain counts exactly: always 34 stitches across.
Round 7 :
Ch 3, turn. Dc in first 4 sts. Begin braid repeat: (Row A: crossed treble group) *sk 2, tr in next 4 sts working fp around previous rows to create raised strand, ch 1; return to skipped 2 and work tr group crossing behind the raised strand; rep from * 3 times across, dc in last 4 sts. (34)
Round 8 :
Ch 3, turn. Dc in first 4 sts. Work background: fpdc around each raised tr, bpdc around cross-behind tr to hold strands. Dc to end. (34)
Round 9 :
Ch 3, turn. Repeat Round 6 (background row). (34)
Info :
Every 3 braid cycles (approximately every 18 rows) you will perform a larger crossover that simulates the five-strand tuck; this is done by temporarily shifting the crossing sequence across a 12-stitch window. Mark the start of this window with a stitch marker so you perform the larger cross in the same place each time.
Round 10 :
Ch 3, turn. Dc across first 4 sts. Start large crossover: across next 12 sts work the following sequence: (tr in st 1 of window, ch1, tr in st 2; skip ahead and work tr pairs so that you create an over/under pattern across the 12 stitches; see detailed stitch map in Notes). Dc in remaining 18 sts. (34)
Round 11 :
Ch 3, turn. Dc in first 4 sts, bpdc and fpdc to lock the large crossover panel, dc to end. (34)
Round 12-29 :
Repeat Rounds 2-11 for additional braid length until the central strip measures the desired runner length minus borders (approximately 75-85 cm for a medium runner). Maintain 34 stitches width. (34 each round)
Info :
For visual consistency, work ends of the panel with two extra background rounds (Rounds 2 and 3 pattern) before finishing to create a tidy join edge. Block lightly to relax the stitches and reveal braid detail before assembly.
Round 30 :
Work two even rows of dc across to finish top and bottom edges. (34)
Info :
Fasten off leaving long tail for joining. You now have one Central Braided Panel approximately 34 dc wide and your chosen length long.
— Floral Motif Square (Mustard Background with Puff Flower) : (Make 12 per column; 24 total)
Round 1 :
Using mustard yarn: Make a magic ring. Ch 3 (counts as dc), work 11 dc into ring. Join with sl st to top of ch-3. (12 dc)
Round 2 :
Ch 1, sc in same st, *ch 3, sc in next dc; rep from * around to form 12 ch-3 loops. Join with sl st to first sc. (12 ch-3 sps)
Round 3 :
Switch to dusty rose for puff flower center: In each ch-3 sp make a puff petal: [yarn over, insert hook, pull up loop] 4 times (9 loops on hook), yarn over pull through all, ch 1 to close puff. Ch 1, sl st into next ch-3 space to move to next petal. Make 12 puff petals evenly around. Join and fasten off pink yarn leaving tail for weaving. (12 puffs)
Info :
Keep petals slightly separated; use finger to coax each puff round outward so the flower is round. You may place a small knot of yarn at the back of the puff center to hold them secure before continuing with mustard background rounds.
Round 4 :
Rejoin mustard yarn at any space behind a puff. Ch 1, sc behind puff petals into the join area, *ch 3, sc into next space behind puff, rep around. (12 ch-3 corners/spaces)
Round 5 :
Work a square expansion: In each ch-3 corner work (sc, hdc, 3 dc, hdc, sc) to form 4 corner blocks; between corners work 3 sc along each side. Join. (This establishes the first square round. Approx stitch count by side: each side 3 sc + corner clusters)
Round 6 :
Ch 3, turn. Dc in each st around, working 3 dc into each corner cluster to increase square shape. (Approx 28-32 dc depending on tension)
Info :
From here, the square is worked by alternating rounds of mesh and solid to create textured background that matches photo. Keep the puff flower centered by counting the petals and ensuring corners remain equally spaced.
Round 7 :
Ch 1, *sc in next 3 dc, ch 3, sk next 3 dc; rep around forming mesh side with ch-3 spaces. At corners ch 5 to pivot. Join. (Creates lacy mesh within mustard square)
Round 8 :
Ch 3, turn. Dc in each sc and in each ch-3 space work (dc, ch1, dc) to fill; at corners work 3 dc into corner ch-5. Join. (Approx 32-36 dc)
Round 9 :
Ch 1, sc into each dc across; at corners sc 3 into corner. Work evenly to finish square edge. Join. (Maintains squareness; approx 36 sc)
Round 10 :
Switch to a delicate taupe contrast row: ch 3, dc in each st around working 2 dc in corner sts. Join. (Even edge rounding; approx 40 dc)
Info :
Block each square lightly to ensure consistent shape and make joining easier. Make 12 of these floral squares for one column. Alternate dusty rose puff flowers every other square vertically to match the photo layout.
Round 11 :
Optional surface finish: With taupe, work a round of sc along the outermost edge, placing 1 sc in each dc and 3 sc in corners to square up. Fasten off leaving long tail for joining. (Approx 40 sc)
Info :
Make 12 identical squares per column. Keep color placement consistent (pink puff on squares 1,3,5; mustard-only puff center on 2,4,6 if you prefer to mix; the pictured runner alternates pink and mustard puffs). Total make 24 mustard-based floral squares (12 per side).
— Golden Textured Square (Alternate filler squares) :
Round 1 :
Using mustard: magic ring, ch 3, work 11 dc into ring. Join. (12 dc)
Round 2 :
Ch 1, sc into same st, *ch 3, sc in next dc, rep around. Join. (12 ch-3 sps)
Round 3 :
In each ch-3 sp: make a small bobble cluster of 5 dc shells: (2 dc, ch1, 3 dc) in each space to read as textured small flower center. Join. (12 shell clusters)
Round 4 :
Ch 1, sc around each cluster, ch 3 between clusters to create mesh, join. (12 ch-3 sps)
Round 5 :
Work out to a square as per the floral square: create 4 corner clusters (sc, hdc, 3 dc, hdc, sc) and 3 sc along each side section. Join. (Approx 28-32 sts)
Round 6-9 :
Work backing rows: alternating shell row and sc rounds to create rich texture across the square. End with a taupe contrast sc round for neat joins. Fasten off, leaving tail for joining. (Square approx same size as floral square)
Info :
These textured golden squares are used as alternating filler squares between floral squares. Make enough to mirror the layout in the image: each column has alternating decorated squares: pink puff, textured golden, pink puff, textured golden, etc.
— Side Lacy Panel (Make 2) :
Round 1 :
Using cream/ivory yarn: Ch 42, turn. Row 1: Dc in 3rd ch from hook and in each ch across. (40 dc)
Round 2 :
Ch 3, turn. Dc in first 4 sts, *ch 2, sk 2, dc in next 4 sts; rep from * across, dc in last 4 sts. (Creates columned openwork sections) (40)
Round 3 :
Ch 1, turn. Sc in first 4 sts, *ch 4, sk next 2 dc, sc in next 4 dc; rep; sc in last 4 sts. (Creates larger openwork cells) (40)
Info :
The side panel uses alternating mesh and leaf motif rounds. The leaf motif is made by forming groups of elongated stitches worked into a base ch loop to form a petal. This is repeated at specific intervals to make the visible leaf shapes.
Round 4 :
Ch 3, turn. Dc in first 4 sts, *work leaf motif in next ch-4 space as follows: (tr, dtr, tr) all worked into same space to create an elongated leaf; ch 2 to space, dc in next 4 sts; rep across; dc in last 4 sts. (40)
Round 5 :
Ch 1, turn. Sc across, placing sc in top of each leaf motif and ch-2 spaces to secure motifs. (40)
Round 6-20 :
Repeat Rounds 2-5 cycling leaf motif placement to create a vertical pattern of open leaves and mesh. Work until panel length equals runner minus border (matching length of central braid). (40 sts each round)
Info :
Edge of the side panel in the photo has small framed squares with an inner leaf pattern; to achieve this, every 6th row, substitute a framed square row: chain 5 at the outer edge to create a corner space, then work four rounds that create a square 'block' containing a leaf motif in its center before returning to mesh repeats. This gives the framed leaf squares visible near the border.
Round 21 :
Work two even rows of dc across to create a neat edge for joining. Fasten off leaving long tail for joining. (40)
— Joining Panels Together :
Info :
Layout: From left to right: Side Lacy Panel (cream) | Column of squares (mustard) | Narrow cream strip (taupe accent) | Central Braid | narrow cream strip | Column of squares (mustard) | Side Lacy Panel. The columns of squares will be joined vertically into a long strip of 6 squares each; sew these strips to the braid and side panels using mattress stitch or whip stitch. Use pins and blocking to ensure straight joins.
Round 1 :
Pin a column of 6 floral squares, aligning edges. Using a yarn needle and mustard yarn, mattress stitch through side loops to join squares edge-to-edge. Use 6-8 evenly spaced stitches per side of each square edge to secure. (Join length: 6 squares tall)
Round 2 :
Repeat for second column of 6 squares. Join a narrow taupe strip to inner edge of each square column: ch across width of square column edge and sc through each outermost stitch to create a 1-row vertical joining strip that fills the small seam gap when sewn to braid. (Seam filler)
Round 3 :
Position central braid between the two square columns and pin in place. Using taupe contrast yarn, sew braid to columns along both vertical edges by working through corresponding outermost dc posts of the braid and through the seam filler row of the square columns. Use small, neat mattress stitch passes approx every 1-1.5 cm. (Secure strongly to avoid separation)
Info :
Sew side lacy panels to outer edges of each column sandwich by aligning top and bottom edges and using cream yarn. Use whip stitch through back loops of the side panel and outermost sc rounds of the square columns. Work gradually and block as you go if necessary to keep edges even.
Round 4 :
After all vertical joins are made, check for evenness: runner should be rectangular; adjust by unpicking small sections and re-sewing if necessary. Press lightly by hand and block if needed before edging. Fasten and weave all long joining tails securely into the backside of the work. (No stitch count change)
— Outer Border & Scalloped Edge :
Round 1 :
With cream yarn, join at a corner with sl st. Work a round of sc evenly along the outer edge of the assembled runner, placing 3 sc in each corner to turn. Place approx 1 sc per every 0.5 cm; the exact number will vary by gauge. Work all around. (This creates a uniform edge for the lace border)
Round 2 :
Ch 3, *dc in next 3 sc, ch 2, sk 1 sc; rep across each straight edge. At corners work (dc, ch2, dc) to create a squared corner. Join with sl st. (Edge now has regular dc groups and ch-2 spaces)
Round 3 :
Ch 1, sc in same st, *ch 5, sc in next ch-2 space to create tall loops; rep all around putting 5-ch loops along straights and 7-ch loop at corners. Join. (Looped picot foundation for scallops)
Info :
The photo shows a delicate picot scallop with small open leaf blocks inserted in the border corners. To mimic this, every 12th loop along the side substitute a decorative leaf shell instead of the standard scallop. Mark these positions before stitching.
Round 4 :
Scallop round: Into each ch-5 loop work (sc, hdc, 3 dc, hdc, sc) to form a fan scallop. Into corner loops work slightly larger fan (sc, hdc, 5 dc, hdc, sc). Join. (Scallops are now defined)
Round 5 :
Picot finish: Ch 1, sc around scallops placing a small picot (ch 3, sl st into top of ch-3) at every scallop peak for delicate points. Join and fasten off. Weave in ends and block fully to shape scallops. (Finish)
Info :
Optional: For a slightly raised border like in the photo, add one more round of sc behind the scallops into the BLO of the fan round before picot finishing. This gives a framed look to the scallops and makes the outer edge more pronounced.
— Finishing Touches & Final Blocking :
Info :
Weave in all ends using a yarn needle, ensuring ends are pulled to backside and trimmed close. Lightly steam-block or wet-block the entire piece to even out stitches and open lacework. Pin scallops and braid close to desired finished shape and allow to dry fully.
Round 1 :
Check all joins and add reinforcement stitches where needed: inside seams of square columns and braid edges are candidates for 5-6 extra mattress stitch passes to secure long-running stress points. (No stitch count change)
Round 2 :
Use remaining taupe yarn to work a subtle running outline around each puff flower if desired: with a yarn needle, couch a thin outline with small whip stitches to make flowers pop. Weave securely and trim. (Detailing)
Info :
Final blocking ensures braid flattens vs. puckers and puff petals sit nicely. Use a gentle steam from a distance if using steam-blocking; do not press directly. Allow to dry fully before use. The runner will soften slightly after washing; recommend gentle hand wash or delicate machine cycle in mesh bag.
— Pattern Summary & Counts :
Info :
Panels made: 1 central braid (34 dc wide x desired length), 2 columns x 6 floral squares each (24 squares total), 2 textured golden alternate squares per column as filler as desired, 2 side lacy panels (40 sts wide x desired length). Border: 5 rounds around assembled rectangle. Ensure all pieces are blocked and straight before joining. Total rounds across all sections will vary based on number of repeats and length chosen; the instructions provided give the full method to create a runner similar to the pictured piece.
This Braided Blossom Table Runner brings timeless texture and soft color to your dining space—combining raised puff flowers, a sculpted braided panel, and airy lacy borders. Each component is thoughtfully designed to assemble into an heirloom-style accent that elevates everyday moments. Enjoy the calm repetition of squares, the satisfying braid rows, and the delicate scalloped finishing touch. 🧶🌸 Your handmade centerpiece will be a cherished addition to the home and a beautiful gift to share. Happy stitching! ✨