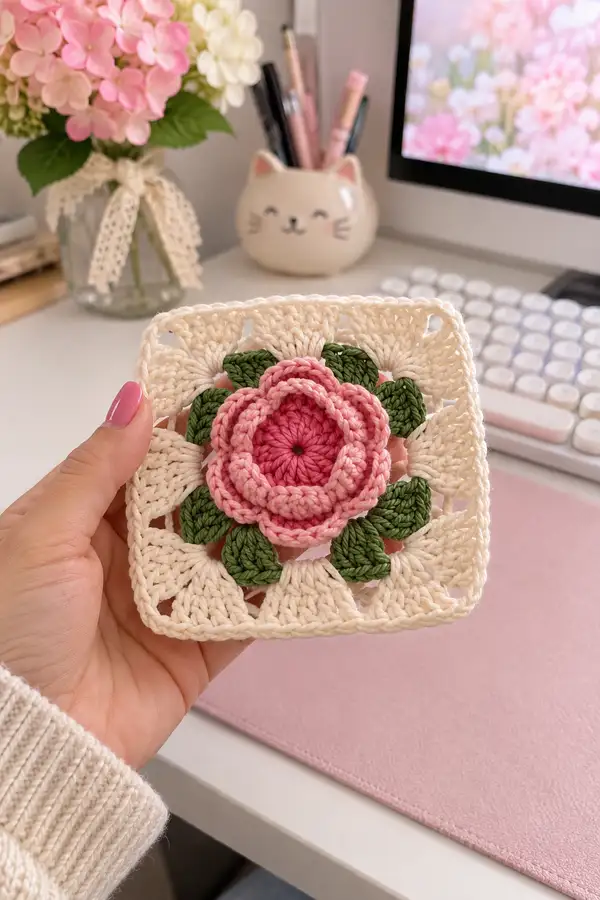
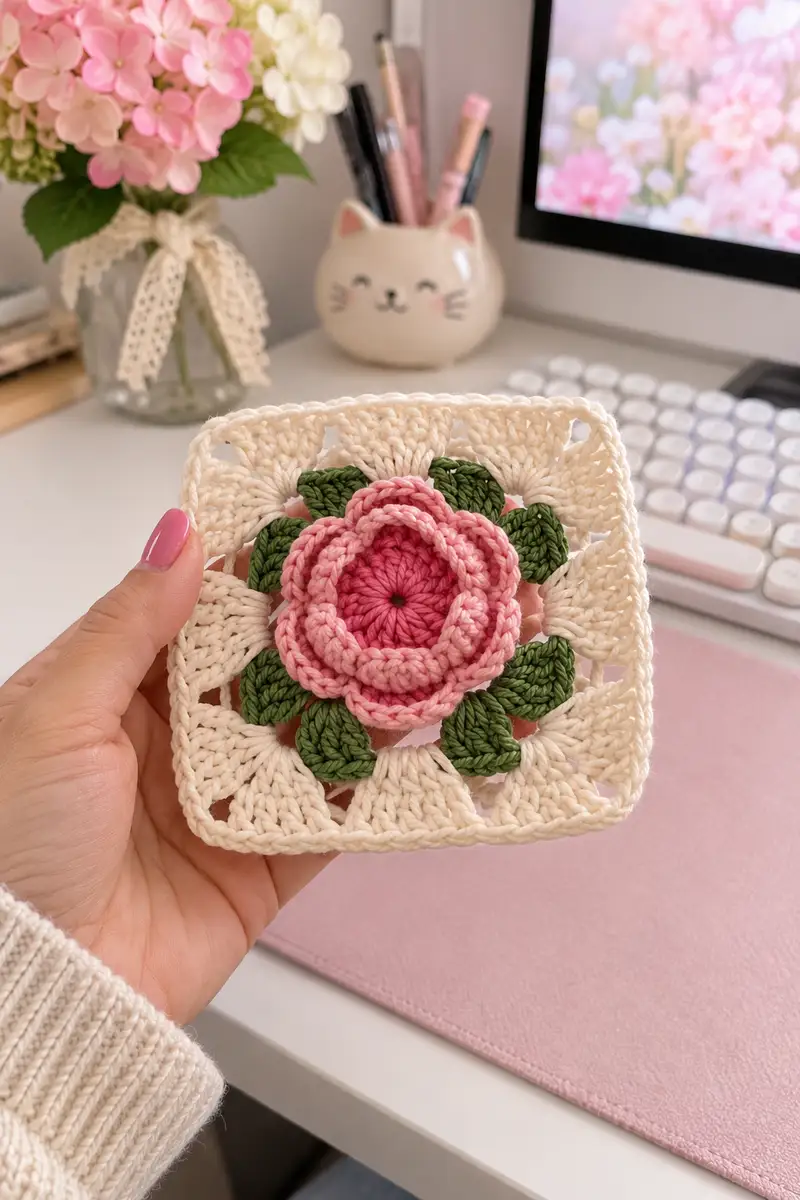
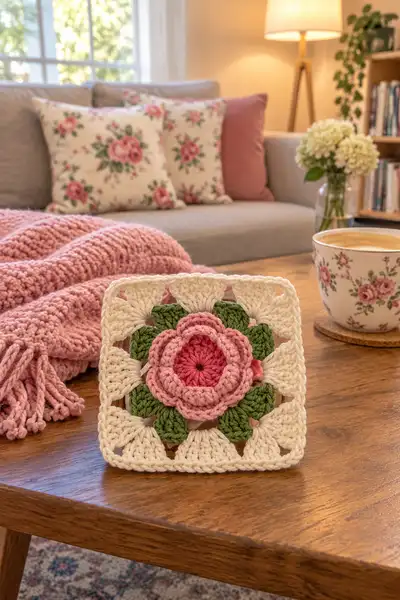
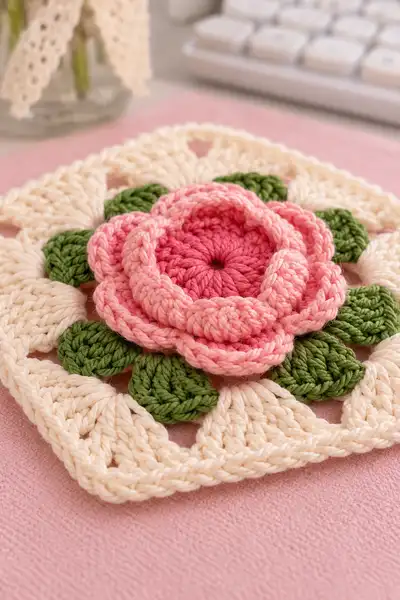
A romantic 3D pink rose granny square that stitches into a gorgeous throw, cushion or decorative panel. This pattern recreates the layered rose center, deep green leaves and delicate cream shell square seen in the photos. Detailed step-by-step instructions guide you through making the raised petals, sculpted leaves and finishing border for a beautiful, tactile motif.
Progress Tracker
0% Complete
— Notes and Gauge :
Info :
This motif measures approximately 12-14 cm (4.5-5.5") square using worsted cotton and a 3.5 mm hook. Gauge is not critical, but consistent tension will yield matching motifs for joining. Work tightly enough that the center petals hold shape without visible gaps; petals are worked over multiple rounds to achieve a 3D look.
— Center Rose (Dark Rose) :
Round 1 :
Make a magic ring, ch1 and work 12 sc into ring. Pull tight and join with sl st to first sc (12)
Round 2 :
Inc in each st around (24)
Round 3 :
(1 sc, 1 inc) x 12 (36)
Round 4 :
(2 sc, 1 inc) x 12 (48)
Info :
Keep the center rounds flat and even. If a small central hole remains, pull tail slightly before weaving in to close. These rounds create the base disc the petals will sit on.
Round 5 :
1 sc in each st around (48)
Round 6 :
1 sc in each st around (48)
Info :
Place 12 stitch markers evenly around the disc to mark petal anchor points. To space 12 petals you can place a marker every 4th stitch (48 /12 = 4).
— Petal Layer 1 (Light Pink) — 12 Sculpted Petals :
Info :
Join lighter pink yarn with sl st at first marker. Each petal is formed over a repeat that uses FLO clusters to create a raised scallop; work petals into the base disc at marker positions. The base stitch count remains 48, petals are built on top.
Round 7 :
*At marker: sl st into marked st, ch1, (sc, hdc, 3 dc, hdc, sc) all in same marked stitch; sl st in next 3 sts to move to next marker; rep from * around to make 12 petals (work will use groups of 6-7 small stitches per petal across the base so base count remains formed by anchors)
Info :
When working petals, maintain a gentle tension so petals sit up from the center without curling in. If a petal seems too wide, pull the sl st placement slightly backward to tighten the base a bit.
Round 8 :
Rotate the work so petals face you. Working behind the petal (insert hook in first sc of petal base from back), join with sl st, ch1 and work 6 sc around the inner edge of each petal to define it; sl st to secure and move to next petal. Repeat around (12 petals)
Round 9 :
Work 1 sc in each sc across the petal inner edge (this will be approximately 72 sc if each petal inner edge gives 6 sc x 12 = 72). Count: 12 petals x ~6 sc = approx 72 sc (work evenly around)
Info :
If your stitch count differs, it's fine: the petals form a ring and the exact sc will vary slightly by tension. Ensure the ring is even and petals are upright before continuing.
— Petal Layer 2 (Light Pink) — Raised Outer Petals :
Round 10 :
Join light pink at the base between two petals from the previous round (behind the petals). Ch2 (counts as hdc), work into back loops of the petal inner edge: *(hdc, 2 dc, hdc) in next petal edge; ch1 and sl st into small gap between petals; rep from * around to form 12 outer petal arches. Approximate repeat count: 12 arches.
Round 11 :
Work into front loop of each arch to build thickness: *(sc, sc, hdc, 2 dc, hdc, sc, sc) in each arch; sl st to move to next arch. Repeat 12 times (creates a thick sculpted petal layer)
Info :
Pinch and shape each created petal as you go to achieve the rounded rose look. Block lightly if necessary to flatten or open petals slightly — steam lightly and reshape with fingers.
Round 12 :
Work 1 sc around each stitch of the petal band to tidy edges (approximate stitch count: 12 petals x ~7 sc = ~84 sc). Join with sl st and fasten off the light pink for now, leaving a tail to sew in if desired.
— Petal Finishing Ridges (Optional shading) :
Round 13 :
If you want to add a thin ridge for definition, join a shade of mid-pink and work 1 sc into the FLO of the petal outermost stitches around. This typically follows the petal row and will be approx (84) sc. Fasten off and weave ends.
Info :
These finishing ridges are optional but add depth on camera. Use a slightly darker or lighter pink for subtle definition.
— Leaf Set (Make 8 leaves) :
Info :
Leaves are worked individually in Leaf Green and are joined to the motif later. Make 8 leaves to fit between petal clusters; pattern below makes one leaf — repeat to make 8.
Leaf Round 1 :
With leaf green, ch6. In 2nd ch from hook: sc, hdc, 2 dc, hdc, sc in next, sl st to base of chain (creates a single leaf). Fasten off leaving tail for sewing.
Info :
Each leaf uses 6 chain foundation and creates a small, slightly cupped leaf which will be sewn under the petals between the petal anchors. Make 8 identical leaves.
Leaf Round 2 (optional extra fullness) :
For a fuller leaf, rejoin at base and work across the other side: sc, hdc, 2 dc, hdc, sc to mirror the first side, then sl st to base and finish. Leaves will be symmetrical and slightly domed.
Info :
Make 8 leaves. Block lightly or steam each leaf flat so they sit flush under the petals when sewn in place. Arrange leaves so their tips point slightly outward under the petal edges.
— Attaching Leaves and Securing Rose :
Info :
Position the 8 leaves between petal anchors around the base disc. Pin each leaf so the base of the leaf slips under the petal base. Turn the motif over and with a yarn needle and matching green tail, sew the base of each leaf to the base disc and the underside of the petal band with small, neat stitches.
Round 14 :
Once leaves are attached, flip motif to the right side, tidy any visible stitches by weaving ends and shaping petals again with fingers to ensure even spacing around the rose.
— Inner Join Round (Create foundation for square) :
Info :
Switch to background cream color. We will create a round of stitches that picks up between petal/leaf spaces and establishes even spacing for the shell rounds that form the square.
Round 15 :
Join cream yarn with sl st in any gap between petals, ch3 (counts as dc), *ch2, skip to next gap and work (dc, ch2, dc) in next gap*; rep from * around to create 12 dc clusters separated by ch2 sps. You should have 12 clusters and 12 ch2 spaces. Join with sl st to top of ch3.
Info :
This round establishes 12 corner-like segments for the later petal shells and also gives breathing room for the square round. The number 12 is convenient for dividing later into 4 corner groups of 3 clusters each.
— Shell Rounds to Square (Cream) :
Round 16 :
Ch3, turn and work (2 dc) into same space as joining, *in ch2 sp: (2 dc, ch2, 2 dc), in next cluster top: (2 dc) in each dc of cluster*; repeat sequence around, creating 12 shell clusters separated by ch2 spaces. This gives an emerging round of shells (total dc per shell cluster will be variable; overall visual count: 12 shell units). Join with sl st to top of ch3.
Info :
This round increases the work in a circular fashion while establishing shell units that will be expanded into corner groups to form a square in upcoming rounds.
Round 17 :
1 sc in each stitch and in each ch sp around to tidy the round and even out stitch counts (this will produce an even edging around the shell round). Join with sl st. (approximate stitch count varies; focus on evenness rather than absolute count)
Round 18 :
Change to working definitive shell-to-corner shaping. Identify 4 points opposite each other to become square corners: mark every 3rd shell cluster with a removable marker (12 clusters / 4 = 3 clusters per quadrant). Work shells normally in non-corner clusters and make corner clusters as (2 dc, ch2, 2 dc, ch2, 2 dc) to push the fabric outwards to square shape. Repeat around; you will have 4 larger corner shells.
Info :
Marking the corner clusters is important — these four areas receive the extra ch2 expansion to convert the round into a square over next 2-3 rounds.
Round 19 :
Work 1 sc in each stitch and ch sp across this entire round to flatten and distribute stitches evenly. Join. This helps the next round of shells sit squarely.
Round 20 :
Shell round: In non-corner shell: (2 dc, ch1, 2 dc) in each shell top. In corner shells: (2 dc, ch2, 2 dc, ch2, 2 dc). Repeat around and join. This builds out the sides and corners further.
Info :
At this stage your motif begins to show four rounded corners. Keep turning and checking your motif on a flat surface to make sure it starts to square up evenly.
Round 21 :
Ch1, sc in each dc and sc in ch spaces all the way around to tidy edges and equalize stitch counts. Join and fasten off cream for the moment.
— Convert Round Work into Square (Extra shells and spacing) :
Round 22 :
Change to cream yarn if changed. Join with sl st at the center point of any side (between corner clusters). Work: ch3 (counts as dc), (2 dc, ch1, 2 dc) in each side shell; at corners work (2 dc, ch3, 2 dc, ch3, 2 dc) to emphasize corner. This round widens sides and yields a more squared appearance. Join with sl st.
Info :
When increasing the corner spacing use ch3 instead of ch2 on this round to aggressively square out the motif if your work remains too round. Conversely, use ch2 for a subtler square.
Round 23 :
1 sc in each stitch around, placing extra sc in corner ch spaces to keep corners defined. Join with sl st. (counts will vary depending on ch choices; the goal is to have even sides and four clear corners)
Round 24 :
Work one round of 1 hdc in each st around to give the sides a slightly raised, flat surface for the final popcorn shell edging. Join and fasten off if you wish to change tension for edging.
Info :
At this point the square should be close to 12-14 cm across. If you want a larger square, repeat shell expansion rounds (similar to rounds 20-22) once more before edging.
— Decorative Shell Border (Cream) :
Round 25 :
Join cream yarn. *In each side space between corner clusters work (ch2, 3 dc, ch2, sl st) forming a petal-like shell around the sides; in corners work (ch3, 5 dc, ch3, sl st) to emphasize corner. Repeat around. Join.*
Round 26 :
Work 1 sc in each stitch around, placing 3 sc in the center dc of corner shells to help turn corners neatly. Join and fasten off.
Round 27 :
Optional rope-edge: With cream, join and work in BLO: 1 sc in each st around to create a subtle ridge; join and fasten off. This gives a neat finishing ridge you can use for joining squares later.
Info :
If you will join squares using the join-as-you-go method, skip the final fasten off and use the last round to join into previously made squares. Alternatively, leave tails to whip stitch squares together later.
— Alternative Edge for Bedspread (Raised Braid Border) :
Round 28 :
For a stronger outer edge that photographs beautifully, join a contrasting thin pink and work: *ch1, sc in each st for 2 rounds (twice)*; on final round work crab stitch (reverse sc) around to give a corded, neat edge. Join and weave ends.
Info :
Crab stitch gives a little spiral edge that helps the motif sit flat and framed against other squares in a bedspread. Use same color as outer cream for subtlety or a soft pink for definition.
— Join-as-you-go Option (for bedspread assembly) :
Round 29 :
If joining as you go: orient your new square next to an already-finished square. On the final round, when you reach the side that meets the existing square, instead of sl st in space, sl st through corresponding space on adjacent square to join. Work across entire side making matches at the shell points and ch spaces. Finish by completing the round to other side and fasten off.
Info :
Join-as-you-go requires careful pinning and matching of shell points. Use a tapestry needle to tidy join ends and to ensure identical tension between joined sides.
— Make-Up Rounds (Optional small textures for blanket look) :
Round 30 :
To add more texture between motifs, make small connecting motifs: chain 6 and join into ch2 spaces of square to create delicate picot chain links; weave tails through. This is decorative and optional.
Info :
These small connectors photograph nicely in a large spread and allow slight movement between motifs to prevent rigidity in blankets.
— Final Blocking and Finishing :
Round 31 :
Lightly wet-block each motif pinning to a square template to ensure straight edges. Use a warm iron or steam to set petals lightly if needed. Weave in all ends and trim close.
Info :
Blocking is essential for achieving the neat square edges seen in the photos and helps the petals flatten and sit uniformly across many motifs in a blanket or cushion cover.
— Summary of Parts (piece counts) :
Info :
Per motif you will work: 1 central rose disk (rounds 1-6), 2 sculpted petal layers (rounds 7-13), 8 leaves (leaf rounds x8), inner join rounds and shell rounds to complete the square (rounds 15-30). Repeat to create as many motifs as your project requires.
— Troubleshooting and Tips :
Info :
If the motif remains too circular after the rounds above, add one more round of expanded corner shells repeating Round 22 pattern until the layout squares up. If petals are too floppy, drop hook size by 0.25-0.5 mm for tighter, firmer petals on later squares.
Info :
To vary the look, change the number of petals by using 8 anchors instead of 12 — adjust leaf count accordingly (8 petals = 8 leaves). When making a full blanket, alternate motifs with plain granny squares for a calmer texture and less bulk.
Finishing this floral granny square feels so rewarding — like saving a little garden into yarn! The layered petals and sculpted leaves create a charming 3D effect that elevates any blanket or cushion. Each completed square is a tiny treasure with romantic vintage vibes. 🧶🌷 Display them as a bedspread, cushion set, or wall panel — they bring cozy elegance and handcrafted love to any room. Happy stitching! ✨