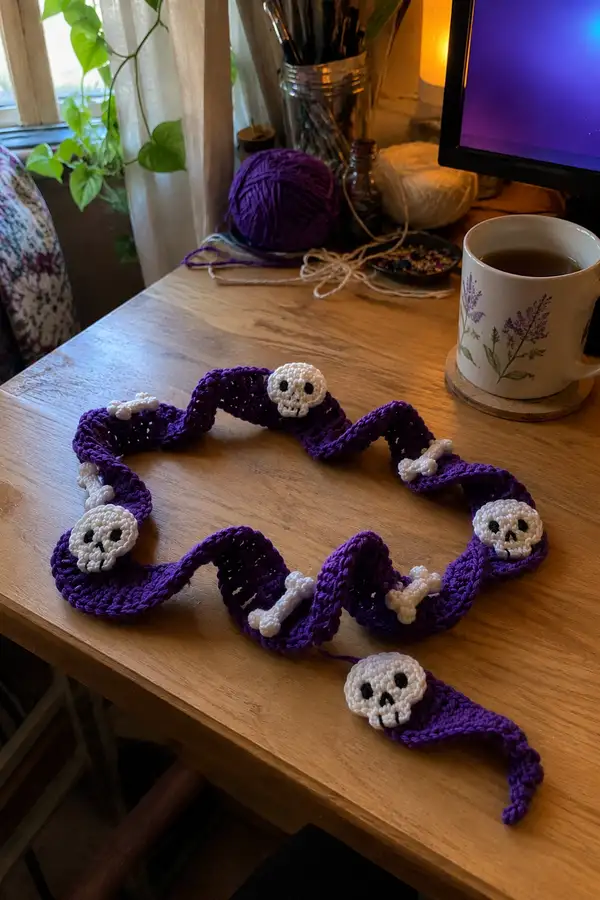
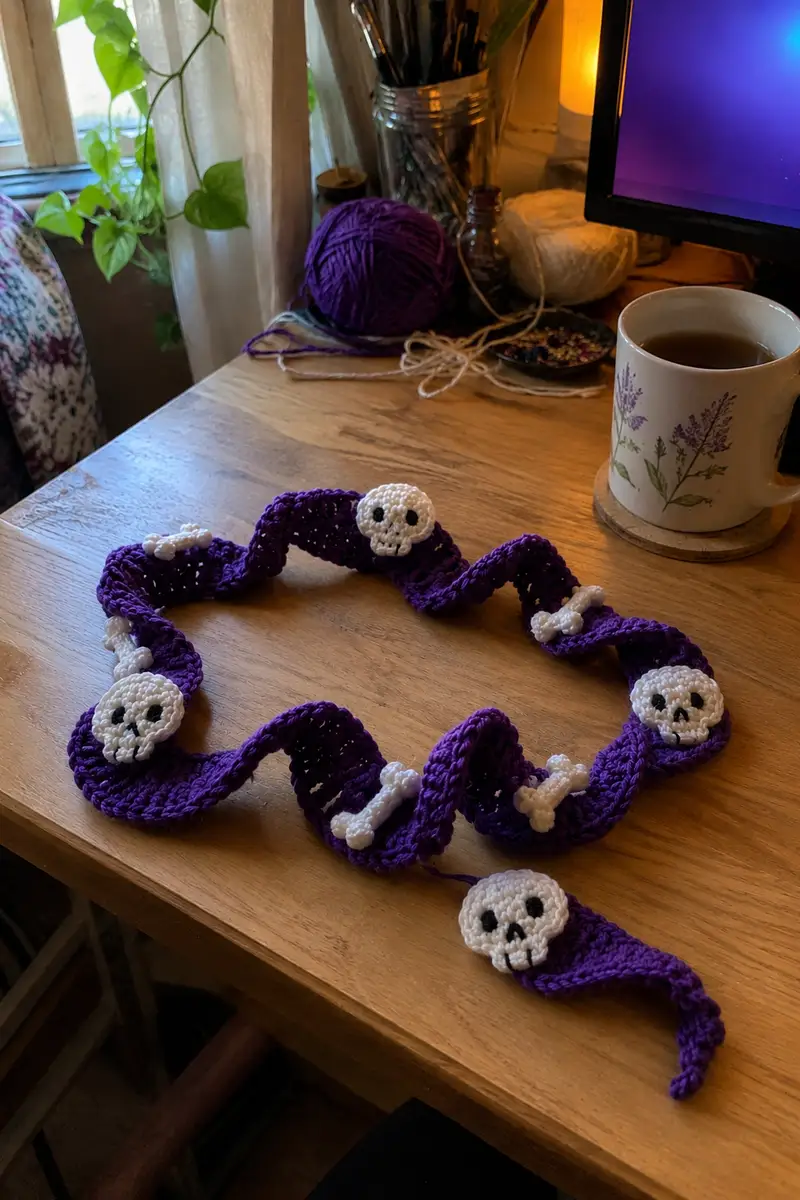
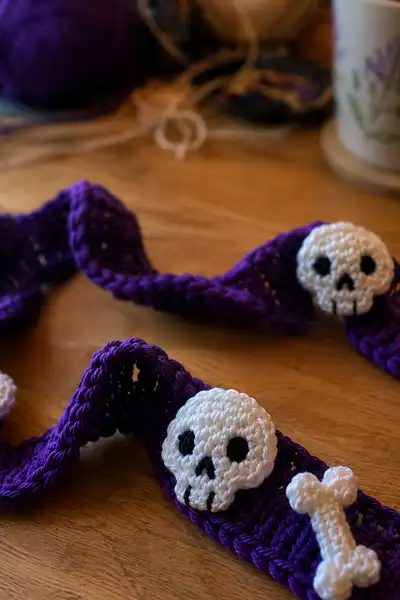
Create a spooky, twisty garland perfect for Halloween parties or moody seasonal decor. This pattern features a long purple spiral ribbon with crocheted white skull and bone appliques sewn along the length. The spiral band is worked in the round and shaped to create the wavy, twisted effect seen in the photos, while skulls and bones are flat appliques with embroidered eyes and nasal details.
Progress Tracker
0% Complete
— Garland Spiral Strip (the long purple twist) :
Notes :
This long spiral band is worked in the round as a narrow tube and then shaped into a twisty spiral. You will crochet a tube with 48 stitches circumference and maintain that for many rounds to obtain length. The finished tube will be manipulated into a spiral by pressing and lightly blocking or by twisting while stitching appliques. Use a 3.5mm hook for an airy but stable fabric.
Round 3 :
(1 sc, inc) x 6 (18)
Round 4 :
(2 sc, inc) x 6 (24)
Round 5 :
(3 sc, inc) x 6 (30)
Round 6 :
(4 sc, inc) x 6 (36)
Round 7 :
(5 sc, inc) x 6 (42)
Round 8 :
(6 sc, inc) x 6 (48)
Info :
At this point your tube measures roughly 14-18 mm across depending on yarn and tension. Place a stitch marker in the first stitch of each round to track round starts as you proceed for length. The tube circumference will remain 48 sts for the next many rounds.
Round 9-18 :
1 sc in each st (48)
Info :
Work evenly and check for any accidental increases or decreases every 8-10 rounds. Keep tension consistent. If you prefer a slightly flattened spiral, switch to 2 sc in each st FLO for two rounds to create a ridge before continuing even rounds.
Round 19-28 :
1 sc in each st (48)
Info :
Length planning: measure the length of these rounds as you go. For a garland approximately 140-160 cm long you will likely need about 60 rounds at 48 sts each. Adjust rounds to the desired length. You can always make a longer tube and trim by tucking in ends.
Round 29-38 :
1 sc in each st (48)
Round 39-48 :
1 sc in each st (48)
Round 49-58 :
1 sc in each st (48)
Info :
If you notice the tube becoming too tight or too loose, try switching hook size for the last section to fine-tune final fabric. Keep the tube unstuffed and flexible; this allows you to twist and shape it later.
Round 59-64 :
1 sc in each st (48)
Info :
When you reach your desired length, fasten off leaving a long tail for neat finishing and joining. Weave the tail through the last round to close and make a small tidy end. If you want a tapered end for a nicer finish, decrease over the last 6 rounds as follows: (6 sc, dec) x 6 = 42, (5 sc, dec) x 6 = 36, (4 sc, dec) x 6 = 30, (3 sc, dec) x 6 = 24, (2 sc, dec) x 6 = 18, (1 sc, dec) x 6 = 12; fasten off and weave tail in.
Info :
To create the spiral effect seen in the photo: hold the tube in your hands and gently twist it along its length so loops form. Pin on a blocking mat or shape on a flat surface. Steam lightly with an iron held at a distance or spritz lightly with water and let dry in shape. Alternatively, you can create the curl by crocheting small subtle ridges: every 6 rounds make a 1-round BLO ridge (1 sc in each st BLO) to create a twist bias. The method below explains adding those ridges as an option.
Alternative Round Option 1 :
To encourage curling, after Round 12: Round 13: 1 sc in each st BLO (48); Round 14-18: 1 sc in each st (48). Repeat every 12 rounds.
Info :
Using BLO rounds every so often creates an internal tension difference that encourages the tube to curl into a spiral naturally without blocking.
— Skull Applique (make 5-8 or as many as you like) :
Notes :
These skulls are slightly domed flat appliques worked in the round. They contain surface embroidery for eyes and nose; you may choose to use small felt circles or safety eyes for larger projects, but embroidered black yarn yields the crisp look in the photos. Work skulls with a 3.0mm hook for a firm small fabric.
Round 3 :
(1 sc, inc) x 6 (18)
Round 4 :
(2 sc, inc) x 6 (24)
Info :
By Round 4 you have a small disc forming. Ensure your increases are evenly spaced and your tension is snug so the skull remains flat. If you prefer a slightly larger skull, add an increase round (3 sc, inc) x 6 to make 30 sts before moving to shaping.
Round 5 :
1 sc in each st (24)
Round 6 :
(3 sc, dec) x 6 (18)
Round 7 :
1 sc in each st (18)
Round 8 :
(2 sc, dec) x 6 (12)
Info :
Stop here if you want a flatter skull. For the slightly domed skull seen in the picture, continue with shaping that adds a small chin and jaw detail and raises the brow area by crocheting forward-facing scallops before finishing.
Round 9 :
(1 sc, dec) x 6 (9)
Info :
Use a tiny amount of stuffing (about a pea sized amount) to make the skull slightly domed if desired. Place stuffing very carefully with a stuffing tool or blunt pencil tip. Do not overstuff; skulls should remain mostly flat to sew cleanly onto the garland strip.
Round 11 :
Fasten off leaving long tail for sewing. Weave tail in around edge for shape reinforcement (optional).
Info :
Embroider facial features using black yarn or embroidery thread. Position eyes at approximately the same horizontal level and spaced by 3-4 stitches depending on skull size. Use simple satin-style filled circle stitches for eyes and an upside-down 'v' or small triangle for the nose. Three vertical short stitches at the bottom center create a 'teeth' effect like in the photo.
Embroider Eyes :
Thread black yarn on a yarn needle, insert from the back of the skull to place the first eye then create 6-8 small horizontal satin stitches to fill a round eye dot. Repeat for second eye symmetrically. Secure ends on the back and weave through 6-8 stitches before trimming.
Embroider Nose & Teeth :
For the nose, make an inverted small triangle using three short stitches meeting at a point. For teeth, embroider three small vertical dashes under the nose on the bottom center edge. Use small, tight stitches to keep the embroidery flat.
Info :
If you prefer not to embroider, use small black felt circles or tiny safety eyes (4-6 mm) before stuffing and closing skulls; if using safety eyes, secure them before any stuffing and be aware these are not recommended for projects intended for small children.
— Small Skull Variation (make several for a dotted look) :
Round 3 :
1 sc in each st (12)
Round 4 :
Fasten off leaving tail. Embroider two black dots for eyes and a small stitch for nose (no stuffing). (12)
Info :
These tiny skulls are perfect to tuck in between larger skulls and bones and add visual rhythm to your garland.
— Bone Applique (Make multiple, roughly 8-12) :
Notes :
These bones are worked in the round but remain almost flat. They feature a central narrow shaft and two rounded knobs at each end. Work with white yarn and 3.0mm hook for nice definition.
Round 2 :
Inc in each st (12)
Round 3 :
(1 sc, inc) x 6 (18)
Round 4 :
1 sc in each st (18)
Round 5 :
Form left knob: ch 4, sl st into next st on bone center; ch 1, turn, 3 sc in chain, fasten off and sew knob to center. (18 + knob)
Info :
Repeat for right knob symmetrically: make a ch 4 loop and 3 sc cluster to form a rounded knob. Alternatively, make two separate small 6-sc small discs and attach them to either end of a 6-sc long center strip.
Alternative Bone Method :
Create bone shaft: ch 7, sc in 2nd ch from hook across (6 sc), turn and sc back across to work both sides to make a flat strip about 6 sts wide; attach discs at ends made from 6 sc in mr (6) fastened off and sewn into place.
Round 6 :
Weave ends and flatten bone. No stuffing needed.
Info :
Ensure both knobs are even in size for a clean look when sewn onto the spiral strip. Press lightly with a damp cloth to flatten if necessary.
— Decorative Edging & Ridges (Optional) :
Round 1 :
Attach purple yarn to edge of spiral's last round. Ch 1, sc evenly around tube edge, working through both loops to create a decorative ridge (48)
Round 2 :
1 sc in each st (48)
Info :
Creating an edging will give your spiral more definition and helps the garland maintain a crisp silhouette. If you added BLO ridges earlier, you can accentuate them with a contrasting slip-stitch line.
— Assembly & Placement :
Info :
Plan your appliques spacing: in the sample photo, skulls are placed about every 18-22 cm with one bone between each skull pair. Measure along your spiral tube and mark with pins or removable tailoring chalk where each skull and bone will be sewn. Balance the composition so heavier areas with multiple appliques do not sag.
Step 1 :
Position skulls: place a pinned skull over the spiral, aligning the bottom of the skull with the saddle point of a twist so the skull sits prominently. Use large basting stitches with white yarn to hold skull in place temporarily.
Step 2 :
Sew skull: using the long tail left earlier, sew the skull to the tube with a whip stitch close to the edge; take care to catch the tube fabric but not the inner hollow, and keep stitches small and even for invisibility.
Step 3 :
Attach bones: position bone appliques in the valley areas between skulls, or along the crest of a spiral for contrast. Use small whip stitches in white yarn to secure each bone at three points: left knob, right knob, and center shaft. Avoid pulling too tight so bones remain slightly raised for dimension.
Info :
To make appliques more secure for outdoor or high-use displays, couch a second invisible thread along the underside of the tube and tack down each applique's perimeter with clear nylon thread in addition to the white yarn. Double-stitching ensures durability.
Step 4 :
Embroider additional accents: using black yarn, add a few short vertical stitches to the skull mouths and small dot accents around the band if desired. Weave all tails into the inside of the tube or along the underside so they are hidden when the garland is hung.
Step 5 :
Create hanging loop (optional): at each end of the spiral, leave a 15-20 cm tail and fold it to create a loop; stitch the loop securely into the tube ends by sewing around the folded tail several times so it is anchored. Alternatively, attach a small ribbon loop for hanging.
Final Info :
Shape garland: once all appliques are sewn, arrange the spiral on a flat surface and tweak twists to spread skulls evenly. For long-term display, you can lightly steam the spiral while pinned to set shape. Hang and enjoy.
— Optional: Make the Spiral with Lace Holes for a More Delicate Look :
Round 1 :
Work the same initial tube to 48 sts. On even rounds, replace 4 sc evenly spaced with (ch 2, skip 2 sts, sc) to create small eyelets. On subsequent round, sc into ch-2 spaces to stabilize. This creates airy pockets that catch light in a pretty way.
Info :
Eyelets will slightly shorten the visible length of the spiral, so factor that into your initial length plan. Eyelets are decorative and pair well with tiny LED fairy lights woven through the spiral.
— Troubleshooting & Tips :
Info :
If your spiral refuses to curl, add more BLO ridges spaced every 6-8 rounds or steam-block while pinned in shape. If your skulls look too domed, remove a small amount of stuffing or work one fewer decrease round to flatten. If appliques flip over after sewing, reinforce with a second row of small catches anchored into the inside of the tube.
This purple spiral garland makes a dramatic and playful addition to Halloween decor — full of texture, personality, and handmade charm. The twisty purple tube provides motion while the white skulls and bones create a stark, spooky contrast. I love that it's customizable in length and spacing so you can tailor it to your space. Display it over a mantel, along a staircase, or as a party backdrop. Happy crafting and enjoy the eerie cuteness! 🧶💀