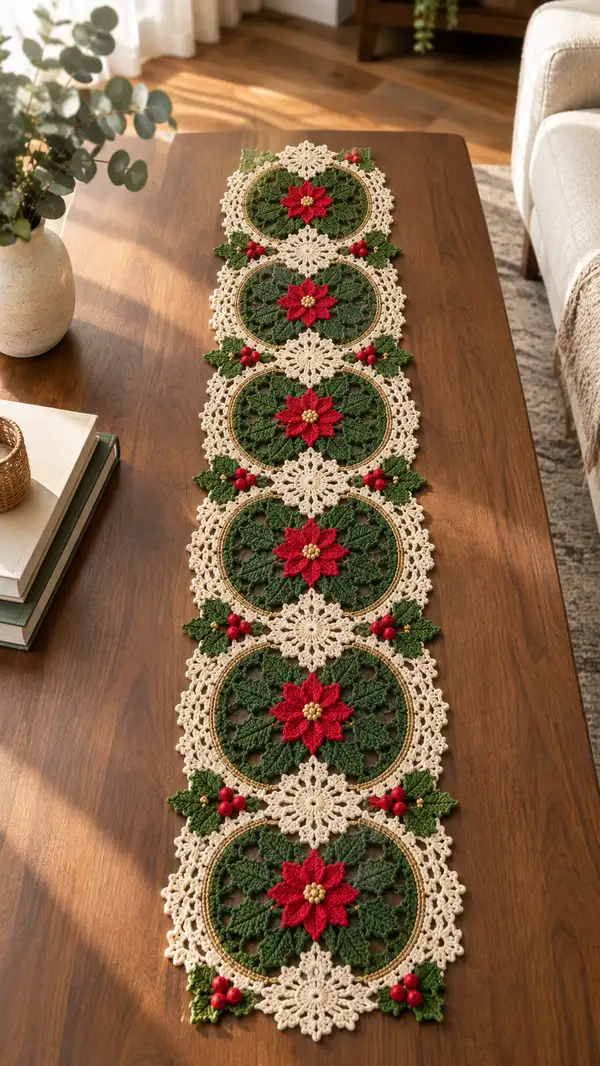
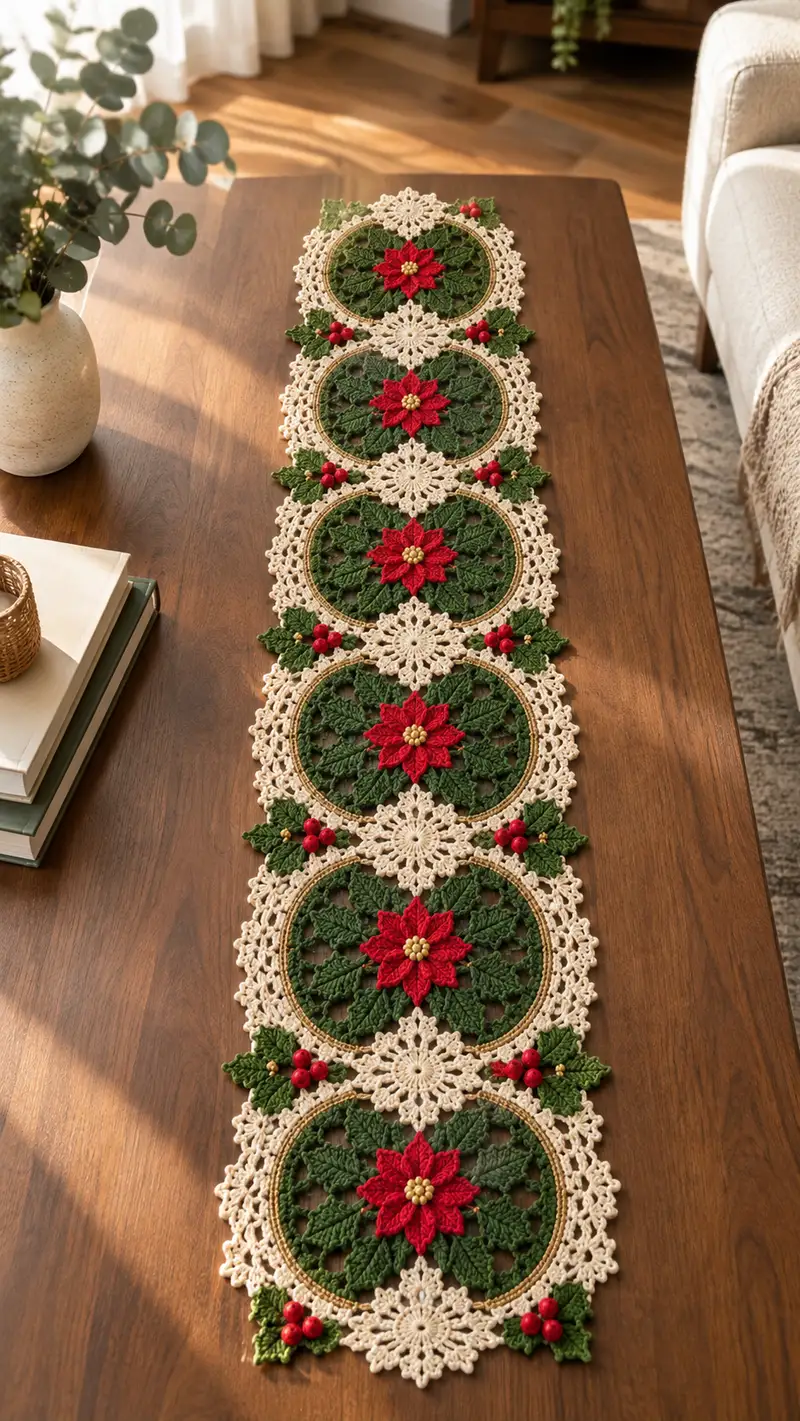
Create a stunning holiday table runner made from linked circular motifs featuring layered red poinsettia flowers, deep green leaves, delicate cream lace, and gold accent rings. This pattern includes detailed stitch-by-stitch rounds for each motif, holly clusters, and join-as-you-go finishing. The finished runner is elegant, richly textured, and perfect as a festive centerpiece or seasonal gift.
Progress Tracker
0% Complete
— Poinsettia Seed Disc :
Round 1 :
6 sc in magic ring (6)
Round 3 :
(1 sc, 1 inc) x 6 (18)
Round 4 :
(2 sc, 1 inc) x 6 (24)
Round 5 :
(3 sc, 1 inc) x 6 (30)
Round 6 :
1 sc in each st (30)
Info :
This small center will be covered with yellow seed bobbles. Work tightly to keep a firm, round center. Use mustard/yellow yarn for seed cluster next.
Round 7 :
*(ch1, bobble) in next st, sl st in next st* rep around (15 bobbles, alternating sl st anchors) (30 total stitch anchors)
Round 8 :
Fasten off leaving long tail for sewing. Arrange bobbles into a small dome and secure to the center of the poinsettia petal assembly. Weave tail through back to secure.
Info :
Seed disc is intentionally small and slightly domed; the bobbles add texture and act as a central focal point. If you prefer beads, sew 6 small beads in a circular cluster instead.
— Poinsettia Petal (Make 8) :
Round 1 :
With red yarn, ch 6, join with sl st to first ch to form a small ring (6)
Round 2 :
Ch1, 8 sc into ring then join with sl st (8)
Round 3 :
Ch2 (counts as first hdc), 2 hdc in next st, 3 dc in next st, 2 hdc in next st, ch1, sl st to base. Fasten off leaving tail for sewing (petal forms a pointed oval)
Info :
Each petal is worked flat and seamed to the base circle later. Make 8 identical petals. Position petals around center evenly — use stitch markers to mark 8 anchor points on the green backing circle before sewing.
Round 4 :
Optional extra shaping: rejoin red along petal edge: *sl st in each st across petal edge to create a subtle raised ridge for definition* then fasten off.
Info :
Sew petals slightly overlapping: position one petal every 48/8 = 6 base anchors if your backing ring has 48 anchor stitches. If your backing ring differs, count evenly spaced points around the center.
— Poinsettia Assembly :
Info :
Arrange 8 petals around the seed disc; the petals should slightly overlap in two layers: inner shorter petals and outer longer petals. If making layered petals, make 8 inner (shorter) and 8 outer (slightly larger) petals. Sew securely with matching red yarn, anchoring at a single stitch point on the green backing circle. Tuck seed disc over petal bases and secure.
Round 1 :
Place assembled petals onto the center of the green motif (worked in next section). Sew with small stitches around the seed disc to hold petals flat and symmetrical.
Info :
Use pins to hold petals in place on the motif while you check symmetry. Sew from the back to the front around the base of each petal to reduce visible stitches on the front face.
— Green Background Circle (Make one motif main disk) :
Round 1 :
With green yarn, 6 sc in magic ring (6)
Round 3 :
(1 sc, 1 inc) x 6 (18)
Round 4 :
(2 sc, 1 inc) x 6 (24)
Round 5 :
(3 sc, 1 inc) x 6 (30)
Round 6 :
(4 sc, 1 inc) x 6 (36)
Round 7 :
(5 sc, 1 inc) x 6 (42)
Round 8 :
(6 sc, 1 inc) x 6 (48)
Info :
This round should give you a sturdy circular base with 48 sts — the typical anchor count for 8 petals. Adjust increases if your gauge produced more/less stitches so the final count divides evenly by 8.
Round 9 :
1 sc in each st around (48)
Round 10 :
1 sc in each st around (48)
Round 11 :
*Ch3, sk 1 st, sc in next st* rep around creating 16 ch3 loop-spaces (48 anchors) (48)
Info :
These ch3 loop-spaces will serve as subtle negative spaces between the leaf spokes. You will work textured leaf spokes in subsequent rounds anchored into these loops and base stitches.
Round 12 :
Work 8 leaf spokes: *in first anchor sc: (sl st, ch6, (dc, tr, dc) in ch6 loop, sl st into next sc anchor), move to next spoke anchor* rep 8 times. This builds a raised spoke for leafy texture. Keep counting to maintain 8 spokes.
Round 13 :
1 sc in each st and sl st across spoke anchors to tidy base (48)
Info :
Leaf spokes are intentionally three-dimensional. Use a slightly looser tension on the stitches forming the leaf body so they lay flat and textured rather than curling.
Round 14 :
Switch to front post technique to start leaf shaping: *fpdc around first dc of spoke, hdc in next, sc in base anchor* rep around to create a raised leaf base (48)
Round 15 :
*(ch4, 3 tr cluster in next ch space, ch4, sl st to form scallop) anchored over each spoke tip* rep 8 times (48 anchors remain)
Round 16 :
1 sc in each st around (48)
Info :
Start shaping more detailed leaf shapes now: for each of the 8 spokes, you will work layered leaf leaves forming a textured star of leaves. Make sure each leaf assembly is mirror-symmetric on both sides of its spoke.
Round 17 :
*(In next spoke area) ch2, 2 hdc, 3 dc, 2 hdc, ch2, sl st to the spoke base* rep 8 times to form primary leaf lobes (48)
Round 18 :
1 sc in each st around to secure leaf lobes (48)
Round 19 :
*(BLO) 1 sc in next 4 sts, (dec) to tidy leaflet base* rep 8 (40)
Info :
Working in BLO on this round creates a subtle ridge that makes leaves sit on top of the background, giving depth when petals are added later.
Round 20 :
1 sc in each st (40)
Round 21 :
*(ch5, skip 3, sl st to next) rep around to form decorative loops between leaves (8 loops)
Round 22 :
Work into loops from previous round: *(sc, hdc, 3 dc, hdc, sc) in each loop* rep 8 (creates decorative leaf interspaces)
Round 23 :
1 sc around edges to tidy up (40)
Info :
The green circle now forms a star of textured leaves radiating from the center. Adjust the number of dc clusters if your base stitch count varies; aim to have eight clearly defined leaf spokes.
Round 24 :
Fasten off leaving long tail for joining to gold ring round. Block this green circle to a target diameter (approx 8–9 inches / 20–23 cm) before continuing.
— Gold Accent Ring :
Info :
Using metallic gold thread held together with a strand of cream if desired, working into the edge of the blocked green circle, create a slim decorative ring. Carry the gold thread carefully to avoid twisting.
Round 1 :
Join gold with sl st anywhere on outer edge, ch1, *sc evenly around working 1 sc into every other edge stitch to create a slim ring* (approx 40 sc depending on green base) (40)
Round 2 :
Ch2, *1 hdc in each sc around to form a raised gold band* (40)
Round 3 :
Optional: work a surface chain or reverse sc row over the gold band to emphasize shine; otherwise fasten off and weave in ends. Ensure metallic thread is secure and not pulled too tightly to avoid puckering.
— Cream Lace Outer Motif :
Round 1 :
With cream yarn, join with sl st to any point on gold band, ch3 (counts as dc), 11 dc into space evenly around to create a cream ring base (12 dc total) (12)
Round 2 :
*(ch4, sk 1 dc, sl st in next) rep around to form 12 ch4 picot loops for outer lace foundation (12 loops)
Info :
This cream ring will create the filigree lacy border visible between motifs and at the runner edges. Work with slightly looser tension so the lace lays flat and delicate.
Round 3 :
Into each ch4 loop: (sc, hdc, 5 dc, hdc, sc) to make a scalloped petal. Rep 12 times (maintains 12 scallops)
Round 4 :
Ch2, *(1 dc, ch2, 1 dc) into top of each scallop, sl st between scallops* rep around (12 2-dc clusters)
Round 5 :
Work a picot lace band: *ch5, sl st into base of cluster, ch3, sl st into next* rep to create open lattice that will be used to join motifs (12 lattice openings)
Round 6 :
1 sc in each stitch and sl st across to tidy the inner edge next to gold band. Fasten off leaving long tail for join-as-you-go (approx 12 sc anchors)
Info :
The cream motif should form a flat lacy rosette; blocking at this stage highlights the scallops and keeps your motifs consistent. Mark the top center scallop — this will align with the join points between motifs.
Round 7 :
Optional extension for subtler texture: rejoin cream at scallop peaks and work *picot edging (ch3, sl st) across each scallop* to create additional lace points.
Round 8 :
Fasten off and weave ends. Make as many full motif assemblies (green + gold + cream + assembled poinsettia) as needed for your runner length (image shows 5 linked motifs). Ensure each motif is blocked to identical diameter before joining.
— Holly Leaf (Make multiples) :
Round 1 :
With green yarn, ch6, sl st to first ch to form ring, ch1, 8 sc into ring, sl st to join (8)
Round 2 :
Ch2, (2 hdc, 3 dc, 2 hdc) in first sc to form center of leaf, sl st to next sc; repeat to create a small pointed holly leaf (4 mini-leaves per leaf motif). Fasten off leaving tail for sewing.
Info :
Holly leaves for the runner are small triple-lobed leaves placed at the joins. Make 2 leaves per join (one mirrored), and optionally press with a light steam to set shape.
Round 3 :
Optional: embroider slightly raised veins using surface slip stitches (sl st in FLO) with a slightly lighter green to mimic holly texture.
— Berry (Make many) :
Round 1 :
With bright red yarn, ch2, 6 sc in 2nd ch from hook (6)
Round 2 :
Work 6 bobble stitches into each sc around to make a small raised berry, or simply sew small red beads. Fasten off leaving tail for attaching.
Info :
Berries are made as small textured bobbles and sewn in clusters of 3 at each motif join. If using beads, secure with fabric glue plus a few sewn passes for safety and durability.
— Joining Motifs (Make 4–6 motifs and join) :
Info :
Decide your desired runner length; the sample shows 5 motifs linked lengthwise. Join-as-you-go (JAYG) method is recommended: join motif B to A on Round 3 of cream lace by slip stitching through corresponding picot loops to form flat, invisible seams. Pin motifs aligned before joining.
Round 1 :
Prepare first motif fully and block. Hold second motif behind first, right sides together. On motif 2, rejoin cream at first join picot, ch1, sl st through corresponding picot on motif 1, ch1, sl st to next; continue across 3–4 join points at each side of motif repeat to create a secure seam (approx 3–4 sl sts per join point).
Round 2 :
As you join motifs chain small connecting loops (ch3) and secure into matching loops on the adjacent motif; this forms the delicate inter-motif chain visible between main circles. Maintain equal tension so motifs lie flat.
Info :
Each full join between two adjacent motifs uses three symmetrical cream scallops — center join and two side points — which visually form the lacy medallions between circles shown in the image.
Round 3 :
After joining each pair, secure ends, weave in tails on the back. Repeat join across the length, assembling a straight column of motifs. Block again once joined to ensure flat even runner.
Round 4 :
Placement of holly: sew two holly leaves at each join location (one on either side of the join's center scallop) then sew three berries in a small triangular cluster adjacent to the leaves. Use gold seed beads at berry centers if desired.
Info :
When sewing leaves and berries, stitch through motif lace openings to hide sewing stitches. Space clusters evenly between gold rings — typically between each pair of adjacent motifs there are two small clusters (top & bottom). Use matching thread colorless/hidden when possible.
— Edge Finishing and Extra Lace Border :
Round 1 :
With cream yarn, join at one outer-most scallop peak of the assembled runner. Ch1, sc evenly across the exposed edge of the cream scallops to neaten and create a starting base for the final lace border (approx 6–8 sc per motif-side scallop).
Round 2 :
*(ch5, sl st in 3rd ch from hook to create picot, sl st to next sc) across each scallop edge* rep to produce delicate points along the runner edge.
Round 3 :
Into each picot point: (sc, hdc, 3 dc, hdc, sc) to create a repeating outer scallop. Fasten off and weave ends.
Info :
Edge rounds create the classic lace trim that frames the runner. Keep stitch counts consistent and block the runner after edging so the scallops are uniform and lie flat.
Round 4 :
Optional corner finishing: if your runner will hang slightly over the table ends, add an extra triangular lace drop at each end by working 3–4 additional lace scallops centered on the end motif. See end-of-runner motif instructions below for symmetry.
— End Motif Symmetry and Extra Lace Drops :
Round 1 :
To finish runner ends evenly, pick a central cream scallop on the last motif and work a centered 3-point drop: ch6, (sc into base, ch3, 3 dc cluster, ch3) rep 3 and sl st back to base to form a triangular pendent of lace. Repeat on both ends.
Info :
These drops echo the delicate medallions seen between the main circles and balance the composition. Keep both ends matched by counting scallop peaks and marking the central scallop with a removable marker before working drops.
— Final Assembly and Finishing Touches :
Round 1 :
Sew the assembled poinsettia (petal assembly + seed disc) to the center of each green ring: anchor at the base of each petal using small whip stitches to the green background stitches, ensuring petals are evenly spaced.
Round 2 :
Attach 2 holly leaves and a cluster of 3 berries at each join: position leaves so they slightly overlap gold ring edge and cream lace; sew berries tight to leaves' base. Repeat for every join location as pictured.
Round 3 :
Weave in all ends on the reverse side of the runner, using a yarn needle. Trim close to the fabric and reweave any remaining tail for security.
Round 4 :
Block completed runner: spray lightly with water and pin to blocking board, stretching gently to straighten scallops and centers. Let dry fully for a crisp, even finish.
Info :
Final blocking is essential for a polished look — motifs shaped consistently will give the runner professional symmetry. If using metallic thread, do not steam; use only light steam-free blocking and avoid high heat.
— Notes and Gauge :
Info :
Gauge is not critical for motif assembly, but consistency is: each motif should be blocked to the same diameter (approx 8–9 in / 20–23 cm) to allow seamless joins. If your motifs are larger/smaller adjust hook size and reblock before joining.
Info :
Make a test motif first to confirm gauge and motif diameter. Keep a reference motif pinned while making subsequent motifs to visually check size. Frequent blocking and consistent tension will ensure identical pieces.
This beautiful table runner brings classic holiday charm to any table with layered poinsettias, rich green leaves, and delicate cream lace. Each motif is like a tiny work of art, coming together to create a timeless centerpiece you will be proud to display. The pattern's modular approach lets you make the runner as long or short as you desire. 🧶✨ Enjoy the process of creating something heirloom-quality that will brighten holidays for years to come! 🎄