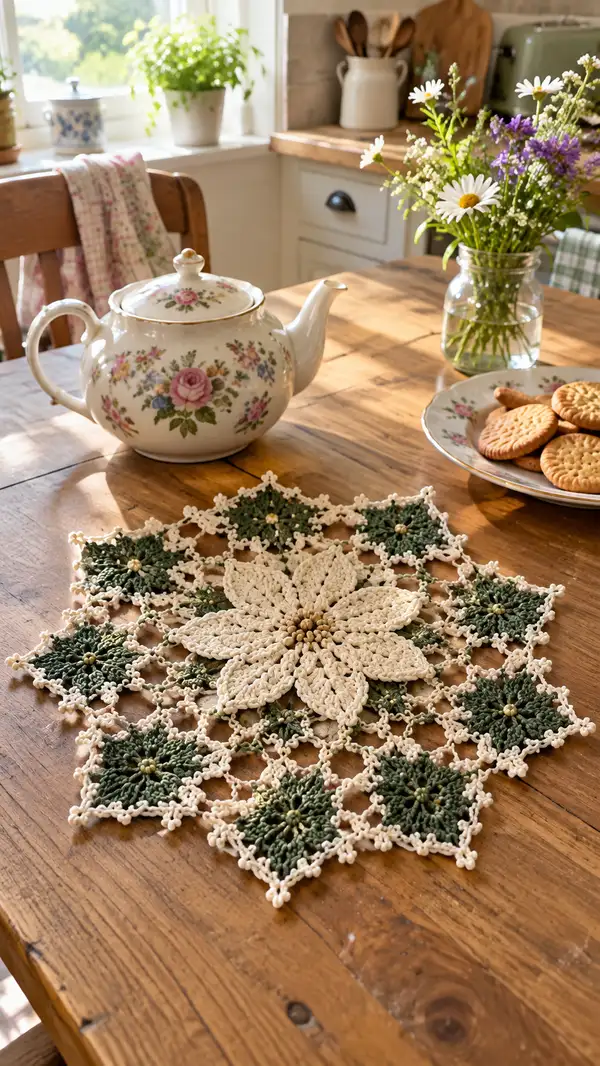
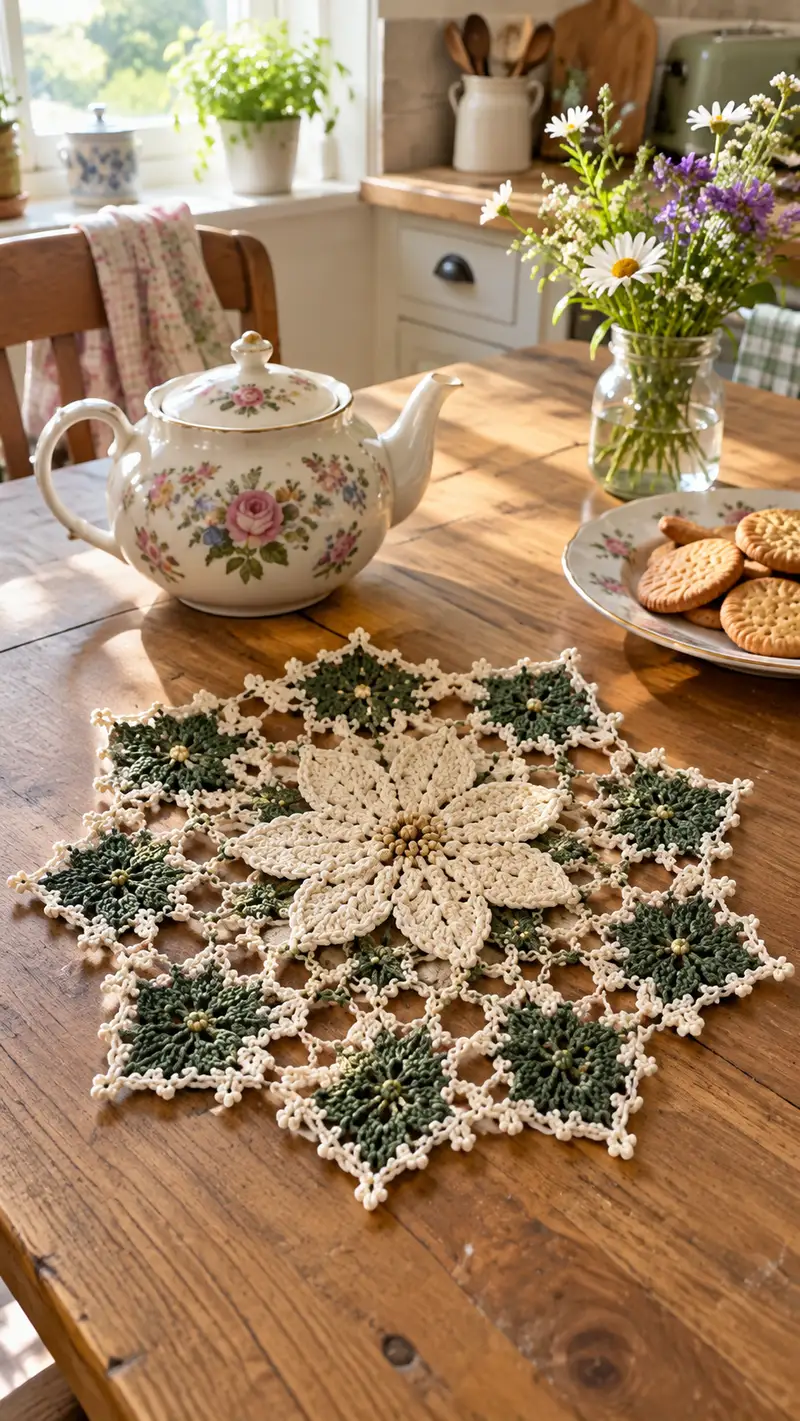
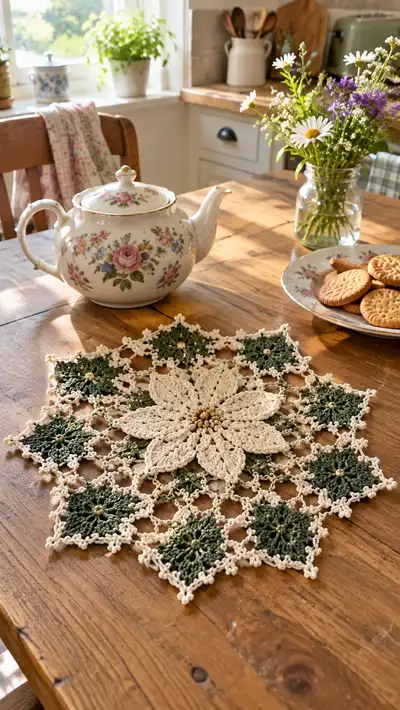
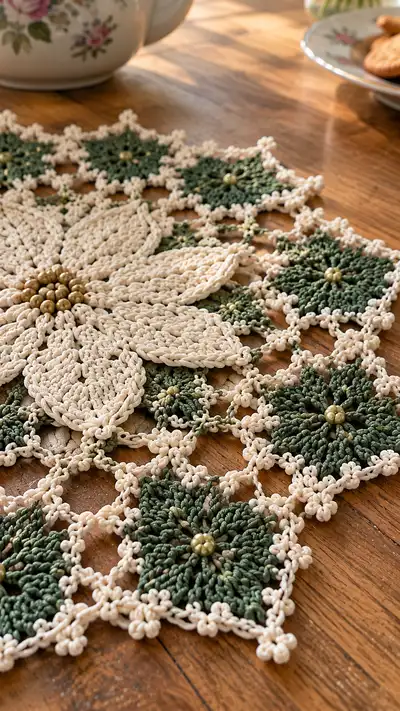
A vintage-inspired lace table centerpiece featuring a raised cream poinsettia surrounded by deep green square floral motifs and delicate cream lace joins. This elegant piece uses cotton or cord-weight yarn, picot edging and bead accents for a classic holiday or year-round centerpiece. The pattern includes step-by-step motif instructions, joining diagrams, and finishing tips to create the layered, textured look shown in the photos.
Progress Tracker
0% Complete
— Materials & Gauge :
Info :
Suggested gauge: Using 3.5mm hook with the specified cotton cord, center flower from tip-to-tip measures approximately 12.5-13 inches (32-33 cm) across. Overall finished centerpiece (including outer border) measures approximately 15-16 inches (38-41 cm). Adjust hook or yarn to change final size.
Info :
Notation: US stitch terms used. Work motifs flat unless otherwise specified. Beads are added as you go—see bead attachment Info for each motif.
— Center Flower (Work as single flower with 8 petals) :
Round 1 :
Make a magic ring. Work 8 sc into ring. Pull tight. (8)
Round 2 :
Inc around: (2 sc) x 8 = 16 sts. (16)
Round 3 :
(1 sc, inc) x 8 = 24 sts. (24)
Round 4 :
(2 sc, inc) x 8 = 32 sts. (32)
Info :
The 32-st round sets up eight segments of 4 stitches each for petal placement. Use stitch markers to mark every 4th stitch (8 markers) to find the center of each petal easily.
Round 5 :
1 sc in each st around. (32)
Round 6 :
*1 sc in next 2 sts, ch 8, skip next 2 sts, sc in next st; rep from * around to create 8 chain loops for petal bases. Ends: sl st to first sc. (32 plus 8 ch-loops)
Info :
Each ch-8 loop will be used to build a petal. Keep loops loose but even. Place a marker at the first ch of each loop if needed.
Round 7 :
Work first petal into first ch-8 loop as follows; rep for each petal (work petals one at a time or work in sequence around): Join yarn into loop, ch1, sc, ch2, (3 dc, ch2) x 3, sc. This produces a petal base with 9 main stitches (per petal). Repeat for all 8 loops. (72 total worked-stitches around when counted as 9x8; petals are independent so overall count not an even continuous round.)
Info :
When crocheting each petal, keep stitches slightly stretched vertically to encourage a raised petal. Work petals on top of the center so they sit layered above previous rounds.
Round 8 :
Petal shaping round 2: In each petal, sl st to first sc, ch1, (hdc, dc, tr, puff1) into the first dc of the petal, continue along petal working (dc, tr, puff1, tr, dc, hdc) to form a tapered shape, ending with sl st to base sc. Repeat for all 8 petals. (8 petals shaped)
Info :
Puff stitch definition: yarn over, insert hook, yarn over, pull up loop (four times), yarn over and pull through all loops, ch1 to close puff. Use consistent tension on puff stitches for even petals.
Round 9 :
Petal round 3 (edge): With cream, ch1 along base into each petal edge work 6 sc evenly around each petal edge to create a thick border; sl st to join between petals. Each petal edge will measure approximately 6 small sc; full set equals approx 48 sc visible. (48 bordering sc around petals)
Round 10 :
Petal ridge: Working in FLO of petal-edge sc only, 1 sc in each st (48). This creates a defined ridge around petals.
Info :
At this stage, the flower center should be stiff and raised. Light blocking helps petals keep shape. If you wish a stiffer finish, starch lightly before final assembly.
Round 11 :
Base round under petals: Return to inner base between petals, join yarn between petals, ch3, (2 dc, ch2, 3 dc) in the small gaps to create arches under each petal for visual separation (8 arch segments). This increases outer edge that will anchor the green motifs. (8 arch clusters)
Round 12 :
Work sl st and picots around the newly formed arches: *sl st into first dc of arch, ch3, sl st in 3rd ch (picot), sl st across arch; rep 8 times to create decorative little points under each petal.*
Info :
Secure the petal bases with small whip-stitches of yarn under each petal if you prefer extra dimensional stability. Add 7-9 small round beads to the very center of the flower now: sew beads in a compact cluster with a short length of strong thread so they sit firmly against the centre. Use a beading needle and weave thread through several stitches and beads to lock cluster.
Round 13 :
Finish internal center: Work 1 sc between petal bases around to tidy inner ring. (8 sc if placed between base arches)
Info :
Fasten off, leaving approx 18" tail for sewing the flower to the joined motif frame later. Weave tail into reverse side to anchor temporarily; final secure during assembly. Block petals flat with slight curve upward toward tip to match photos.
— Green Floral Square Motif (Make 12 motifs) :
Round 1 :
Make a magic ring. Ch3 (counts as dc), work 11 dc into ring. Sl st to top of ch3 to join. (12 dc)
Round 2 :
Ch1, sc in same st, ch4, skip 1, sc in next st; rep around to form 6 ch-4 loops (for star points). After 12 dc, you will get 6 loops. (12 sc points / 6 loops)
Round 3 :
In each ch-4 loop: (sc, ch3, 5 dc, ch3, sc). This creates 6 petal-like points for the star within the square. (6 star points)
Info :
Each green motif pictured has a slight star/flower texture. We create a 6-point star to mimic the photographed texture. Place a bead in the very center later as shown.
Round 4 :
Round to form sq corners: Rotate motif, ch1, sc evenly around the outer edge working 2 sc in the valleys between star points to begin squaring off — total approximate sc count 30. (approx 30 sc)
Round 5 :
Working for square shape: *(sc, ch3, sc) in the outermost stitch at each star point tip to make small looped corner; then 3 sc along each side between corners.* Continue around to create a soft-square outline. Count: 4 corner loops + 3*4 side sc clusters = approx 28 sc plus corner loops.
Round 6 :
Make bead anchor round: Sl st to a central small gap, attach bead using yarn needle or small length of thread; secure bead by passing needle through bead and several stitches of the center; knot thread on the back and weave in ends. Repeat for each green motif before continuing to outer rounds. (1 bead per motif)
Info :
Attach beads now while the motif center is open — this keeps the bead firmly anchored and centered without distorting outer rounds. Use a small anchoring stitch through the base ring if necessary.
Round 7 :
Ch1, 1 sc in each st around forming a tighter edge to the motif. (approx 28-32 sc depending on counting of loops)
Round 8 :
Create border loops for joining: *ch7, sl st into a designated corner sc or ch3 loop, ch7, sl st into next side marker* repeat four times to create four corner loops and side loops. This prepares motifs to be joined by chain arches in the cream color later. (4 corner loops and 4 side loops per motif)
Round 9 :
Finish motif edge: Work tiny picot edging around corners: (sc in each corner base, ch3, sl st in first ch of chain to make picot) — repeat to create delicate points at the edge. Fasten off leaving tail for joining. (edge picots approx 12-16 total)
Info :
Make 12 green motifs in total for the arrangement shown (photo shows 12-13 motifs placed in two concentric rings). Block each motif flat to exact same size before joining for even outer border.
— Join Motifs to Form Outer Ring :
Info :
Arrange motifs in layout: center flower sits in the middle, with twelve green square motifs forming an outer ring in a diamond/square arrangement (photo shows alternating green squares and open lace segments). Lay out motifs on blocking surface to match photos: 8 green motifs form a ring adjacent to petals, 4 more extend corners. Pin into place.
Round 10 :
Using cream yarn, join motifs with chain arches: With cream held in one motif corner loop, join to adjacent motif by sl st, ch6, sl st into next motif loop, ch6 back into next loop creating a decorative bridge. Repeat to join all adjacent motifs in sequence around the center. (approx several chain bridges per motif depending on layout)
Info :
Use slip-stitch joining or crochet-join method for an invisible seam. Pin motifs tightly together during joining to maintain geometry. Keep tension consistent on chains to avoid sagging.
Round 11 :
Once primary joins are complete, reinforce joins with sc rounds: Into each cream chain-arch, work (sc, ch3, sc) across to create lacey hex cells between motifs. This fills the grid and replicates the photo's open lace. Count: if you have 12 motifs joined, expect approximately 24-36 chain-arch cells depending on your join spacing.
Info :
At this stage, check overall shape. If the assembly is floppy, add 1-2 rounds of sc along inner joins to tighten. Conversely, if too tight, adjust by making larger chain bridges on the next pass.
Round 12 :
Work decorative bobble ring in the spaces between each motif set: Into each 5-ch space (or designated open cell) work (ch1, puff3, ch1) with picot on top to create a beaded bobble effect. These small bobbles create the tiny clusters visible along the cream joining lace. Repeat across all open cells. (expect 30-40 tiny bobbles)
Info :
Puff3 = yarn over, insert hook, pull up loop (three times total), yarn over and pull through all loops, ch1 to close. Keep puff height consistent.
— Outer Border & Points :
Round 13 :
With cream, work a continuous round of (sc, picot, ch3, sc) around the already-joined outer edges to create small points and loops that mimic the photo's tiny clustered picots. Count: work 3-4 picot units per side seam and 1 at each external corner — total approx 40-48 picot points.
Round 14 :
Refine corner shaping: At each outer corner (where a green motif corner meets another), work (sc, ch5, sc, ch5, sc) to create a prominent corner loop. This results in diamond points around the perimeter aligning with photo's star-shaped outer edge.
Info :
Use stitch markers to mark every corner location before working this round. Corners must be symmetrical for an even star shape.
Round 15 :
Work final picot edging: Into each outer loop work (sc, ch3, sl st into 3rd ch) to create small, tight picots. Around corners, increase to (sc, ch3, pic, ch3, sc) to give a fuller point. Fasten off and weave ends through reverse side; trim.
Info :
After finishing the outer picot edging, block the entire assembly stretcher-style: pin out the star points evenly and mist lightly. Let dry fully for a crisp finish. Press small beads into place if needed with a dab of fabric glue on reverse for extra security (optional).
— Alternate: Work Green Motifs Assembled First (Optional) :
Round 16 :
Work green motifs entirely, blocking each to size. Join 3 motifs into triangular strips first using the chain-arch method, then join strips into the full ring. This can ease alignment when working without a large flat surface.
Info :
Assembling in subsections helps if you prefer to sew seams rather than slip-stitch join directly. Sew with mattress stitch to invisibly seam motif edges then apply cream crochet rounds to disguise seams and add lacework.
— Detailed Stitch Math & Repeat Notes :
Info :
Petal math recap: 8 petals x 9 base-petal stitches = 72 petal stitches in that shaping round. Center increases follow 8-segment geometry: exp from 8 to 16 to 24 to 32 to maintain even petal placement.
Info :
Green motif math recap: Start 12 dc in MR (Round 1), set up 6 loops for star points (Round 2), shape to soft-square by adding sc in valleys and corner loops. Expect approx 28-32 sc per outer finish round depending on picot additions.
Round 17 :
Optional lace-fill row between motifs: If you wish a fuller lace network, work two rows of chain arches between motifs: Row A: ch6 arches; Row B: sc across arches with picots; this increases overall diameter by approx 2.0-2.5 cm per row.
Info :
Keep notes on the number of chains you used per bridge so that you can repeat exactly across the project. Small inconsistencies in chain-arch length create visible distortion across the circular geometry.
— Beading & Finishing Touches :
Round 18 :
Beading: For green motifs, use one 6-8mm bead sewn at the center of each motif. For the flower center, cluster 7-9 beads in a compact cluster. Use strong beading thread and pass through stitches multiple times. Tie off and weave ends thoroughly to the back.
Info :
When sewing beads, avoid pulling so tightly that centers pucker. The beads should sit slightly above the yarn surface to catch light. If using metallic beads, test for colorfastness against moisture when blocking.
Round 19 :
Weaving ends: Weave all tails back into the wrong side using tapestry needle, following yarn joins into center of motifs or under petals. Tie a small secure knot inside motif if necessary then weave at least 6-8 cm of tail through multiple stitches before trimming.
Info :
Label your motifs as you make them and keep them in pinned layout. This helps prevent accidental flipping of asymmetric motifs during assembly.
— Blocking & Final Assembly :
Round 20 :
Blocking: Pin entire finished piece to a flat board, stretching petals slightly upward and pinning outer points to form crisp star points. Mist lightly with water and allow to dry fully. Use rustproof pins and ensure beads sit flat and secure while drying.
Info :
For stiffer finish, use light spray starch during blocking. For a softer hand, simply lightly mist and dry. After drying remove pins carefully and re-shape any slight asymmetry by re-blocking smaller sections if necessary.
Round 21 :
Final check: Inspect joins and bead security. If any joins look loose, reinforce with small whip-stitches under an adjacent lace chain. Trim any stray fibers and give a final light steam (not direct iron) if desired for smoothness.
Info :
Store flat or wrapped in tissue to avoid flattening petals. This centerpiece is decorative—avoid heavy soiling; spot clean only with mild soap and cool water; re-block after washing.
Finishing this poinsettia lace centerpiece is so rewarding — the raised petals, lace bridges and tiny beads come together into an heirloom-quality accent for your table. 🧶 The pattern combines textured crochet and delicate joining to produce a piece that's both decorative and tactile. Whether you display it for the holidays or year-round, it's a project that adds vintage charm and a handmade heart to your home. Happy stitching and enjoy the lovely blooms you created! ✨