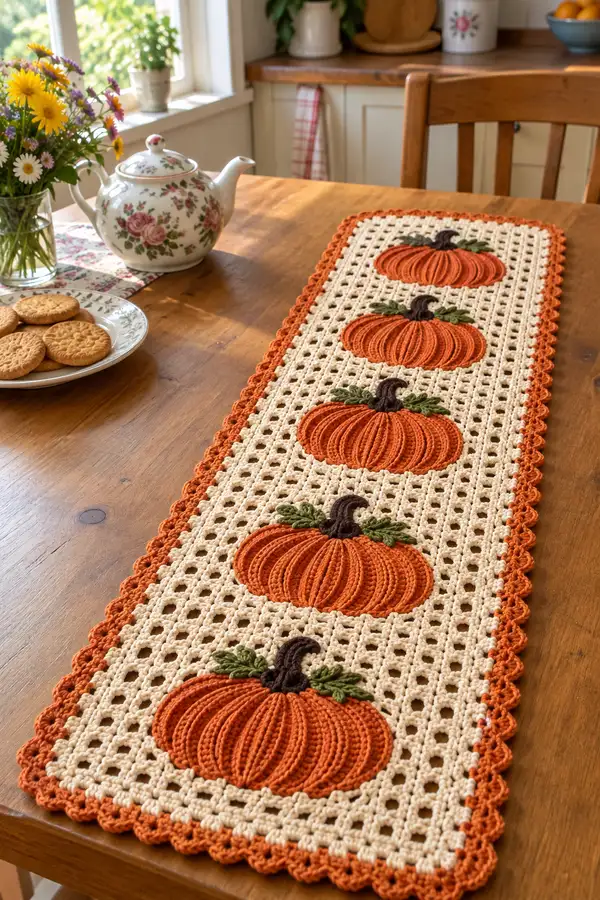
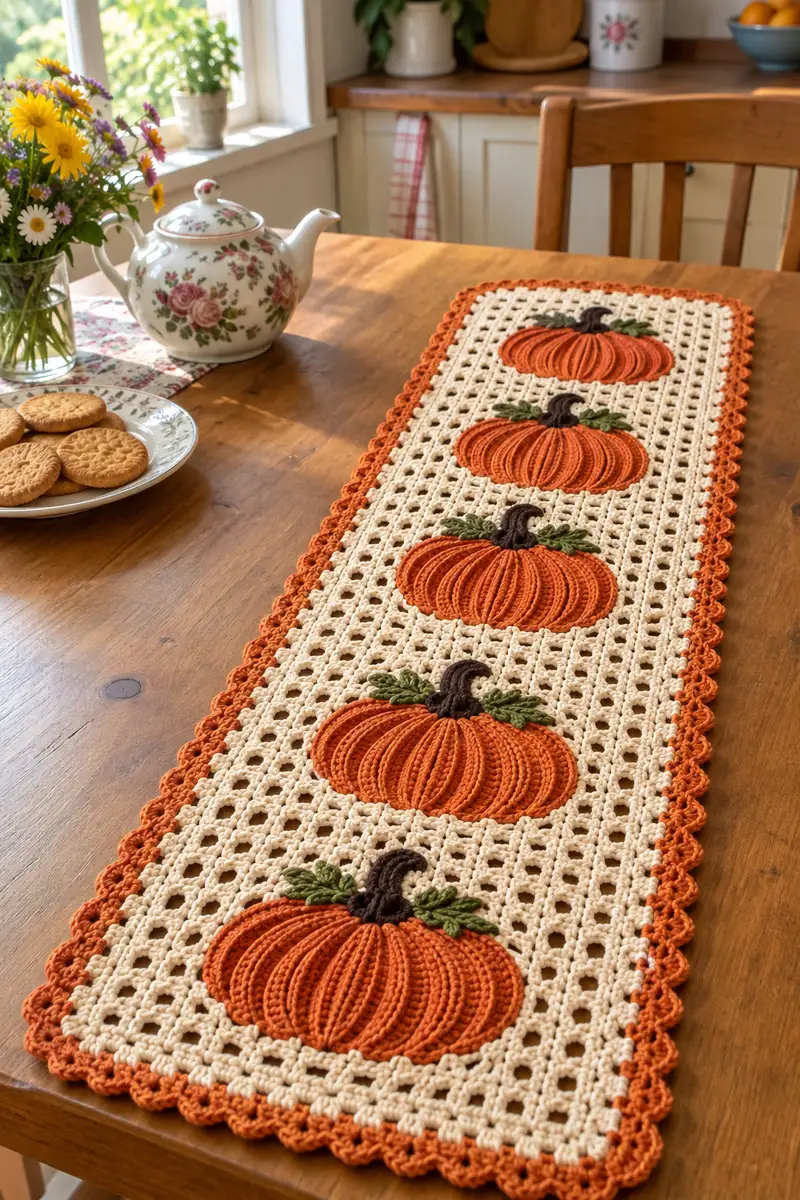
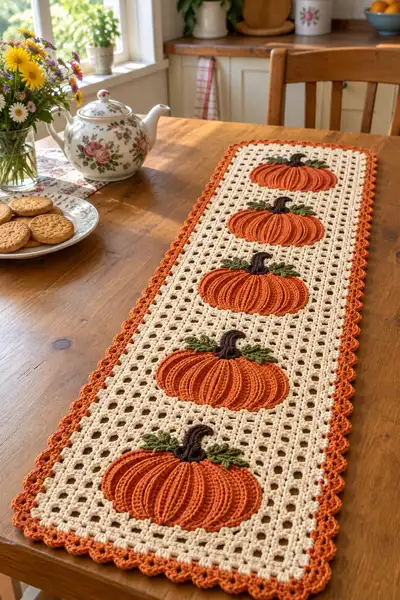
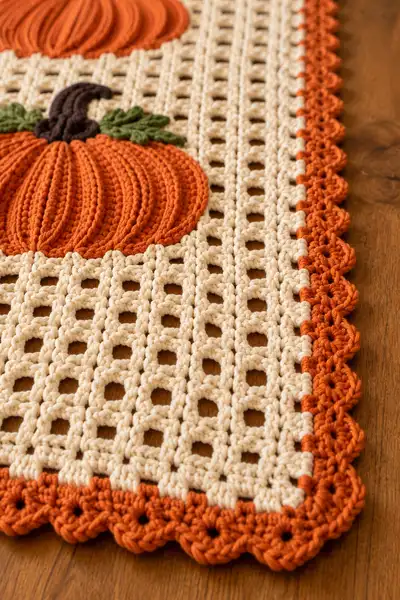
This warm, seasonal table runner features five raised pumpkin appliques set on a lacy cream mesh background with a scalloped rust border. The textured pumpkins use surface ribs for a classic harvest look, while the filet grid keeps the piece light and elegant. Perfect for an autumn dining table or entry console, it pairs beautifully with farmhouse and vintage decor. Detailed step-by-step instructions and lots of helpful tips make this a satisfying weekend project.
Progress Tracker
0% Complete
— Notes & Gauge :
Info :
Gauge is flexible for a runner but a good guideline: 12 dc and 8 rows in filet grid = 4 inches (10 cm) with 4.5mm hook and worsted cotton. Use hooks that produce a firm fabric for amply supportive mesh. Block panel after completion to square and even out openwork.
Info :
This pattern is presented in sections: Mesh Panel (base), Pumpkin Appliques (make 5), Leaves (make 10), Stems (make 5), Border Scallop. Follow each section in order, block the mesh panel, arrange and sew appliques, then add border.
— Mesh Panel (Filet Grid) :
Row 1 :
Ch 85 (foundation chain to create 41 filet squares across; note: chain count = 3 + 2 x number of squares; adjust multiple if you want a narrower or wider runner)
Row 2 :
Dc in 4th ch from hook (counts as first dc), *ch 2, sk 2 ch, dc in next ch; rep from * across. End with dc in last ch. (Panel width now = 41 filet squares across)
Info :
Each 'ch2' forms an open square of filet. Keep turning chain counts consistent (ch3 counts as first dc on turning rows). Place marker in first dc of every row to mark row start and keep edges straight.
Row 3 :
Ch 3, turn, dc in same space as beg ch3, *ch 2, sk next dc, dc in next dc (the dc that begins next square); rep to end. Maintain 41 open squares across.
Row 4 :
Repeat Row 3 for even openwork grid. (41 squares)
Row 5-8 :
Repeat Row 3. Keep tension even. (41 squares each row)
Info :
Work first 8 rows to establish the base before starting motif placement. These initial rows keep the lower edge sturdy. Place a stitch marker at the center column (square number 21) to help center pumpkins later.
Row 9 :
Ch 3, turn, dc in same st, *ch 2, sk next dc, dc in next dc; rep across. (41 squares)
Row 10-16 :
Repeat Row 9 maintaining grid. This builds height between pumpkins. (41 squares per row)
Info :
Decide vertical spacing: this runner features five pumpkins each separated by 9 rows of open grid. Measure and mark where pumpkin centers will sit. From lower edge count up 9 rows for the center of first pumpkin, then 11 rows between centers for even spacing (adjust to fit your runner length).
Row 17 :
Continue grid: ch 3, turn, dc in same st, *ch 2, sk next dc, dc in next dc; rep across. (41 squares)
Row 18-25 :
Repeat Row 17 for 8 rows to make a taller space for the first pumpkin to be attached. (41 squares per row)
Info :
Block the mesh panel lightly before appliqué placement if you wish to square edges and make stitch spacing consistent. Pin the panel to measurements, steam lightly or wet block as appropriate for the yarn fiber.
Row 26-35 :
Repeat established grid rows (ch3, turn, dc in same st, *ch 2, sk, dc) for ten rows. These rows form the area that will sit between top pumpkins and the scalloped border.
Info :
When the full mesh panel is worked, you should have enough height for five pumpkin placements with consistent spacing. If your runner is longer or shorter, adjust by adding or subtracting sets of 8-12 rows between pumpkin placement points.
Row 36-46 :
Continue repeating grid rows for eleven more rows to reach the top area above the final pumpkin. These rows give a clean top margin before the border begins. (41 squares)
Row 47 :
Last grid row: ch 3, turn, dc in same st, *ch 2, sk next dc, dc in next dc; rep across. Fasten off leaving a long tail for joining border. (41 squares)
Info :
Weave in vertical tail loosely or leave it to be hidden in the scalloped border later. Block and pin the panel square/rectangular now to set the filet grid perfectly straight. Allow to dry completely.
— Pumpkin Applique (Make 5 identical) :
Info :
Make each pumpkin in Rust/Burnt Orange using 4.0mm hook for a compact, flat applique. The pumpkin is worked in continuous rounds to form an oval, then decorated with 12 raised ribs made with surface slip-stitch or embroidery.
Round 1 :
With pumpkin color, make magic ring, 6 sc in MR (6)
Round 3 :
(1 sc, 1 inc) x 6 (18)
Round 4 :
(2 sc, 1 inc) x 6 (24)
Round 5 :
(3 sc, 1 inc) x 6 (30)
Round 6 :
(4 sc, 1 inc) x 6 (36)
Info :
At this point the motif is circular; to create a flattened pumpkin shape we'll broaden on two opposite sides by adding increases in sequence for a couple of rounds to form an oval. Keep a stitch marker at round starts and an extra marker at the center front to orient ribs later.
Round 7 :
(5 sc, 1 inc) x 6 (42)
Round 8 :
(6 sc, 1 inc) x 6 (48)
Round 9 :
(7 sc, 1 inc) x 6 (54)
Round 10 :
(8 sc, 1 inc) x 6 (60)
Info :
Now you have a round with 60 stitches — this is ideal to mark 12 rib positions (every 5th stitch gives 12 evenly spaced marks). Place temporary thread markers at those intervals: every 5th stitch around to show rib channels.
Round 11-16 :
1 sc in each st around (60) for six rounds to build height and surface for ribbing. (Rounds 11-16 = 6 rounds)
Info :
If you prefer a slightly flatter pumpkin, work only 4 even rounds here; for a plumper look, work 8 even rounds. These rounds are the body onto which ribs will be worked.
Round 17 :
(8 sc, 1 dec) x 6 (54)
Round 18 :
(7 sc, 1 dec) x 6 (48)
Round 19 :
(6 sc, 1 dec) x 6 (42)
Info :
Begin stuffing very lightly if you want a slightly padded applique (optional). Use only a thin layer in the center to keep the motif flat—remember these are appliques, not 3D toys. Stuff sparingly and evenly by pushing small tufts with a stuffing tool or pencil tip.
Round 20 :
(5 sc, 1 dec) x 6 (36)
Round 21 :
(4 sc, 1 dec) x 6 (30)
Round 22 :
(3 sc, 1 dec) x 6 (24)
Round 23 :
(2 sc, 1 dec) x 6 (18)
Round 24 :
(1 sc, 1 dec) x 6 (12)
Round 25 :
6 dec (6). Fasten off leaving long tail for sewing if you want to close completely now, otherwise leave tail short and finish with an invisible close. Flatten lightly and set aside.
Info :
These rounds create a slightly curved, flattened shape. Do NOT overstuff. The ribs will visually lengthen the pumpkin and emphasize an oval silhouette.
Round 26 (Rib Preparation) :
Rejoin pumpkin color at the base edge where you placed the front center marker. Using a tapestry/yarn needle and a long length of yarn (approx 30-40cm for working individual ribs), we will create surface slip-stitch ribs. Alternatively, use slip-stitch surface technique with hook: Insert hook from RS at near base, pull up loop and sl st along the surface to top and back down to base to form one raised ridge.
Round 27-38 :
Create 12 evenly spaced vertical ribs by working surface slip-stitch or surface slip-stitch embroidery: locate the markers placed at every 5th stitch earlier; for each rib, with yarn on RS, insert hook at base near marker, draw a loop and work surface sl sts up over the center rounds to top, then secure at top and come back down on the other side to meet the starting point. Make 12 ribs total, spacing them evenly. After each rib, fasten off and weave in ends behind motif. (12 ribs)
Info :
How to make a neat rib: use small, even surface slip-stitches or a chain-stitched embroidery stitch over the surface, pulling loops snug but not puckering. Ribs should be slightly raised and parallel, giving the pumpkin a segmented look.
Round 39 (Optional Padding) :
If you want the center slightly domed, add a tiny bit of stuffing under the central ribs now (very light), spread evenly, then secure with a few small whip-stitches through inner rounds to keep stuffing in place. Fasten off and weave in ends.
Info :
Make five identical pumpkin appliques. Block each lightly to flatten and ensure ribs sit correctly. Position pumpkins on mesh panel marking centers carefully with pins before sewing.
— Stem (Make 5) :
Round 1 :
With brown yarn, ch 7 (foundation for a short curled stem), sc in 2nd ch from hook and across (6 sc). (Row form)
Round 2 :
Ch 1, turn, BLO sc in each st across (6)
Round 3 :
Ch 1, turn, sc2tog, sc, sc2tog (4) — begin slight taper
Round 4 :
Ch 1, turn, sc in each st across (4)
Round 5 :
Fold length to make slight curve; join ends with sl st along one long edge to form a short tube with an open curl. Fasten off leaving tail for sewing. (Curl the top slightly to create a pumpkin stem look)
Info :
Alternatively make stems with a tightly crocheted spiral: ch 3, work 12 sc into 3rd ch from hook, sl st to join and curve into an S-shape before sewing on. Choose method that gives a compact, sturdy stem.
— Leaves (Make 10 small leaves) :
Round 1 :
With green yarn, ch 8, sc in 2nd ch from hook, hdc in next, dc in next 2, hdc in next, sc in last 2, ch 1, turn (leaf base)
Round 2 :
Working along opposite side of foundation ch, sc in first, hdc in next, dc in next 2, hdc in next, sc in next 2; sl st to first sc to close leaf. Fasten off leaving tail for sewing. (Small symmetrical leaf)
Info :
Vary leaf sizes by adjusting foundation chain length. You can create vein details using a few surface sl sts in darker green for contrast. Make 10 leaves total (two per pumpkin) and block lightly.
— Border Scallop :
Info :
We recommend joining border color (Rust) around the blocked mesh panel using sc evenly spaced along edges, then working two rows of shell scallops for a framed look. Use a slightly smaller hook (3.5-4.0mm) for a crisp edge.
Round 1 (Join) :
Join rust yarn with sl st into any stitch on the outermost row edge of the mesh panel. Work sc evenly around edges, placing 1 sc into each turning ch and 1 sc into each turning dc on corners. (Work approx 85 sc along long sides and 21 sc along short sides — adjust to your actual panel pic counts)
Round 2 :
Ch 1, sc in same st, *ch 2, skip 1 sc, sc in next sc; rep across to create small picot spacing along edge. This prepares scallop foundation.
Round 3 (Scallop Row A) :
*In next ch-2 space work (5 dc, sl st) to make a shell; skip next ch-2 foundation, sc in next sc; rep across. At corners adjust shells to make nice rounded corner shells (work 7 dc into corner space). Fasten off and rejoin as needed. (Shells across long edge ≈ 17-20 shells depending on panel length)
Round 4 (Scallop Row B) :
Optional second scallop: Join between shells, ch1, sc in first shell center, *ch2, sc in center of next shell; rep across for a layered scalloped look. Fasten off. Weave in ends and block edge to open shells evenly.
Info :
Adjust shell counts so scallops sit evenly around the runner. Use pins to shape shells while blocking. A lighter or smaller hook gives firmer scallops that hold shape better under tableware.
— Assembly & Applique Placement :
Info :
Position five pumpkins evenly down the center of the mesh panel. For this runner, center the first pumpkin approximately 4-5 rows up from the bottom border, then place subsequent pumpkins with 11-12 rows of mesh between centers. Use removable pins to test placement.
Step 1 :
With long sewing tail from each pumpkin or with new yarn, whip-stitch the pumpkin to the mesh panel along the outermost rounds (Rounds 11-16 area) so that the ribs align vertically with the mesh squares. Sew through the mesh dc rows (not the open ch-2 spaces) to anchor flat.
Info :
Sew with small stitches along the base and top curves of the pumpkin; avoid pulling too tight: pumpkins should sit flat with a slight raised profile from ribs. Leave the very center stitches free if you added tiny stuffing so it sits naturally.
Step 2 :
Sew the stem into the small gap at the top center of each pumpkin. Sew the two small green leaves on either side of the stem, overlapping slightly. Secure with backstitches and weave in tails on WS of runner.
Step 3 :
After all pumpkins, stems and leaves are attached, check runner edges and add any additional reinforcement stitches through mesh intersections to prevent stretching under weight of table items.
Info :
Optional: add a thin backing fabric to the underside of the runner for extra stability and to prevent stretching; baste it in place around appliques and edges before finishing border if desired.
— Finishing Touches :
Info :
Weave in all ends thoroughly on the wrong side. Lightly steam-block the entire runner once assembled to settle the scallops and help appliques lie perfectly flat. Avoid heavy pressing directly onto applique ribs; use steam from a distance.
Info :
Optional embroidery: with darker orange or brown, add small embroidered lines at the rib bases or subtle highlights on leaves to enhance depth. Use long straight stitches or split-stitch to follow rib direction.
Info :
Care: wash by hand or gentle machine cycle on cool inside a laundry bag if using cotton yarn; reshape and lay flat to dry to preserve shape and scallops.
This Pumpkin Patch Table Runner is a delightful way to bring autumn warmth to your home — each pumpkin ripple and scalloped shell adds handcrafted charm. The pattern balances airy filet lace with tactile, raised appliques so every place-setting looks ready for harvest gatherings. Enjoy the slow, meditative rhythm of creating the mesh, the rewarding detail of adding ribs, and the satisfaction of a beautifully finished tabletop accent. 🧶🍂 Happy crocheting and may your home feel cozy and festive all season long!