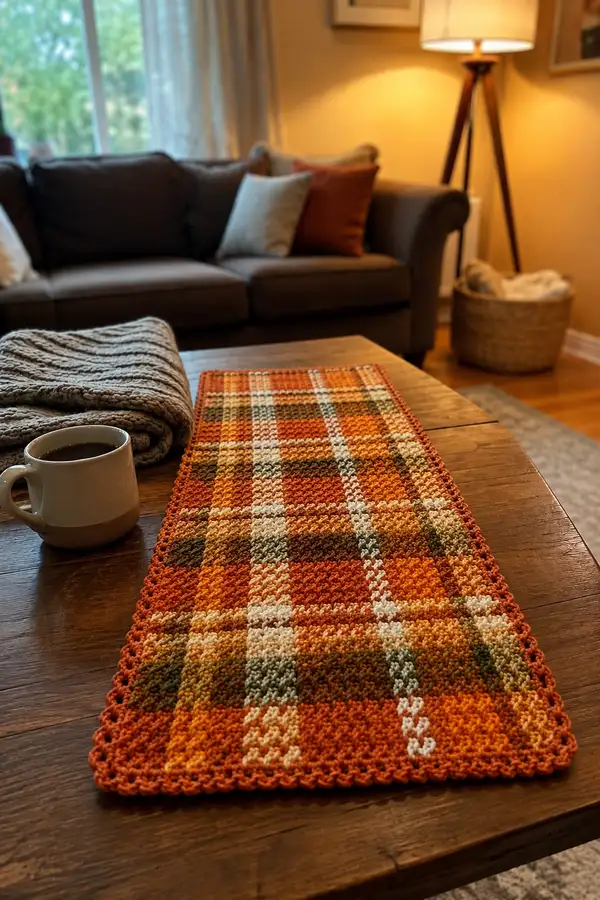
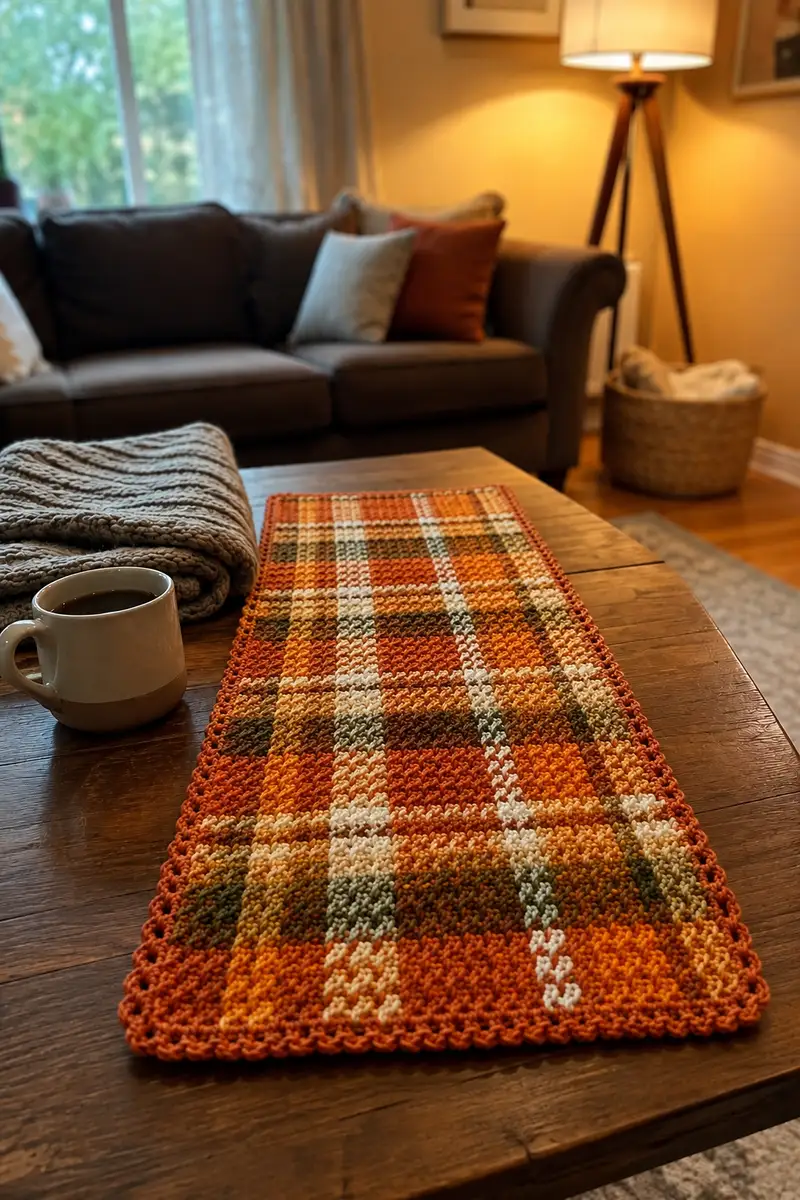
Bring warm harvest tones to your table with this Mosaic Autumn Plaid Table Runner in Pumpkin Spice. This runner uses a linen/moss stitch foundation with planned color-blocks to create a classic plaid grid. Finished edges use a neat scallop border in a deep pumpkin rust for a hand-finished, cozy look. Perfect for seasonal decor, Thanksgiving tables, or as a year-round accent in warm-toned rooms.
Progress Tracker
0% Complete
— Notes & Gauge :
Info :
This runner is worked flat in rows using the linen/moss stitch (also called woven or herringbone linen stitch in some sources). To create the plaid effect we change colors across each row in blocks of 12 stitches (12 stitches x 6 blocks = 72 stitches). The design repeats a 24-row color chart; repeat that chart five times to reach an approximate length of 36" (91 cm). Gauge: 18 linen-stitch rows = 4" (10 cm) and 36 sts = 4" (10 cm) using worsted yarn and 4.0mm hook. Adjust hook to match gauge.
Info :
Finished size (approx): 12" (30 cm) wide x 36" (91 cm) long after blocking. Length will vary with the number of 24-row repeats you choose; each 24-row repeat adds about 4.5" (11.5 cm) to length. This sample uses 5 repeats (24 x 5 = 120 rows).
— Foundation Chain :
Round 1 :
With Color A (Pumpkin Rust) ch 73. This creates 72 foundation stitches across (ch 73 = 72 sts for linen stitch). Turn.
Round 2 :
Row 1 (RS): Sc in 2nd ch from hook and in each ch across — 72 sc. Turn. (72)
Info :
Row 1 establishes your first row of single crochet which sets up the linen stitch pattern. Keep tension even; this row will look like a traditional sc row and will be the base for subsequent moss/linen rows.
Round 3 :
Row 2 (WS): Ch 1 (does not count as st), turn. *Sk first sc, sc in next ch-1 space (between the sc from previous row); repeat across ending with sc in last sc. (72 sc-in-spaces). Turn.
Info :
From here on the fabric is built by working sc into the ch-1 spaces (the gaps) created by the previous row, which produces the dense, woven linen look. For color changes mid-row, finish the last stitch with the old color and join the new color in the final yarn over of the last sc, then continue sc in the next st with the new color.
— Color Blocks & Chart Overview :
Info :
Width is divided into six vertical blocks of 12 stitches each. For clarity we will refer to blocks left-to-right as Block 1 through Block 6. Each row below lists the color to work per 12-st block. Use the colors defined: Color A = Pumpkin Rust (border/main), Color B = Burnt Orange, Color C = Cream/Ivory, Color D = Olive/Forest, Color E = Mustard/Gold. All rows are worked using linen/moss technique: sc in the spaces between sc from previous row. Maintain 72 sts per row.
Info :
For joining a new color mid-row: finish the sc with the outgoing color until the final yarn over, drop that color, pick up new color and pull through to complete the stitch. Carry yarn loosely behind your work along the row, trap it every 6-8 stitches or cut and weave ends depending on preference. Use stitch markers to mark block boundaries the first time you work across.
— Main Panel (Color Chart rows 1-24) :
Round 4 :
Row 3 (RS) — Blocks: [B1: Color A x12] [B2: Color B x12] [B3: Color A x12] [B4: Color B x12] [B5: Color A x12] [B6: Color B x12] (72) Work linen stitch across in these colors.
Round 5 :
Row 4 (WS) — Blocks: [A x12] [B x12] [A x12] [B x12] [A x12] [B x12] (72) Continue linen stitch, changing colors at block boundaries. Carry or join new yarn as preferred.
Round 6 :
Row 5 (RS) — Blocks: [A x12] [C x12] [A x12] [D x12] [A x12] [E x12] (72) This introduces Cream, Olive and Mustard vertical accents. Work sc-in-spaces across using each block color.
Round 7 :
Row 6 (WS) — Blocks: [A x12] [C x12] [A x12] [D x12] [A x12] [E x12] (72)
Round 8 :
Row 7 (RS) — Blocks: [B x12] [B x12] [A x12] [A x12] [B x12] [B x12] (72)
Round 9 :
Row 8 (WS) — Blocks: [B x12] [B x12] [A x12] [A x12] [B x12] [B x12] (72)
Info :
At this stage you'll notice vertical bands forming. The alternating rows above create the base plaid grid. Keep a small snapping of yarn tails at block joins and weave in later. Use markers at the boundaries to help position the vertical color swaps cleanly.
Round 10 :
Row 9 (RS) — Blocks: [A x12] [A x12] [C x12] [C x12] [D x12] [D x12] (72)
Round 11 :
Row 10 (WS) — Blocks: [A x12] [A x12] [C x12] [C x12] [D x12] [D x12] (72)
Round 12 :
Row 11 (RS) — Blocks: [E x12] [A x12] [B x12] [A x12] [B x12] [A x12] (72)
Round 13 :
Row 12 (WS) — Blocks: [E x12] [A x12] [B x12] [A x12] [B x12] [A x12] (72)
Round 14 :
Row 13 (RS) — Blocks: [B x12] [C x12] [B x12] [D x12] [B x12] [C x12] (72)
Round 15 :
Row 14 (WS) — Blocks: [B x12] [C x12] [B x12] [D x12] [B x12] [C x12] (72)
Info :
As you work the RS rows the color changes will appear more distinct; on WS rows the carried yarn sits behind. Always complete a sc before switching color. If you prefer no carried yarn, cut and weave in each time (more ends to weave but a flat underside).
Round 16 :
Row 15 (RS) — Blocks: [A x12] [E x12] [A x12] [E x12] [A x12] [E x12] (72)
Round 17 :
Row 16 (WS) — Blocks: [A x12] [E x12] [A x12] [E x12] [A x12] [E x12] (72)
Round 18 :
Row 17 (RS) — Blocks: [D x12] [D x12] [B x12] [B x12] [C x12] [C x12] (72)
Round 19 :
Row 18 (WS) — Blocks: [D x12] [D x12] [B x12] [B x12] [C x12] [C x12] (72)
Round 20 :
Row 19 (RS) — Blocks: [A x12] [B x12] [A x12] [C x12] [A x12] [D x12] (72)
Round 21 :
Row 20 (WS) — Blocks: [A x12] [B x12] [A x12] [C x12] [A x12] [D x12] (72)
Round 22 :
Row 21 (RS) — Blocks: [B x12] [A x12] [E x12] [A x12] [B x12] [A x12] (72)
Round 23 :
Row 22 (WS) — Blocks: [B x12] [A x12] [E x12] [A x12] [B x12] [A x12] (72)
Round 24 :
Row 23 (RS) — Blocks: [C x12] [D x12] [C x12] [D x12] [E x12] [A x12] (72)
Round 25 :
Row 24 (WS) — Blocks: [C x12] [D x12] [C x12] [D x12] [E x12] [A x12] (72)
Info :
This 24-row sequence creates a balanced plaid with vertical and horizontal bands. Count your rows - this 24-row chart is the repeat unit used for length. At the end of Row 24 the fabric should display alternating large and smaller blocks and thin cream crossing stripes created by Color C placements.
Round 26-120 :
Repeat Rows 1-24 four more times (Rows 25-48 = repeat set 2, Rows 49-72 = set 3, Rows 73-96 = set 4, Rows 97-120 = set 5) to reach 120 rows total. Keep all linen-stitch rules and maintain 72 sts per row. End after completing Row 24 of the final repeat (this is Row 120). (72)
Info :
If you prefer a longer runner, continue repeating the 24-row chart until desired length is reached; each 24-row repeat adds approximately 4.5" (11.5 cm). Trim repeats evenly so both ends finish after a WS row for easier border attachment.
— Finishing Panel Edge Preparation :
Round 121 :
Last Row (WS finished): Fasten off all colors except Color A (Pumpkin Rust) which will be used for the border. Cut other colors leaving 4-5" tails for weaving. Turn so the RS of work faces up for border attachment.
Info :
Weave in tails that are visible on the WS now or trap them under the first border round if you prefer. Make sure edges are even; lightly block the panel if required to square the sides before adding border.
— Border Round 1 (Even Sc Round) :
Round 122 :
With Color A and RS facing, join with sl st to any corner stitch. Ch 1, sc evenly along the long side edge working 1 sc in each row-end space along the edge. When you reach a corner, work 3 sc in the corner end (this creates a smooth corner). Continue sc along the short end, working 3 sc in corner at each corner. Work sc evenly along entire perimeter. Place 1 sc into each finished row-end on short sides and into the top of each sc on long sides. The total stitch count will vary slightly; ensure corner increases (3 sc) are present at each corner to keep runner flat.
Info :
Work the first border round with a slightly smaller tension to pull the edges in neatly. If you find puckering, work fewer sc per side and space evenly—count the sides and divide sc evenly to keep symmetry. Marker placement at midpoints of sides helps spacing.
— Border Round 2 (Shell/Scallop Edge) :
Round 123 :
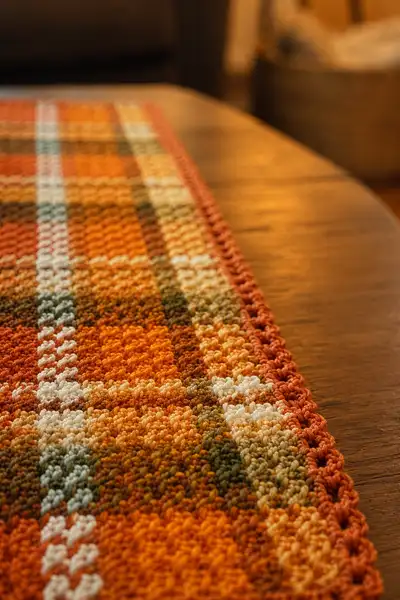
Change to 3.5mm hook if desired. *Sk 2 sc, shell (5 dc) in next sc, sk 2 sc, sl st in next sc*; rep around to create small scallops. At corners, work shell into the center sc of the 3-sc corner to anchor the shell and maintain smooth corners. Finish with sl st to join to first shell. Fasten off and weave ends. This makes an elegant scalloped edge similar to the sample photo.
Info :
Alternate border option: crab stitch (reverse single crochet) for a twisted rope edge. For a plainer look, work an additional sc round and finish with picot stitches every 6 sc (ch 3, sl st in first ch) to add small points.
— Final Finishing :
Round 124 :
Weave all tails to WS using a tapestry needle. Gently wet block the runner to measurements (12" x finished length) and pin edges square. Allow to dry completely. Trim any visible ends. Press lightly on RS with warm iron if desired, using a damp cloth to protect yarn if fiber content requires (always test first).
Info :
Blocking evens stitches and helps the plaid sit flat on the table. Linen/moss stitch can bias slightly on the edges; the border with corner increases and blocking will correct and square it.
— Optional Surface Lines (Thin Cream Crosses) :
Round 125 :
To emphasize the thin cream crossing stripes as seen in the photo, use Color C and a 3.5mm hook to surface slip-stitch along selected vertical columns and horizontal row lines. For vertical: work surface sl st along the center stitch of each 12-st column where the Cream block appears in the chart; for horizontal: work a surface sl st across the RS at the center of each 6-row band if you want the subtle raised white line. Work lightly; these lines are decorative and optional.
Info :
Surface slip stitch adds contrast without changing the fabric structure. Use matching yarn held double for a stronger accent or single strand for a subtle line. Secure ends neatly on WS.
— Care Instructions :
Info :
Machine wash gentle in warm water if yarn label permits; otherwise hand wash and lay flat to dry. Avoid bleach and high heat. Block again if necessary to restore shape after washing.
Info :
Store folded in cool, dry place. If you use the runner on a frequently used table, rotate occasionally to distribute wear. Spot clean spills promptly to prevent dye transfer on lighter colors.
Completing this Mosaic Autumn Plaid runner is so satisfying — all those warm pumpkin, rust and cream squares knit visually together into a timeless table accent. The texture is cozy and tactile and the scalloped border gives a finished, handmade flourish. I love how it dresses a wooden table instantly with seasonal charm. Share, display, and enjoy the cozy glow of handmade home decor! 🍁🧶