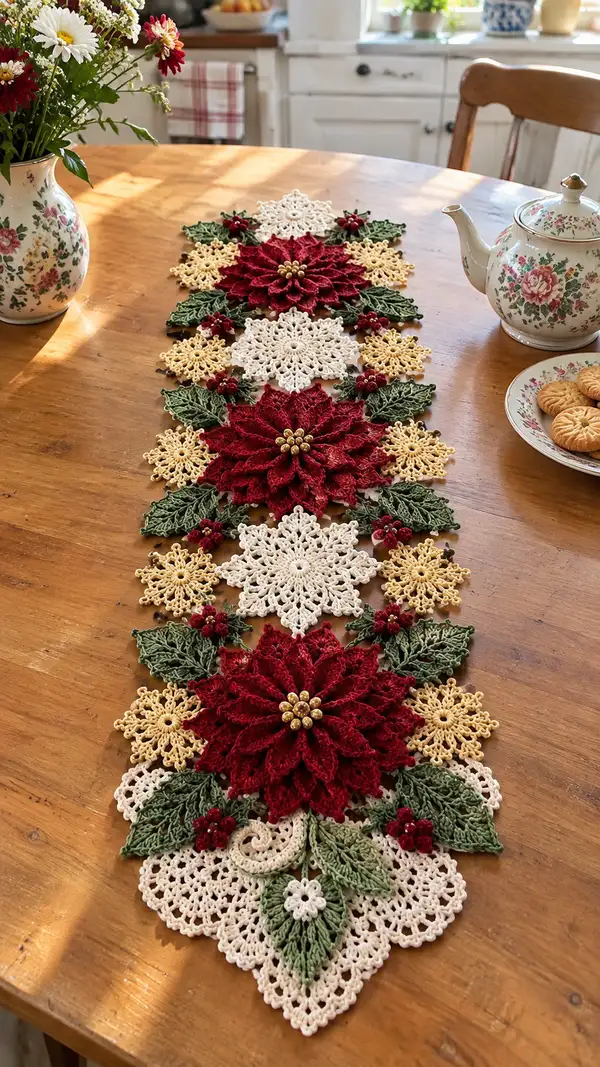
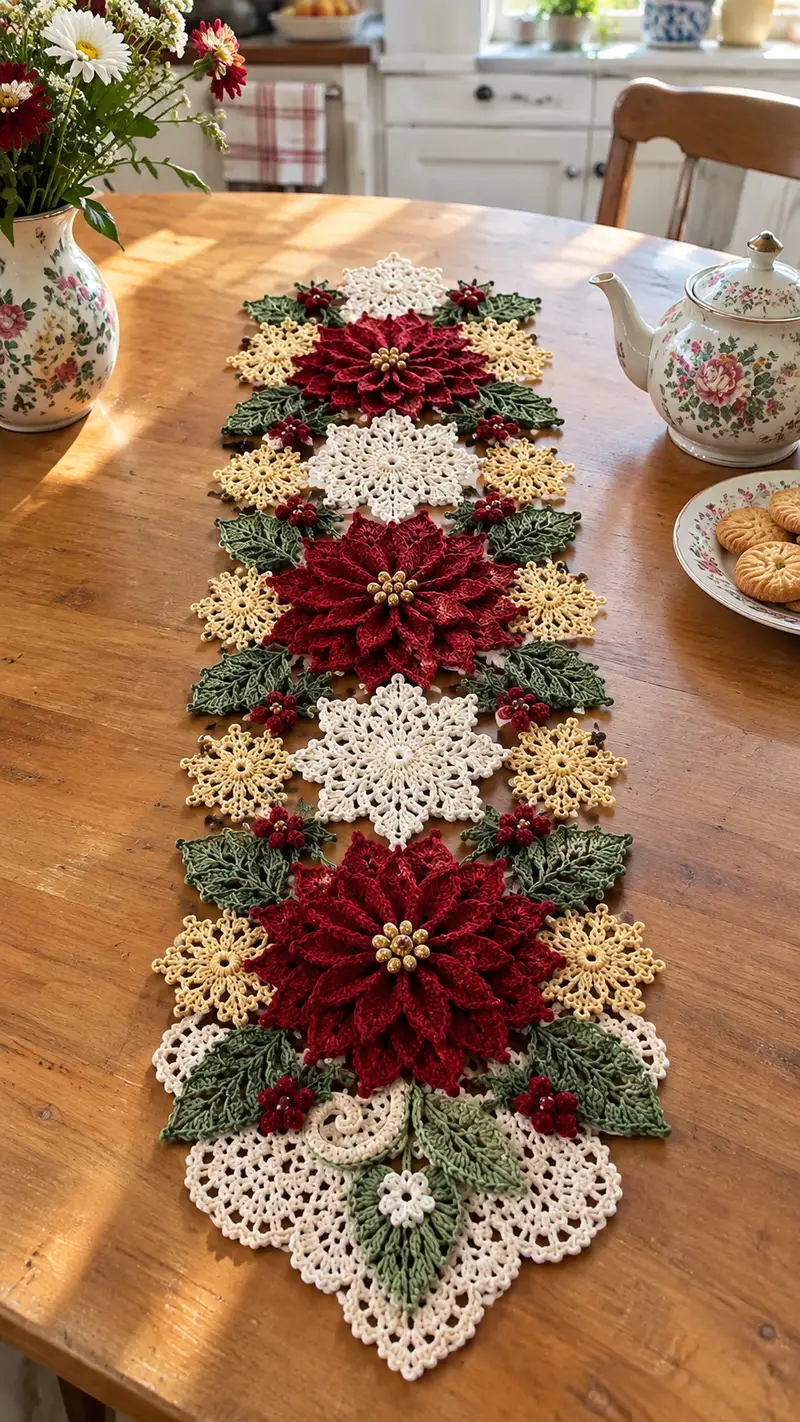
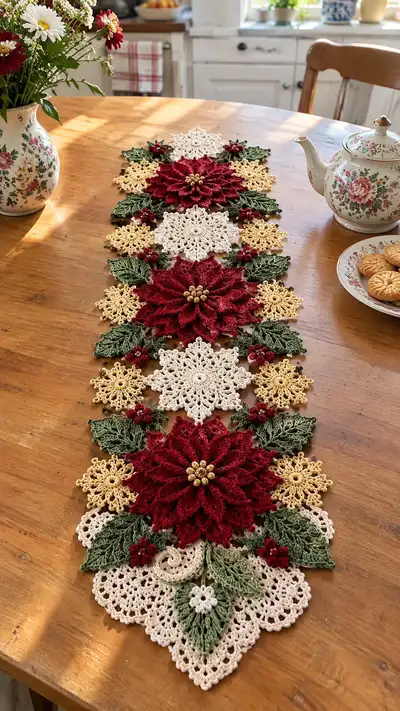
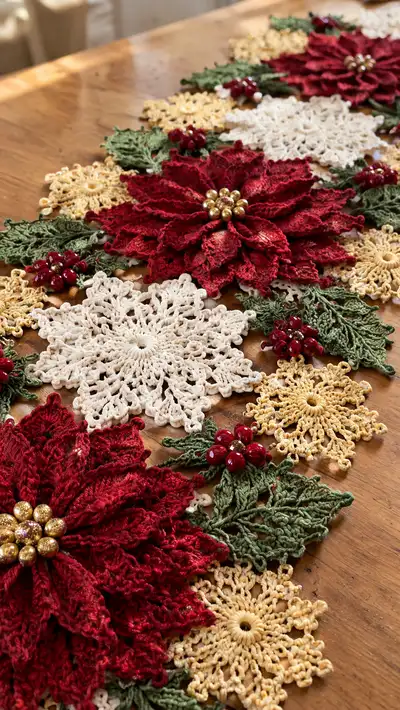
A festive, lace-style table runner composed of layered poinsettias, openwork snowflake doilies, leafy sprigs and beaded berry clusters. This elegant runner uses crisp cotton yarn in deep red, cream, gold and olive green for a vintage holiday look. The motifs are crocheted individually and joined to create a long, decorative centerpiece perfect for holiday dining tables.
Progress Tracker
0% Complete
— Overview :
Info :
This runner is made from a repeated set of motifs: 3 large layered poinsettia flowers, 4 large snowflake doilies, 8 small gold star motifs, many leafy sprigs and 6 small berry clusters. Work motifs separately using mercerized cotton and block each piece to size before assembly. Join motifs with a whipstitch and small connecting chain loops to retain lacy structure.
Info :
Tension: Aim for firm, neat stitches. Use a slightly smaller hook than manufacturer recommendation if your gauge is loose. Blocking is essential — pin points and steam gently then allow to dry fully to set shapes.
— Large Poinsettia Flower (Make 3 identical) :
Round 1 :
Make mr, ch1, 8 sc in ring, pull tight (8)
Round 2 :
Inc in each st around (16)
Round 3 :
(1 sc, inc) x8 (24)
Round 4 :
(2 sc, inc) x8 (32)
Info :
These rounds create a small disc that becomes the base for petal attachments. Do not fasten off; keep working in continuous rounds with markers to locate each petal base point.
Round 5 :
(3 sc, inc) x8 (40)
Round 6 :
1 sc in each st around (40)
Info :
Place stitch markers at every 5th stitch to divide into 8 evenly spaced sections for petals. Each petal will be worked across a defined chain space on subsequent rounds.
Round 7 :
(BLO) *ch3, sk 2 sts, sc in next st; rep from * around to make 8 ch3 loops (40 still counted as working sts)
Round 8 :
Work petals into each ch3 loop as follows: join with sl st to ch3 base, (ch2, 2 dc, tr, dtr, tr, 2 dc, ch2, sl st) in same loop - form pointed petal. Repeat 8 petals
Info :
Petal rib texture: on next petal layer we'll work raised stitches using BLO and FLO sequences to build depth. Keep tension steady; petals should be slightly cupped.
Round 9 :
Working around petals, sc evenly between petals to form a small picot edge: (sc, ch3, sl st in top of petal) x8
Round 10 :
For second petal layer (larger), into the space between petals work: ch4, 3 tr, 3 dtr, 3 tr, ch4, sl st to base. Repeat 8 times (creates larger outer petals)
Round 11 :
Form ribbed petals row: *in each large petal work (sc in FLO 3 times, sc in BLO 3 times) to create raised center; sl st at base; rep around*
Info :
Tip: To get dramatic raised ribs on petals, use a slightly smaller hook (2.25mm) for the rib rounds. This draws the petal center up while leaving edges soft.
Round 12 :
Create petal edging with picots: into each petal tip work (sc, ch3, sl st) to create lacy picot scallop (8 picots)
Round 13 :
Work a third petal layer between the existing petals: join at base between two large petals, ch5, (dtr, tr, dtr) in arch, ch5, sl st; repeat 8 times for interleaving petals
Round 14 :
Refine petals: sc around entire motif in back loops only (BLO) to create a firm underlayer (approx 96 sc - 12 sc between each pair of petals, adjust to match spacing)
Info :
At this point you have three layers of petals: small inner, large outer, and interleaved medium. Block petals with pins to open petals and set points. If using beads for center, attach now after Round 15.
Round 15 :
Center bead attachment prep: ch1, sc around the central disc (the original rounds), maintaining 32-40 sc to form a tight center (32-40 depending on tension)
Round 16 :
Use short decorative chains between petals to create lace gaps: *ch6, sl st to opposite petal base* x8 to form eight arches around flower (no change to sc count)
Round 17 :
Work tiny bulge ridges at petal bases: in each arch work (ch3, 5 dc cluster, ch3) anchored with sl st to petal base - 8 clusters
Round 18 :
Refine outer rim: 1 sc in each st around entire motif including arches and petal edges to tidy edges (approx 160 sc - exact depends on your arch counts)
Info :
If you prefer a fuller flower, repeat Rounds 10-13 with an additional petal row offset between existing petals. Blocking will help petals sit on top of one another attractively.
Round 19 :
Work final decorative edging: *(sc in next 4 sts, picot) x around* to give crisp points to each petal (maintain count from prior round)
Round 20 :
Fasten off leaving long tail for sewing and attach 9 gold beads in a circular arrangement to the center disc with sewing thread; tie off and weave ends neatly
Info :
Bead cluster: thread beads onto thin sewing thread or fine beading needle, pass thread through center disc several times to secure. Knot thread on backside and weave into rounds to hide tail. Do not glue beads; sewing preserves flexibility and washing.
Round 21 :
Optional depth: if you wish, create a tiny gathered underside disc: ch6, join to form loop, sc 12 into loop, pull to gather and sew to underside of flower to raise petals (12 sc)
Info :
Make 3 of these large poinsettias. Block them with generous pins: aim for finished diameter about 18–22 cm (7–8.5 in) depending on yarn. Use rust-proof pins when working with beads and metallic threads.
— Large Snowflake Doily (Make 4) :
Round 1 :
Make mr, ch3 (counts as dc), 11 dc into ring, sl st to top of ch3 (12)
Round 2 :
Ch5 (counts as dc+ch2), *dc in next st, ch2; rep from * around; sl st to 3rd ch of ch5 (12 dc, 12 ch2 spaces)
Round 3 :
Into each ch2 space: (sc, ch5, sc) to form airy points; sl st into top of first dc to finish 12 points (no change to count)
Round 4 :
Work each point: *sl st into ch5 space, ch4, 3 dc, ch4, sl st into same space* Repeat round to deepen points (12 points)
Info :
Snowflake points are decorative and will fit between poinsettias. Keep tension open but not loose; these motifs are for visual breathiness and mimic lace snowflakes.
Round 5 :
Between points join with *ch3, sl st into base of next point* to create small arches (12 arches)
Round 6 :
On each point work picot clusters: (sc, picot, sc) centered on point tip; do this on all 12 points
Round 7 :
Enhance center: inside the ring, sc 24 around central dc ring to firm center (24)
Round 8 :
Work a ring of chain loops between outer points: *in arch do (ch6, sl st) to create loops* x12
Info :
Block each snowflake flat to maximize star shape. Aim for finished diameter 14–16 cm (5.5–6.5 in) so they sit proportionally between large poinsettias.
Round 9 :
Edge the snowflake with small decorative sc clusters: work (sc, ch2, sc) into each space between points to give a scalloped border
Round 10 :
Fasten off and weave ends. If desired, use a single small gold or pearl bead in center by sewing through the central ring.
— Small Gold Star Motif (Make 8) :
Round 1 :
Make mr, ch1, 6 sc in ring, pull tight (6)
Round 2 :
Inc in each st around (12)
Round 3 :
(1 sc, inc) x6 (18)
Round 4 :
Form 6 small points: *ch5, sl st into next st* around creating 6 ch5 loops
Round 5 :
Into each ch5 loop work (sl st, ch3, 5 dc, ch3, sl st) to form little star rays (6 rays)
Round 6 :
Edge with sc around entire star to tidy and add stiffness (approx 48 sc depending on rays)
Round 7 :
Optional: add a single seed bead or tiny sequin at each star center by sewing; finish and fasten off
Info :
These little gold stars are used as accent fill; keep them small so they nest between petals and doilies without overpowering the runner.
— Leaf Motif (Make 12–16) :
Round 1 :
Ch8, sc in 2nd ch from hook, hdc, dc, tr, dtr into next chain, then work other side: tr, dc, hdc, sc to create a double-sided leaf (approx 14 sts total per leaf)
Round 2 :
Work rib vein: ch1, sc in middle of leaf base, *(FLO) sc down one side along post stitches, return up other side in BLO to create raised vein* - this creates one central vein
Round 3 :
Edge with picots for realism: *(sc, ch3, sl st) around edge at intervals of 2 sts to mimic serration (approx 8 picots per leaf)
Round 4 :
Work a second smaller leaf for layered effect: ch6, sc in chain back and forth to form small leaf (8 sts) and attach to larger leaf with sl st
Info :
Leaves are worked in olive; for a variegated look use two shades of green and alternate for each side of runner. Block them slightly cupped to mimic natural leaves.
Round 5 :
Optional vein embroidery: with contrasting green, embroider a running stitch along center vein using tapestry needle for expressive texture
Round 6 :
Fasten off leaving long tail for sewing to runner; weave ends to hide
Info :
Make between 12 and 16 leaves depending on spacing and if you plan extra filler between flowers. Leaves are usually sewn in groups of 3 or 4 around each poinsettia cluster.
— Berry Cluster (Make 6 clusters) :
Round 1 :
Thread six small glossy red beads on a short length of sewing thread. Knot one end. With the main yarn and a fine beading needle, sew beads together into a tight cluster by passing the needle through bead centers and across the thread core 3–4 times
Round 2 :
Secure cluster to a small crocheted base: ch4, join to form loop, sc 8 into loop, sew bead cluster onto loop center and secure by stitching through loops several times
Round 3 :
Work two small leaves or a tiny chain stem from base: ch6, sl st back to base, ch6 other direction; fasten off and weave ends
Info :
These clusters are decorative and should be sewn on securely with multiple passes. If you prefer not to sew beads directly into crochet, glue beads onto a small stitched pad and then reinforced-stitch into place.
— Small Connecting Doily / Base Lace (Make 4 panels) :
Round 1 :
Make mr, ch1, 10 sc in ring, sl st to join (10)
Round 2 :
(ch4, sc in next st) x10 to form 10 chain loops around base
Round 3 :
Into each ch4 loop work (sc, ch6, sc) to make delicate arches (10 arches)
Round 4 :
Between arches create lacy petals: *(sl st, ch3, 5 dc, ch3, sl st) in each arch* x10
Info :
These panels serve as the scaffold linking the larger motifs together. Make four of these smaller doilies to sit under and between snowflakes and poinsettias creating continuous lace down the runner.
Round 5 :
Edge entire panel with sc and tiny picots: work (sc in each st, picot every 4th sc) until panel is finished (approx 60 sc)
Round 6 :
Fasten off leaving a long tail for joining. Block flat to approximate 12–14 cm (4.5–5.5 in) diameter.
— Joining & Runner Assembly :
Info :
Layout your blocked motifs on a flat surface in the order pictured: Start with a small base lace panel, then a small cluster of leaves and berries, followed by a large poinsettia, then a snowflake, then a gold star cluster and repeat to form a long runner with even patterning. Pin pieces as you go to check spacing.
Round 1 (Joining Step 1) :
Using long tail from each motif, whipstitch the doilies to adjacent motifs at key contact points: sew through the sc rounds of each motif in hidden stitches. Use small stitches (about 8–12 stitches per contact point) for a secure join
Info :
Join points: aim to secure petals to doily arches at 6–8 points per flower so the weight is distributed. Avoid sewing through delicate picots; anchor into the firmer sc or dc rounds.
Round 2 (Joining Step 2) :
Attach leaves in groups of 3 around each poinsettia: position leaves under outer petals and sew securely through the BLO sc round that formed the underlayer. Use the long tail to ladder stitch into place to keep seam invisible.
Round 3 (Joining Step 3) :
Sew berry clusters at junctions between leaf groups and petals — place 1–2 clusters near each poinsettia to echo the picture. Secure through the small chain loops at the cluster base and into leaf base for stability.
Round 4 (Joining Step 4) :
Where motifs meet with open arches (for example snowflake to doily), join by slipping a small chain of ch6 between motifs and sewing chain ends into motifs to create airy links. Repeat chains to create decorative lace connections.
Info :
Assembly tip: Work slowly and step back often to ensure symmetry on both sides of runner. If a seam looks bulky, remove and resew with smaller, tighter stitch to reduce visible thread.
Round 5 (Final Edging) :
Once all motifs are joined, work a simple lace edger around the entire runner: with contrast or base cream yarn, sl st to one edge and work *(sc, ch4, sc) in each exposed space around perimeter; when you reach a tight curve, reduce chains to ch2 to keep edge smooth
Round 6 :
Finish with a picot round: *(sc in next 3 sts, picot) around entire runner to give tidiness and tiny points along perimeter
Info :
Weave in all tails, steam-block the entire assembled runner pinned to final shape, and allow to dry fully. This final block sets joins and shapes petal overlaps.
— Optional Reinforcements and Variations :
Info :
For a sturdier runner, sew a lightweight interfacing fabric to the underside hidden behind motifs using small whip stitches. For outdoor display, use mercerized acrylic yarn and secure beads with a dab of clear-drying craft glue in addition to stitching.
Info :
Color variations: substitute burgundy or blush for red, champagne for gold, and sage for olive to create different seasonal palettes. You may also make the snowflakes in metallic thread for shimmer.
Info :
Storage: store flat between sheets of tissue paper to protect beads and keep petals from crushing. Avoid hanging which can distort lace shape over time.
Completing this runner is so satisfying — watching each petal, leaf and snowflake come together into a cohesive heirloom centerpiece is a joy. The layered textures and bead centers bring holiday sparkle that feels timeless and warm. This project makes a stunning gift or a treasured table accent for years to come. 🎄🧶✨