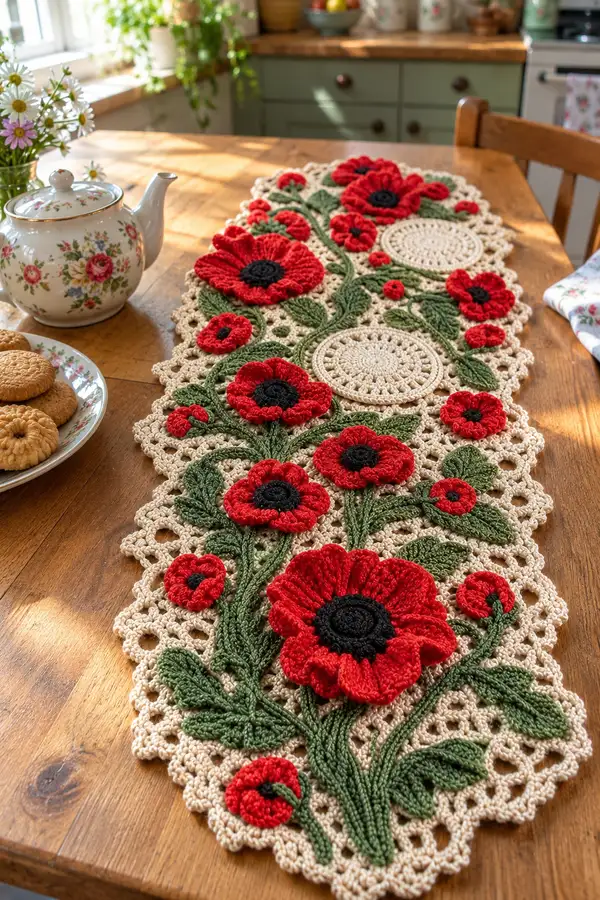
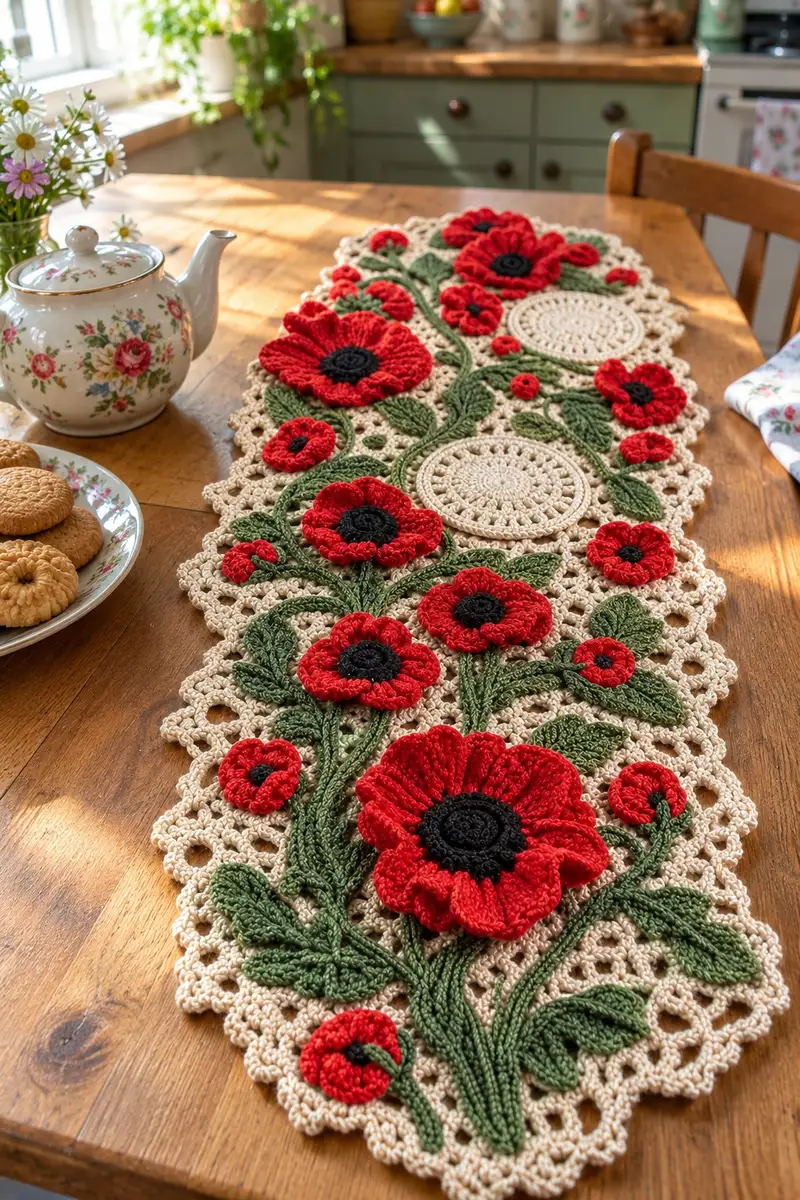
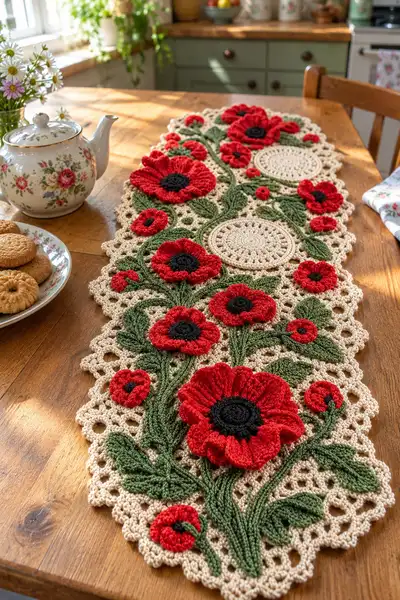
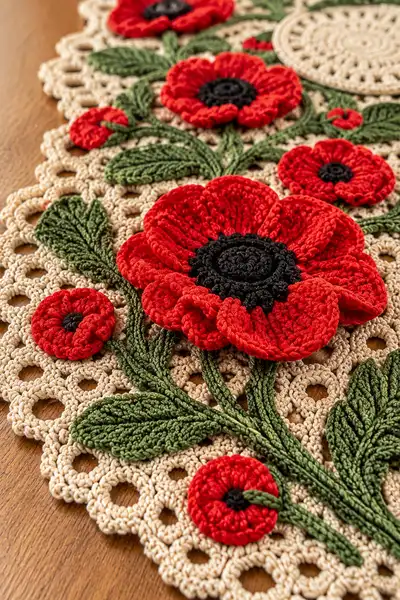
Bring a sunlit field of poppies to your table with this richly textured crochet table runner. The design features layered red poppies with black centers, sculpted green leaves and stems, and delicate neutral lace background motifs. Designed to lie flat on a dining table, the runner combines Irish-style applique with raised petals for a beautiful 3D effect.
Progress Tracker
0% Complete
— Overview & Notes :
Info :
This pattern is modular: you will make background circular motifs, sculpted poppy centers, layered petal clusters, leaf shapes and stems, then assemble and join them onto the lace background. The layout shown uses three large circular bases with vines connecting them, but you can alter placement. Work tightly enough to avoid gaping holes for cotton yarn; I use 3.5mm for the lace base and 3.0mm for centers and petals where a tighter fabric is desired.
Info :
Gauge is not critical for dimension but try to keep hook sizes consistent so appliques sit flat. Block flat motifs before assembly to ensure edges align. Use pins to position appliques before stitching; sew with matching yarn and small invisible whip stitches for neat joins.
— Large Round Motif (Background circle) :
Round 1 :
6 sc in magic ring (6)
Round 3 :
(1 sc, inc) x 6 (18)
Round 4 :
(2 sc, inc) x 6 (24)
Round 5 :
(3 sc, inc) x 6 (30)
Round 6 :
(4 sc, inc) x 6 (36)
Round 7 :
(5 sc, inc) x 6 (42)
Round 8 :
(6 sc, inc) x 6 (48)
Round 9 :
1 sc in each st (48)
Info :
Change to a picot or lacy round to begin the openwork. Keep tension relaxed for the lacy rounds so motifs lie flat.
Round 10 :
(1 sc, ch 3, skip 2) x 16 around (48 ch-3 spaces)
Round 11 :
Work into each ch-3 sp: sl st, ch 1, 3 sc cluster, ch 1, sl st to form decorative loop (48 loops)
Round 12 :
1 sc in each sc and 1 sc in each loop around to tidy edge (48)
Round 13 :
FLO: 1 sc in each st BLO on previous round to create a subtle ridge (48)
Round 14 :
Ch 1, *hdc, ch 2, skip next 1 st* repeat around to form a scallop base (48 scallop anchors)
Round 15 :
Into each scallop anchor: (sc, hdc, 3 dc, hdc, sc) to create scalloped edge (48 scallops)
Info :
Fasten off and block this motif to a 10-12cm diameter depending on your tension. Make three of these large motifs for the runner, placed along the length.
— Small Round Motif (Secondary base) :
Round 1 :
6 sc in magic ring (6)
Round 3 :
(1 sc, inc) x 6 (18)
Round 4 :
(2 sc, inc) x 6 (24)
Round 5 :
1 sc around (24)
Round 6 :
*(ch 4, sl st into next st)* around to create small eyelet ring (24 ch-4 loops)
Round 7 :
Into each ch-4 loop: sl st, ch 1, 3 sc cluster, ch 1, sl st (24 little loops)
Round 8 :
1 sc in each st and in each little loop to tidy edge (24)
Round 9 :
BLO: 1 sc in each st BLO (24)
Round 10 :
Work a micro-scallop: (sc, ch2, sc) into each st around (24 scallops)
Info :
These smaller motifs are used as accent background medallions between the large circles. Make two to four depending on runner length. Block flat and set aside.
— Poppy Center (Black) :
Round 1 :
6 sc in magic ring (6)
Round 3 :
(1 sc, inc) x 6 (18)
Round 4 :
1 sc in each st (18)
Round 5 :
BLO: 1 sc in each st BLO to create a rim (18)
Round 6 :
Work bobble round for texture: *(yo, insert, yo, pull through, yo, pull through 2 loops) repeat 4 times in same st, sl st to next st* repeat around (18 textured bobbles)
Info :
Fasten off leaving a long tail for sewing. The textured bobble round imitates the dense seed head of a poppy. Use tighter hook (3.0mm) for the center if you want firm texture.
— Poppy Petal Cluster (Large Flower) :
Info :
This section describes making an assembled petal cluster that forms 8 large petals joined to a circular petal base. Work the petal base first, then form petals around it. The petal base will sit on top of the black center.
Petal Base Round 1 :
6 sc in magic ring (6)
Petal Base Round 2 :
6 inc (12)
Petal Base Round 3 :
(1 sc, inc) x 6 (18)
Petal Base Round 4 :
1 sc in each st (18)
Info :
We will create 8 petal anchors around this base. Each petal is worked as a short fan to create a broad rounded petal with a ruffled outer edge.
Petal Anchor Setup :
Join red yarn to front loop of next st. *Ch 3, (sc) into same st, ch 2, sl st into next base st* repeat 8 times around to create 8 ch-3 anchors (8 anchors)
Petal Round 1 (each petal) :
Work into each ch-3 anchor: sl st, ch 2, (2 dc, ch 1, 3 dc) all into anchor to create a full fan base (8 fans)
Petal Round 2 :
Turn petals up and in RS: Into each fan: *(dc, picot, dc, 2 dc cluster, dc, picot, dc)* across fan to form textured ridge and slight cup (count 8 petal shapes formed)
Petal Round 3 :
Edge each petal with (sc, hdc, 3 dc, hdc, sc) into outer edge to create ruffled lip
Info :
After finishing all 8 petals, fasten off and weave ends. Slightly block each petal into a soft curve using pins and a small amount of steam shaping if desired. Join the black center beneath the petal base with matching black yarn so center peeks through.
— Poppy Petal Cluster (Medium Flower) :
Petal Base Round 1 :
6 sc in magic ring (6)
Petal Base Round 2 :
6 inc (12)
Petal Base Round 3 :
1 sc in each st (12)
Petal Anchor Setup :
Join red yarn: *ch 2, sl st into next st* repeat around to create 6 anchoring points (6 anchors)
Petal Round :
Into each anchor: ch 2, (2 dc, ch 1, 2 dc) making 6 smaller fans. Edge with single ruffle round: (sc, 2 dc, sc) for each petal. Fasten off and block slightly.
Info :
Make multiple sizes of petals for layered flowers: 8-petal large, 6-petal medium and 5-petal small clusters to create depth. Use darker and lighter reds as desired for variety.
— Small Poppy Buds :
Round 1 :
6 sc in magic ring (6)
Round 3 :
1 sc around (12)
Round 4 :
Fold slightly and sl st through both sides to create a closed bud shape, fasten off leaving long tail for sewing (no stuffing)
Info :
Attach buds at stages along stems; some buds are half-open — you can fold the edge slightly and tack a few stitches to make a half-open effect.
— Leaf (Make Many) :
Row 1 :
Ch 11, sc in 2nd ch from hook, sc across (10 sc) — this is the foundation row length; you may adjust to make larger/smaller leaves
Row 2 :
Ch 1, turn, inc in first st, sc across until last st, inc in last st (12)
Row 3 :
Ch 1, turn, sc in first, (hdc, dc, hdc) in next 3 sts to start shaping center vein, sc across to last, sc in last (12)
Row 4 :
Ch 1, turn, dec at first two sts (invisible dec), sc across center, dec final two sts (10)
Row 5 :
Ch 1, turn, sc across (10)
Row 6 :
Ch 1, turn, BLO: 1 sc in each st BLO to create a ridge for the leaf edge (10)
Row 7 :
Ch 1, turn, shape symmetrical tip: dec in first two sts, sc remaining, fasten off leaving long tail for sewing
Info :
Work leaves in FLO or BLO on specified rounds to create a raised central vein: use surface slip stitch along center after the leaf is complete to emphasize veins. Make leaves in multiple sizes and orientations for a natural look.
Leaf Variation (Pointed with Vein) Row 1 :
Ch 14, sc in 2nd ch from hook across (13)
Row 2 :
Ch1, turn, inc in first, sc across, inc in last (15)
Row 3 :
Ch1, turn, sc, hdc, (dc x3) along center to create bulk, hdc, sc across (15)
Row 4 :
Ch1, turn, dec at both ends to shape tip, sc across, fasten off leaving long tail
Info :
Surface crochet or embroider a central vein with matching green yarn using back stitch or slip stitch. For pronounced veins, work a raised surface chain down the center and secure with tiny stitches at each end.
— Stem Cord (Make long vine pieces) :
Method A - I-cord Spun:
Ch desired length + 3, sc in 2nd ch from hook and each across, do not turn, work continuously in a spiral around the chain by inserting hook under both loops of the foundation chain and working sc in a tubular fashion for a minimum of 6 rounds of sc around chain to create a firm cord. Fasten off and block into gentle curves.
Method B - Tightly Worked Rope:
Create a 6-8 strand braid: crochet 6 short chains, join them with slip stitch at one end and braid tightly. Use matching yarn to secure ends and whipstitch the braid lengthwise for added stability. This gives a hand-stitched vine appearance.
Info :
Make stems in varying lengths to mirror the image: some long sweeping stems connecting the three large circles, and short stems that hold small buds and leaves. Stems should be flexible but hold shape; optional wiring can be slipped inside a cord for extra firmness.
— Assembly Base Lace Panels & Joining :
Info :
Arrange three large circular motifs spaced evenly along the runner length with two small motifs between them. Create connecting lace strips by working a chain-ladder base and adding chains/loops to match the large motif scallop spacing. The lace between motifs uses the same eyelet patterns to appear continuous.
Join Round 1 :
With RS facing, position two large motifs with their scallops overlapping by two scallops. Using neutral yarn and whip stitch, join along overlapping scallop edges with invisible whip stitches, sewing through both motif edges at each scallop base (approx 10-12 stitches per scallop cluster).
Join Round 2 :
Create lace connectors: ch 8, sl st into scallop sp on adjacent motif, repeat from motif to motif to form open lattice. Fasten off and weave ends.
Info :
For a neat join, use a smaller hook and tighter tension when slip-stitching connectors—this prevents sagging between motifs. Pin the entire composition on blocking mats before permanent stitching.
— Leaf & Stem Attachment :
Info :
Position stems such that they curve naturally between motifs. Attach stems first using small slip-stitches along the length every 1–2 cm to hold them flat. Use matching green yarn for invisible joins.
Attachment Step :
Sew leaves onto stems starting with largest leaves near base of flower and smaller ones farther up. Use a ladder stitch or small whipstitches along the central vein area so leaves sit flush and are slightly cupped outward.
Info :
For dimensionality, sew only the base of some leaves so their tips lift slightly from the background. Alternate leaf orientations for a natural effect.
— Attaching Poppy Petals & Centers :
Step 1 :
Position black center directly on the petal base so the bobble texture faces up. Use black yarn tail and a tapestry needle to sew center through the petal base using small stitches around the center circumference (approx 10-14 small stitches). Pull gently to fasten but avoid puckering petals.
Step 2 :
Place the petal cluster above the black center and sew the petal base onto the background motif at the scallop area so the flower sits slightly raised. Use red yarn tail and small stitches at petal base, anchoring to both petal base and background motif edge.
Info :
Tack only at intervals around the petal base (6-8 anchor points) to maintain a lifted look. Use extra stitches on large petals to prevent flopping; weave tails into the petals to secure without visible knots.
— Small Bud & Accent Attachment :
Step :
Sew buds at stem tips. For half-open buds, add a tiny black slip stitch at bud center to suggest the inner center. Use short lengths of stem cord joined beneath the bud and sewn onto the background for a natural poppy bud look.
Info :
Vary bud sizes to create a dynamic composition. Place a few micro-buds in clusters of two or three near leaves for visual interest.
— Edging the Runner :
Round 1 :
With neutral yarn, work a tidy sc round around entire connected runner to unify edges: 1 sc in each st and 1 sc in each scallop tip (approx stitch count will vary with runner size)
Round 2 :
*(ch 4, sl st into next sc), sk 1* repeat around to create uniform openwork loops that echo motif eyelets.
Round 3 :
Into each ch-4 loop: sl st, ch1, 5 sc cluster, ch1, sl st to form a lacy rosette point (repeats equal number of ch-4 loops)
Round 4 :
Edge each rosette with (sc, hdc, 3 dc, hdc, sc) to create final scalloped edge. Fasten off and weave ends thoroughly.
Info :
Keep the scallop depth shallow enough that the runner lies flat. Use blocking to prevent cupping of petals and scallops. Spray starch lightly if you want a stiffer table runner that will sit perfectly flat.
— Finishing Touches & Blocking :
Info :
Pin the finished runner flat on blocking mats, shape petals and leaves with pins, and lightly steam or mist to set shape. Allow to dry completely. Weave in all tails with a tapestry needle and trim close to work. Optionally, add micro surface embroidery to leaf veins with a slightly darker green for contrast.
Care :
Hand wash gently in cool water, reshape while damp and lay flat to dry. Press lightly if needed; avoid tumble drying. Cotton or cotton-blend yarns work best for durability on table surfaces.
This Poppy Field Table Runner transforms a simple table into a blooming centerpiece full of texture and color. The combination of lace backgrounds and sculpted poppies creates an heirloom-quality piece you'll be proud to display. It's a slow, satisfying project that rewards patience with beautiful 3D flowers and elegant detail. 🌺 Take your time, block carefully, and enjoy the floral result — perfect for seasonal tables or a thoughtful handmade gift. 🧶