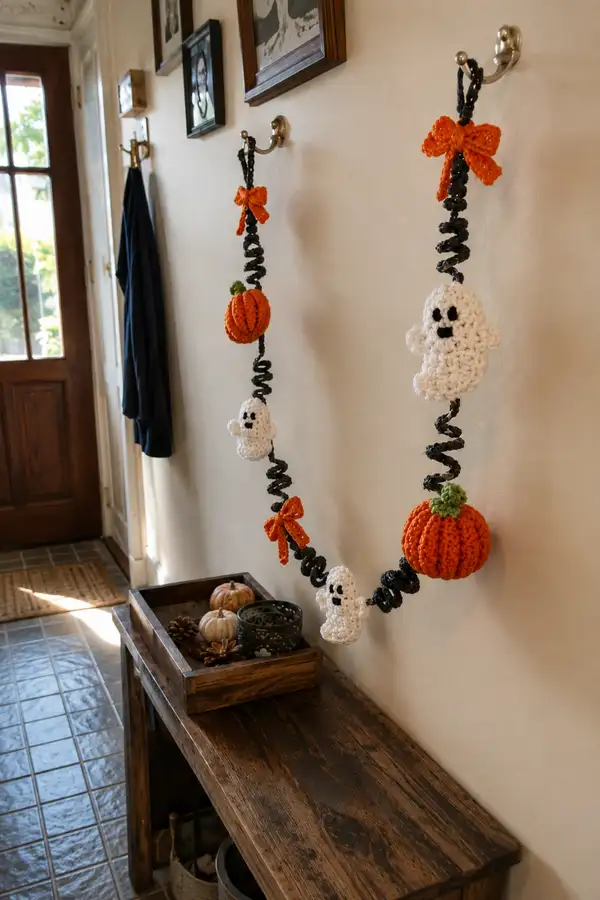
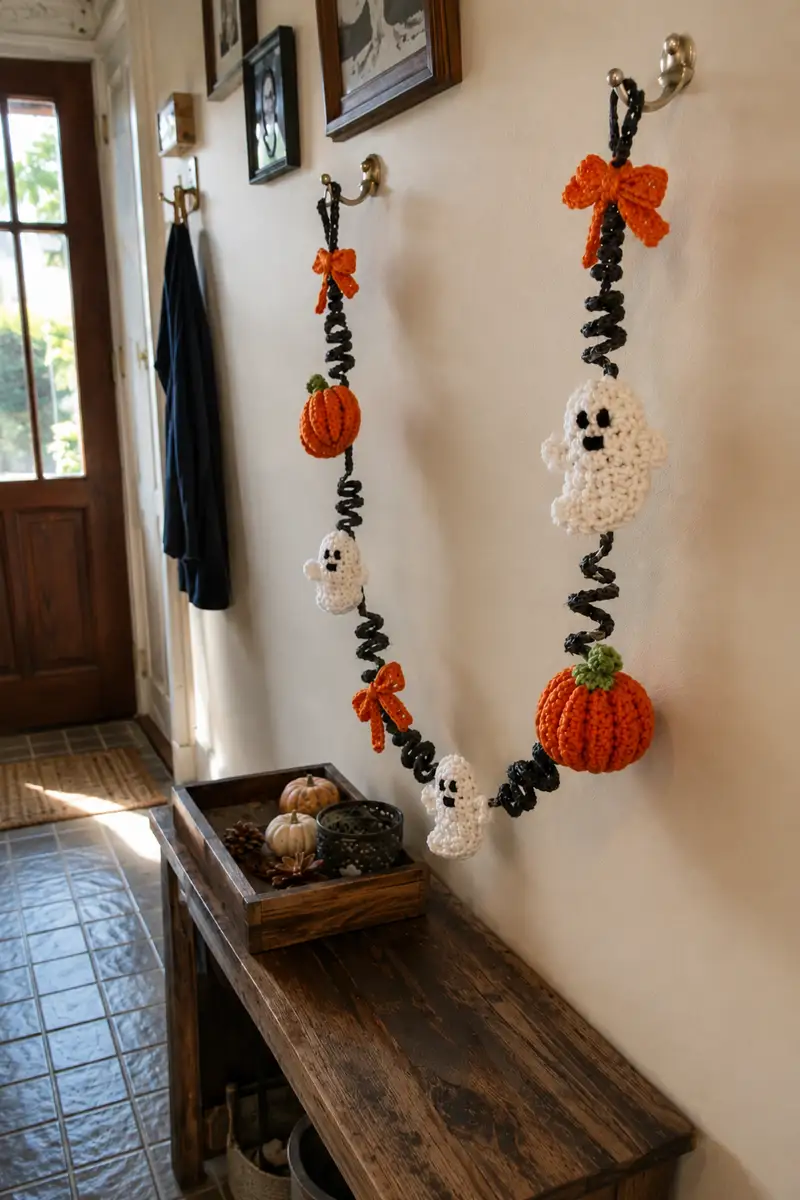
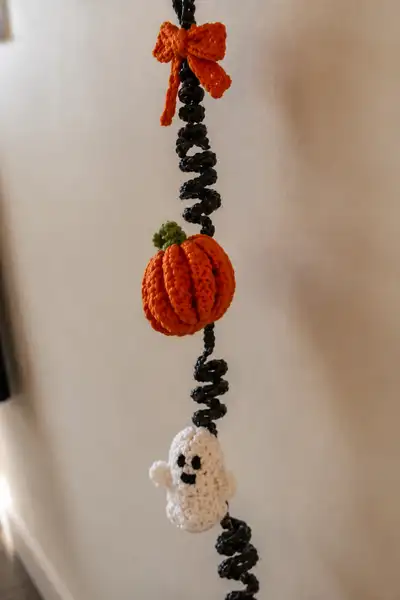
Create a whimsical Halloween garland featuring plump ribbed pumpkins, squishy little ghosts, and corkscrew black spirals tied with bright orange bows. This pattern shows how to crochet each motif, assemble them on a spiral cord, and finish with tidy bows for a festive display. Perfect for hanging on a wall, mantel, or entryway to welcome autumn trick-or-treaters.
Progress Tracker
0% Complete
— Notes & Overview :
Info :
This pattern describes crocheting three ghost motifs, two plump pumpkins, three small orange bows, and one long corkscrew spiral cord. Each motif is made separately and sewn onto the spiral cord with stitch-by-stitch placement guidance. Maintain consistent tension; pieces shown are worked in worsted weight yarn with a 3.5mm hook.
Info :
Stitch counts shown at the end of each round are total stitches in that round. When an instruction is repeated across a round, the parenthetical indicates how many times to repeat the grouped instruction.
— Pumpkin (Large) - Make 2 :
Round 1 :
6 sc in magic ring (6)
Round 3 :
(1 sc, inc) x 6 (18)
Round 4 :
(2 sc, inc) x 6 (24)
Round 5 :
(3 sc, inc) x 6 (30)
Round 6 :
(4 sc, inc) x 6 (36)
Round 7 :
(5 sc, inc) x 6 (42)
Round 8 :
(6 sc, inc) x 6 (48)
Round 9-14 :
1 sc in each st (48)
Info :
These even rounds create the midsection of the pumpkin. Keep tension steady for a round, plump pumpkin. Use stitch markers every 8 stitches to help maintain even placement for later ribs.
Round 15 :
(6 sc, dec) x 6 (42)
Round 16 :
(5 sc, dec) x 6 (36)
Round 17 :
(4 sc, dec) x 6 (30)
Round 18 :
(3 sc, dec) x 6 (24)
Info :
Begin light stuffing now. Add fiberfill a little at a time to avoid lumps—the pumpkin should feel firm but slightly springy. Distribute stuffing evenly so ridges will sit nicely later.
Round 19 :
(2 sc, dec) x 6 (18)
Round 20 :
(1 sc, dec) x 6 (12)
Info :
Leave a long tail (about 20cm/8in) and don't fasten off yet. Pull the tail through the remaining 6 sts and gather to close. Secure with a knot and weave the tail inside to hide. This completes the basic spherical pumpkin body.
Info :
After closing, place the pumpkin with the top seam up. We will add vertical ribs next by dividing the pumpkin circumference into equal segments. The pumpkin above was worked to 48 sts at widest; we will create 10 ribs spaced evenly by counting 48/10 = about 4.8 sts; place ribs either every 5 stitches alternating smaller spacing to maintain symmetry.
Rib Formation Step 1 :
Cut a long length of the orange yarn (approx 120-150cm/48-60in). Thread a yarn needle and bring the needle from the top center through to the base, leaving a small tail at top. Pull gently to anchor. For 10 ribs, insert needle back up at a point ~5-6 stitches away from where it emerged, pull through to the top center, and tighten slightly to create a visible segment. Repeat around the pumpkin to continue forming evenly spaced vertical ribs.
Info :
As you form each rib, keep tension consistent so ribs are visible but not puckering the pumpkin excessively. After all ribs are sewn, tie the yarn at the top and weave ends in. This pulling creates the pumpkin's characteristic segmented look.
Stem :
Ch 6, join to form a ring with sl st, Round 1: 6 sc in ring (6). Round 2: (1 sc, inc) x 3 (9). Round 3-4: 1 sc in each st (9). Fasten off leaving tail to sew to top center of pumpkin. Stuff stem lightly before sewing. For a more textured stem, work FLO rib rounds or create small leaves by chaining 6 and forming picot edges and sewing at the stem base.
Info :
Sew stem to the top center by inserting needle through the top center and around base of stem. Secure with multiple passes and weave in ends. Repeat for second pumpkin.
— Ghost (Small Friendly Ghost) - Make 3 :
Round 1 :
6 sc in magic ring (6)
Round 3 :
(1 sc, inc) x 6 (18)
Round 4 :
(2 sc, inc) x 6 (24)
Round 5 :
(3 sc, inc) x 6 (30)
Round 6-9 :
1 sc in each st (30)
Info :
Place eyes now between rounds 7 and 8 about 6-8 sts apart depending on desired expression. If embroidering, use black yarn and make small satin-stitched ovals centered on the round specified. If using safety eyes, insert and lock before stuffing.
Round 10 :
(3 sc, dec) x 6 (24)
Round 11 :
(2 sc, dec) x 6 (18)
Info :
Begin light stuffing at this stage to give the ghost a soft rounded head. Stuff sparingly to allow flexibility so the ghost can hang and move along the spiral cord.
Round 12 :
1 sc in each st (18)
Round 13 :
(1 sc, dec) x 6 (12)
Info :
We will create the ghost's little arms next. With white yarn and working where you want the arm positioned (usually between rounds 8 and 10 on the side), join yarn and work the small arm motif described below twice.
Arm (Make 2 for each ghost) :
Round 1: 6 sc in MR (6). Round 2: (1 sc, inc) x 3 (9). Round 3-4: 1 sc in each st (9). Round 5: sl st to join & fasten off leaving tail for sewing. Slightly stuff the arm and sew to the side of the ghost aligning the opening around round 9. Secure with multiple passes to make the arm appear rounded and attached.
Round 15 :
With the ghost body still open at the bottom, create three scallops for the bottom edge to read as a wavy ghost hem. Attach yarn at one bottom stitch and work: *(sc 1, ch 3, sl st in the same stitch) in next 6 sections* to create 6 small loops around bottom edge. Fasten off and weave ends in.
Info :
Embroider a small smile and two oval eyes on the front using black yarn. Use satin stitch technique for filled ovals, 3-4 passes for a dense look. Make the face slightly above the midpoint of the body (around rounds 7-8 as placed earlier).
— Spiral Corkscrew Cord :
Info :
The spiral cord is the structural element of the garland. You can make the corkscrew by crocheting a long chain and then making multiple sc in each chain stitch to force a curl, or by crocheting around a wire core. Below are two safe methods: crochet-only (recommended) and optional wire core for firmer spirals.
Method A - Crochet-Only Corkscrew :
Ch 140 (this gives a generous garland length; adjust chain length to desired final length). Turn, Row 1: 3 sc in 2nd ch from hook, *3 sc in next ch* across (420 sc). Sl st to join if you prefer a tube, or continue in continuous rounds using a small marker and slip stitch to bring the spiral tighter.
Info :
3 sc in each chain forces a strong curl. If you want a looser curl, do 2 sc in each ch instead. For durability, hold two strands together: the black novelty ribbon plus a strand of regular black worsted.
Method B - Wire Core Corkscrew (Optional) :
Cut a length of thin floral wire or pipe cleaner to the length of the garland. Chain 140 and then single crochet around the chain holding the wire alongside as you work, inserting the hook under the wire occasionally to trap it inside the cord. Work 2 sc in each chain to form a tight wrap around the wire. Bend the wire gently to form a corkscrew shape every 3-4 inches; the crocheted wrap will hold the shape.
Info :
If using wire, fold the wire ends inward and cover them well with yarn so there are no sharp tips. Weave in ends tightly to prevent wire from slipping out.
Spiral Segments :
After forming the corkscrew cord, fold it into gentle S-curves to preview motif placement. Mark positions for two large pumpkins and three ghosts plus bows and spacing using pins. Typical spacing: top bow, 8-10 cm, pumpkin, 10-12 cm, ghost, 10 cm, bow, 10-12 cm, small ghost, 10-12 cm, pumpkin, 10 cm, bottom ghost, finish with bow. Adjust spacing to taste.
— Small Orange Bow - Make 3 :
Bow Wing (Make 2 wings per bow) :
Ch 12, Row 1: sc in 2nd ch from hook and across (11). Row 2-3: ch1, turn, sc across (11). Fasten off leaving long tail. Fold the rectangle in half lengthwise and wrap the long tail tightly around the center several times, then sew or glue to secure and form the bow shape. Repeat for second wing and combine two wings together with the wrapped center. Leave long tail to tie around spiral cord and sew in place.
Bow Tails (Optional) :
Ch 10, sc back along the chain, fasten off. Fold tails under the bow and sew to backside for a finished look. Use green yarn instead if you want leaves instead of tails.
Info :
To attach the bow to the spiral cord, wrap the long tail around cord and sew through several rounds of the cord so the bow cannot slip. For a neat loop to hang over hooks, create a 10-ch loop at the top and work a small row of sl st to make a cord looped hanger, then knot and sew into place.
— Small Pumpkin (Optional Accent) :
Round 1 :
6 sc in magic ring (6)
Round 3 :
(1 sc, inc) x 6 (18)
Round 4 :
(2 sc, inc) x 6 (24)
Round 5-7 :
1 sc in each st (24)
Round 8 :
(2 sc, dec) x 6 (18)
Round 9 :
(1 sc, dec) x 6 (12)
Info :
Close and pull tail through remaining sts, then create 6 ribs by sewing vertical lines with yarn as described for large pumpkin. Add a 5-stem: ch 4, sl st, ch 4 returning; sew green yarn stump on top, weave ends in.
— Assembly & Spacing :
Info :
Layout the corkscrew cord flat and arrange motifs according to your desired spacing. Pin each motif so you can step back and check balance. Typical order top-to-bottom: loop hanger and bow, short spiral section, pumpkin, long spiral, ghost, bow, small ghost, spiral, pumpkin, ghost, bottom bow.
Attaching Motifs :
Sew each motif to the spiral cord through several rounds of the cord and several stitches of the motif. For the pumpkins, stitch through the base (the seam where you closed the pumpkin) and around a few stitches into the ridge to anchor. For ghosts, stitch through the center back and through the cord to keep them facing forward. Use a locking knot and weave ends into the motif interior.
Info :
When sewing, use small stitches and pass the yarn needle through multiple times for strength. If you used novelty ribbon for the corkscrew, make sure your needle can pass easily; consider using a blunt tapestry needle to avoid splitting the ribbon strands.
— Final Finishing Touches :
Info :
Trim any visible yarn tails and weave ends into the bodies. If desired, add a dab of fabric glue under each bow to lock the center wrap. Optionally, add a small loop at the top with a few extra chains to make hanging easier on knobs or hooks.
Info :
Gently shape pumpkins with your fingers to emphasize ribs and roundness. Slightly pull scallops on ghost hems to create a playful floating look. Block lightly by pinning shapes to a flat surface if necessary, then steam carefully from a distance to set the shape (test on a yarn scrap first).
Info :
For a longer garland, increase the chain length for the corkscrew cord proportionally and add more motifs, keeping the balance of pumpkins, ghosts, and bows for a cohesive look.
This spiral Halloween garland combines simple amigurumi shapes, cozy ribbed pumpkins, and playful corkscrew cord for a striking seasonal accent. Each motif comes together with straightforward shaping techniques and simple surface finishing to create a polished look. Hang it on a door or over your mantel to brighten autumn evenings with handmade charm. 🧶🎃👻 Enjoy making it and share your spooky-season creations!