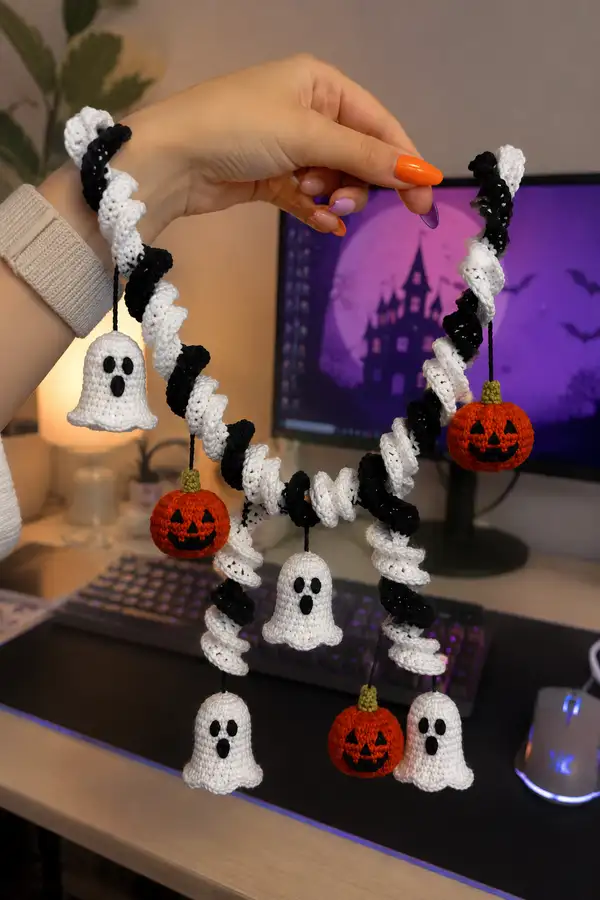
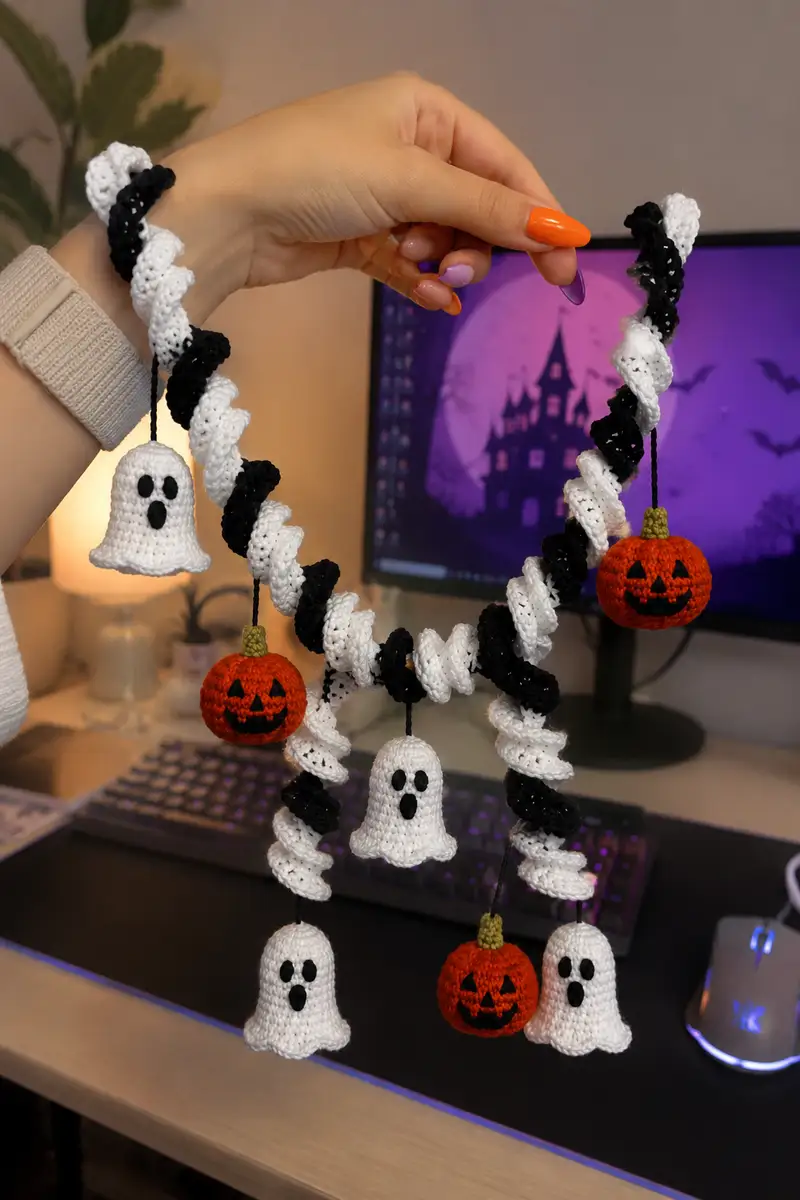
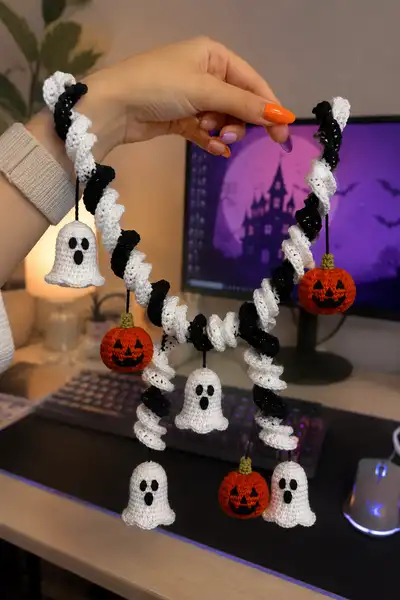
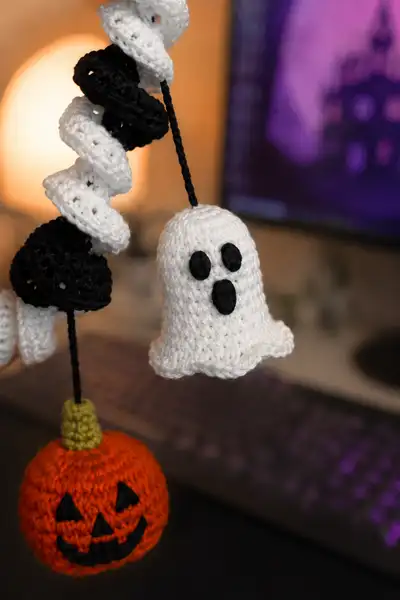
A playful Halloween garland featuring alternating black-and-white spiral ruffles strung with tiny amigurumi ghosts and jack-o-lantern pumpkins. The design uses simple amigurumi techniques and modular spiral motifs to create a dramatic twisted garland perfect for doorways, mantels, or party decor. Each ghost has a scalloped bell base and embroidered facial features; pumpkins are round with carved faces and a tiny green stem. Friendly, festive, and perfect to display through the spooky season.
Progress Tracker
0% Complete
— Overview :
Info :
This pattern is modular: you will make a long spiral garland rope composed of alternating color ruffle modules and attach small amigurumi ghosts and pumpkins at intervals. The pattern below contains full round-by-round instructions for each ornament and for the spiral modules. Make 4 ghosts and 3 pumpkins for a garland similar to the sample photos. Adjust quantities to lengthen or shorten your garland.
— Materials & Gauge :
Info :
Gauge is not critical for this decorative piece but tight stitches are recommended so stuffing does not show. Using a 3.5mm hook with worsted weight yarn will yield ornaments approximately 2.25-2.75 inches (5.5-7 cm) tall for ghosts and 2.25-3 inches (6-7.5 cm) diameter for pumpkins. The finished garland length with 7 ornaments is roughly 60-80cm depending on spacing; adjust by adding more spiral modules.
— Ghost (Make 4) :
Round 3 :
(1 sc, inc) x 6 (18)
Round 4 :
(2 sc, inc) x 6 (24)
Round 5 :
(3 sc, inc) x 6 (30)
Round 6 :
(4 sc, inc) x 6 (36)
Round 7-12 :
1 sc in each st around (36) — work 6 rounds to build height of head/dome
Info :
Place eyes between rounds 9-10, approximately 6-8 sts apart depending on expression. Use small safety eyes (6-8mm) or embroider eyes now. If using safety eyes, insert and secure washers before continuing. Mark the center front for face alignment.
Round 13 :
(4 sc, 1 dec) x 6 (30)
Round 14 :
(3 sc, 1 dec) x 6 (24)
Info :
Begin stuffing the dome firmly but not overstuffed. Use small tufts to maintain a rounded top and prevent lumps. Continue stuffing as you shape the head toward the neck.
Round 15 :
(2 sc, 1 dec) x 6 (18)
Round 16 :
(1 sc, 1 dec) x 6 (12)
Round 17 :
1 sc in each st (12)
Info :
The 12-st round forms the neck. Keep stitches even and maintain tension so the neck is a neat cylinder; this will support the flared skirt later. If you prefer a very narrow neck, make an additional round of dec here: (1 sc, dec) x 4 leaving 8 sts.
Round 18 :
(1 sc, inc) x 6 (18)
Round 19 :
1 sc in each st (18)
Round 20 :
(2 sc, inc) x 6 (24)
Round 21 :
1 sc in each st (24)
Round 22 :
(3 sc, inc) x 6 (30)
Round 23 :
1 sc in each st (30)
Info :
These increases create a gentle flare where the ghost skirt will ripple. Maintain even tension so the scallop row below lies flat and pretty.
Round 24 :
*2 sc, 5 dc in next st* around, repeat 10 times (each repeat uses 3 sts = 30) — creates 10 shell scallops
Round 25 :
Sl st into center of first shell, ch1, sc in same stitch, *skip to center of next shell, sc, repeat around (10 sc across 10 shells)* (10)
Round 26 :
Working in back loops of the 10 sc from previous round: (2 sc in each st) x 10 (20) — builds a bit more flare and a finished edge
Info :
Fasten off white yarn leaving a long tail for sewing to hanger cord if you plan to blind-stitch the hanging loop. Finish stuffing skirt region lightly from the neck downward to avoid overfilling the skirt frills.
Round 27 :
Optional decorative picot edge: *ch3, sl st in first ch, sc into next back loop* around shells if desired (10 picots)
Round 28 :
Finish: Fasten off leaving 18–25 cm tail for hanging. Weave tail through top of neck in a tight running stitch and form a small loop, knot securely to create the hanging cord anchor. Hide ends inside head.
Info :
Facial features: For classic boo-face, embroider two small oval eyes and an open round mouth using black yarn. Make small oval felt pieces or crochet tiny ovals (ch4, 3 sc back across, fasten off) and sew in place for a raised look. Use embroidery to attach them securely so they will not detach.
— Pumpkin (Make 3) :
Round 3 :
(1 sc, inc) x 6 (18)
Round 4 :
(2 sc, inc) x 6 (24)
Round 5 :
(3 sc, inc) x 6 (30)
Round 6 :
(4 sc, inc) x 6 (36)
Round 7 :
(5 sc, inc) x 6 (42)
Round 8-14 :
1 sc in each st around (42) — work 7 rounds to build height of pumpkin sphere
Info :
At the end of round 12 or 13 place a small amount of stuffing into the ball to keep shape as you continue. Leave center area for later stuffing so you can add more to make the pumpkin plump.
Round 15 :
(5 sc, 1 dec) x 6 (36)
Round 16 :
(4 sc, 1 dec) x 6 (30)
Round 17 :
(3 sc, 1 dec) x 6 (24)
Info :
Begin stuffing the pumpkin firmly now, adding small pieces of fiberfill and working them in evenly so each pumpkin has a rounded, slightly flattened look like a real jack-o-lantern.
Round 18 :
(2 sc, 1 dec) x 6 (18)
Round 19 :
(1 sc, 1 dec) x 6 (12)
Round 20 :
6 dec (6) — close top and fasten off leaving long tail for closing. Weave tail through remaining sts and pull tight to close. Hide tail inside pumpkin.
Info :
To create pumpkin ribs: Thread matching orange yarn onto a needle and divide circumference into 6 equal sections (use stitch count 42 rounds earlier to mark positions). Sew vertical lines from top to bottom by pulling thread through the center of the top, down along the surface to the base, and back up. Repeat for each rib, pulling slightly to create the segmented pumpkin look. Tie off inside and bury the tail in the stuffing.
Round 21 :
Stem (with olive/green): Make a small tube. Ch6, join to make loop, 6 sc in loop (6)
Round 22 :
1 sc in each st around (6)
Round 23 :
Repeat Round 22 for 6 rounds total (6) — extend stem length to 6 stitches high
Round 24 :
Fasten off leaving long tail. Sew stem to top center of pumpkin and secure inside with a few stitches. Add a couple of tiny surface slip stitches across stem in darker green to suggest texture.
Info :
Embroider jack-o-lantern face using black yarn. Use satin stitch or embroidered triangles for eyes and nose and a curved smile; sew carefully through rounds 9–12 area so face sits on the curved front. Make sure embroidery is tight and secure.
— Spiral Garland Rope (Make 1 long rope; modular) :
Info :
The spiral is constructed from repeating ruffle modules worked separately in alternating colors and then joined with a short core tube or chain. Each ruffle module is compact and when stacked alternating black and white modules, twisting them around the central cord produces the spiral twist. Make 12–16 modules per garland depending on desired length; the sample uses 14 modules (7 white, 7 black).
Module Base - Round 1 :
Ch 20, sl st to join into a ring carefully without twisting (20) — this forms a short loop base for a module
Module Base - Round 2 :
1 sc in each ch around (20)
Module Base - Round 3 :
1 sc in each st around (20)
Info :
The base rounds build a little tube that will act as the center that the ruffle sits on. Keep tension even so each module has the same inner diameter to stack neatly when twisted.
Module Ruffle - Round 4 :
*sc in next st, 3 dc in next st* repeat around (for 20 sts results in 10 sc+10 shells) — creates an initial set of shells for a ruffle
Module Ruffle - Round 5 :
*sc in next st, 5 dc in next st* repeat around — enlarges shells for fullness
Module Ruffle - Round 6 :
Sl st to join into center of first shell, ch1, sc in same place, *sc in center of next shell* repeat around (10 sc) — tidy up shell centers
Module Finish - Round 7 :
1 sc in each st (10) working through both loops; fasten off leaving 25–30 cm tail for joining modules
Info :
Work all white modules first, then black modules, or alternate as you go. Block modules gently with steam if desired to set shell shape. Make at least 14 modules to match sample; more modules = longer garland.
Core Cord (long) - Round 8 :
Chain to desired core length (sample uses ch 120 for a 60cm garland; adjust for length). This chain will be the central core the modules slip over or are sewn onto. Leave long tail at each end for hanging loops.
Core Cord - Round 9 :
To make cord sturdier, work 1 sc in each ch across the chain in a single-pass tube: ch1, turn, starting in 2nd ch from hook sc across, fasten off leaving long tails and stitch ends together to form continuous core.
Info :
Slip each ruffle module onto the core cord and space them end-to-end. To make the spiral twist, stack alternating colors and then gently twist the entire cord until the modules naturally coil in a spiral. Adjust spacing so ruffles overlap slightly and maintain the twist by sewing a few hidden stitches through each module at its inner tube to the core cord, securing their rotation.
Securing Modules - Round 10 :
Using tail left from module, whip stitch inner tube of module to core cord at 3 evenly spaced points (top/middle/bottom of inner tube). Repeat for each module to secure position and spiral tension.
Info :
If you prefer the modules to be removable, you can slide them on without sewing and secure with a small safety pin inside each tube, but sewing gives a cleaner finished look and prevents modules from sliding along the cord.
— Hanging Cord & Braids :
Round 1 :
Cut three lengths of black yarn 60 cm each for braiding. Fold them in half and tie at one end to create loop. Braid tightly to form hanging tail. Knot at end and weave in ends tightly.
Info :
You will make multiple short braids (approx 20–25 cm) to create the hanging strings for ornaments. Use a single strand for upper anchor and 3-strand braids for ornament suspensions to add weight and contrast against the white spiral.
— Attaching Ornaments :
Info :
Select mounting positions on the spiral where ruffles create a small pocket; tuck a short black braid or cord through the inner tube of a module and use the tail from each ornament (left from finishing) to tie or sew through the braid, so ornaments hang down between coils. Space ornaments evenly — sample spacing: hang an ornament every 12–16 cm along the garland.
Attachment Step 1 :
Thread the long tail from the ghost/pumpkin through a small length of black braid or through a yarn loop and knot securely. For neatness, hide the knot inside the top neck/stem of the ornament.
Attachment Step 2 :
Position ornaments so they hang flat against the front of the spiral, not twisting. Sew through the inner top of each ornament into the core cord of the module with 6–8 secure stitches. Knot and bury yarn ends into stuffing.
Info :
When attaching multiple ornaments, pin each into place and view from a distance to ensure balanced spacing and symmetry left-to-right. The sample has symmetrical pairing: two pumpkins near the ends and ghosts grouped centrally.
— Embroidery & Facial Detail :
Ghost Eyes & Mouth :
Cut small scraps of black yarn or felt. Using a yarn needle, sew two small ovals for eyes onto the dome front approximately 6–8 sts apart between rounds 9–10. For the mouth, make a slightly larger oval and sew centered under eyes. Alternatively, embroider eyes with satin stitch using black yarn.
Pumpkin Face :
Using black yarn, embroider triangular eyes and nose with satin stitch and create a curved smile with a combination of satin and back stitch. Work through rounds 9–12 for the face area so the smile sits on the curve of the pumpkin. Secure all yarn ends tightly and hide within stuffing.
Info :
For a clean look, work embroidery before final stuffing is complete so you can stabilize stitches from the inside. Use small tacking stitches to hold embroidery in place while you complete stuffing and final assembly.
— Final Finishing :
Info :
After all ornaments are attached and the spiral rope's modules are secured, check all knotted ends and buried tails. Trim any visible tails close to the fabric and weave them inside with the yarn needle. Steam-block the garland lightly if you want shell edges to relax; do not press or stretch the spiral while wet.
Round :
Make two hanger loops on either end of the core cord by forming small overhand loops with the core tail and securing with a few tight whip stitches. These loops will be used to hang the garland on hooks or nails.
Info :
Inspect finished garland, adjust ornament positions if needed, and gently twist modules if the spiral becomes loose after handling. Optionally add extra small beads or mini pom-poms between modules for more texture.
This cheerful Halloween garland combines dramatic black-and-white spiral ruffles with tiny crocheted ghosts and jack-o-lanterns to make a playful seasonal statement. Each section is made modular so you can easily customize length or ornament mix. It's a satisfying weekend project with instant festive payoff — hang it with pride and enjoy the smiles it brings! 🎃👻🧶